• LUCZORAMA SHIPWRECK SCAVENGER HUNT GIVEAWAY. 4 Weeks of Fun • 1 Legendary Prize ((OcCre’s Fram Ship)) • Global Crew Welcome!
    **VIEW THREAD HERE**

Xebec of 1753 - Plank on Bulkhead Kit by Amati in 1/60 Scale - Build by Smithy

Just in case anyone is interested in the Popular Mechanics Chebec model, I'll post links to the five issues of it's construction. It won't take away from this excellent thread, I think, as I'll just post the links:

Part I - Shaping the Hull
Part II - Completing the Hull and Painting It
Part III - Guns, Deck Fittings, Longboat and Masting
Part IV - Standing Rigging and Sails
Conclusion - Running Rigging and Sail Installation

These were published from November, 1958 to March, 1959. It took me a year to build, at the age of 15-16. I was quite proud of it when done, although I only installed the 4 guns beneath the quarterdeck (which would be hard to install later) due to their high cost of $1 each. I never did install the remaining 20 large guns and 34 blunderbusses - my allowance just would not, err, allow it.

Anyhow, if nothing else, I felt this would provide a bit of nostalgia and show how some nice models were built before there were as many quality kits as there are today.
 
I wrote the above post after just starting to read this thread. I can say, after reading this far, that I enjoy your writing even more than the photos, which is unusual for me. I admit to sometimes skimming a thread to mostly look at the photos, stopping to read about a photo that interests me. But your writing is like a good book to me. Quite enjoyable!

You will certainly get the best of me by reading the words. The photographs will swiftly dispel any impression that I'm a modeller of much talent. Indeed, it could be said that I only build models in order to have something to write about.

If you are enjoying this little romp across the cutting board, there's another one HERE in which I revert to plastic aircraft modelling.
 
I am building the same kit.
for me the instructions are not very good, and I don;t have the sheet with pictures. but I am moving along slowly, and looks good so far.
I will be watching!

If you require the instructions at any point, please feel free to send me a PM with your email address and I'll send you photographs of whatever is necessary.
 
I've been painting a curvaceous model today, which went really well. However, I mustn't bore you with my personal life. I also brushed up my colouring skills on Le Coquin.

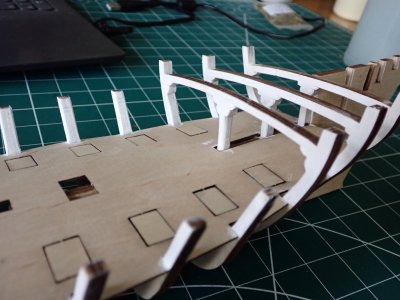
P3290021.JPG

Two coats of Stynylrez white primer brushed on took me this far. It's a primer intended for airbrushing plastic and resin kits but works well on wood too. It's pigment heavy and covers the different aspects of the plywood, unifying edges and faces into an even white surface which reflects the light back through the always slightly translucent Vallejo Game Color paint and makes the 'Bloody Red' shade quite vivid. I thought Bloody Red was perfect for a pirate ship.

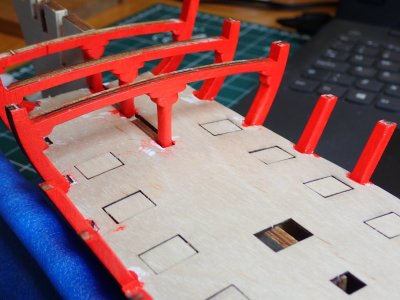
P3290022.JPG

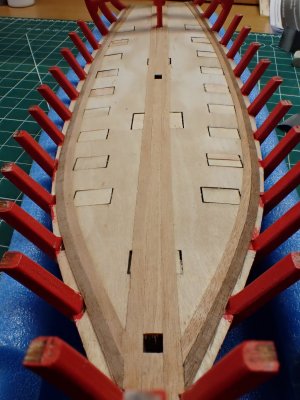
Two coats of red and Coquin begins to come to life! With both primer and topcoat, I was able to apply the second coat immediately after the first one. By the time I'd covered the aft end, and worked around the timberheads, the start point was dry enough to receive the second layer. Such is the joy of acrylic paint!

Note that I've glued the many holes for the gratings closed with the scrap material that originally came from them. There's one left open on this photo and you will see that the keel is visible just a millimeter below the surface. Every opening had either keel or bulkhead directly underneath. If this were seen through the grating, it would look awful, and planking around the holes would be tiresome for me, especially with the fancy planking scheme. I'll simply back my gratings with a slip of black paper which will give the impression of depth, and stick them directly to the deck.

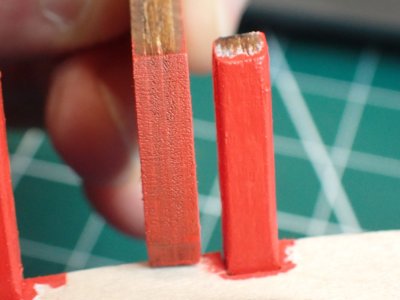
P3290024.JPG

This is the result of using primer. The unprimed plywood scrap is not only less dramatic in colour but it's clearly made of plywood. I love the plywood for it's strength and stability but it's hopelessly anachronistic and ugly as a boot, even on the faces. If the instructions (suggestions?) are followed, the prow will be plywood, dyed to approximately match the hull planking. Ew, nasty! Consequently I'll be veneering any plywood which remains visible above the smooth white bottom of our saucy little bateau.
 
Now that was creative modelling, sans kits, sans tools, sans forums, sans everything.
Yeah, my dad was a mechanic, so had pliers and such, and a radial arm saw, and I used double-edge razor blades (had the cuts to prove it, until I learned that masking tape on one end was a blessing), but none of the tools that we modelers feel are necessary today.
 
If you are enjoying this little romp across the cutting board, there's another one HERE in which I revert to plastic aircraft modelling.
Very nice work on the Anson, a neat but less-known aircraft. I've done plastic modeling on-and-off over my life. Only the poor Aurora kits were available initially, got into it quite heavy about 40 years ago. Only have a Spit and a 109E left from my collection. Looking at some very nice WWI aircraft that are now available. BAD, BAD me. Get back to the Granado!
 
the tools that we modelers feel are necessary today.

Opinion Piece. (Other opinions are available. Terms and conditions apply. Not to be taken with alcohol. Not to be taken seriously. :))

It seems to me that we have been seduced by the lure of technology into making our hobby much more complicated, expensive and dependent on dozens of other people. I believe that in the process the hobby has become impersonal and the modellers, homogenised. The models are now spectacularly detailed but standards are so high that very few of us ever feel happy with our achievements.

At best, the hobby is no more satisfying than it ever was, at worst those high standards, requiring so much time and treasure, actively discourage new recruits.

But what do I know? Not much.
 
It seems to me that we have been seduced by the lure of technology into making our hobby much more complicated, expensive and dependent on dozens of other people.
Too true. I confess to buying so many tools that 1) I can't find what I know I bought when I thought I needed it, 2) I run across tools I forgot I bought when I thought I needed it, and 3) I can't find room to store all the tools I bought, leading back to 1) and 2). I viscous cycle.
 
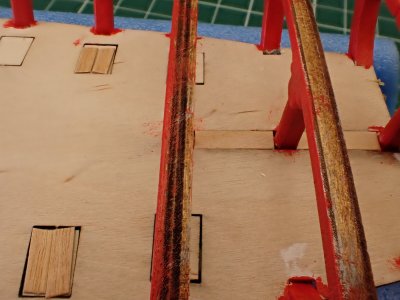
P3300026.JPG

Some of the holes in the deck for the gratings, together with the long slot under the quarterdeck, needed filling to make the deck more or less even. I didn't manage to glue the deck down perfectly but let's keep that between us, eh?

While the patches were drying I started bending wood.

P3300031.JPG

I use a smoothing iron and a pine board. I briefly wet the planks with boiling water from a kettle, clamp one end and then as I move the iron along the plank I feed the free end in at an angle. That's very unclear, sorry. I can't think of a better way to describe it right now. Maybe next time?

P3300032.JPG

I did ten each of milk and plain walnut. The bends are various, approximate and irregular and somewhere on each strip I can usually find a section with a curve that I can use. This is the way I plank hulls too, as you will see quite soon if you stick around.

P3300035.JPG

I laid three 4mm 'king planks' straight down the middle before starting to work the curved ones in from the bulwarks. Originally I intended to use a third colour wood but subtlety won out and I used some wood that matched one of the curving timbers.

[That's just a damned lie Mr Smith!]

OK. I picked up the wrong sheaf of 4mm planks and accidentally made it more elegant. I was aiming for orange but overnight I confused myself and put the two sheaves down in the wrong places. I didn't realise until much too late to do anything about it. I certainly wasn't going to start over.

P3300033.JPG

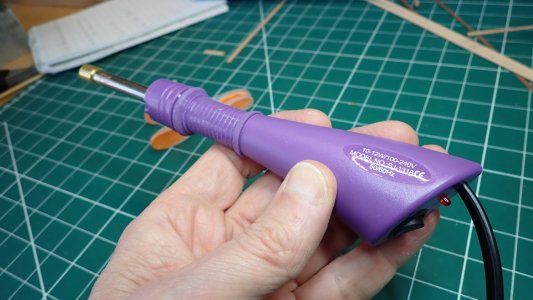
Seven full planks in a (bad) day is quite good progress, even if the quality of the work is a tad sub-par. The speed and ease of tacking the curves down instantaneously is achieved by heat setting the Titebond with this rhinestone applicator. Much loved by dressmakers and cowboys alike, it's available from China via the Amazon, which is a curiously long way round. It was far cheaper than those yellow handled plank bending tools and all the better for having a power on light and a switch. It heats up much faster but doesn't get hot enough to char the wood. Just a brilliant little tool that you really must have or you are a rubbish modeller (laughs bitterly at own hypocrisy). Note that I have cut the heat guard away from mine for added excitement.

For more discussion of the heat setting technique I refer the honorable members to a post I made in an earlier project of mine HERE.
 
Last edited:
Back
Top