YQ Bluenose by Johan [COMPLETED BUILD]

Light fantastic! Of course, this means you can work on your BN in the dark as well now Johan ROTF
Seriously though, great job. I hope I can one day be as adventurous to add features such as lighting to my model. My current knowledge of volts and amperes would probably burn my ship to the ground :confused:
Thank you Mark.
Indeed, the lights are something else. It took me quite some time before I committed to the installation of lights. In the end of the day it was easier than I thought; one can buy ready to use LEDs. Just make sure it's all connected in parallel, hook it up to the appropriate power supply and voilá, there's light.
It's just a tad time consuming...
 
While preparing the waterways, I had to come to the conclusion that I need to cut my Bluenose from the jig.
Access to the deck and thus to the waterways is severely impacted by the frame extensions and the jig.
The dilemma was that the six extensions of the transom are extremely fragile and cutting the hull loose would surely lead to broken extensions.
Therefore I decided to shift focus momentarily to the transom.
Since I am not really enthiusiastic about the transom part in the kit, I decided to make my own.
I used pear strips with a width of 3mm, bonded together and traced the outline of the part in the kit on my transom.
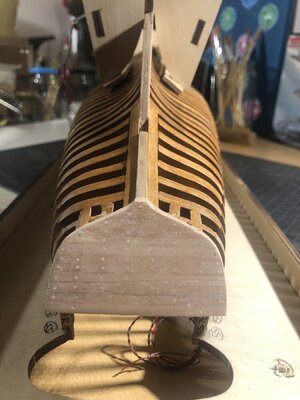
After trimming I bonded the transom to the extensions and added some trennels, just because I could.

Once I gather enough courage, I will cut her loose from her constraints. So one of these coming days I will share this monumental moment.

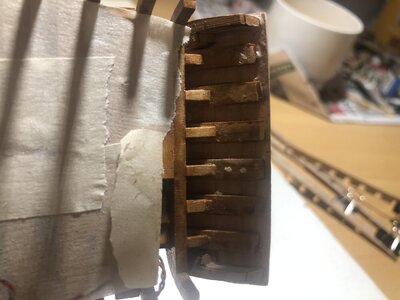
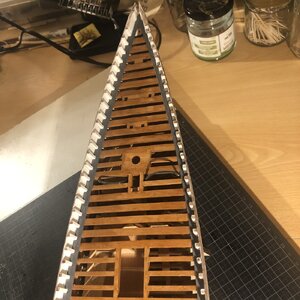
Picture of the six vulnerable transom extensions with the transom attached. Clearly two protruding trennels can be seen. Oops...
7E880657-002A-418F-AD77-4B7AFFB21791.jpeg

The self made transom in place with the trennels.
Final trim will not be done before starting the planking project...
6B9EE51B-CACA-4427-B44F-FDE179C32E1F.jpeg
 
Last edited:
While preparing the waterways, I had to come to the conclusion that I need to cut my Bluenose from the jig.
Access to the deck and thus to the waterways is severely impacted by the frame extensions and the jig.
The dilemma was that the six extensions of the transom are extremely fragile and cutting the hull loose would surely lead to broken extensions.
Therefore I decided to shift focus momentarily to the transom.
Since I am not really enthiusiastic about the transom part in the kit, I decided to make my own.
I used pear strips with a width of 3mm, bonded together and traced the outline of the part in the kit on my transom.
After trimming I bonded the transom to the extensions and added some trennels, just because I could.

Once I gather enough courage, I will cut her loose from her constraints. So one of these coming days I will share this monumental moment.

Picture of the six vulnerable transom extensions with the transom attached. Clearly two protruding trennels can be seen. Oops...
View attachment 322626

The self made transom in place with the trennels.
Final trim will not be done before starting the planking project...
View attachment 322627
Well thought and nice planking, Johan. The protruding tremel is no problem, because of the later inside planking.
I cut the frames just above the base of the jig with my saw. Then the force on the frames was low and towards the plank.
Regards, Peter
 
Well thought and nice planking, Johan. The protruding tremel is no problem, because of the later inside planking.
I cut the frames just above the base of the jig with my saw. Then the force on the frames was low and towards the plank.
Regards, Peter
Thanks Peter,
The next post will show the cutting free of the hull from the jig. Nerve-wracking experience.
I didn't use a saw to separate her, but used pliers instead, with satisfactory results.
 
Last edited:
And finally she's separated from the jig.
I ultimately decided to use cutting pliers to cut her free; a saw was not very practical, again accessibility being the main driver.
Using the pliers was rather freaky; quite some movement of the frames was observed, so I was rather worried I would see some frames break under the tension, but she came out unscathed, fortunately.
The cut line is somewhere between 15 and 20mm above the net trimline. The final trim will be done after planking.

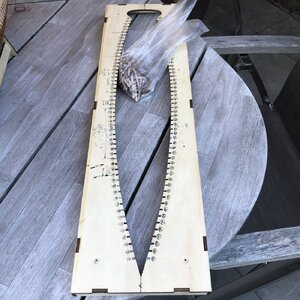
An empty nest...
85B4DCC8-7653-40B5-A2D9-0BE445C2682A.jpeg
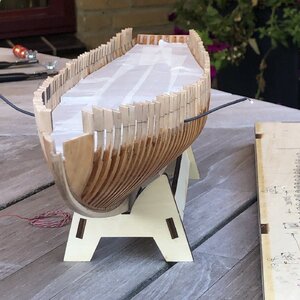
And a liberated hull.
3AF10537-59B5-43D9-941F-0EA31C298E7A.jpegB0C810A1-A94A-4E29-BECA-FBBB37F59CA5.jpeg
 
Last edited:
And finally she's separated from the jig.
I ultimately decided to use cutting pliers to cut her free; a saw was not very practical, again accessibility being the main driver.
Using the pliers was rather freaky; quite some movement of the frames was observed, so I was rather worried I would see some frames break under the tension, but she came out unscathed, fortunately.
The cut line is somewhere between 15 and 20mm above the net trimline. The final trim will be done after planking.

An empty nest...
View attachment 322750
And a liberated hull.
View attachment 322751View attachment 322752
Congratulation with this milestone! Free from the jig, showing more of her elegant lines. Now everything will go easy ......... ;)
Regards, Peter
 
Thanks Peter, it’s appreciated.
”Now everything will go easy ......... ;)” Some famous last words, before disaster struck?
I have this peculiar notion that I still have some challenges ahead… ;)
 
Many hours of work and little to show for, that's how my Bluenose is progressing.
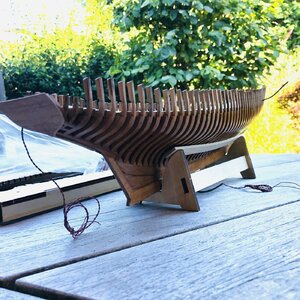
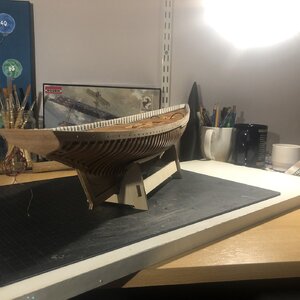
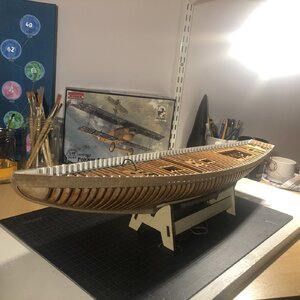
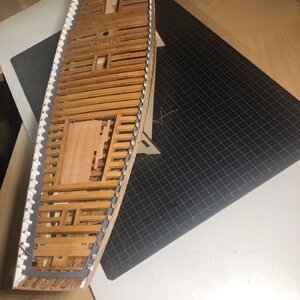
I painted the 13 waterways, fiddled them to fit and attached them permanently to the hull. A short sentence but a lot of work. In hindsight, the gaps in longitudinal direction were a rather good job, fitting nicely to the frames, but I paid too little attention to the lateral gaps between frames and waterways.
The only excuse I have is that during trimming of the waterways I was completely focused on the longitudinal fitment and almost completely neglected the lateral gaps between frames and waterways... :eek: I am still contemplating on if and how to fix it.
Another job was to paint all stanchions and the inside of the bulwarks.
After painting it was measuring time again, dry fitting, trimming and finally bonding the 4 bulwarks to the stanchions and waterways.
(Note to self: as if you didn't know, adhesives and paints don't work well together... )
I understand why the bulwarks are split the way they are (size) but it's certainly not for ease of assembly.
What struck me during this process is the number of times one dry fits a part, before even thinking about grabbing the glue bottle; the ratio between grabbing the glue bottle and the beer bottle is about 1:4.
After two beers you have to be careful which bottle you're about to pick up.

43697EFB-657F-4043-BAF2-51538B0F01CA.jpeg


5BB1776B-F455-4E2E-B4A8-227734B44552.jpeg
 
The waterways also look very good to me - I don't see any untowards gaps. I do like the slightly darker grey colour of the waterways - that goes well with the natural (finished) wood color of the deck beams. On the subject of which bottle to pick up. When I restored the Bowman Steamboat, I had my usual mix of turpentine and Tung Oil in an old cup in close proximity to my coffee. Needless to say, the next moment I realized something is very wrong ... but only after I swallowed the mixture. :eek:
 
I do like the slightly darker grey colour of the waterways - that goes well with the natural (finished) wood color of the deck beams
Glad you like it!
I think the grey should be lighter, but I really like the contrast with the white bulwarks and as you wrote, it goes very well with the deck beams.
 
Back
Top