I have to keep telling my self the same, over and over. . . impatient old goat possibly. RichRich, You're absolutely right. Thanks for reminding me.
-

Win a Free Custom Engraved Brass Coin!!!
As a way to introduce our brass coins to the community, we will raffle off a free coin during the month of August. Follow link ABOVE for instructions for entering.
-

PRE-ORDER SHIPS IN SCALE TODAY!
The beloved Ships in Scale Magazine is back and charting a new course for 2026!
Discover new skills, new techniques, and new inspirations in every issue.
NOTE THAT OUR FIRST ISSUE WILL BE JAN/FEB 2026
- Home
- Forums
- Ships of Scale Group Builds and Projects
- Bluenose PoF Group Build
- Bluenose Group Build Logs
You are using an out of date browser. It may not display this or other websites correctly.
You should upgrade or use an alternative browser.
You should upgrade or use an alternative browser.
- Joined
- Sep 3, 2021
- Messages
- 5,197
- Points
- 738

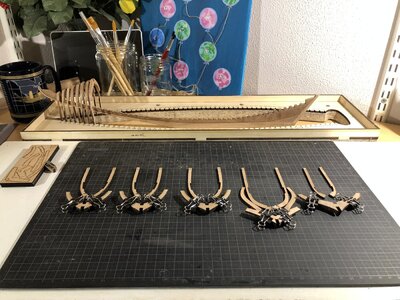
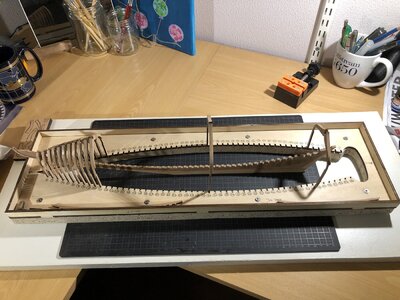
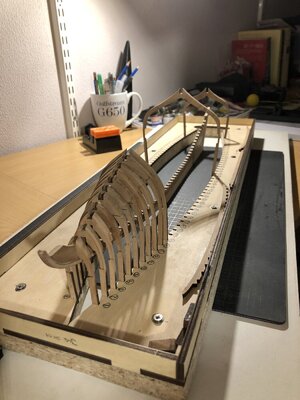
The first frames (#1 trough #8) positioned in the assembly jig. Added the keel assembly, after quite some fiddling....
Not all char removed yet, I think I'll remove the last remnants when the hull is out of jig.
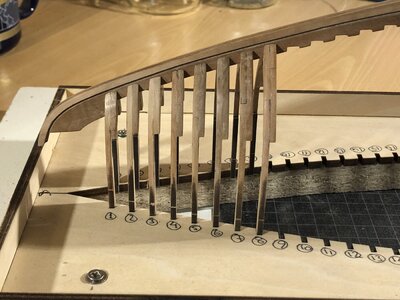
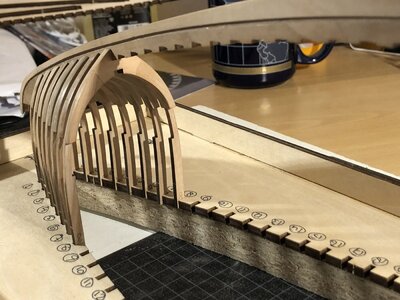
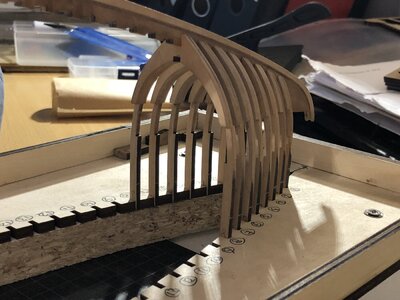
Work on the next frames started, #9 through #11 are being processed, frames #30 and #49 are next.
Any advice on when to start bonding the frames to the keel assembly?
Not all char removed yet, I think I'll remove the last remnants when the hull is out of jig.


Work on the next frames started, #9 through #11 are being processed, frames #30 and #49 are next.
Any advice on when to start bonding the frames to the keel assembly?

Hi Johan. Nice to see this picture. And a good idea to sand the latest char when you have the hull complete. Before planking you have to sand her anyway.
And what Heinrich says: first dry-fit till all the frames are done.
Regards, Peter
And what Heinrich says: first dry-fit till all the frames are done.
Regards, Peter
- Joined
- Sep 3, 2021
- Messages
- 5,197
- Points
- 738

Johan I would not glue any frames to the keel at this stage. I would wait until frame #49 is completed so that you can have a dry-fit of all frames simultaneously.
Hi Johan. Nice to see this picture. And a good idea to sand the latest char when you have the hull complete. Before planking you have to sand her anyway.
And what Heinrich says: first dry-fit till all the frames are done.
Regards, Peter
 , thanks, I'll hold my horses. Reason I asked is that the fit of the frames to the bulkhead is very tight. When playing around with the first 8 frames in jig and trying to dry fit the keel assembly to the frames was near impossible. Only when I first dry fitted the frames to the keel and then dry fitting the frames to the assembly jig I was successful. I think I'll have to check the total thickness of the keel assembly against the width of the notch in the frames. The notches in the keel are also suspected of not yet being up to specs, so that's another thing to check.
Moving right along!More frames...
View attachment 280992
I just stored my frames in the jig until they were all done. I adjusted the tops of the frames to fit in the jig, as I built the frames. I sanded on the same face at the top of every frame, to fit in the jig, that way I avoid changing the space between them up top. Then checked the fit of the frames to the keel prior to gluing everything, and made any adjustments to the keel at that time.
The key is making sure everything goes together snug, prior to gluing it all together. Problem is some of the frames fit the keel so tight, I almost broke them removing to add glue! So be careful! But I think everyone has broken a few frames.
- Joined
- Oct 28, 2018
- Messages
- 760
- Points
- 403

Hi Johan ,
I had also considered building in the way you do but I have moved away from that, for the simple reason to avoid breakages
As you can see in my posts I clamped the keel between the 2 slats and the recesses of the frames have been adjusted accordingly.
The result is that you can align the frames more easily and then put them on the keel more tightly with a good view of the frames
After I had all the frames done with yellow tape held together and placed in the mold
Also note the laser cut in the mold is not square, which has cost me an unnecessary amount of time, to repeat the above step
Greeting,
Henk
More frames...
View attachment 280992
I totally agree with Dean's post. It's fit, fit, fit. With the adjustments always on 1 side. To maintain the regular spacing between the frames. I now see that reflected in my BN at the top shelves with the scuppers. Everything is related. But of course that's with any kit. But good to keep in mind by very frame.Moving right along!
I just stored my frames in the jig until they were all done. I adjusted the tops of the frames to fit in the jig, as I built the frames. I sanded on the same face at the top of every frame, to fit in the jig, that way I avoid changing the space between them up top. Then checked the fit of the frames to the keel prior to gluing everything, and made any adjustments to the keel at that time.
The key is making sure everything goes together snug, prior to gluing it all together. Problem is some of the frames fit the keel so tight, I almost broke them removing to add glue! So be careful! But I think everyone has broken a few frames.
Regards, Peter
Building up the frames with the keel and the jig is another issue. You have to develop a certain procedure for that yourself. Or make sure that you can tilt the frames in from the bottom and slide them over the keel or all of them in the jig and then place the keel. But then the fit in the keel must already be in order. Fortunately for you and Piero (and the others), there are now several logs with examples, so you are choose the most ‘suitable fit’ for you.Hi Johan ,
I had also considered building in the way you do but I have moved away from that, for the simple reason to avoid breakages
As you can see in my posts I clamped the keel between the 2 slats and the recesses of the frames have been adjusted accordingly.
The result is that you can align the frames more easily and then put them on the keel more tightly with a good view of the frames
After I had all the frames done with yellow tape held together and placed in the mold
Also note the laser cut in the mold is not square, which has cost me an unnecessary amount of time, to repeat the above step
Greeting,
Henk
PS: Nice to see that you are at the same stage as Piero does. Don’t make it a race, but stimulate each other! With the ‘digital helping hands’ of the others.
Regards, Peter
- Joined
- Sep 3, 2021
- Messages
- 5,197
- Points
- 738

@Henk Liebre, @Peter Voogt, @Heinrich and @Dean62,
Thanks for all your reactions, great!
Based on the advice, so freely given, I decided to move along building all the frames first, perform all the initial beveling, fit check the frames to the keel and make sure the frames fit in the assembly jig. For the first 8 frames I already filed and sanded the top aft sides to ensure the frames fit the jig, so I will continue to do so for the other 47 frames...
I've read through a couple of logs for the joining of the keel with the frames. I haven't committed to one specific approach yet, but it's good to know there are some alternatives; plans A, B and C...
One particular stubborn frame needs a repair though; the width of the gap in frame #4 exceeds the width of the keel and rather loosely fits the keel...

- Joined
- Sep 3, 2021
- Messages
- 5,197
- Points
- 738

As I said before, I haven't given myself a specific schedule constraint, so I have no intention turning this into a building competition.PS: Nice to see that you are at the same stage as Piero does. Don’t make it a race, but stimulate each other! With the ‘digital helping hands’ of the others.
Despite all the uncertainties I'm facing and my anxieties with this build, I want to enjoy this journey, I want to enjoy my successes and overcome my mistakes ánd I want to do things I haven't done before.
So I am frequently checking other builds to enjoy and to learn.
I second the comment of Heinrich for your state of mind. RIchThat is a great philosophy to adhere to Johan!
I agree, enjoy the journey and proceed with care, always thinking ahead.
On my build I had my sons birthday that I wanted to finish in time for, since it was his gift. However I never rushed, I just put in more hours, there is a big difference! So I always work at the same speed, it is just a matter of how much time I put in.
On my build I had my sons birthday that I wanted to finish in time for, since it was his gift. However I never rushed, I just put in more hours, there is a big difference!
- Joined
- Dec 11, 2021
- Messages
- 287
- Points
- 238

As I said before, I haven't given myself a specific schedule constraint, so I have no intention turning this into a building competition.
Despite all the uncertainties I'm facing and my anxieties with this build, I want to enjoy this journey, I want to enjoy my successes and overcome my mistakes ánd I want to do things I haven't done before.
So I am frequently checking other builds to enjoy and to learn.
I totally agree with you Johan, my goal is theoretical! And of course it depends on many factors: first of all health, then the Master Chief Officer who wants to take a trip to the valleys of Switzerland, then to the valleys of Italy ... etc.
The Supreme Poet used to say: "... those who go slowly, go healthy and go far ..."
All the Best!
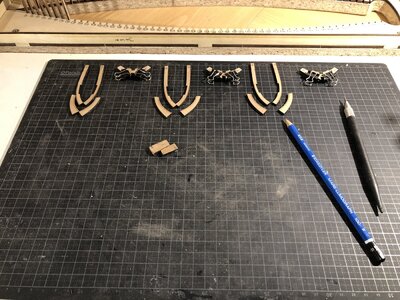
Nice progress but to diverge. . . . I like the dull black cutting mat which reduces/eliminates glare that my green one has and is approaching replacement time. What was the source? Rich (PT-2)Frames #9, #10, #11, #30 and #49 beveled and filed and sanded to fit both jig and keel assembly.
Fixed fit issue of frame #4.
Up to the next batch of frames...
View attachment 281379View attachment 281380
- Joined
- Sep 3, 2021
- Messages
- 5,197
- Points
- 738

I bought the cutting mat at Pipoos, what you might consider a Dutch equivalent to Hobby Lobby, although not quite so large. A little look around learned that they are also available in the US, Walmart, to name one, but eBay offers also quite a selection.Nice progress but to diverge. . . . I like the dull black cutting mat which reduces/eliminates glare that my green one has and is approaching replacement time. What was the source? Rich (PT-2)
A steady progress, Johan. It looks nice.  Every next frame is a stept further to the last one.
En de 11-stedentocht komt elk jaar weer een jaar dichterbij.
Regards, Peter
En de 11-stedentocht komt elk jaar weer een jaar dichterbij.
Regards, Peter


