- Joined
- Sep 3, 2021
- Messages
- 5,197
- Points
- 738

Thank you so much Uwe. So far I'm having a wonderful birthday!
 |
As a way to introduce our brass coins to the community, we will raffle off a free coin during the month of August. Follow link ABOVE for instructions for entering. |
 |
 |
The beloved Ships in Scale Magazine is back and charting a new course for 2026! Discover new skills, new techniques, and new inspirations in every issue. NOTE THAT OUR FIRST ISSUE WILL BE JAN/FEB 2026 |
 |

Thank you so much Uwe. So far I'm having a wonderful birthday!

Thanks for your well wishes, Dan!Hey Happy Birthday Johan!


Wonderful, Johan. I hope you are having a perfect day celebrating with family and friends. All the best wishes for a blessed birthday!
Happy Birthday, Johan!
Thanks for all your well wishes. So far it has been a wonderful day, with brilliant memories being made!Van harte gefeliciteerd Johan, een heel fijne bijna-voorbij-dag vandaag.proost


Hi Johan, I too wish you all the best and a very Happy Birthday.
Herman and Dean, thanks for your well wishes, I had a terrific birthday!Happy Birthday Johan!


Haha, a deje-vu: my admiral has the same Elna! Also with a ‘air-bubble’ power-pedal with a tube to the side?So, being 69 years of age and none the wiser, I started my 70th year with the fabrication of yet another sail, the main topsail.
For now the process is as follows:
1. Stain the cloth and let dry.
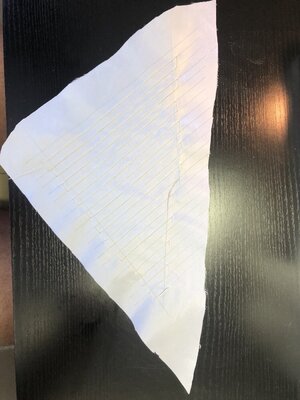
2. Transfer the lines of the previously prepared paper template the cloth.
3. Stitch (straight) the seams, simulating the sails trips being stitched together.
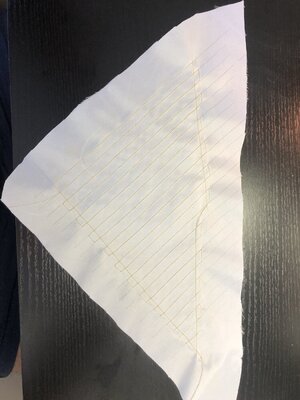
4. Next the edges of the sail, again straight stitches.
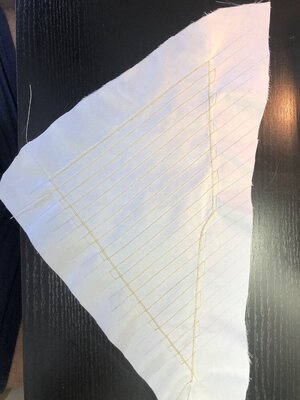
5. Again stitching the edges, but now with a zigzag stitch
All stitch are done with the smallest possible settings (1 on the Admiral's Etna, no clue what that means, but could be mm's.)
6. Apply diluted woodglue on the sail and set aside to dry.
7. Once dry, cut the excess material, just outside of the outer zigzag stitches.
The first sail was trimmed with a pair of scissors, may be I'll experiment with cutting, but not sure yet.
8. Finish the sail by adding the necessary hardware, prior to setting the sail.
Pending on my experience the process may vary...
Step 3, main topsail, the dummy seams:View attachment 385159
Step 4, stitched the net edges of the sail:
View attachment 385158
Step 5, the zigzag stitch applied, left and right of the stitch made in step 4:
View attachment 385156
The next steps will be shown later, once reaching those steps.
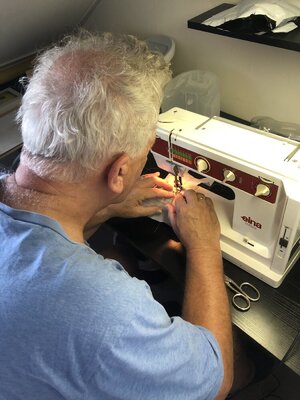
A shot, taken by the Admiral, of a man-at-work:
View attachment 385157

Hey Dan,Hello Johan, I like how you have managed to eliminate the puckering effect when sewing all those straight strip lines, that was a huge problem I had even after adjusting the settings to help reduce them. Question about step #6, applying diluted wood glue. Are you putting it over the entire sail or just the edges? Also, I saw a video where you can hold a straight edge down on the fabric and use a cutting wheel to trim out the fabric. In a tight curve you would probably still need scissors though. Just thinking out loud.

Thanks Peter,Haha, a deje-vu: my admiral has the same Elna! Also with a ‘air-bubble’ power-pedal with a tube to the side?
Just what Daniel wrote: looking good how you managed the stitching.
Regards, Peter

I'm so glad my admiral didn't take a picture....it would seriously damaged my left over "manhood" that I have.A shot, taken by the Admiral, of a man-at-work:
View attachment 385157
Mine has a video of me doing it. I'm not sure what her intentions are with it.I'm so glad my admiral didn't take a picture....

There's a video of me as well. Luckily SOS does not allow updating these kind of files, so I'll just bury it somewhere dark and deep...Mine has a video of me doing it. I'm not sure what her intentions are with it.

Luckily I'm beyond the point of damaged "manhood"... (I hope this remark does not lead to all kind of dubious reactions.)I'm so glad my admiral didn't take a picture....it would seriously damaged my left over "manhood" that I have.
Your second sail looks absolutely stunning and all straight lines!!!! Honestly a great job and you did it all by yourself!
Peter
It’s going better and better, Johan.Step 7, after applying the diluted woodglue; trimming of the edges:
View attachment 385266
