-

Win a Free Custom Engraved Brass Coin!!!
As a way to introduce our brass coins to the community, we will raffle off a free coin during the month of August. Follow link ABOVE for instructions for entering.
- Home
- Forums
- Ships of Scale Group Builds and Projects
- Bluenose PoF Group Build
- Bluenose Group Build Logs
You are using an out of date browser. It may not display this or other websites correctly.
You should upgrade or use an alternative browser.
You should upgrade or use an alternative browser.
The main 'approval authorities' are you and your Admiral …..Hey Peter, glad the main mast meets your approval. And for sure, as with almost every previous step, I moved into unknown territories. Next up is the foremast, at, least I have now some lessons learned from the mainmast build.
Good morning Johan. You OWNED this. Cheers GrantMore work on the spars, focus is now on the lower fore- and main masts.
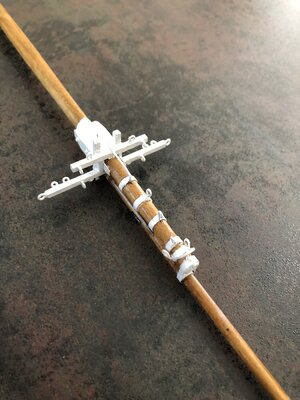
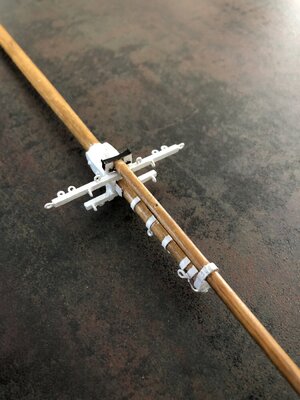
The latter mast is nearing completion, again the Model Shipways drawings are leading, so there's quite a few parts self-fabricated, especially the tresseltree (or is it Christmas tree?) is almost entirely scratch-build, with some parts used from the kit.
View from the port side, looking fwd.
The upper four eyes are not positioned in line on the mast's center line, but are displaced radially to prevent interference of the later to be installed blocks. This is in accordance with the MS drawings, but I overdid it a little, to make it look like a deliberate action:
View attachment 367930
View from the port side, looking aft.
In all, some 25 eyes in one form or another have been added, incredible...
The tresseltree itself consists of 12 parts.
View attachment 367931
And now up to the foremast.
Happy Easter to those who celebrate this holiday!
- Joined
- Sep 3, 2021
- Messages
- 5,150
- Points
- 738

Thanks Grant.Good morning Johan. You OWNED this. Cheers Grant
Admittedly, deviating from the build instructions requires a lot of planning ahead and sometimes a redo becomes necessary.
Still this turns out to be a very satisfying build.
Agreed. I love deviating from the instructions….makes it so much more fun however includes more redo’s. Cheers GrantThanks Grant.
Admittedly, deviating from the build instructions requires a lot of planning ahead and sometimes a redo becomes necessary.
Still this turns out to be a very satisfying build.
- Joined
- Sep 3, 2021
- Messages
- 5,150
- Points
- 738

Yep, I did 't! Yesterday marked reaching the highest points in the build.
Both fore- and main masts now have their top masts installed. The attachments do not look close to the original YQ instructions, as I said, I will follow quite closely the MS sail- and rigging plans...
Still some tidying up to do, but in all I'm quite happy with this result. After that it's back to making some more mast hoops, lol.
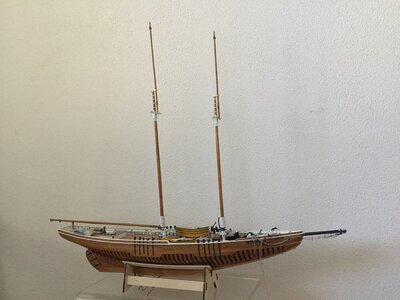
General view port side.
Final adjustment of the mast will be taken care of during the rigging of the masts:
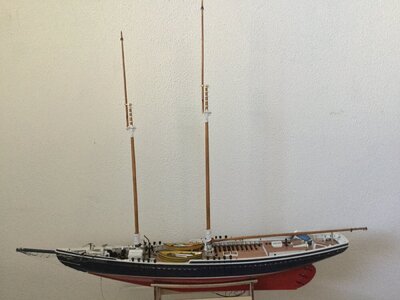
General view starboard side:
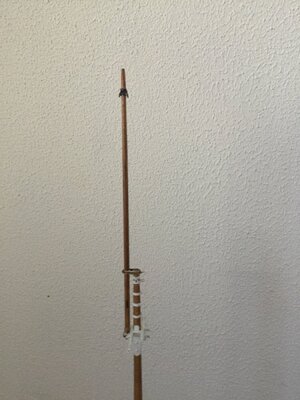
Detail of the main topmast installation:
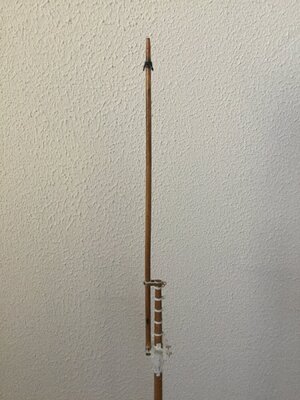
Detail of the fore topmast installation:
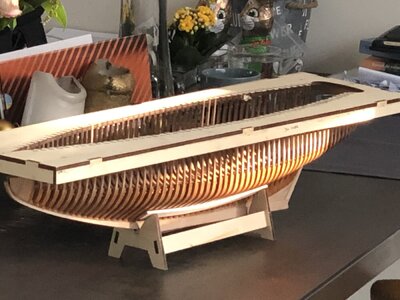
And this is where I was at April 16th, 2022,
One thing's certain; progress, albeit slow, has been made!
Both fore- and main masts now have their top masts installed. The attachments do not look close to the original YQ instructions, as I said, I will follow quite closely the MS sail- and rigging plans...
Still some tidying up to do, but in all I'm quite happy with this result. After that it's back to making some more mast hoops, lol.
General view port side.
Final adjustment of the mast will be taken care of during the rigging of the masts:

General view starboard side:

Detail of the main topmast installation:

Detail of the fore topmast installation:

And this is where I was at April 16th, 2022,
One thing's certain; progress, albeit slow, has been made!

Last edited:
Hi Johan. Nice to see your BN has reached her full length and height! This chapter with a lot of complicated details also done.Yep, I did 't! Yesterday marked reaching the highest points in the build.
Both fore- and main masts now have their top masts installed. The attachments do not look close to the original YQ instructions, as I said, I will follow quite closely the MS sail- and rigging plans...
Still some tidying up to do, but in all I'm quite happy with this result. After that it's back to making some more mast hoops, lol.
General view port side.
Final adjustment of the mast will be taken care of during the rigging of the masts:
View attachment 369068
General view starboard side:
View attachment 369069
Detail of the main topmast installation:
View attachment 369070
Detail of the fore topmast installation:
View attachment 369071
Regards, Peter
- Joined
- Sep 3, 2021
- Messages
- 5,150
- Points
- 738

What a journey, especially when disregarding the build instructions. I have you to blame for that.Hi Johan. Nice to see your BN has reached her full length and height! This chapter with a lot of complicated details also done.
Regards, Peter

That bit about a lot of complicated parts rings true, very true...
- Joined
- Sep 3, 2021
- Messages
- 5,150
- Points
- 738

This topic has been discussed before: the diameters of the various spars.Yep, I did 't! Yesterday marked reaching the highest points in the build.
Both fore- and main masts now have their top masts installed. The attachments do not look close to the original YQ instructions, as I said, I will follow quite closely the MS sail- and rigging plans...
Still some tidying up to do, but in all I'm quite happy with this result. After that it's back to making some more mast hoops, lol.
General view port side.
Final adjustment of the mast will be taken care of during the rigging of the masts:
View attachment 369068
General view starboard side:
View attachment 369069
Detail of the main topmast installation:
View attachment 369070
Detail of the fore topmast installation:
View attachment 369071
And this is where I was at April 16th, 2022,
One thing's certain; progress, albeit slow, has been made!
View attachment 369073
I tapered all spars close to the dimensimon per the spreadsheet @Peter Voogt generated for his build. We both agreed that the rather crude spars, as delivered with the kit, should receive some tapering to do justice to the scale.
Looking at the modified detail parts, this appeared to have been the right decision. Now, having the masts at full height, I'm wondering... Both lower- and top masts look rather fragile. Now I'm scared.

You have a beautiful representation there Johan. I was thinking the same thing as you about the potential fragility of those mast. The shroud lines should stiffen it up.
Loved the flashback image! You've come a long way and the future looks bright!
Also like Daniel wrote, That’s why they have ‘invited’ shrouds and stays ……..Looking at the modified detail parts, this appeared to have been the right decision. Now, having the masts at full height, I'm wondering... Both lower- and top masts look rather fragile. Now I'm scared.
- Joined
- Sep 3, 2021
- Messages
- 5,150
- Points
- 738

You have a beautiful representation there Johan. I was thinking the same thing as you about the potential fragility of those mast. The shroud lines should stiffen it up.
A lot of rigidity, if not all, has to come from the shrouds and stays.Also like Daniel wrote, That’s why they have ‘invited’ shrouds and stays ……..
Right now I am thinking about adding a number of those first; a) for proper alignment and b) for stability and rigidity. Just to sort out which.
- Joined
- Sep 3, 2021
- Messages
- 5,150
- Points
- 738

Thanks Paul.Loved the flashback image! You've come a long way and the future looks bright!
Sometimes it's good to look back over your shoulder to see where you are coming from. This was one of those moments.
Looking beautiful Johan! I like the white mast bands and hardware. 
- Joined
- Sep 3, 2021
- Messages
- 5,150
- Points
- 738

Thanks for your compliments, Dean.Looking beautiful Johan! I like the white mast bands and hardware.
The white bands were made using thick hobby paper, 0.4mm thick. That worked surprisingly well, way better than trying to use thin copper foil...
Good morning Johan…be scared be very scaredThis topic has been discussed before: the diameters of the various spars.
I tapered all spars close to the dimensimon per the spreadsheet @Peter Voogt generated for his build. We both agreed that the rather crude spars, as delivered with the kit, should receive some tapering to do justice to the scale.
Looking at the modified detail parts, this appeared to have been the right decision. Now, having the masts at full height, I'm wondering... Both lower- and top masts look rather fragile. Now I'm scared.
 . Seriously tho, the tapered masts was the right decision it looks nicely in scale. Your detail on the masts is so very good and it is so cool to see the length and height of you BN- awesome model. I guess from here on it is gentle gentle in the build process. Daniel is spot on, once your rigging happens those will become solid. I remember with the Victory how fragile the top gallant masts and yards were and now she could become a bird cage and survive.
Very neat and tidy Johan, well done. Now you've reached the highest point in your build I hope the rest is all downhill, as in easy cruising and plain sailingYep, I did 't! Yesterday marked reaching the highest points in the build.
- Joined
- Sep 3, 2021
- Messages
- 5,150
- Points
- 738

Hey Grant, you're right; the tapering was a must-have. Whenever I look at the overall picture, the decision to taper is justified.Good morning Johan…be scared be very scared. Seriously tho, the tapered masts was the right decision it looks nicely in scale. Your detail on the masts is so very good and it is so cool to see the length and height of you BN- awesome model. I guess from here on it is gentle gentle in the build process. Daniel is spot on, once your rigging happens those will become solid. I remember with the Victory how fragile the top gallant masts and yards were and now she could become a bird cage and survive.
Cheers Grant
I am now planning the steps to add rigidity to the two masts; not quite certain yet...


