- Joined
- Oct 1, 2023
- Messages
- 1,134
- Points
- 393

Thank you Peter,
I'm dry fitting 102 on the Port side. I made some clamps depicted in your photos.
Ted
I'm dry fitting 102 on the Port side. I made some clamps depicted in your photos.
Ted


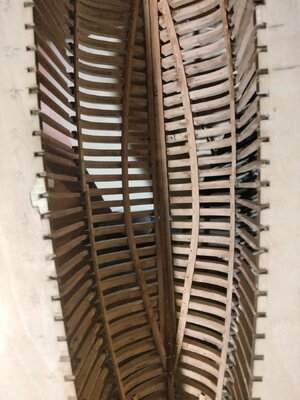
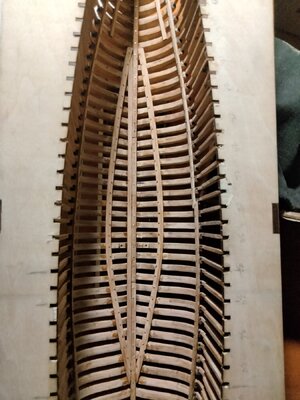
Don’t forget the sanding of the inside of the frames to get a smooth alignment and connection for the bearing beams.Whew, I got it. Between using the clamps I found on Peter's build and Paul's YouTube video I got the frame nudged over. Installed and glued View attachment 448285

I've got them sanded as well as I can.Don’t forget the sanding of the inside of the frames to get a smooth alignment and connection for the bearing beams.
Regards, Peter
Good afternoon Ted. I love this log. Your perseverance and desire to get this right is an example to myself. I share your exclamation re skill sets. I look at the other guys here on SOS and just wonder how they do it. I guess as we go, one day we will find outI wish my work would be as nice as that seen on this site.
My skill set is just not that advanced no matter how hard I try. Keep building,keep learning and gaining modeling skills l
Ted

I don't think I have enough years left to catch up with these guys , being 76. I have developed quite a few skill sets over the years so I can't complain. Everything from building, tuning and racing top fuel dragsters and funny cars to restoration and flying light aircraft. I've general contacted and built 400 unit apartment complexes, homes to the stars in Beverly hills and Malibu; office building on Ventura Blvd but am having fits getting two little sticks to match up properly. The main thing is I'm having a lot of fun trying. I think this model will be a thing of beauty but it won't be more than marginally accurate.Good afternoon Ted. I love this log. Your perseverance and desire to get this right is an example to myself. I share your exclamation re skill sets. I look at the other guys here on SOS and just wonder how they do it. I guess as we go, one day we will find out. Cheers Grant


It's pretty easy, just look at what I did the day beforeCatching your own mistakes is, in itself a positive sign in this hobby.


Thanks. Once again the results were better the second time around. I don't know if it's from experience or because the parts fit better when installed properly. Lol.There are enough planks to take one out.

There were very few steps where I didn’t encounter one or two redo’s…Thanks. Once again the results were better the second time around. I don't know if it's from experience or because the parts fit better when installed properly. Lol.
I glued the nails, cut the protrusions and filed them flush to the underside of the beams prior to installing. I don't want to weaken the frames with to many drill holes.
I got all the char removed from the lower deck beams too.
Back on track
Ted
Good morning Ted. I am in the same "ship"but am having fits getting two little sticks to match up properly. The main thing is I'm having a lot of fun trying. I think this model will be a thing of beauty but it won't be more than marginally accurate.

Right now I'm involved in a scratch build aircraft. So far there isn't any part I didn't manufacture twice (apart from the skids).There were very few steps where I didn’t encounter one or two redo’s…

Could you share some photos. The only scratch build i was ever involved in was the rubber bandit. It was an attempt ata rubber band powered manned flight . I worked mostly on the ribs. They were about 3/64" thick carbon fiber. Eventually the owner refused to fly it and wouldn't let anyone else try.Right now I'm involved in a scratch build aircraft. So far there isn't any part I didn't manufacture twice (apart from the skids).
