YUANQING BLUENOSE - Heinrich

With so much being said about the YuanQing Bluenose and with the tremendous response the kit has caused on SOS - and other forums - the time has come to start the actual building of the kit. I am not going to say anything more about the Kit Review - it available on the Bluenose Group Build and under the Kit Review section where it has rewritten all SOS records for a kit review. (The last time I checked, the views were well over 9 000!)

As promised, we started doing the translation (thanks Admiral Anna), but I quickly realised that the only way to create a truly accurate instruction manual is in conjunction with the actual build. Only there will we discover the pitfalls that cause the downfall of many an instruction manual.

So let's see how the assembly the building jig pans out. First off, the kit provides you with 4 very large-sized sheets with drawings and plans on both sides - thus 8 in total. Two of those are important and pertain to the jig assembly. First, there is the Parts Checklist and secondly, the actual jig-assembly drawing itself.

View attachment 197808

The above picture from the Parts Check-list, shows the sheet used for the jig assembly. I am so happy to report that it is NOT MDF (highly toxic when sanded or filed and don't get water near it) or Plywood (susceptible to warping), but a 4mm thick Sycamore sheet of wood.

View attachment 197809

In real life, this is what the drawing shows. Parts 1, 2 and 3 which will be needed for the jig are clearly marked.

View attachment 197810

The first thing to do before any jig assembly (or keel and rib-assembly for that matter) takes place, is to make sure that your working surface is absolutely level.

View attachment 197811

Parts #2 and #3 were then removed the sheet using an X-Acto knife which was as easy falling out of a tree. The laser-cutting is very precise, and once you have cut through the tabs, the parts come out easily. I do apologise for my luxurious blue bedsheet that went AWOL for this picture, but it was subjected to a quick ironing by the Admiral. :)

View attachment 197812

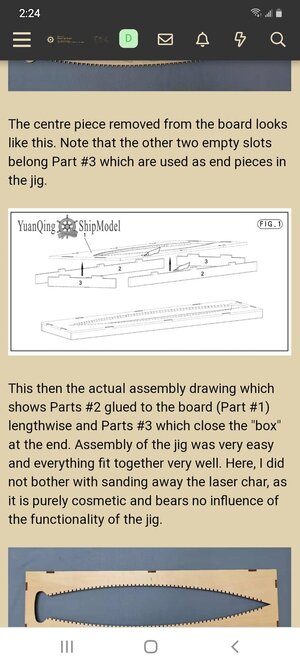
The centre piece removed from the board looks like this. Note that the other two empty slots belong Part #3 which are used as end pieces in the jig.

View attachment 197813

This then the actual assembly drawing which shows Parts #2 glued to the board (Part #1) lengthwise and Parts #3 which close the "box" at the end. Assembly of the jig was very easy and everything fit together very well. Here, I did not bother with sanding away the laser char, as it is purely cosmetic and bears no influence of the functionality of the jig.

View attachment 197814
The assembled jig from the bottom (yes I am right!)

View attachment 197815

And from the top. Remember, this is the side on which we will be building - hence its designation as the "top" side.

And that concludes the jig assembly. All done in a morning which includes the drying time of the PVA. It was all very straightforward, and will not present any problems. Next up, YuanQing suggests starting with the assembly of the ribs - and they are right of course - but I found the keel more interesting!

Thank you all so much for watching and following - and for those of you who have ordered this kit - I believe you are in for a treat!

Kind regards - Heinrich
This jig seems short with nothing underneath to support the ribs up high, or hold the keel. Is this jig totally different than those on Alert and La Coureur?
 
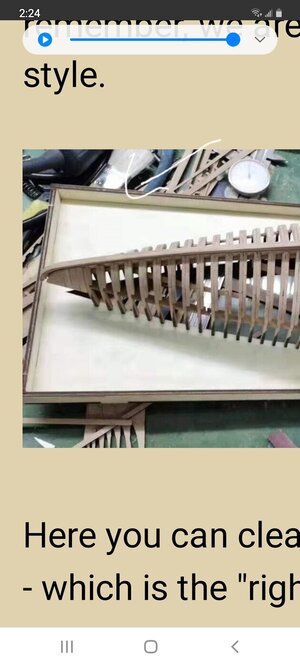
Hello Don. It does looks strange doesn't it? But remember, we are building upside down - Hahn style.

View attachment 197889

Here you can clearly see the jig the "wrong" side - which is the "right" ROTFside, up!

Hi Heinrich

Nice building log. I have a question.

Is the jig in your posted picture in the correct position ?

The sides I am pointing with my arrow i belive have to go against the bench. Those laterals walls (arrow) are a type of "legs" to separate the jig from the bench....correct ?

In that way the point of the ribs aren't against the bench. Or Am I missing something ?

20201209_142636.jpg

This is your posted jib picture. Looks like goes as I have described.

Screenshot_20201209-142413_Chrome.jpg

Cheers
Daniel

Ps: a picture of the MARMARA jig showing what I tried to explain on the above picture with the arrow.

20201209_143437.jpg
 
Last edited:
Hi Heinrich,

Those joints look like very tight fits, are there any problems with the laser cut edges, do you have to do any squaring of the those edges??

Jan
Hello Jan. The joints fit beautifully and no - ZERO squaring was required on any edge. I just took great care when sanding ("polishing" is actually a better word!) away the laser tabs where the parts were removed from their sheets.
 
Heinrich my friend, my Botter is almost ready, but there are still 2 others ships to finish, so i cant join you with a Blue Nose, but this wil be on the top of my list to built someday.
Peter my friend - sometimes the English language doesn't say what we want it to mean! ROTF By "joining", I simply meant that it is great to have you here and to follow the build. Your precision work on your Zuiderzee Botter still serves as an inspiration to me!
 
This jig seems short with nothing underneath to support the ribs up high, or hold the keel. Is this jig totally different than those on Alert and La Coureur?
Hello Kurt. The jig is very different to the Alert and Le Coureur and for the very simple reason that it is an upside-down build. I will explain the jig and its function a little later and will tag you on that. Thumbsup
 
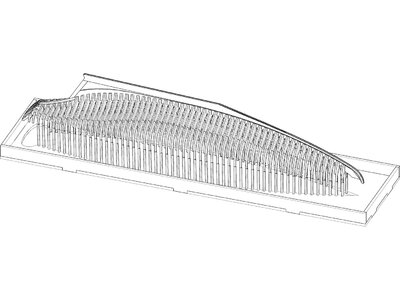
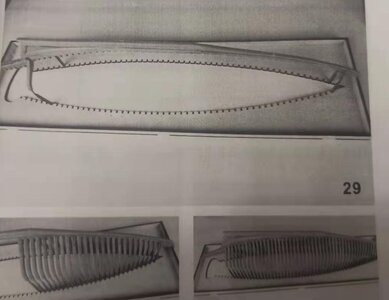
Good morning my dear friends. I will try to the best of my ability to explain the jig. On any jig, the main purpose is to support/guide and ensure alignment of most the upper part of the ribs. On a normal-style build, that would require a "high" jig with a proper floor, substantial sides and "roof" section into which the upper parts parts of the ribs will be inserted. Because of the severe curvature of Bluenose's keel which is not a flat or level keel, the normal build-style cannot be used - hence it is built upside down. With the jig placed upside down, the floor lies absolutely flat on working surface and the upper parts of the ribs indeed fit into the slots of the jig until they are flush with the underside - i.e. until they press flat against the working surface (table).

1.jpg

All the ribs go into the provided slots of the "upside-down" jig and protrude all the way through the floor section until they press flat against the working surface. The keel at the bow and stern end though, do NOT go into the jig, but are "suspended" above it.

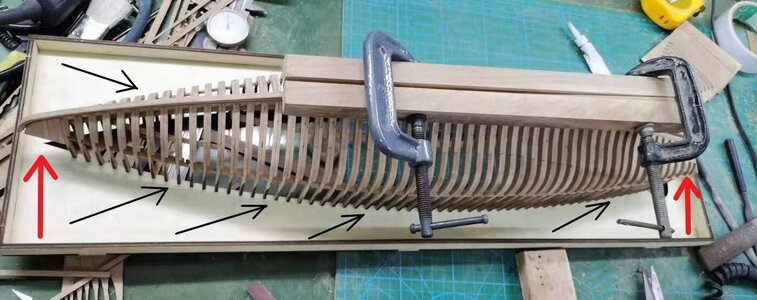
Let us now re-look at the picture @Dematosdg Daniel mentioned, to explain the above drawing more clearly.

微信图片_20201113075333.jpg

The black arrows point to where the ribs go through the floor of the building jig and press flat against the table. The two red arrows indicate the bow and stern sections of the keel which are both suspended and do NOT go into the jig.

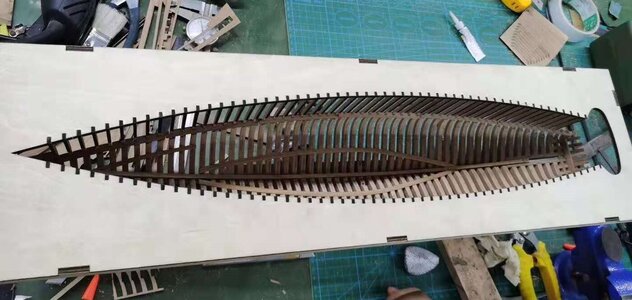
If we take the above picture and turn it the right way up, it looks like this:

微信图片_20201113075349.jpg

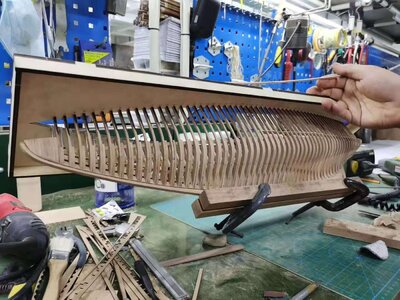
Here you can see the fully-supported ribs extending all the way through the floor.

And from another angle:

微信图片_20201113075355.jpg

@Kkonrath Kurt, I hope that explains everything.

@Dematosdg Daniel, thank you for your well-considered question! Thumbsup It forced me to have another look at everything and make sure that I pass on the correct information!
 
I can see the orders streaming in from members of that other forum. :p

.
Hello Brian. You know, just as the real Bluenose has transcended borders, this model seems to be doing it too. I am getting mails from all over the world from non-model ship builders who, as friends of Bluenose, are wishing me well with the project. I never realized the significance of the real ship until now myself. It is absolutely amazing!
 
We will set a shipmodeling Bed and Breakfast for the overflow Lol
We will accommodate all. I am not prejudiced against anyone or any organization. We have proved that we are real and legitimate and that is all that matters! So get frying those sausages and eggs. And please ... some real toast and marmalade for me! You guys have no idea how much I miss real bread. China does not make bread - they bake cake which they think is bread! ROTF
 
Good morning my dear friends. I will try to the best of my ability to explain the jig. On any jig, the main purpose is to support/guide and ensure alignment of most the upper part of the ribs. On a normal-style build, that would require a "high" jig with a proper floor, substantial sides and "roof" section into which the upper parts parts of the ribs will be inserted. Because of the severe curvature of Bluenose's keel which is not a flat or level keel, the normal build-style cannot be used - hence it is built upside down. With the jig placed upside down, the floor lies absolutely flat on working surface and the upper parts of the ribs indeed fit into the slots of the jig until they are flush with the underside - i.e. until they press flat against the working surface (table).

View attachment 197935

All the ribs go into the provided slots of the "upside-down" jig and protrude all the way through the floor section until they press flat against the working surface. The keel at the bow and stern end though, do NOT go into the jig, but are "suspended" above it.

Let us now re-look at the picture @Dematosdg Daniel mentioned, to explain the above drawing more clearly.

View attachment 197936

The black arrows point to where the ribs go through the floor of the building jig and press flat against the table. The two red arrows indicate the bow and stern sections of the keel which are both suspended and do NOT go into the jig.

If we take the above picture and turn it the right way up, it looks like this:

View attachment 197937

Here you can see the fully-supported ribs extending all the way through the floor.

And from another angle:

View attachment 197938

@Kkonrath Kurt, I hope that explains everything.

@Dematosdg Daniel, thank you for your well-considered question! Thumbsup It forced me to have another look at everything and make sure that I pass on the correct information!
@Heinrich...
As I will also be going thru this process soon enough, I have a question. Normally the keel is located below the portion of the jig that locates the upper frames, and will therefore receive the frames one at a time, as they are built and installed. It seems to me that this build requires that all of the frames be in place first and then the keel is attached to the frames? If so, I am not looking forward to trying to align 50 plus notches at once, in order to attach the keel to the frames! Am I missing something here? I am committed regardless, but obviously curious about the actual process. Thanks!
In addition, it seems the added sides on the jig serve no real purpose, other than maybe to add stiffness to prevent bowing?
 
So with all questions and responses answered and replied to, let us continue. So as an overview picture, I left you last night (China time :)) with Parts #10 - 12 assembled. The pictures I posted were without cleaning (by cleaning I mean just wiping the parts with a wet cloth and allowing it to dry). So let me start off by showing you what the assembled part "cleaned-up" looks like:

微信图片_20201209211131.jpg

This also provides a nice contrast between the Pear Wood of the keel and the Sycamore wood of the jig.

微信图片_20201209222807.jpg

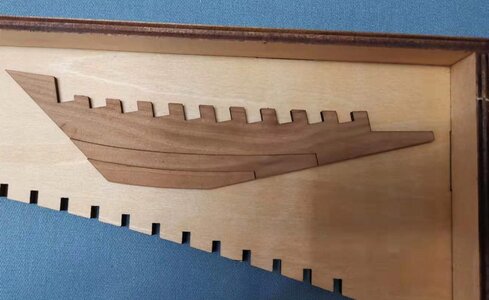
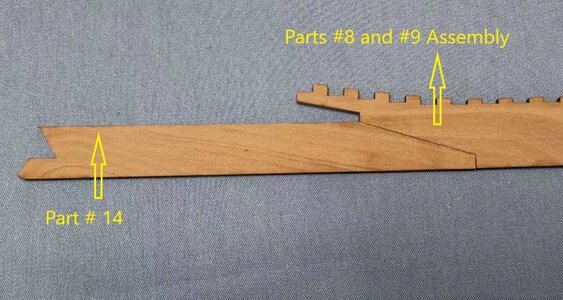
The next step was to join our first assembly comprising of Keel Parts # 8 and #9 to Keel Part #14.

微信图片_20201210090503.jpg

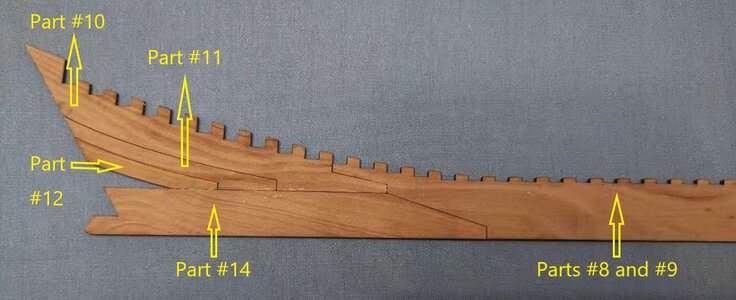
After which the Assembly comprising of Parts #10, #11 and #12 slots right into the notch provided for by the Parts #8 and #9 Assembly.

微信图片_20201210090437.jpg

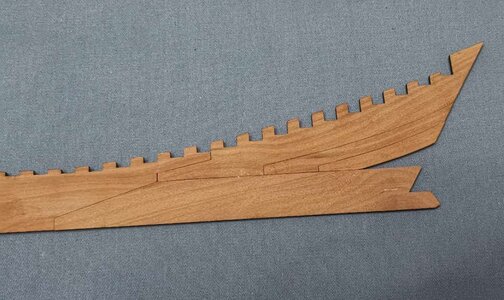
From the other side, this is what it looks like.

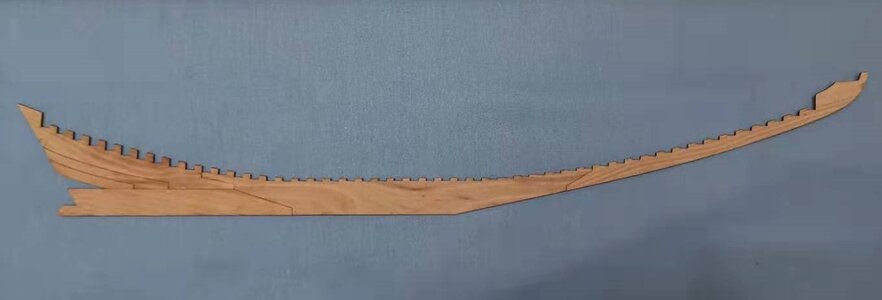
And the whole assembly thus far looks like this:

微信图片_20201210090536.jpg

And from the flipside:

微信图片_20201210090516.jpg

To say that I am happy with how it looks would be an understatement. I cannot describe how accurately the parts fit and how fine those joints are.

This then leaves us with only two parts left to complete the centre-keel assembly.

微信图片_20201210090447.jpg

This Keel Part #13 which is drying in the clamps at the moment!

Stay tuned!
 
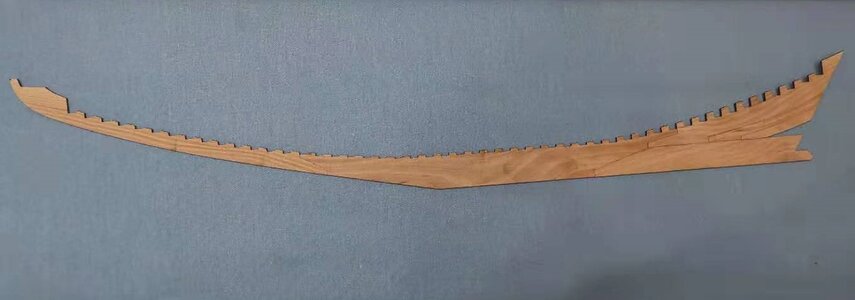
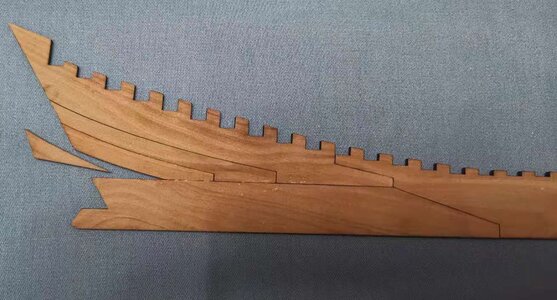
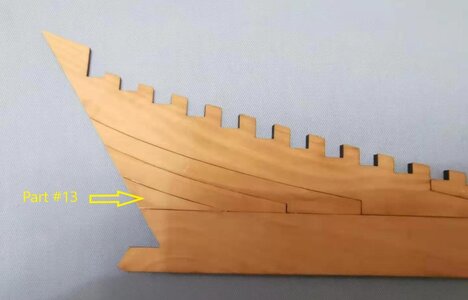
So just to show that we do not discriminate against "unlucky #13", here it is in its rightful place! And btw, Part #13 was not unlucky it all - it fitted beautifully!

微信图片_20201210111702.jpg

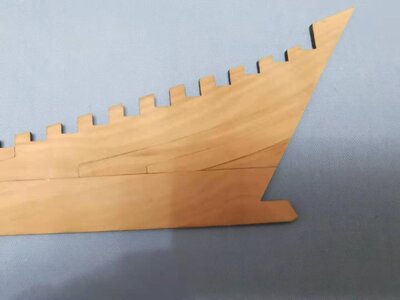
And from the other side.

微信图片_20201210111653.jpg

Now there is one part left and then the inner keel assembly is done!
 
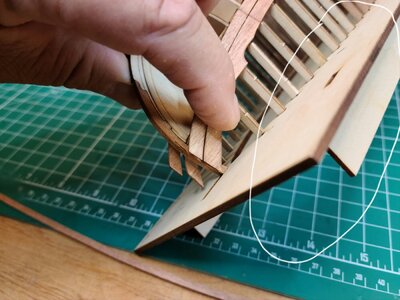
@Dean62 Hello Dean. Sorry for the late reply, but I'm running around here like the proverbial "blue-a**ed fly". All your comments and questions are perfectly logical and make a lot of sense. And rest assured ... I also dreaded the thought of aligning the keel with 58 frame notches! :D But NO! After the frames and keel have been assembled, the first thing that goes into the jig is the keel with two frames! And as you can see from the two pictures below the large one, the ribs then get added one by one. However, as to how that works _ I have not read and translated that far!

Remember, this is as much of a learning curve to me as to all of you. But I will promise you one thing. I will figure it out and if the way that the keel is going together is anything to judge by, we have no worries.

微信图片_20201210111638.jpg
 
@Dean62 Hello Dean. Sorry for the late reply, but I'm running around here like the proverbial "blue-a**ed fly". All your comments and questions are perfectly logical and make a lot of sense. And rest assured ... I also dreaded the thought of aligning the keel with 58 frame notches! :D But NO! After the frames and keel have been assembled, the first thing that goes into the jig is the keel with two frames! And as you can see from the two pictures below the large one, the ribs then get added one by one. However, as to how that works _ I have not read and translated that far!

Remember, this is as much of a learning curve to me as to all of you. But I will promise you one thing. I will figure it out and if the way that the keel is going together is anything to judge by, we have no worries.

View attachment 197968
Seems a rotisserie is in order! ;) Because once that keel is on, you have to flip it over to get the other frames in. Hmmm...
 
Back
Top