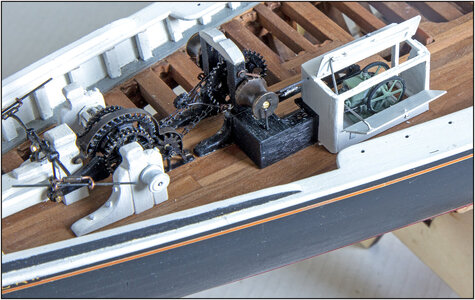
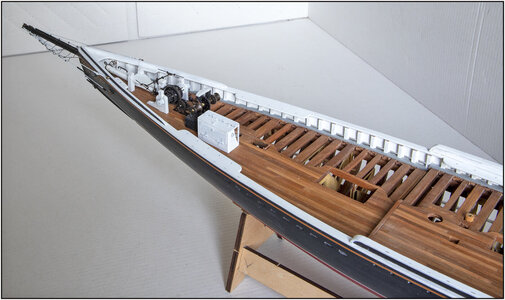
YUANQING BLUENOSE - Peter Voogt [COMPLETED BUILD]

The 5 items that were still on the list:
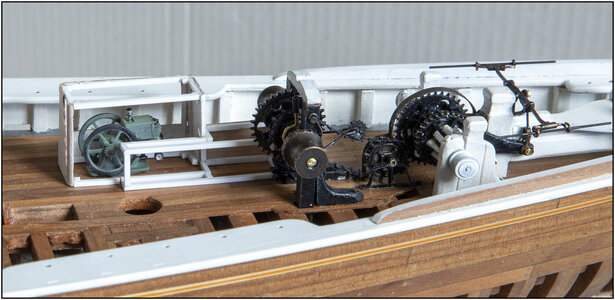
801 Rocker.jpg
-the braking system with both purchase arms on the gears and the pump-brake shaft in the so-called 'rocker' on the bowsprit table;
-the pawl that engages from the samson on the center cog;
-the protective bracket over the drive of the winch;
-the new chain;
-the new chain tensioner.

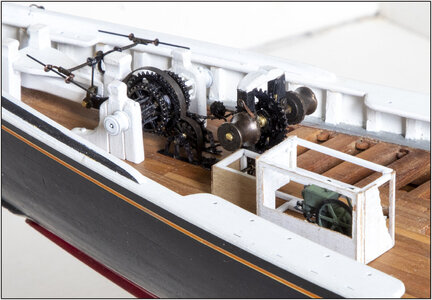
In terms of lighting, the photos have to be edited a bit to make all the black parts a bit visible:
802 Cover.jpg

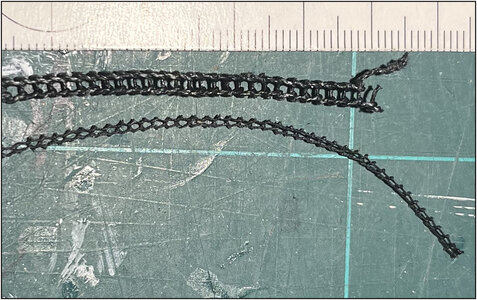
The chain now also has better proportions to use with the machine later:"
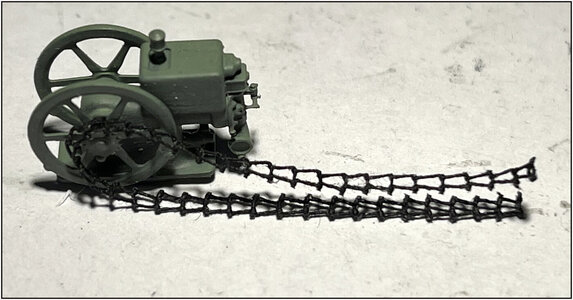
803 Chain.jpg
When making, I use 2 combs whose teeth are slightly closer together. The links are then slightly shorter.
Regards, Peter
 
The 5 items that were still on the list:
View attachment 316342
-the braking system with both purchase arms on the gears and the pump-brake shaft in the so-called 'rocker' on the bowsprit table;
-the pawl that engages from the samson on the center cog;
-the protective bracket over the drive of the winch;
-the new chain;
-the new chain tensioner.

In terms of lighting, the photos have to be edited a bit to make all the black parts a bit visible:
View attachment 316343

The chain now also has better proportions to use with the machine later:"
View attachment 316344
When making, I use 2 combs whose teeth are slightly closer together. The links are then slightly shorter.
Regards, Peter
I wonder, once finished, how on earth are you going to protect all this beautiful, intricate details against the test of time?
Again, exemplary modeling!
 
The deck building will look great
That green motor remains an asset
I wonder, once finished, how on earth are you going to protect all this beautiful,

There is a simple solution:
Dust cover;)

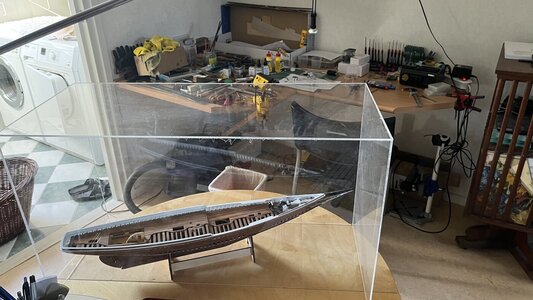
I'm working on a dust cover on my sub, spraying the base plate black and adjusting the wiring so that it now comes out at the bottom and can reach the socket,
 
I wonder, once finished, how on earth are you going to protect all this beautiful, intricate details against the test of time?
There is a simple solution:
Dust cover;)
Indeed: a vitrine/ dust cover.
From the moment I was working on the deck, I covered the BN between the working times with the Ducati-cover that is standing useless.
But still have to clean the BN often, because of the worker.
1B3C10FA-45EB-4D04-8C12-4CFE587AADE4.jpeg
Regards, Peter
 
After a lot of tweezing work, the third part is ready: the winch drive:
View attachment 315925
A = 1st axle that will be connected to the machine house later;
B = small gear on this axle is driving the large gear on 2nd axis 'D';
C = clutch that engages or disengages chain sprocket 'E'. Thus, the 2nd axis 'D' can also work separately. This allows heavy loads to be lifted;
D = 2nd axle with both barrels. The catches D1 and D2 engage on the teeth on both sides, depending on which direction of rotation is to be secured;
E = Chain sprocket with chain that provides the drive to the 3rd axle.
Both shafts are mounted in brass bushings over which naild brackets are attached.

View attachment 315926
E = chain sprocket on the minor 3rd axle 'F'
F = the small gear on the shaft drives the large gear 'G' on the 4th shaft, the winch;
G = there are 2 decelerations, shaft 1 to shaft 2 as well as shaft 3 to shaft 4, which ensure that the windlass for the anchors, among other things, rotates slowly and can move large loads;
H = 2 gears on the winch that are connected to the braking system. That comes on the table for the samson.
I = tensioner on the drive chain.

The unforgivable macro shot:
View attachment 315927
Keep in mind that the entire gear is just under 4.5 cm long / less then 2" ........

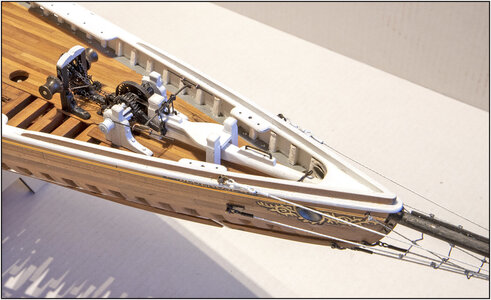
The whole on the bow:
View attachment 315928
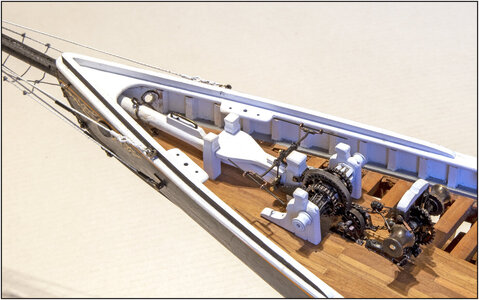
And one more from the front:
View attachment 315929

A complex past that has cost me a lot of thinking and improvisation, with the help of AL-FI.
Now the braking system that also needs to be completely scratched. And the catch on the samson and cover over the gears on axle 1 and 2.
Regards, Peter
Looking very good Peter. I really like what you have done! Looking forward to the addition of the motor and box. ;)
 
Last edited:
Looking very good Peter. I really like what you have done! Looking forward to the addition of the motor and box. ;)
Thanxs, Dean. Nice to see you have some time to visit my log. Hope you have soon the time to work on your builds again.
The motor is on the worktable and collecting the parts for the boxes. But most of it will be scratch.
Regards, Peter
 
The 5 items that were still on the list:
View attachment 316342
-the braking system with both purchase arms on the gears and the pump-brake shaft in the so-called 'rocker' on the bowsprit table;
-the pawl that engages from the samson on the center cog;
-the protective bracket over the drive of the winch;
-the new chain;
-the new chain tensioner.

In terms of lighting, the photos have to be edited a bit to make all the black parts a bit visible:
View attachment 316343

The chain now also has better proportions to use with the machine later:"
View attachment 316344
When making, I use 2 combs whose teeth are slightly closer together. The links are then slightly shorter.
Regards, Peter
What a brilliant and innovative way to emulate a chain. Great work Peter, nice to watch Thumbsup
 
The boxes for the engine and gear drive are next.
Again, inspiration from old photos:
806 Engine.jpg
- the engine box is white and the gearbox is 'black';
- hinged parts on the top and port side;
- the back with 'eyes' can apparently also be removed.

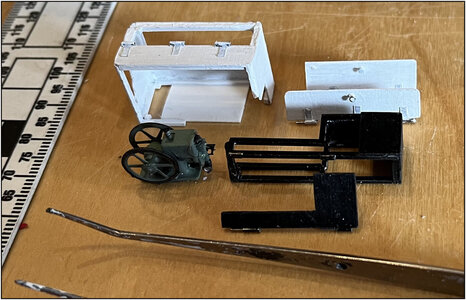
The basis for the engine box and gearbox:
804 Engine.jpg
In accordance with 'my BN theme', the starboard side will also remain open here and there will be open hatches on the top.

805 Engine.jpg
The port side is closed, but there is also a hatch. The back is 'nibbled'.

The engine was already provided with an old color by Henk. Applied some black accents to some parts myself and some 'metalic' on both filters. The spark plug was made white and fitted with a colored cable. That's dyed hair! (More detailed pictures later, when the chain is ready.)
Here's another link to get the sound back between your ears:
Regards, Peter
 
Last edited:
This is next-level stuff Peter. I hope you realise you're setting the bar very high for the rest of us mortals ... :(

Great work though Thumbsup
 
This is next-level stuff Peter. I hope you realise you're setting the bar very high for the rest of us mortals ... :(

Great work though Thumbsup
Thanks, Mark. I only know the hight of my own bar. And sometimes I also bump my head against it.
Every one has its own bar and the hight of each bar is ok. Most importantly: that you are building and stays busy.
Regards, Peter
 
The motor in its box looks support Peter. Dean has done an amazing job in designing it and through Henk's efforts and contacts it all came to fruition. However, all loose ends have to be tied up and executed and that is where you come in. And if there is a better man to do that job than you, I have not met him!
 
Hi Heinrich. Thank you very very much for this kind words. But please, not to much credits to me. :rolleyes:
Sometimes it gives a feeling of satisfaction when something works during your own build. But the satisfaction is even greater when you've done things together. And even more with the intercontinental connection!
Then a comment from my father sings through my head again: "You don't have to know or be able to do everything yourself, as long as you know someone who knows or can. But don't let them work 'for' you, but work together."
It's great that I can contribute to this through this SOS. And for this special BN-parts, most of the credits goes to Dean @Dean62 and Henk @Henk Liebre. But also to you, Heinrich. You brought the BN to our attention and, as BN Moderator, you helped to create an enthusiastic environment to show all our construction activities in the Group Build.
But of course that also applies to the other Moderators and Goup Builds. We are doing well TOGETHER.
Regards, Peter
 
The drive with the motor of the winch and anchor winch is also installed.
Knotted a new small chain first:
807 Chain.jpg
The 1st version and the 3rd. The latest has 29 links per 5cm/inch.

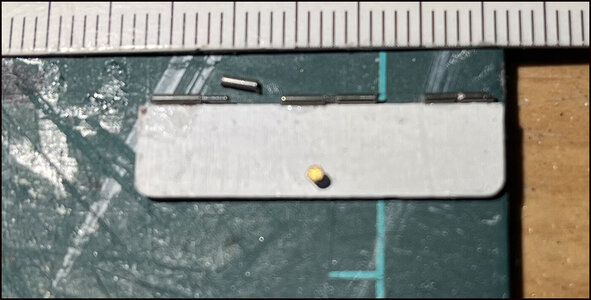
Also new hinges made:
808 Hinges.jpg
Of '21' syringe internal 0.5, for the pin of spring steel 0.5. Unfortunately the photo is not sharp.

All parts ready:
809 Parts.jpg

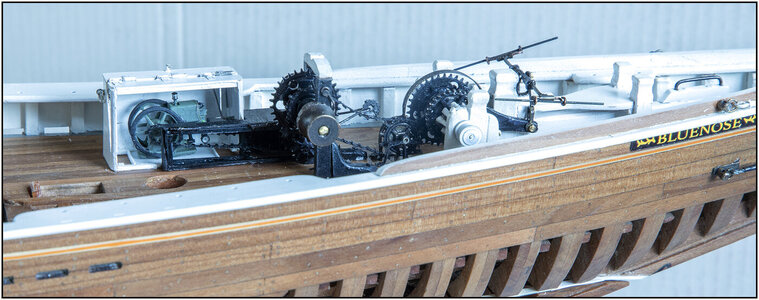
The complete 'drive-chain' with the open starboard side:
810 Drive.jpg

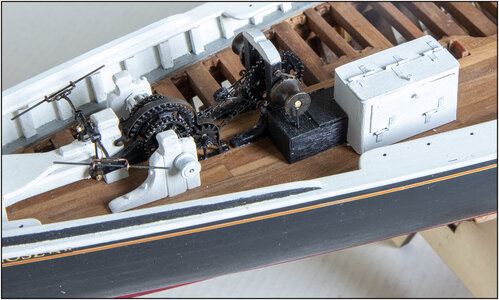
The closed port side:
811 Closed.jpg
The black box in front of the engine housing is the 'gearbox'. There is a friction clutch so that the engine can be started without the winches turning at the same time. The control handle on the black box.

With the 3 hatches open:
812 Opened.jpg
With this side also a view of the engine.
Thanks to these photos I now know that I still have to add some finishing touches with paint.;)

And a overall view of the front:
813 Front.jpg

Regards, Peter
 
Last edited:
Back
Top