YUANQING BLUENOSE - Peter Voogt [COMPLETED BUILD]

The main sail stowed on the boom with the gaff on top.
First I made a mold with a few clothespins in which the boom could lie. Fold it hoop by hoop and stored the sail between the arms:
View attachment 338837
And enclosed with a few temporary slings.

When finalizing I had to feed the slings both at the top and the bottom between the wood and the sail:
View attachment 338838
Cleared some space with a toothpick. I also had to keep in mind: the boom tackle under the boom and de bridles on top.

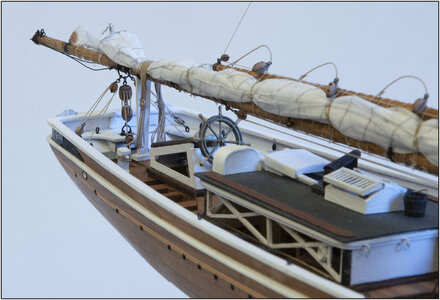
Then this is the result:
View attachment 338839
With sharp light from above.

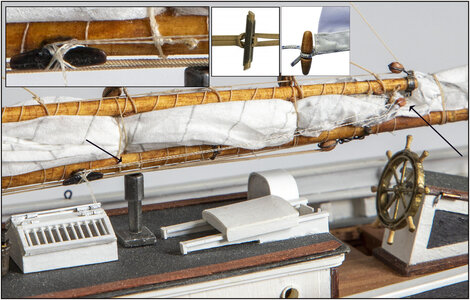
With some details:
View attachment 338840
The sail is quite cleverly secured with the slings:
-with the eye splice forward, the rope is first thrown back over the gaff;
-brought forward between the sail and the boom;
-along in front of the sail, pushed back between the sail and the gaff;
-behind the sail, brought forward under the boom;
-passed through the eye splice and tightened.
The sling then separately threads the sail together and also pulls everything tight around the gaff and the boom.

Oblique from above:
View attachment 338841

From the port side with natural light:
View attachment 338842
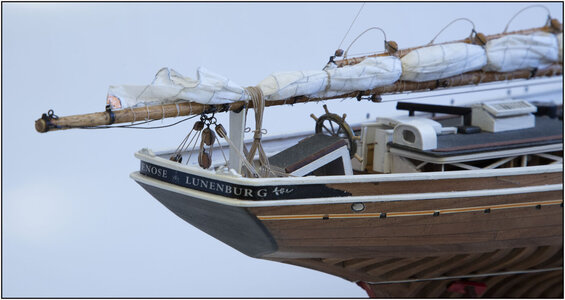
Anyway, I'm very pleased with this result. The folds fall naturally and the whole gives a nice view of a furled sail.
Regards, Peter
You nearly had me convinced to commit to furling sails, nearly.
What a beautiful job!
 
Before I could finally place the main mast, I first attached 2 blocks at the stern:
969 Block.jpg
-a 2-disc 5mm block on the 'Boom Buffer. Where the eye is integrated with a kind of shock absorber;
-a 1-disc 5mm block is mounted on a horse.
I will clarify it in the next post.

Then glued the mast in the deck hole and the 2 temporary braces in the longitudinal and transverse direction were applied again to allow the glue to harden with an aligned mast.

I spent a lot of time figuring out how the rigging works and what the best or logical order is. I follow Jenson with clear drawings in The Sage and Lankford with the MS drawings. These two are almost identical.
Decided to work more or less from the inside out. Then I can reach it more easily to secure some lines.

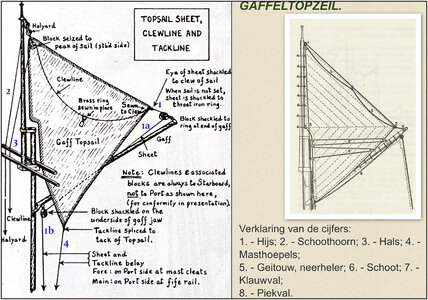
As 1st the 4 lines of the topsail secured. With a standing or a furled sail, the view of the lines is slightly different. Left the sketch of Jenson from The Saga:
970 RigTop.jpg
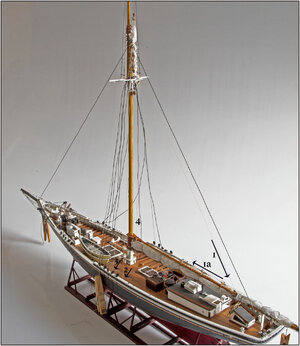
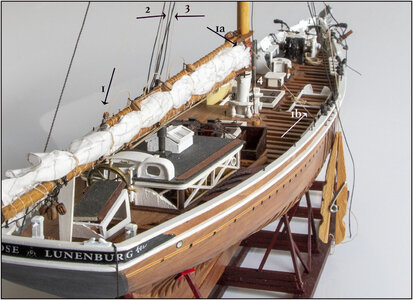
The numbering corresponds to that in the next 2 photos. I made the clew line according to Lankford.
A quick search on the internet I found a clear jest with the Dutch names on the site of 'Zien en Weten'. (Numbering is different!)

The 4 lines of the furled topsail:
971 RigTop.jpg
972 RigTop.jpg
It may not be very clear but they are 'tan' / beige-brown lines of 0.15 or 0.25 mm.
1: the sheet that pulls the sail to the side to a block on top of the gaff. And along the gaff to a block under the clevis jaw (1a) and then is fastened around a belaying pin on the railing to starboard.
2: top halliard that is secured to the railing on the port side via an eye on the spreader.
3: the clewline that is also secured through that eye and also to port.
4: tack from the bottom of the sail which is secured to starboard on the fife rail at the bottom of the mast.

Perhaps strange in itself that 2 ropes on starboard and 2 ropes on port are secured.
A clear explanation on the drawings of MS/Lankford:
"This sail is set to port of the peak halliards but the tack is over the gaff on starboard side."
What can be seen in this picture:
blue-03.JPG

Also the flag line reeved through the block at the bottom of the end of the gaff and is attached to port side to the cleat:
973 Vlag.jpg
The ends of the line are attached to each other to the right of the cleat with a 'houtje-touwtje'. I wonder what it's called in English. See the inserts above in the photo. At the top of a flag is an eye splice/touwtje, for the stick/houtje of the line and below a stick/houtje, for the eye splice/touwtje of the line.
Regards, Peter
 
Last edited:
Thanks, Stephan. And now a aha ……. Grant @GrantTyler is busy with the same type of lines. Yesterday he showed one and called it aan joggle. What’s in a name …… ;) …. clewline or clueline …..
Regards, Peter.
I'm often surprise by names in rigging, especially Dutch names makes sometimes no sense or make it more difficult. English names are easily to follow, mostly. And there is the danger by translate from English to Dutch. Sometimes something is not the same but sounds like. Example: stay-tackle is not the "stagtakel" but the "zijtakel". Another word for stay-tackle in English is also side-tackle. That makes more sence. "Stagtakel" in English is garnet or garnet-tackle.
 
I'm often surprise by names in rigging, especially Dutch names makes sometimes no sense or make it more difficult. English names are easily to follow, mostly. And there is the danger by translate from English to Dutch. Sometimes something is not the same but sounds like. Example: stay-tackle is not the "stagtakel" but the "zijtakel". Another word for stay-tackle in English is also side-tackle. That makes more sence. "Stagtakel" in English is garnet or garnet-tackle.
Lost in translation... o_O
 
The boom aft secured with the Main Sheet directly under the boom and both Boom Crutch Tackles to either side:
974 Schoot.jpg
Most are hook blocks because they also need to be detachable. Both Tackles are to secure the boom when not in use.
Close to the wind, the most force is placed on the boom. But the less close to the wind she sails, the further out the boom will be.
There is a certain line length available. As she sails further downwind, this stern sheet is also released and the boom tackle under the boom is released. The front hook block is then secured to the railing.
You can see both situations on the following 2 photos:
975 Schoot.jpg

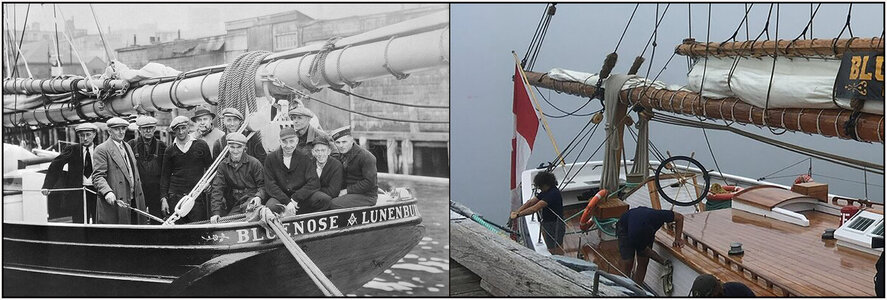
The line for the rear sheet has quite a lot of length, to put the boom out. That line has to go somewhere. With the Bluenose, it is often hung over the boom:
976 Rope.jpg
As seen in the photos of both the original and the BN-II: (On the right a cutout from a photo of Roger @RogerD )
977 Rope.jpg
It is then simply hung over the sail so that the sail is also held together a little extra at the rear.
The line of the main sheet goes from the top 3 sheave block to the single block on the horse just in front, and is then secured to 1 of the 2 bitts. Depending on the wind which side the boom is on.
Regards, Peter
 
Last edited:
Catch-up time for me on all the fabulous build on SOS - and none come more fabulous than yours, Peter. She is now more and more looking like a miniature ship (not a model) - a better accolade I cannot give you.
 
The following lines to the boom and gaff are going to put a bit of strain aft on the lower mast. Therefore it is now time to secure the shrouds with the deadeyes.
Here are the 2 pictures I posted earlier. In terms of execution, especially in the photo on the left, this is my starting point:
919 Deadeyes.jpg
-'drop'-shaped upper deadeyes;
-only a kind of white brace around the top deadeye;
-sheer pole on the outside;
-the loose end of the lanyard after the last pass the lower deadeye, just above the sheer pole with a clove hitch around the shroud.

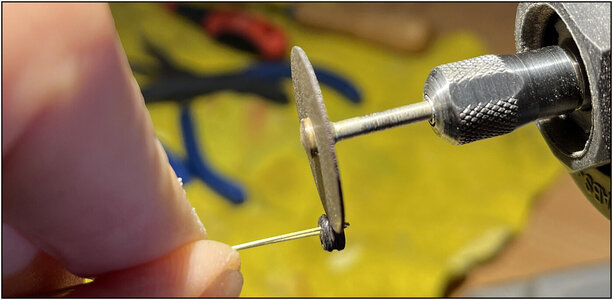
Started with the 'drop'-shaped sanding of 8 deadeyes. Provide the flattened sides with a slot where the ropes just fit:
980 Juffer.jpg

First the 2 deadeyes of the front swifter made to measure and secured. These are secured just in front of the lower mast. With that I could start aligning the lower mast. Then it was the turn of the rear swifter. These are attached behind the mast. Now I was able to align the mast completely. Both longitudinally and transversely. After that, the 2x2 other deadeyes installed.
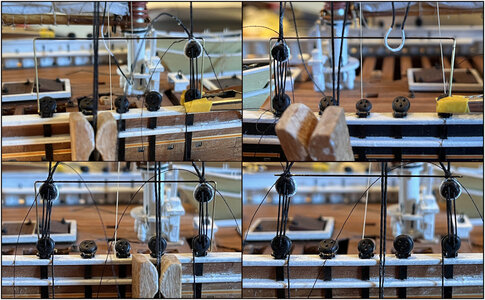
First I made a bracket that fit around the 2 outer low deadeyes. Then I was able to align the shroud with the top deadeye. Some pictures from different stages, from 2 sides:
978 Juffer.jpg
-Aligning and fixing the first to the bracket: photo top left.
-Determined the correct length, I was able to make the underside loop white, as if it were the brace: photo above right.
-Then this 2nd deadeye secured: photo bottom left.
-Cut off both outer sides of the bracket and a sheer pole was he result: photo bottom right.

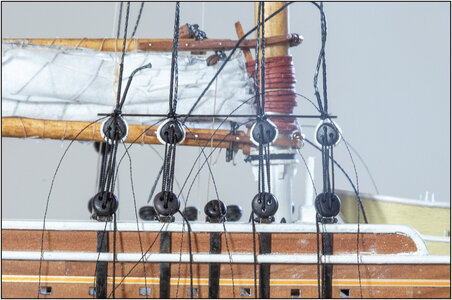
On the starboard side all 4 deadeyes secured:
979 Juffer.jpg
When the port side is also fixed, I can tension the 8 shrouds. And then:
-secure the folded loose ends with 2 more bindings;
-secure the loose end of the lanyards above the top deadeyes with the clove hitch.

Then it is the turn of the weaving ratlines and install the two topmast shrouds. There was still work to be done before I can go to the boom and gaff again.
Regards, Peter
 
Last edited:
Back
Top