YUANQING BLUENOSE - Peter Voogt [COMPLETED BUILD]

I am tempted to build another Bluenose from plans, and add the complete ship below the deck. I would then feel obligated to do a cutaway on one side (removing the frames) to display that detail. It would make for a lengthy project. Maybe when I retire! ;)
Hi Dean. Thanxs for your reply.
To made the (complete) inside, it needs ‘some interpretation’. But the drawings in The Saga will help. The main lines, I have them in mind. Will see how I can work them out and show (you) my solution.
Maybe I am that far, when you are starting. ;) And provide you with ideas to give you inspiration. Because my building proces is not going very fast.
And …… retired ……. Not bad, I like it, every day.
Regards, Peter.
 
Last edited:
Hi Dean. Thanxs for your reply.
To made the (complete) inside, it needs ‘some interpretation’. But the drawings in The Saga will help. The main lines, I have them in mind. Will see how I can work them out and show (you) my solution.
Maybe I am that far, when you are starting. ;) And provide you with ideas to give you inspiration. Because my building proces is not going very fast.
And …… retired ……. Not bad, I like it, every day.
Regards, Peter.
From all of the reading and research that I have had access to, the below deck arrangement was by direct orders of Capt. Walters and there are no drawings of what those compartments were for a layout. We can generalize some areas by usage but not drawings of the BN. BN II did it's own layout for both the BN II and then with revisions for the most current rebuild for which there is a "walk through" video available. Certainly a tourist accommodation approach. Any below decks design will be builders choice. IMHO. Rich
 
From all of the reading and research that I have had access to, the below deck arrangement was by direct orders of Capt. Walters and there are no drawings of what those compartments were for a layout. We can generalize some areas by usage but not drawings of the BN. BN II did it's own layout for both the BN II and then with revisions for the most current rebuild for which there is a "walk through" video available. Certainly a tourist accommodation approach. Any below decks design will be builders choice. IMHO. Rich
Rich, Thanxs for your reply. That all seems to fall under ‘some interpretation’. Or AL-FI.
And now the possible / intended below deck arrangement is by direct order of Capt. Voogt. ;)
Regards, Peter
 
Last edited:
My Admiral doesn't always like it when I spend the necessary hours building behind my work table. Tonight, she was working at her computer, which is in the same room as my workplace. Then it's so nice to sit there together.:)
While nailing the sisters keelson, she sometimes heard a ploing ...... followed by a sh.. …….. :mad: What are you doing? What's going on?
I don't think I need to explain this any further .........
Anyway, according to her, I'm not quite .......... :rolleyes:
Did she take some action photos to show you how nailing is going:
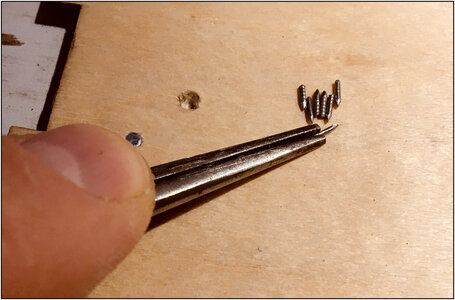
Use a pointed pliers to grab a nail in the right position:
155 Nails.jpg
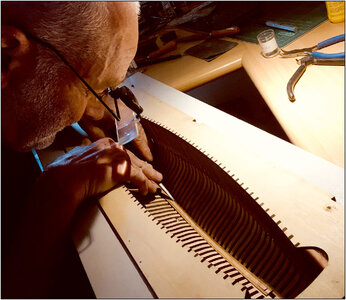
To stick the nail in the next hole:
156 Nails.jpg
Fortunately, a pair of glasses does wonders.
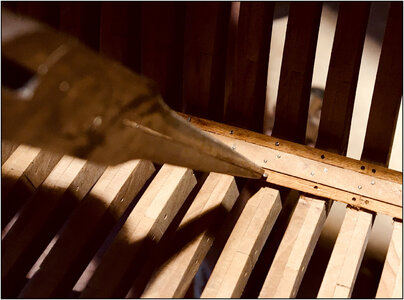
Then press them deep enough into the hole, sometimes with a little hit:
157 Nails.jpg
I first pre-drilled the holes in the sisters under the column drill. After gluing, I drilled the holes deep enough by hand. So the nails can be pressed to the right depth without too much resistance.
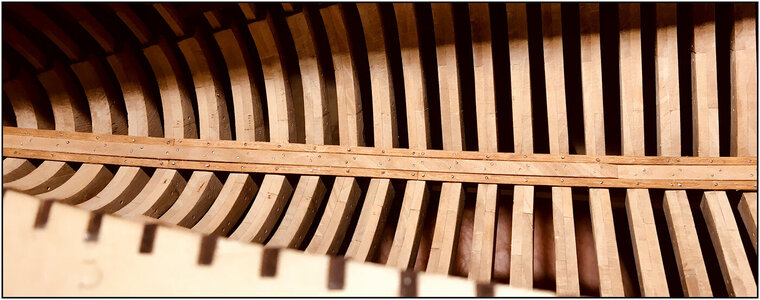
I'm just over halfway, but ran out of nail.
158 Nails.jpg
Continue quietly ........ cut, cup-burr, cut, cup-burr, ......... Does give a déjà vu with the railings of The Lee. :)
Regards, Peter
 
Last edited:
My Admiral doesn't always like it when I spend the necessary hours building behind my work table. Tonight, she was working at her computer, which is in the same room as my workplace. Then it's so nice to sit there together.:)
While nailing the sisters keelson, she sometimes heard a ploing ...... followed by a sh.. …….. :mad: What are you doing? What's going on?
I don't think I need to explain this any further .........
Anyway, according to her, I'm not quite .......... :rolleyes:
Did she take some action photos to show you how nailing is going:
Use a pointed pliers to grab a nail in the right position:
View attachment 238346
To stick the nail in the next hole:
View attachment 238347
Fortunately, a pair of glasses does wonders.
Then press them deep enough into the hole, sometimes with a little hit:
View attachment 238348
I first pre-drilled the holes in the sisters under the column drill. After gluing, I drilled the holes deep enough by hand. So the nails can be pressed to the right depth without too much resistance.
I'm just over halfway, but ran out of nail.
View attachment 238349
Continue quietly ........ cut, cup-burr, cut, cup-burr, ......... Does give a déjà vu with the railings of The Lee. :)
Regards, Peter
Looking great Peter! It's tedious work for sure...with a few curse words sprinkled in. ;)
It also doesn't help having to get to the bottom with the jig in the way!
 
Rich, Thanxs for your reply. That all seems to fall under ‘some interpretation’. Or ALFI.
And now the possible / intended below deck arrangement is by direct order of Capt. Voogt. ;-)
Regards, Peter
Your observation that I did not provide my source for the below deck layout was by Walters and not Roue is in order.
In looking back into my books I now do not find that statement as I recalled and wrote. What I have found in my back-searches are: Joan E. Roue, A Sprit Deep Within, Naval Architect W.J. Roue and the Bluenose Story, p. - 19, " Ne . . . She carried aboard many luxuries previously unknown to other vessels of the fishing fleet. The cabin of Captain Angus Walters was furnished with a brass bed and fitted with electric lights and bells. a complete electrical system ran throughout the entire vessel. The Main cabin could accommodate eight men, with the captain's quarters located in a smaller recess off this compartment. In the forecastle, she had quarters for 16 men, two more than provided in other vessels of her type. In general, her accommodation were spacious, second to none in the fleet."
Next is Keith McLaren, A Race for Real Sailors, (related to her presence in the Great Lakes), p.-190, ". . . he had her fish holds gutted and replaced with cabins on the starboard side and a showcase of the Lunenburg fishery - complete with scale models and exhibits - installed on the port side."
I'll have to keep; looking around for my reference to the layout by Walters below deck. I recall possibly seeing below deck plans on the YouTube tour inside the newest BN but nothing of the original. If you have a plan drawing or citation please pass those along to me. Thanks, Rich
Thanxs, Rich, for this information. Bit by bit I can make my plans for the inside. All the pieces of information are welcome.
If I find something, for sure, I let you know.
Ps:
Please do not worry about the 1st line of your reply. I was just kidding with my 'Direct order of Capt. Voogt'. It was written on my iPad and could not ad a emoji. Now it's there. But Capt. Voogt will still make the final decision.;)
Regards, Peter
I spent some time last night before turning off the bed-stand light going back through the book about William Roue, A Spirit Deep Within, and in the back pages found some related text: p. 44 (related to BN II below for tourists) ". . . "This would certainly be a far reach from the bunk-lined fo'c'sle cabins, forward of the fish holds, which the hands of the original vessel had experienced." Then later from a typewritten, legal paper size was a document found and presented in the book, p. 70 , "No. 17 --- SPECIFICATIONS of 110 foot L.W.> Fishing Schooner Designed by Wm. J. Roue ". . .. . . p. 75, . . . "DECKHOUSE to be built in usual mnner for vessels of this type and arranged according to usual practice and wishes of Captain Angus Walters.". . .
FINAL CLAUSES: The Builder to supply and install all necessary blocks, Mast hoops, storm sails, belaying pins, complete all iron work, ventilators, four port lights to open in cabin, an additional port in toilet, Cabin to be finished in Oak varnish. Toilet supplied and installed in toilet room. Cabin and forecastle to have hard wood floors and finished under Capt. Walters direction and instruction." . . .
No drawings of the layout of spaces.
I have written to George Rhuland, of the ship builder company who in a YouTube video on building the Bluenose said that he has in his possession the construction plans that were used. I will be asking about the below deck work and let you know what comes forth.
Not what we are looking for but pieces are being found to be added to my prior notes.
Rich
 
Time to think about the next step.
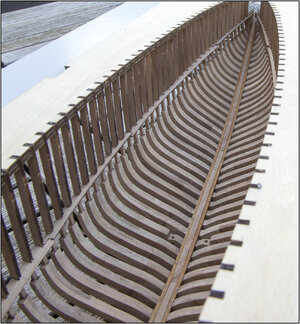
First up are the bearing beams for the upper deck beams.
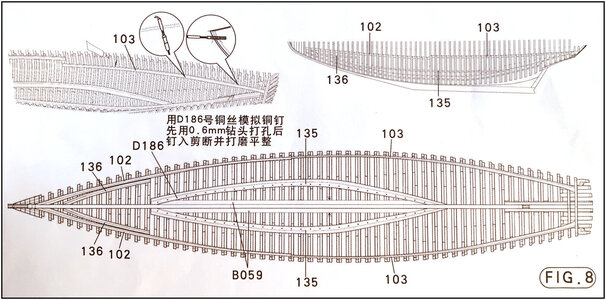
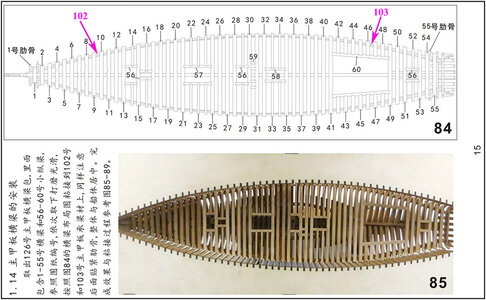
With some pictures of the manual drawings, for the non-BN-builders to get a impression.
Those beams are the parts 102 and 103:
162 Beams 102-103.jpg
The manual shows that the deck beams will soon be placed on this beams and will partly run between the frames:
163 Beams 102-103.jpg
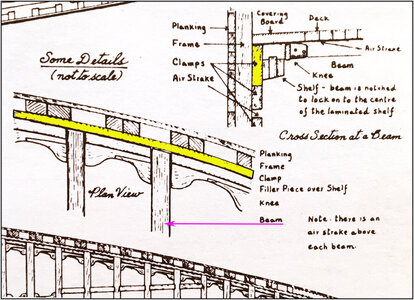
But in mentioned ‘Saga’ there is a detail drawing. With the confinement of the deck beams against a 'Clamp' running along the inside of the frames:
164 Saga Clamp.jpg
In the drawing I made the ‘clamp’ yellow.
That clamp is also necessary because otherwise the knees, when I follow the YQ-manual, between the beams have ‘no meat’ to secure against. And I want to make those knees too.
I will put the clamp on the bearing beams, so those beams will act like the shelf in the drawing.

So first a lot of dry fitting and measuring. Because the deck and the waterways (the reusable 'spacers') must also be properly positioned. And lateron the outside top plank with the scuppers just above the deck.
Regards, Peter
 
Last edited:
Started with the first of the bearing beams for the upper deck beams: the one starboard in the front.
I has to adjust it on 3 point:
-the connection to the keelson, over the sisters keelson;
-the top to allow the deck beams to connect flat later;
-a nice smooth connection to where all frames goes from double to single. Where, according to the YQ manual, the deck beams will be on. Only not with my BN. But it's the starting point for the aligning of the decks on the deck beams.
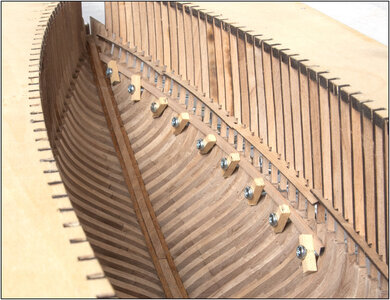
And I can test the clamps I made to an idea of some of the SoS-member. OkayThumbs-Up
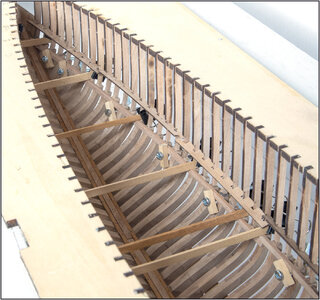
How it looks on the inside:
165 Top beam.jpg
Took the port side spacers out to get some more space for my hand inside.
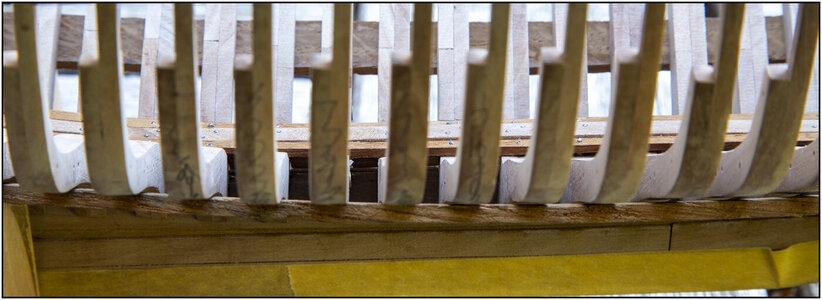
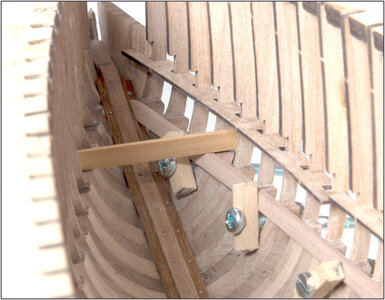
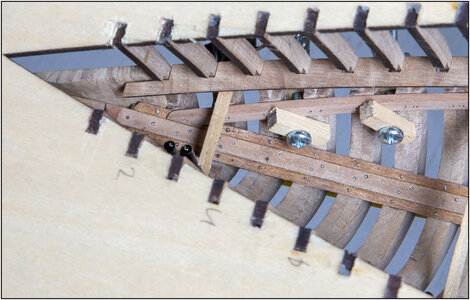
The adjustments in the front with a bevel on 3 different angles:
166 Top beam Detail.jpg
On the two beams on the back, YQ has lasered a bevel line. Not on this in the front. But they certainly need to be beveled to get the deck beams fit flat on it.

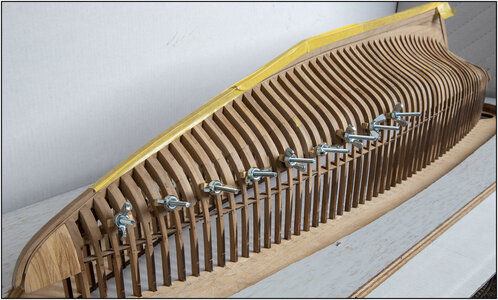
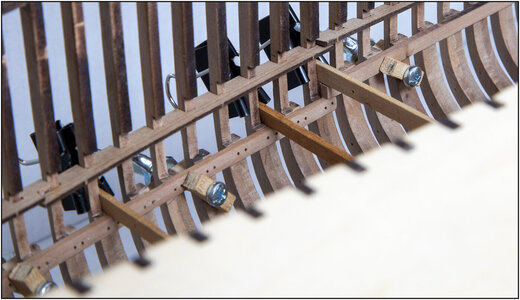
How it looks on the outside with the clamps:
167 Clamps.jpg

And the flowed connection to the frame transitions
168 Adjust.jpg

After some extra sanding, for me it looks ok. Up to the beam on port.
Regards, Peter
 
Last edited:
Macro shots have advantages and disadvantages. You see everything. ;)
So I wasn't completely satisfied with what I saw now (even better). Adjusted a few things.

169 Beams.jpg
The bearing beam #102 runs against frames 1 to 27.
Not all 27 notches will be exactly aligned in a row. Therefore 5 temporary deck beams placed over an equal distance. With the advantage that I can press the beam against it when gluing in to get into place. Because only visually will not work;
All the holes for the nails marked and pre-drilled. Like the keelson, this is a beam that should give strength to the construction. So also with each frame 2 nails, both one in the front and the rear frame part.

170 Bow.jpg
The connection at the front to the keelson was not neat (enough). So a little extra sanding.

171 Change.jpg
Looking a bit ahead at the connection of both beams to the middle deck. Made a small chamfer between the connecting parts because the space between the lower (#102) and upper (#103) beam was just not the thickness of a beam. It's not much, but enough to not fit correct.

Regards, Peter
 
Back
Top