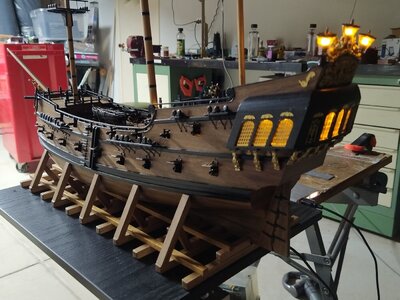
ZHL Black Pearl 2020 Golden Edition [COMPLETED BUILD]

Hey Tony, I'll add my congratulations to your son. You must be very proud of his accomplishments.
Also, from my side, congrats to you and your son! I cannon thanks enough for their service! To those in the uniform- we salute you!
Thumbs up to your son Tony! Papa very proud for sure! I can’t even imagine following the rigging plan in my kit! I just started my planking yesterday, plan to take it slow and easy! Ha! As always, your work inspires me to keep moving forward!
Congrats to your son! Tell him, “Thank you for your service!” for us. Now the fun stuff begins for you—the rigging.

Thanks, David (my son) has achieved more than we ever expected since joining the Army. His last posting was for 2 years at Fort Leavenworth an exchange program with the US Army, he returned January. He is now based 90 minutes away so we'll be able to see a lot more of him and our two granddaughters.
 
Thanks, David (my son) has achieved more than we ever expected since joining the Army. His last posting was for 2 years at Fort Leavenworth an exchange program with the US Army, he returned January. He is now based 90 minutes away so we'll be able to see a lot more of him and our two granddaughters.
That’s cool! Not all service members and their families are blessed with being that near to each other.
 
Thanks to everyone who has read, liked and replied to my posts keeping a log is all new to me, any feedback is always welcome.
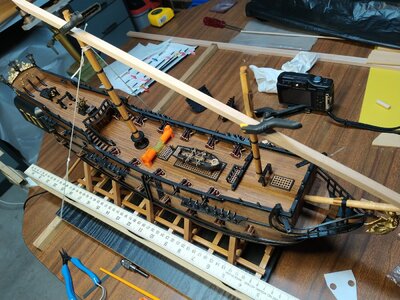
This week I have been finishing off the masts and have made a temporary base.

IMG_20210511_162434.jpgIMG_20210511_163545.jpgIMG_20210511_164058.jpg
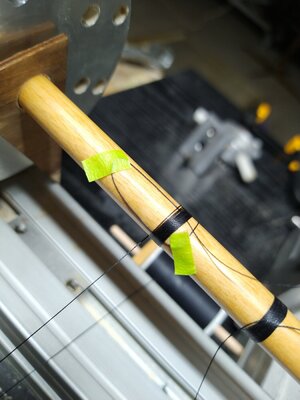
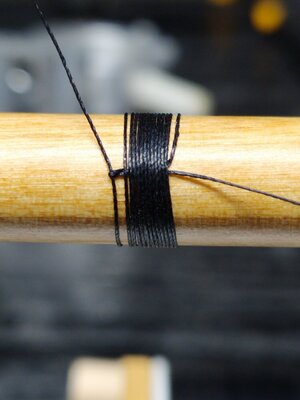
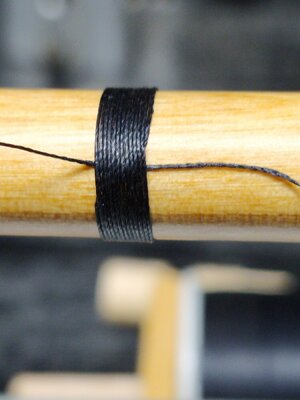
This is how I made the wooldings.

IMG_20210516_132149.jpg
The model is fixed to a temporary base now, this will make it easier to handle while I attempt to do the rigging. I've also connected it to a USB power pack for the first time everything was OK. The final base with have a USB connector built in.
 
Thanks to everyone who has read, liked and replied to my posts keeping a log is all new to me, any feedback is always welcome.
This week I have been finishing off the masts and have made a temporary base.

View attachment 233529View attachment 233528View attachment 233527
This is how I made the wooldings.

View attachment 233526
The model is fixed to a temporary base now, this will make it easier to handle while I attempt to do the rigging. I've also connected it to a USB power pack for the first time everything was OK. The final base with have a USB connector built in.
She’s looking great, Tony!
 
I've been busy with all the little bits that don't look much but seem to take a lot of time. All the masts, yards, crosstrees, deadeyes and blocks are ready for fitting. The blocks are poor quality and needed a bit of work, the groves needed to be deeper and the holes had to be opened up.

IMG_20210527_110219.jpg
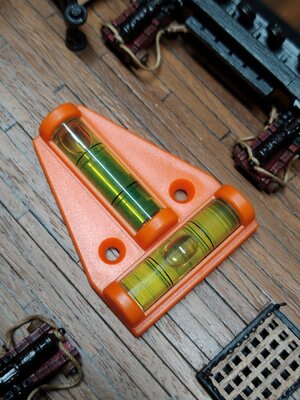
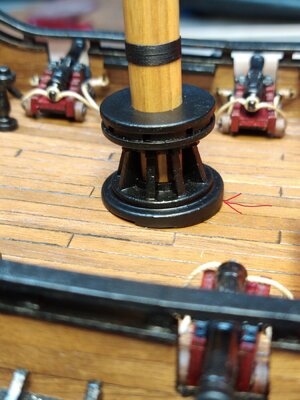
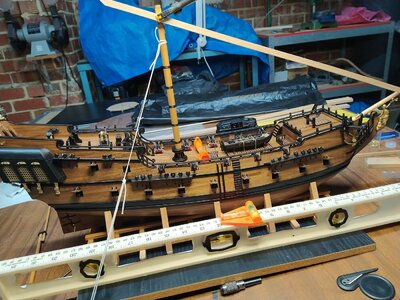
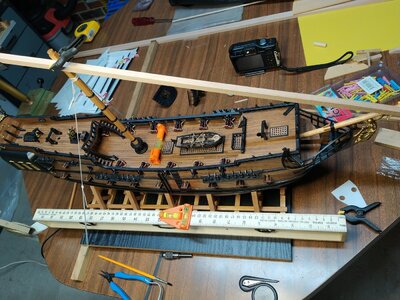
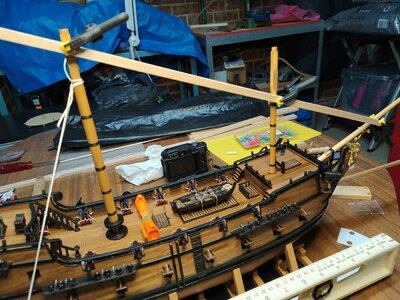
Ready to set the masts up, first of all I insured the base was level. When the main mast was square to the keel there was a 2mm gap under the front of the capstan due to the rake on the deck.

IMG_20210527_213210.jpg
A spacer was made to go under the capstan and hold the mast at the right angle.

IMG_20210527_154326.jpgIMG_20210527_154311.jpg
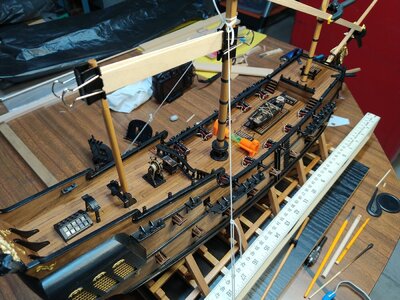
The mast needed to be tied back to hold it in position, I used epoxy to secure the mast. I then placed a piece of timber between the mast and bowsprit.

IMG_20210527_160010.jpgIMG_20210527_160033.jpg
The timber is used to line up the fore mast.

IMG_20210527_164259.jpg
Then the mizen mast was clamped to the main mast.
Now time to start the rigging.
 
I've been busy with all the little bits that don't look much but seem to take a lot of time. All the masts, yards, crosstrees, deadeyes and blocks are ready for fitting. The blocks are poor quality and needed a bit of work, the groves needed to be deeper and the holes had to be opened up.

View attachment 235663
Ready to set the masts up, first of all I insured the base was level. When the main mast was square to the keel there was a 2mm gap under the front of the capstan due to the rake on the deck.

View attachment 235664
A spacer was made to go under the capstan and hold the mast at the right angle.

View attachment 235668View attachment 235669
The mast needed to be tied back to hold it in position, I used epoxy to secure the mast. I then placed a piece of timber between the mast and bowsprit.

View attachment 235667View attachment 235666
The timber is used to line up the fore mast.

View attachment 235665
Then the mizen mast was clamped to the main mast.
Now time to start the rigging.
I love it! I just wish I had thought of it when lining up my masts. Eyeballs don’t cut it anymore.
 
How did you fasten your guns down? Glue didn’t hold them for me and the restraining ropes allowed them to turn upside down when I had to turn the ship over. It wasn’t until I fully rigged them (without blocks) that they remained in place.
 
You do nice work, Tony. Thank you for sharing.
I've been busy with all the little bits that don't look much but seem to take a lot of time. All the masts, yards, crosstrees, deadeyes and blocks are ready for fitting. The blocks are poor quality and needed a bit of work, the groves needed to be deeper and the holes had to be opened up.

View attachment 235663
Ready to set the masts up, first of all I insured the base was level. When the main mast was square to the keel there was a 2mm gap under the front of the capstan due to the rake on the deck.

View attachment 235664
A spacer was made to go under the capstan and hold the mast at the right angle.

View attachment 235668View attachment 235669
The mast needed to be tied back to hold it in position, I used epoxy to secure the mast. I then placed a piece of timber between the mast and bowsprit.

View attachment 235667View attachment 235666
The timber is used to line up the fore mast.

View attachment 235665
Then the mizen mast was clamped to the main mast.
Now time to start the rigging.
Fantastic Tony. I'm going to steal all your good ideas when I get to this point in five years...
 
How did you fasten your guns down? Glue didn’t hold them for me and the restraining ropes allowed them to turn upside down when I had to turn the ship over. It wasn’t until I fully rigged them (without blocks) that they remained in place.
Hello, Vic. One of the ways to fasten gun cartridges to the deck is to use a pin in the front axletree. Make a hole in the deck the size of your pin and glue the pin to the hole. This way you don't have glue leftovers under the trucks and oftentimes, when we oil the deck, the glue will not adhere to it.
 
As always Tony, you continue to impress me with your thorough process within your build! Always coming up with a way to make it the best way to make things work! I always look forward to seeing your progress! My second planking is moving along A-OK with my Pearl! Have a great day!
 
How did you fasten your guns down? Glue didn’t hold them for me and the restraining ropes allowed them to turn upside down when I had to turn the ship over. It wasn’t until I fully rigged them (without blocks) that they remained in place.
I glued a small piece of scrap timber under the gun near the front axle then put glue on the piece of scrap to fix the gun in place. This gave a stronger joint as there is more contact area and the glue doesn't show around the wheels.
 
Great technique Tony! During my years as a surveyor I was always amazed how some of our older 20,000 dollar instruments were only as accurate as the 3 dollar level bubble used to set them up!
I was looking at getting a laser Level then tried the little spirit levels I had and they worked fine. Sometimes the best tool is the one you already have.
 
As always Tony, you continue to impress me with your thorough process within your build! Always coming up with a way to make it the best way to make things work! I always look forward to seeing your progress! My second planking is moving along A-OK with my Pearl! Have a great day!
Glad to hear that the planking is going well. The way I did the masts evolved as I was assembling them first the main mast needed to be held in position so I used the tiebacks. Then I clamped a straight edge to the top of the mast to aline the square part, it then occurred to me as they're all the same diameter I could clamp the timber to the bowsprit and use that to set the fore mast.
 
Glad to hear that the planking is going well. The way I did the masts evolved as I was assembling them first the main mast needed to be held in position so I used the tiebacks. Then I clamped a straight edge to the top of the mast to aline the square part, it then occurred to me as they're all the same diameter I could clamp the timber to the bowsprit and use that to set the fore mast.
I see you used epoxy to set the masts! As far as my planking, well it looks like I just need to do some sanding but no wood filler is needed...that’s a good sign for me...ha!
 
I see you used epoxy to set the masts! As far as my planking, well it looks like I just need to do some sanding but no wood filler is needed...that’s a good sign for me...ha!
I used the epoxy because I didn't want the masts to move. As my rigging skills are zero I can't count on the ropes to keep everything straight.
Looking forward to seeing some photos of your progress.
 
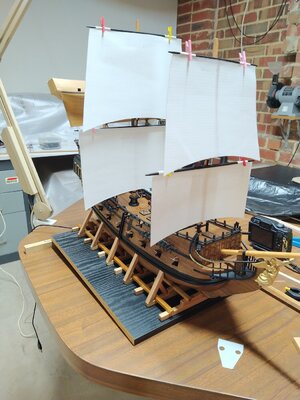
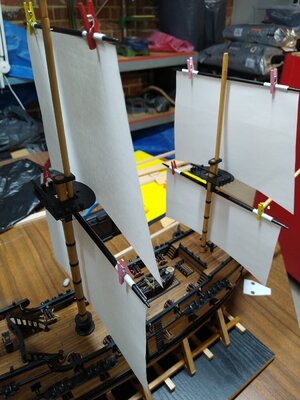
Just a quick update, now the masts are in place I wanted to see how the sails would look. The precut sails provided looked to deep (hung over the deck and yards). Before sewing the sails adjustment are needed.

IMG_20210529_151247.jpgIMG_20210529_151410.jpg

Paper templates where made and fitted, between 10-15mm was removed from the bottom of the sails.

IMG_20210529_151735.jpg
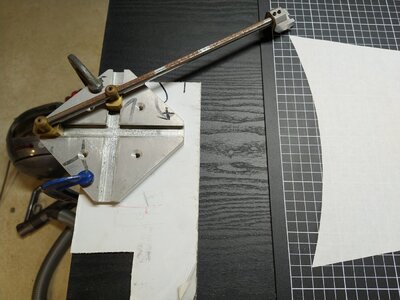
This is a little gadget I made up to draw/cut ovals worked well for the sails.

Now a question what is the correct height of a sail?, Should it reach the previous yard or be longer/shorter.
 
Back
Top