ZHL Le Soleil Royal

Wow, it’s been almost 3 weeks since I posted any progress and as it turns out I haven’t been able to do too much.
I planked the little forward deck. Every thing I looked at showed the deck with the wide finished planking that is used on the hull but I chose to use the planking that was used on all the other decks. It was easy to trim before installing the hull planking below it. D0342D3E-9EA9-405B-A7A3-4AB03895D2F0.jpeg
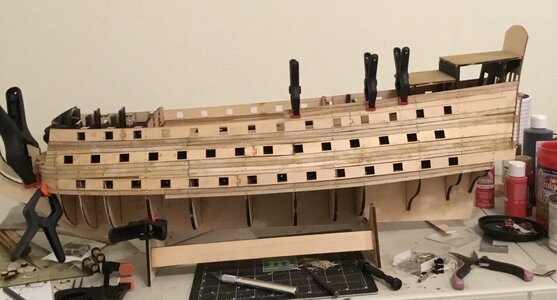
I then continued with the hull planking on the port side.
F7D0EB12-36A7-4C4D-9E5D-C5653CD9F629.jpeg
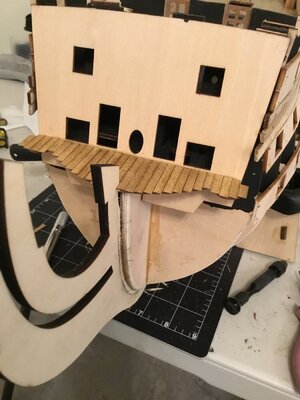
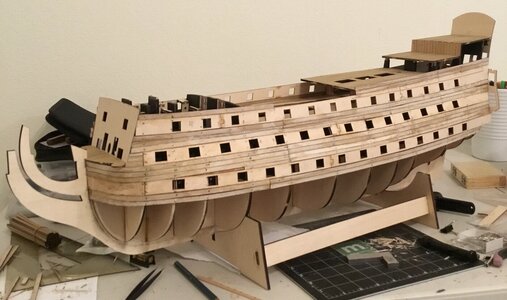
Next on the agenda was to put the planking on the front walls of the rear decks where the windows and doors are to go. It seemed easier for me to do that now before the planking on the sides was in place.
4F156788-C8BF-49A3-B949-4F767C0FA671.jpeg
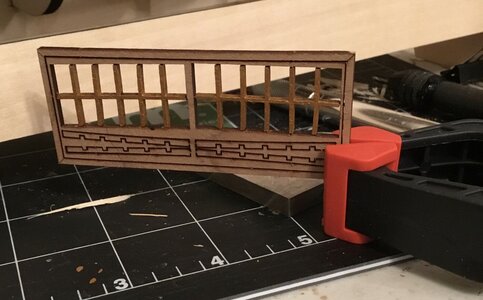
The last thing I did was to paint the muntins for the windows gold.
09CFE573-F1B3-4272-93F9-2555A4C7EEE9.jpeg
Hopefully I can make more progress in the future as free time is a bit scarce.
 
Wow, it’s been almost 3 weeks since I posted any progress and as it turns out I haven’t been able to do too much.
I planked the little forward deck. Every thing I looked at showed the deck with the wide finished planking that is used on the hull but I chose to use the planking that was used on all the other decks. It was easy to trim before installing the hull planking below it. View attachment 235051
I then continued with the hull planking on the port side.
View attachment 235054
Next on the agenda was to put the planking on the front walls of the rear decks where the windows and doors are to go. It seemed easier for me to do that now before the planking on the sides was in place.
View attachment 235055
The last thing I did was to paint the muntins for the windows gold.
View attachment 235056
Hopefully I can make more progress in the future as free time is a bit scarce.
Wow Jay. Great work on your part. I'm really liking this ship and if I ever decide to do another, this may be the one I try. I really enjoy reading all the builds of the ships I like. I remember you saying this was a Zhl kit. How are the instructions? (just for my future reference) Sail on mate.
 
Wow Jay. Great work on your part. I'm really liking this ship and if I ever decide to do another, this may be the one I try. I really enjoy reading all the builds of the ships I like. I remember you saying this was a Zhl kit. How are the instructions? (just for my future reference) Sail on mate.
Thanks M8e, are there any ships with great instructions?? They are decent for this kit but you have to make sure that you read ahead and reread a few times. There are some things that aren’t explained so you can just do what you please. No one I come in contact with will ever know that there might be a variation anyway so just have fun with it I say.
 
Wow, it’s been almost 3 weeks since I posted any progress and as it turns out I haven’t been able to do too much.
I planked the little forward deck. Every thing I looked at showed the deck with the wide finished planking that is used on the hull but I chose to use the planking that was used on all the other decks. It was easy to trim before installing the hull planking below it. View attachment 235051
I then continued with the hull planking on the port side.
View attachment 235054
Next on the agenda was to put the planking on the front walls of the rear decks where the windows and doors are to go. It seemed easier for me to do that now before the planking on the sides was in place.
View attachment 235055
The last thing I did was to paint the muntins for the windows gold.
View attachment 235056
Hopefully I can make more progress in the future as free time is a bit scarce.
Hi Jay
Good to see the progress
Keep it up
 
I'll be reading through all the Soleil builds before I start mine. Thanks for sharing your work, Jay!
Vic, if it wasn’t for you I wouldn’t have been able to get this far on the build. Big thanks for your help.
 
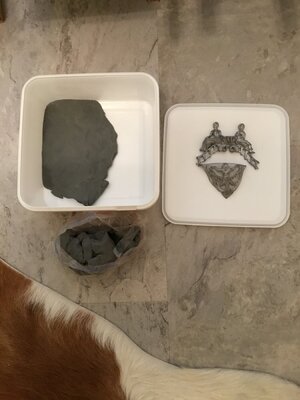
I thought since the decorations for the Soleil Royal weighed so much I would use some of the molding material I had left over from when I used to make custom gear shift knobs for the motorcycle club I belong to. I chose two decorations since I didn’t have much of the mold material left. The bottom decoration is used on the right and left side of the ship so I can cast the second one when I need it.
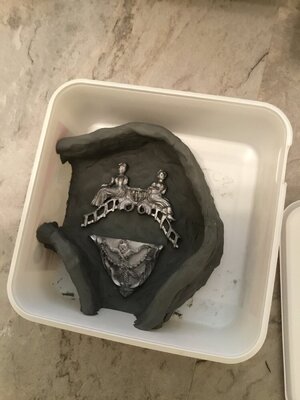
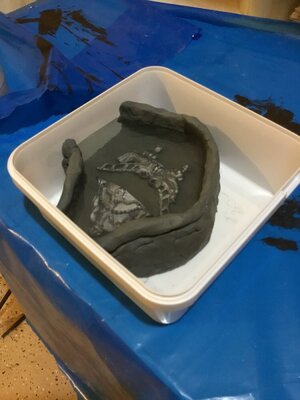
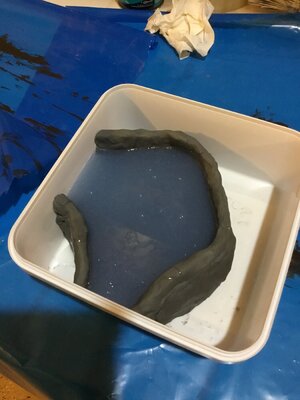
I start with the clay in the container and make a form for the decorations and make sure the clay is tight on the container so there is no leakage of the silicone. You need about a half an inch around the sides of the decorations including the half inch over the highest part of the decoration. 264C8FDB-365E-48CA-854F-3CB157F9D98D.jpeg

The finished form.
AE338F25-4296-4FE3-A4C2-098A5B89DDD2.jpeg
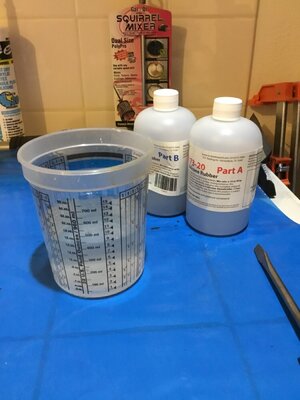
There is a mathematical formula to figure out how much silicone you need to use. I did that one time but you have too much material left over so I just pour water in the form to see how much I need.
31F90D0B-D5A8-4CA9-97B0-43D5D66BD86E.jpeg
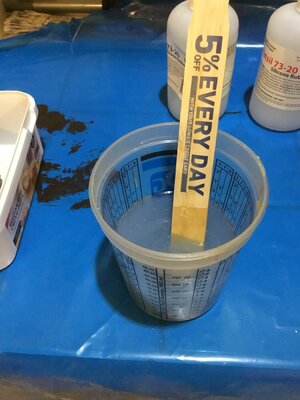
I pour the water into a mixing cup and in this instance I need 14 ounces of silicone. Since part A and part B is a one to one ratio I will use 7 ounces of each. I had just enough. You have 5 minutes to mix and pour the silicone before it starts solidifying. In Colorado I could demold in one hour but here in the south with the humidity it takes a while longer. 8BC2E844-44AA-4B05-8725-85FCC6BD9ECA.jpeg
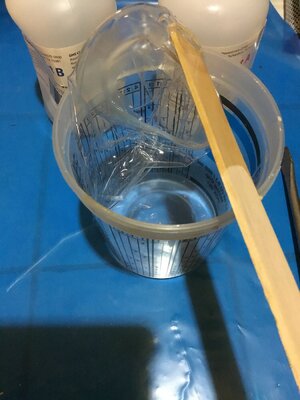
It takes about 30 seconds or so to mix so plenty of time to pour into the form.
BF571924-B8D0-48C4-8614-1634689824A2.jpeg
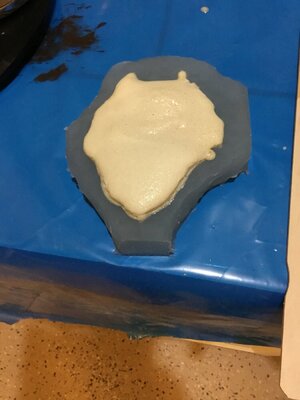
This is what it looks like in the form.
3220C364-EB4C-408F-80F8-A0FB6D20AED7.jpeg
I get the resin from Hobby Lobby and always wait till they have a 40 or 50% off coupon before I buy it.
90091AEC-4BFC-4469-80F6-B30FD8DF09B9.jpeg
When I can pull up the mixing stick and all the silicone comes up with it I know it’s ready to demold.
9247E765-FABF-4094-B0EC-CEF41DB4CEBA.jpeg
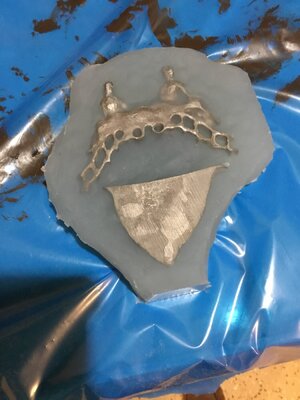
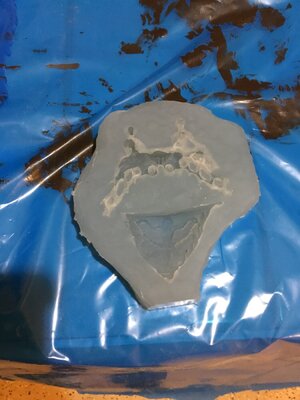
Taking the clay out, this is what the back of the mold looks like. 5E1A0458-8AB7-48F6-8DDA-E8F2D3134436.jpeg
I remove the decorations and trim the sprue from the mold.
2D3BF5C2-5BF9-4800-A792-B70685734CBE.jpeg
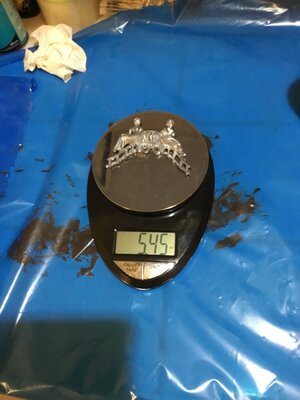
The top decoration weighs 5.45 ounces. E5FE6969-9962-436C-A85D-D0DE9A5FD97E.jpeg
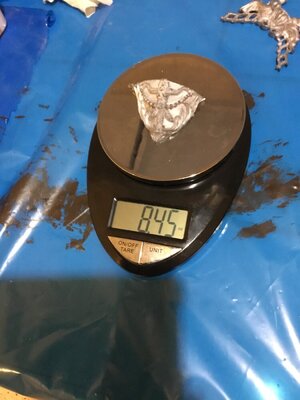
The bottom decoration weighs 8.45 ounces so the right and left side would weigh over a pound.
5B0A52B4-EF85-4CEE-88C5-6B18AABCCFA1.jpeg
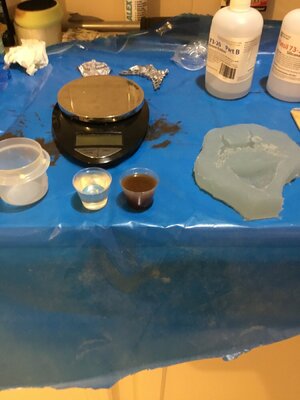
I poured water in the mold and it came out to about 2 ounces so I poured 1 ounce of part A and 1 ounce part B of resin into mixing cups.
3F3E9010-B047-43A6-A138-470FBD9764BE.jpegI added the 2 ounces to another cup to mix. The resin has only a 2 minute mixing and pouring time. You need to make sure when you pour that the resin gets into every nook and cranny and no air bubbles. You can squeeze the mold while pouring to facilitate that. It takes about 10 minutes for the resin to completely harden.
DF6AD63A-0143-4F97-9E36-48D0FE1D546D.jpeg
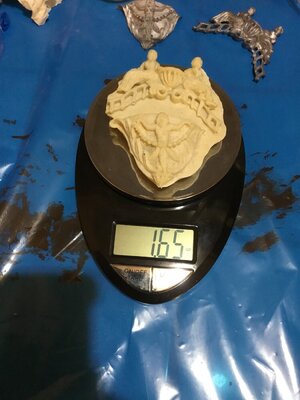
Out of the mold it only weighs 1.65 ounces compared to the 13.90 ounces of the metal decorations. After I trim the unwanted resin off it will probably only weigh a little over an ounce.
32DF19F3-8AEF-4111-8E72-8108BE4A20C2.jpeg
 
I thought since the decorations for the Soleil Royal weighed so much I would use some of the molding material I had left over from when I used to make custom gear shift knobs for the motorcycle club I belong to. I chose two decorations since I didn’t have much of the mold material left. The bottom decoration is used on the right and left side of the ship so I can cast the second one when I need it.
I start with the clay in the container and make a form for the decorations and make sure the clay is tight on the container so there is no leakage of the silicone. You need about a half an inch around the sides of the decorations including the half inch over the highest part of the decoration. View attachment 236341

The finished form.
View attachment 236342
There is a mathematical formula to figure out how much silicone you need to use. I did that one time but you have too much material left over so I just pour water in the form to see how much I need.
View attachment 236343
I pour the water into a mixing cup and in this instance I need 14 ounces of silicone. Since part A and part B is a one to one ratio I will use 7 ounces of each. I had just enough. You have 5 minutes to mix and pour the silicone before it starts solidifying. In Colorado I could demold in one hour but here in the south with the humidity it takes a while longer. View attachment 236344
It takes about 30 seconds or so to mix so plenty of time to pour into the form.
View attachment 236345
This is what it looks like in the form.
View attachment 236346
I get the resin from Hobby Lobby and always wait till they have a 40 or 50% off coupon before I buy it.
View attachment 236347
When I can pull up the mixing stick and all the silicone comes up with it I know it’s ready to demold.
View attachment 236348
Taking the clay out, this is what the back of the mold looks like. View attachment 236349
I remove the decorations and trim the sprue from the mold.
View attachment 236350
The top decoration weighs 5.45 ounces. View attachment 236351
The bottom decoration weighs 8.45 ounces so the right and left side would weigh over a pound.
View attachment 236352
I poured water in the mold and it came out to about 2 ounces so I poured 1 ounce of part A and 1 ounce part B of resin into mixing cups.
View attachment 236353I added the 2 ounces to another cup to mix. The resin has only a 2 minute mixing and pouring time. You need to make sure when you pour that the resin gets into every nook and cranny and no air bubbles. You can squeeze the mold while pouring to facilitate that. It takes about 10 minutes for the resin to completely harden.
View attachment 236354
Out of the mold it only weighs 1.65 ounces compared to the 13.90 ounces of the metal decorations. After I trim the unwanted resin off it will probably only weigh a little over an ounce.
View attachment 236355
Hi Jay
This looks really impressive. Congrats
Indeed, she will be much lighter
 
Inge, ha ha, nope nobody gave me the idea. Although probably most everyone on this forum who has built a ship most likely has had the thought of making a mold to do cannons or other ship decorations. I just had never seen anyone do the process in the forum and since I have the material already I would show the way I do it. I also said that because of the high cost of the material I wouldn’t recommend it. I am just doing it for the fun of it.
 
Hey--it's looking good! I have this model, the framing is done, except for some sanding of the bow and stern frames. It's been on hold for a while as I have been working on some other models.
 
Hey--it's looking good! I have this model, the framing is done, except for some sanding of the bow and stern frames. It's been on hold for a while as I have been working on some other models.
Thanks Andy. Looking forward to seeing your build log.
 
Back
Top