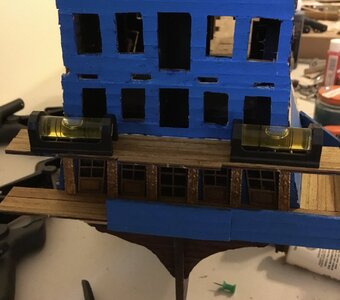
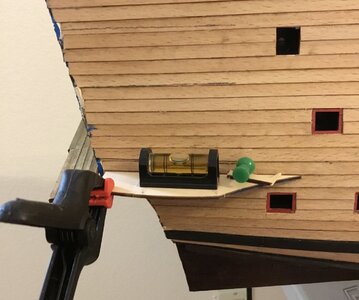
Good evening Jay. All looking spot on. I am with you going a lighter blue- looks way better. Cheers GrantI installed the bottom balcony floor and made sure it was level. View attachment 393594
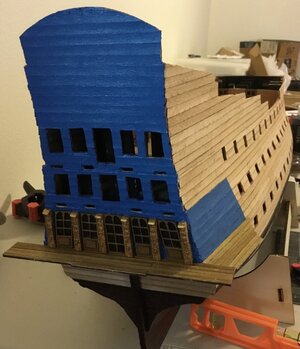
I finished the planking on the framework for the bow and installed the grates.
View attachment 393595
-

Win a Free Custom Engraved Brass Coin!!!
As a way to introduce our brass coins to the community, we will raffle off a free coin during the month of August. Follow link ABOVE for instructions for entering.
-

PRE-ORDER SHIPS IN SCALE TODAY!
The beloved Ships in Scale Magazine is back and charting a new course for 2026!
Discover new skills, new techniques, and new inspirations in every issue.
NOTE THAT OUR FIRST ISSUE WILL BE JAN/FEB 2026
You are using an out of date browser. It may not display this or other websites correctly.
You should upgrade or use an alternative browser.
You should upgrade or use an alternative browser.
ZHL Le Soleil Royal
- Thread starter Jay
- Start date
- Watchers 37
-
- Tags
- le soleil royal zhl
- Joined
- Dec 27, 2019
- Messages
- 551
- Points
- 308

I attached the lower balcony floor on the starboard side. It is nice and level.
I was looking at the spaces for the aft windows and doors and thought I would check the decorations that go between them. Obviously the second deck decorations are too tall and would interfere with the top balcony floor. Time to make a mold of them and cast them in resin.
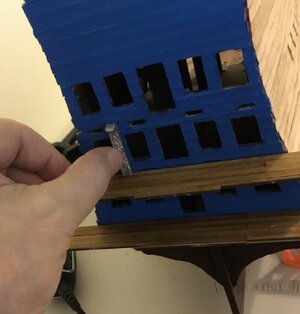

I was looking at the spaces for the aft windows and doors and thought I would check the decorations that go between them. Obviously the second deck decorations are too tall and would interfere with the top balcony floor. Time to make a mold of them and cast them in resin.

- Joined
- Oct 9, 2020
- Messages
- 2,229
- Points
- 488

Hello,
I have a question about making resin parts. Would using a pressure pot help? I am thinking of making my own resin parts for this build, when I get to it, but was wondering if it is worth investing in a pressure pot. or maybe this would just be overkill...
Thanks
I have a question about making resin parts. Would using a pressure pot help? I am thinking of making my own resin parts for this build, when I get to it, but was wondering if it is worth investing in a pressure pot. or maybe this would just be overkill...
Thanks
- Joined
- Dec 27, 2019
- Messages
- 551
- Points
- 308

Hey Jack, good question. I don’t know how much you are going to pay for the pressure pot, maybe $175? Are you just using it for one build? The pressure pot is used to take the air bubbles out of the resin, in my case my resin starts setting up within 2 minutes, sometimes I don’t even get it poured out of the cup into the mold before it turns solid. You would need to use a really slow curing resin. Silicone for molds and resin aren’t cheap. Some of the decorations I still have to use the supplied metal parts (the cannons) for one, I won’t know what else till I try. One thing I can tell you is it will be a big investment.Hello,
I have a question about making resin parts. Would using a pressure pot help? I am thinking of making my own resin parts for this build, when I get to it, but was wondering if it is worth investing in a pressure pot. or maybe this would just be overkill...
Thanks
- Joined
- Oct 9, 2020
- Messages
- 2,229
- Points
- 488

I haven't taken the fittings out of the box yet, but I was thinking of just focusing on the bigger pieces. The thing I am not sure about is getting the resin parts and the metal fittings to look alike on the model.Hey Jack, good question. I don’t know how much you are going to pay for the pressure pot, maybe $175? Are you just using it for one build? The pressure pot is used to take the air bubbles out of the resin, in my case my resin starts setting up within 2 minutes, sometimes I don’t even get it poured out of the cup into the mold before it turns solid. You would need to use a really slow curing resin. Silicone for molds and resin aren’t cheap. Some of the decorations I still have to use the supplied metal parts (the cannons) for one, I won’t know what else till I try. One thing I can tell you is it will be a big investment.
For me it is not so much about the cost and more about the fact that it is easier to glue resin pieces to the model than those heavy britania metal fittings. I would probably drill holes in the metal fittings and stick pins in them so that I can get a solid attachment to the hull. And it looks like fun too... But I can appreciate the cost involved because there are a lot of fittings.
Is the resin that you use paintable, or do you have to add a dye to your resin mix?
- Joined
- Dec 27, 2019
- Messages
- 551
- Points
- 308

I haven't taken the fittings out of the box yet, but I was thinking of just focusing on the bigger pieces. The thing I am not sure about is getting the resin parts and the metal fittings to look alike on the model.
For me it is not so much about the cost and more about the fact that it is easier to glue resin pieces to the model than those heavy britania metal fittings. I would probably drill holes in the metal fittings and stick pins in them so that I can get a solid attachment to the hull. And it looks like fun too... But I can appreciate the cost involved because there are a lot of fittings.
Is the resin that you use paintable, or do you have to add a dye to your resin mix?
Hey Jack, yes the resin is totally paintable.

- Joined
- Oct 9, 2020
- Messages
- 2,229
- Points
- 488

great. thanks for the information
- Joined
- Oct 9, 2020
- Messages
- 2,229
- Points
- 488

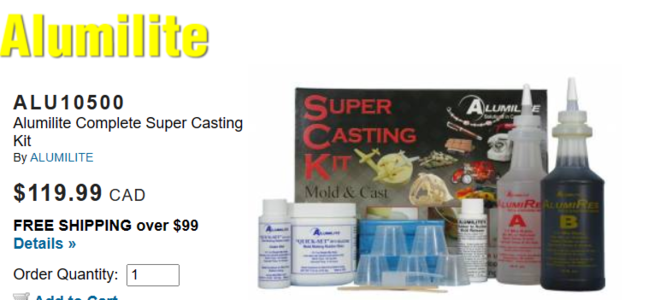
do you think one kit of alumilite would be enough?
I see what you mean by expensive.
I see what you mean by expensive.
- Joined
- Dec 27, 2019
- Messages
- 551
- Points
- 308

Jack, the kit of alumilite is just the resin. You still need the silicone for the molds. Does the kit have that also?do you think one kit of alumilite would be enough?
I see what you mean by expensive.
- Joined
- Dec 27, 2019
- Messages
- 551
- Points
- 308

yes it does, actually. I was thinking that I could reuse the molds.
View attachment 394800
That should work for you and yes you can reuse the molds.
- Joined
- Dec 27, 2019
- Messages
- 551
- Points
- 308

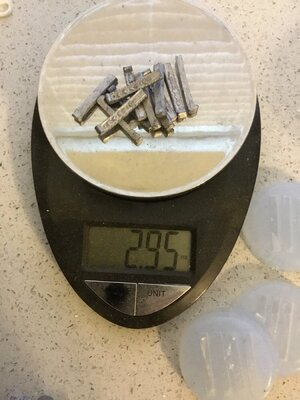
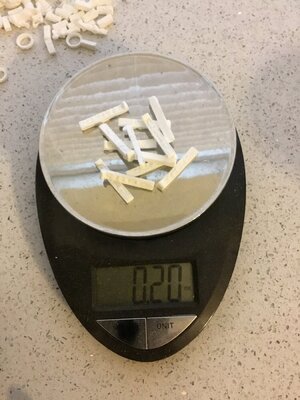
Hi JayTime to weigh the decor that goes between the windows and doors on the aft balconies- 2.95 ounces, almost 3 ounces. View attachment 394922
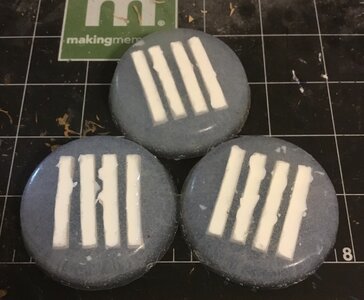
I made a mold and cast the resin.
View attachment 394923
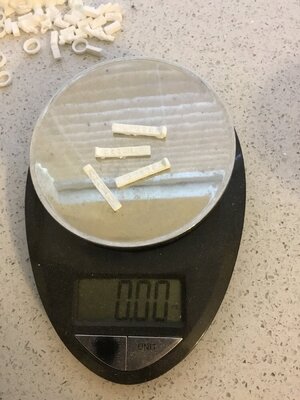
Here I weighed 4 of the pieces and they didn’t even register on the scale.
View attachment 394924
Here’s all twelve weighing in at just 2 tenths of an ounce.
View attachment 394925
Impressive indeed. This is definitely a great approach
- Joined
- Dec 27, 2019
- Messages
- 551
- Points
- 308

Thanks Gilbert, definitely shouldn’t be as heavy with the resin pieces. Can’t say I won’t be glad to finish this part of the build.Hi Jay
Impressive indeed. This is definitely a great approach
- Joined
- Dec 27, 2019
- Messages
- 551
- Points
- 308

I like it that you went out of your way to keep the side and back decks level with each other. It will help you in the long run.Put the doors and windows on the bottom deck of the balconies. I had thought there were only four columns (part #X16) but I think there were six and I think six on the second deck also so I will have to cast 4 more columns.
I also put planking down for the floor of the lower balcony starboard side.
View attachment 395628
- Joined
- Dec 27, 2019
- Messages
- 551
- Points
- 308

Thanks Vic, am trying my hardest to keep the build going in the right direction but still keeping an eye out for any forks in the road.I like it that you went out of your way to keep the side and back decks level with each other. It will help you in the long run.
- Joined
- Dec 27, 2019
- Messages
- 551
- Points
- 308

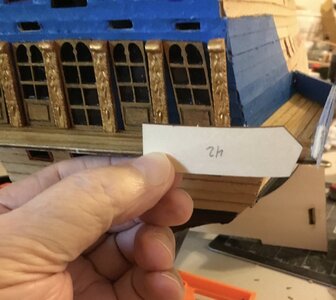
Little by little, inch by inch. By the yard it’s hard, by the inch it’s a cinch!I don’t know if I am doing something wrong or if these parts are just weird so I’m just gonna fabricate them the way I think they should be on the balconies. View attachment 396281
Did the lower balcony wall my way and then attached the middle balcony floor and made sure it was level.
View attachment 396307


