- Joined
- Oct 9, 2020
- Messages
- 2,229
- Points
- 488

thanks. appreciate the feedback.Just be aware it will take some experimenting and not everything will turn out perfect the first time. You will get the knack for it the more you try it.
 |
As a way to introduce our brass coins to the community, we will raffle off a free coin during the month of August. Follow link ABOVE for instructions for entering. |
 |
 |
The beloved Ships in Scale Magazine is back and charting a new course for 2026! Discover new skills, new techniques, and new inspirations in every issue. NOTE THAT OUR FIRST ISSUE WILL BE JAN/FEB 2026 |
 |

thanks. appreciate the feedback.Just be aware it will take some experimenting and not everything will turn out perfect the first time. You will get the knack for it the more you try it.

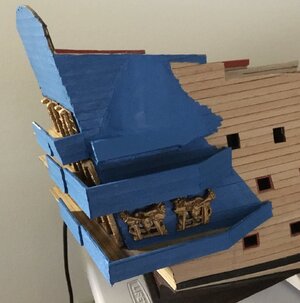
Good morning Jay. Looking great all round. Cheers GrantI finished shaping the bell and painting it.
View attachment 399671
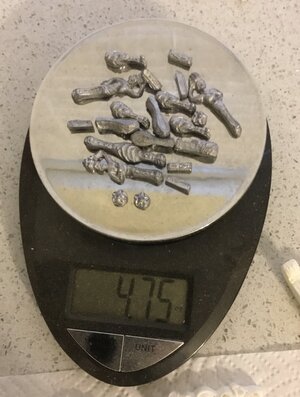
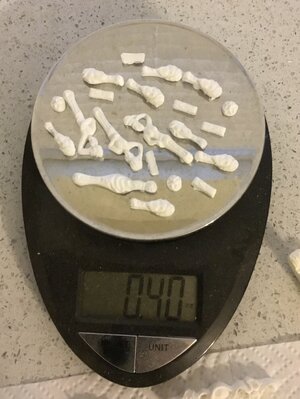
I also cast a small batch of the smaller pieces in resin. The metal pieces weighed in at 4.75 ounces and the resin pieces weighed in at .40 ounces a difference of 4.35 ounces.
View attachment 399672
View attachment 399673
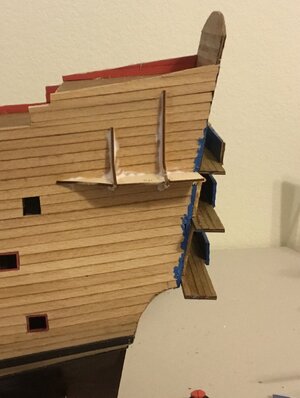
I installed the floor of the bell on the port side. I did that so that when I am forming the bell and sanding it, it wouldn’t make a mess on the other two floors beneath it.
View attachment 399674
Well Ken, you can however enjoy the muffinsGreat idea for molding pieces! You were fortunate your wife didn't need her muffin pans. I don't take those types of chances.

Thanks Grant, I just keep plugging away.Good morning Jay. Looking great all round. Cheers Grant

Ken, it’s easy, after 53 years of marriage you just tell her it’s time to get you those non stick pans and I get the old ones.Great idea for molding pieces! You were fortunate your wife didn't need her muffin pans. I don't take those types of chances.

Very smart Jay!Ken, it’s easy, after 53 years of marriage you just tell her it’s time to get you those non stick pans and I get the old ones.

Appreciate it Gilbert.Well done Jay

Vic, the bottom gallery is the nemesis. I have a couple ideas on how to alleviate the problem.Will your fittings fit between the galleries, Jay? That’s where I ran into trouble.

Darivs , yes I love suggestions. I was like you, unhappy with the results I got and today was in the process of rectifying it. If I am not happy with what I am doing and it doesn’t work out I would be happy to try your suggestion although I think it might be above my pay grade. I may have to resort to more primeval methods if that is the case.Can I make a suggestion? The painted surface of the side gallery appears like lumpy plaster, and this conflicts with the wooden planked hull in appearance. If you are not against doing some more scratch building, you could glue narrow veneer strips of wood over the putty surface, so it looks like wood was also used on the galleries. I suggest using narrow strips of veneer, about 2-3mm wide, and paint those blue.
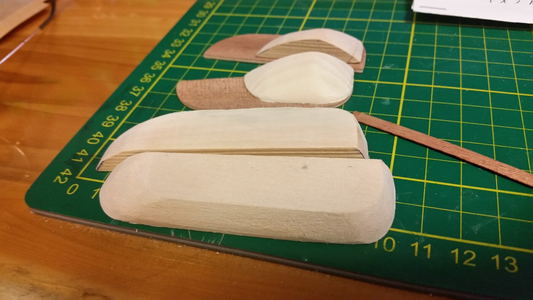
Example: On the galleries for La Couronne, Corel uses blocks of wood to form the bottom portion of the side galleries. If merely stained, they look plain and devoid of detail.
View attachment 401015
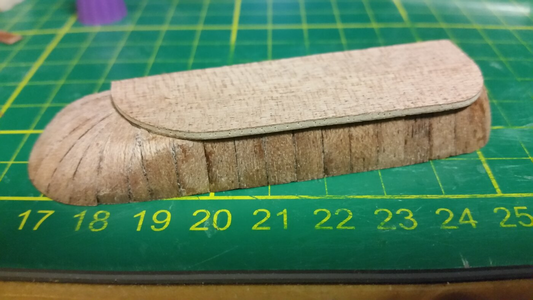
I used 5mm wide vertical strips of walnut veneer in this example, 2 or 3mm horizontal planks would probably look better in your case. Also, thinner strips are much easier to bend and form. The strips were glued at one end using fast holding CA glue. PVA glue applied is then applied with a brush under the strip, softening the strip, and then the strip was bent over the curved of the wood block and pressed and held with a block of wood (to keep your fingers away) while hot air was used to dry the strip, drying the glue in place. Lightly sanding the entire piece smoothing over any facets, leaving a completely rounded part.
View attachment 401016
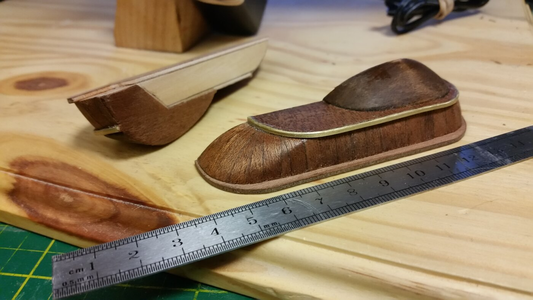
The plywood was edged with veneer or brass strip for more detail. Your ship has castings of carvings. Spray lacquer brought out the dark wood grain.
View attachment 401017
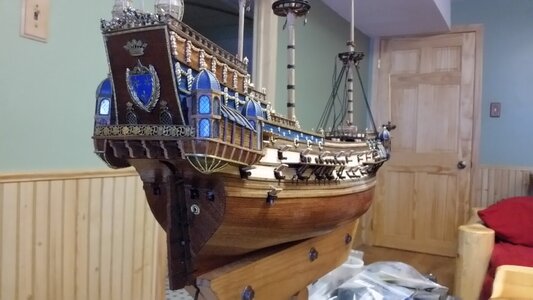
Having a striped wooden gallery looks a lot better. Using thinner strips on your model would make the process much easier than the 5mm strips I laid over some very sharp double curves. You have to cut the ends of your strips to match the juncture where the gallery meets the side of the hull. If this added detail worth it to you?
View attachment 401018
I really hate leaving a feature I am unhappy with. Your eyes go directly to the flaw FOREVER when you look at the model, yet it's invisible to everyone else. I don't see how laying thin veneer strips is above your skill level. 1/16" wide thin strips of cherry and walnut wood are available at some of the larger hobby stores like Hub Hobby, and you of course find timber online. It just takes TIME and PATIENCE. Trust me, dood.Darivs , yes I love suggestions. I was like you, unhappy with the results I got and today was in the process of rectifying it. If I am not happy with what I am doing and it doesn’t work out I would be happy to try your suggestion although I think it might be above my pay grade. I may have to resort to more primeval methods if that is the case.

Darivs, couldn’t agree with you more.I really hate leaving a feature I am unhappy with. Your eyes go directly to the flaw FOREVER when you look at the model, yet it's invisible to everyone else. I don't see how laying thin veneer strips is above your skill level. 1/16" wide thin strips of cherry and walnut wood are available at some of the larger hobby stores like Hub Hobby, and you of course find timber online. It just takes TIME and PATIENCE. Trust me, dood.
Perhaps. There’s a lot of carvings over the surface of the Soleil Royal’s side galleries. You would have to examine the decorations and judge whether or not laminating the putty surface is worth the effort based on what is visible in the end.While I agree that it could have been sanded more, I think the bell will be covered with so much bling you might never notice. I used strips of wood, but you’d probably never notice it.
