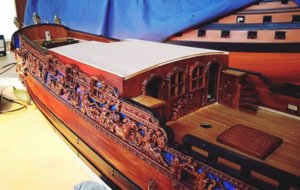
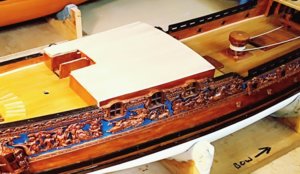
Just WOW! Did I actually say WOW? Yea...WOW! Great job, John!
-

Win a Free Custom Engraved Brass Coin!!!
As a way to introduce our brass coins to the community, we will raffle off a free coin during the month of August. Follow link ABOVE for instructions for entering.
-

PRE-ORDER SHIPS IN SCALE TODAY!
The beloved Ships in Scale Magazine is back and charting a new course for 2026!
Discover new skills, new techniques, and new inspirations in every issue.
NOTE THAT OUR FIRST ISSUE WILL BE JAN/FEB 2026
You are using an out of date browser. It may not display this or other websites correctly.
You should upgrade or use an alternative browser.
You should upgrade or use an alternative browser.
ZHL Royal Caroline Kit, scale 1/30
- Thread starter neptune
- Start date
- Watchers 57
-
- Tags
- royal caroline
Just WOW! Did I actually say WOW? Yea...WOW! Great job, John!
Wow, Wow, Wow, thank you Jim, you guy's are just so encouraging,
Best regards John,
Very,Very nice work John.Your cabin is just the height of opulence appropriate to a Royal Yacht of the period.
Kind Regards
Nigel
Kind Regards
Nigel
Very,Very nice work John.Your cabin is just the height of opulence appropriate to a Royal Yacht of the period.
Kind Regards
Nigel
Thank you Nigel for the very nice comment,
best regards John,
...we are just honest, John!Wow, Wow, Wow, thank you Jim, you guy's are just so encouraging,
Fantastic work John! Each time I see the dark finish on the carvings I like it more and more, just beautiful. You know what...I think Jim likes your build too
I think that I have to cut a half the roof or more to be able to see the fittings etc, what do you guys think, any idea's, all comments welcome,
Best regards John,
Best regards John,
You Could John,How about sandwiching clear acetate between deck and cabin?This would protect the interior from dust falling into the cut out.That would be my only concern.If it were me I would do a curvy shaped cut out rather than one with straight sides as this is then obvious to the casual observer it is a cut away detail rather than the ships design.
Kind Regards
Nigel
Kind Regards
Nigel
You Could John,How about sandwiching clear acetate between deck and cabin?This would protect the interior from dust falling into the cut out.That would be my only concern.If it were me I would do a curvy shaped cut out rather than one with straight sides as this is then obvious to the casual observer it is a cut away detail rather than the ships design.
Kind Regards
Nigel
Thank you for idea's Nigel, I will give them some thought, she is going to end up in a case so dust shouldn't be a problem, will have to think about it some more,
best regards john,
Hi John,
I will be doing a admirality style of deck with the deckbeams in and only planking it partly so you still can see the interiors.
I will be doing a admirality style of deck with the deckbeams in and only planking it partly so you still can see the interiors.
That would be the way I'd go. Lovely work, John.Hi John,
I will be doing a admirality style of deck with the deckbeams in and only planking it partly so you still can see the interiors.
OH definatly open it up I like nigels way just a opion, but susch FANTASTIC WORK SHOULD BE SEEN, and admired. Don
To make an opening on the existing top would be a very delicate\challenging work. How much of trouble would be cut off existing top and replace with the new one?
Thank you guys for all the suggestions and the likes,
I like Nigels idea, but, there is always a but, with the roof on the cabin I think it would be hard to try and cut it out and also cover the edges, so I opted for Maartens way, well I hope it will be something like Maartens, just to cut the opening following the fore and aft planks which are tapered.
as Jim said below,
Quote,
To make an opening on the existing top would be a very delicate\challenging work. How much of trouble would be cut existing top and replace with the new one?
So I thought I would try and carefully, very carefully cut the opening with a very sharp knife, I know its sharp, ask my finger, I have heard of guys water marking their work, but never Blood marking it, and if things went wrong then I could remove the roof and start again,
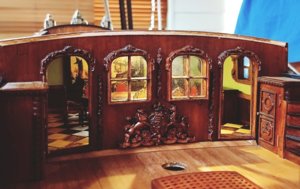
But first one last pic of the cabin with the lights on, as when I cut the roof out the lights will go with it,
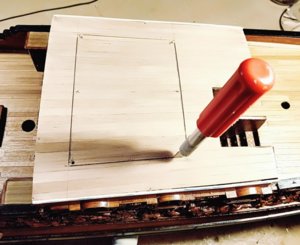
So I marked up the area to be cut out, first I drilled a hole in each corner, I was going to try and cut it out with
a mini saw, but then I thought it might cause a lot of splintering so I went with the sharp knife instead and
used a steel rule as a guide,
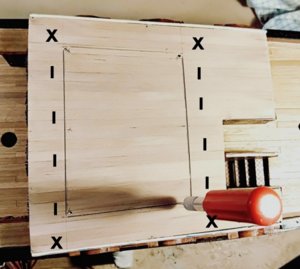
I had to be careful and to cut and avoid the front beam and also the third beam that were
supporting the roof, I used a piece of strip wood through the cabin doors to measure where
the beams were X,s mark them, the beams are just back from the cut lines so that i can insert
new Pear wood beams in front of them as the original are plywood,
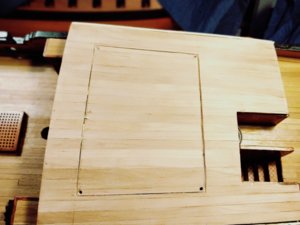
I cut to the first markings and when everthing came out OK I decided to open up the width by another
couple of planks, see next pic,
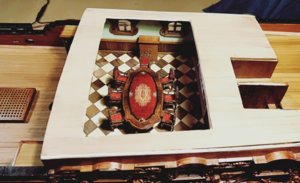
I was going to extend the opening length wise as well, but at the moment visually it looks balnced, but I'm happy
with so far,
thanks once again for all the suggestions comments and likes,
Best regards john,
.
.
I like Nigels idea, but, there is always a but, with the roof on the cabin I think it would be hard to try and cut it out and also cover the edges, so I opted for Maartens way, well I hope it will be something like Maartens, just to cut the opening following the fore and aft planks which are tapered.
as Jim said below,
Quote,
To make an opening on the existing top would be a very delicate\challenging work. How much of trouble would be cut existing top and replace with the new one?
So I thought I would try and carefully, very carefully cut the opening with a very sharp knife, I know its sharp, ask my finger, I have heard of guys water marking their work, but never Blood marking it, and if things went wrong then I could remove the roof and start again,

But first one last pic of the cabin with the lights on, as when I cut the roof out the lights will go with it,

So I marked up the area to be cut out, first I drilled a hole in each corner, I was going to try and cut it out with
a mini saw, but then I thought it might cause a lot of splintering so I went with the sharp knife instead and
used a steel rule as a guide,

I had to be careful and to cut and avoid the front beam and also the third beam that were
supporting the roof, I used a piece of strip wood through the cabin doors to measure where
the beams were X,s mark them, the beams are just back from the cut lines so that i can insert
new Pear wood beams in front of them as the original are plywood,

I cut to the first markings and when everthing came out OK I decided to open up the width by another
couple of planks, see next pic,

I was going to extend the opening length wise as well, but at the moment visually it looks balnced, but I'm happy
with so far,
thanks once again for all the suggestions comments and likes,
Best regards john,
.
.
Last edited:
Well made surgeon-Neptune! 
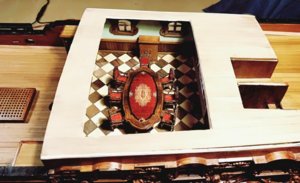
So this is where I left off last time,
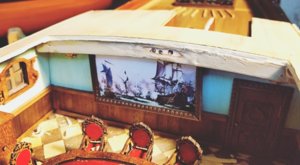
I was going to put the new beams in front of the plywood ones, so I cut right back to them,
this of course is the rear beam,
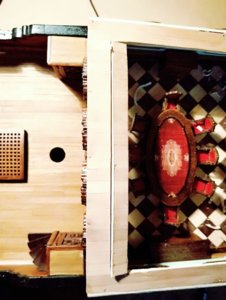
and cutting across the front beam,
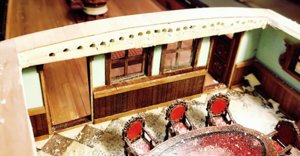
I decided that the plywood beams had to go, so i drilled a series of holes across them,
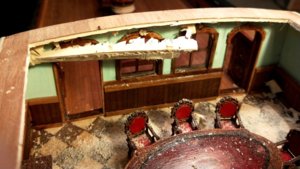
and then managed to break them free, just a little bit of debris on the deck, it will clean up just fine,
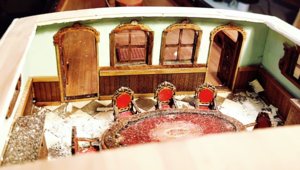
and afterwards,
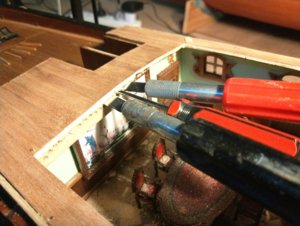
breaking out the rear beam,
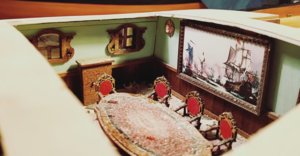
a bit of a mess,
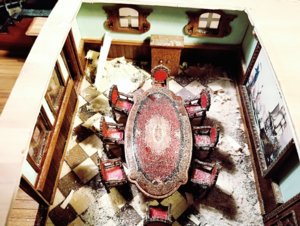
The princess was not impressed,
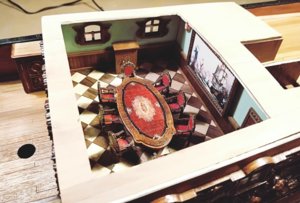
and the situation after a clean up,
my idea is to cut new beams and to bring them up level with the existing cabin roof planks, which will mean
rebating the beam ends where they go back under the cabin roof, then I will use the existing roof planks as a
base for some new planking, it will mean the the cabin roof will be raised by approx 2mm,
.
Last edited:
John, you are not only a Shipwright - you a chef as well! I keep saying that talented people - are talented in everything...  They looks yummy!!


