-

Win a Free Custom Engraved Brass Coin!!!
As a way to introduce our brass coins to the community, we will raffle off a free coin during the month of August. Follow link ABOVE for instructions for entering.
-

PRE-ORDER SHIPS IN SCALE TODAY!
The beloved Ships in Scale Magazine is back and charting a new course for 2026!
Discover new skills, new techniques, and new inspirations in every issue.
NOTE THAT OUR FIRST ISSUE WILL BE JAN/FEB 2026
You are using an out of date browser. It may not display this or other websites correctly.
You should upgrade or use an alternative browser.
You should upgrade or use an alternative browser.
ZHL Royal Caroline Kit, scale 1/30
- Thread starter neptune
- Start date
- Watchers 57
-
- Tags
- royal caroline
These blocks look great, but the kit ones are beautiful also.
I will have a look at my 7 and 8 mm blocks and if mine will fit. To be continued.
Thank you Maarten, I look forward to your reply,
best regards John,
G'day Maarten, here is the recipe, it is quite simple but don't tell anyone,Hi John, I mis the recipe.
I boil the potatoes just like normal boiled potatoes but not for as long so they are not too soft, then I slice them up and lay them in the baking dish after I have a good layer I then spinkle some grated cheese over them then add another layer with more grated cheese on top, after that I make up some cheese sauce that you buy in packets and pour it slowly over all the potatoes in the baking dish baking dish, you can add some sliced onions if you like them, but my Admiral just likes the potatoes and cheese, then put it in the oven and cook till golden brown, most of it is nice and juicy but you will get some crispy cheese bits around the edges and over the top, Mmmmm I'm feeling hungry now,
I also do the same with Cauliflower and also Broccoli, you can also mix the Cauliflower and broccoli,
hope this helps,
best regards john,
Potato bake and one of your butter chicken pies = culinary heaven!.
ps. your Royal Caroline's ok too.
Thank you Hedley for those nice comments.
Did you like the La Belle kit, are you saving it for a rainy day,
best regards john,
Hello John! These are very nice blocks. They looks like a blocks! I am wonder if there is a way to purchase them, still.
G'day Jim, I'm not sure I think somebody on the Forum said you can but you have to go through someone else's email, not sure how it works,
best regards john,
...and, i missed the taste!
Yummy nice and Cheesy with a bit of crispy cheese as well,
.
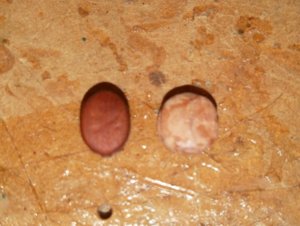
I took another look at the blocks, the varnished one is one of the ones I bought a few years ago and it is just a little
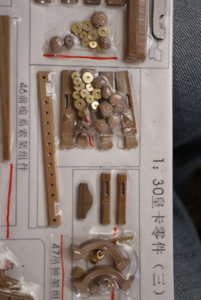
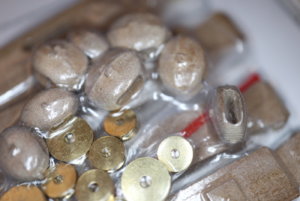
bit longer than the kit block, also it is shaped better, so I thought that I would mill it out and put in the brass sheave,
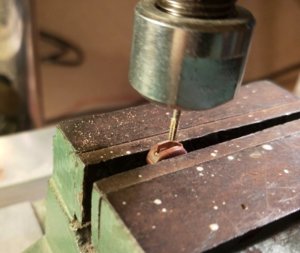
I milled the slot a bit wider than the pulley and also a little bit longer,
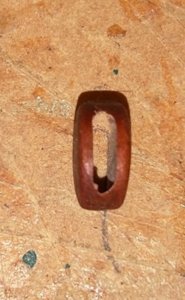
The milled block,
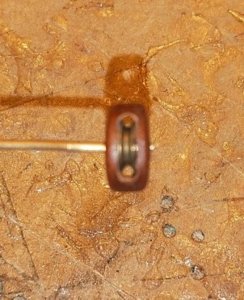
and the sheave fits just nicely,
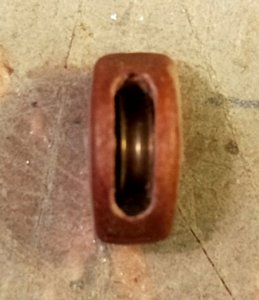
and the finished block, just got to be stropped now, so I think this is the way I will do it, the kit blocks will probably mill out ok as well but seeing these are already shaped I will just use these and keep the others for spares,
.
Last edited:
Hi John, I am going to test this also. Sounds great.G'day Maarten, here is the recipe, it is quite simple but don't tell anyone,
I boil the potatoes just like normal boiled potatoes but not for as long so they are not too soft, then I slice them up and lay them in the baking dish after I have a good layer I then spinkle some grated cheese over them then add another layer with more grated cheese on top, after that I make up some cheese sauce that you buy in packets and pour it slowly over all the potatoes in the baking dish baking dish, you can add some sliced onions if you like them, but my Admiral just likes the potatoes and cheese, then put it in the oven and cook till golden brown, most of it is nice and juicy but you will get some crispy cheese bits around the edges and over the top, Mmmmm I'm feeling hungry now,
I also do the same with Cauliflower and also Broccoli, you can also mix the Cauliflower and broccoli,
hope this helps,
best regards john,
These are the blocks John is refering to.Dear John, I have reviewed what I have in my kit and I found these blocks. It seems to me that in my case it looks much better than your kit. Is it so or am I looking at the wrong parts of the kit?
View attachment 137398View attachment 137399
- Joined
- Aug 5, 2018
- Messages
- 243
- Points
- 143

Hi John, Yes its in the cupboard just lying there ! It looks like a fine kit. Getting very,very tempting, may rain soon.Thank you Hedley for those nice comments.
Did you like the La Belle kit, are you saving it for a rainy day,
best regards john,
Dear John, I have reviewed what I have in my kit and I found these blocks. It seems to me that in my case it looks much better than your kit. Is it so or am I looking at the wrong parts of the kit?
View attachment 137398View attachment 137399
G'day Alex, thank you posting the pics of the blocks, they do look better shaped than mine and the sheaves that go in the blocks look smaller than the ones in mine, maybe they updated the kit at some time and I got an older version,
best regards John,
What is your over all opinion of everything from ZHL. Thinking of this for my next build. Although that may be about a year from now until current build is done. Any problems deciphering the instructions? If I remember correctly they are not in english and many cd tutorials.
What is your over all opinion of everything from ZHL. Thinking of this for my next build. Although that may be about a year from now until current build is done. Any problems deciphering the instructions? If I remember correctly they are not in english and many cd tutorials.
G'day Ken, my overall opinion of the Royal Caroline kit is very Positive, however you have to study the plans very carefully, the main problem is that the plywoos keel section is not as long as the plan, if I could build her again I would dry fit the keel sections and lay it over the drawing of the Anatomy of the ship Royal Caroline drawing and see what I would have to add to the keel length, but of course by doing this you are opening Pandora's box and all the things that flow from this alteration, also I decided to just go with the kit out of the box and used their templates, which ended up giving me a different look with the carvings fitted at the bow, I will attach a couple of pics of my RC and also of Maartens RC, Maarten went with the drawings and I think, Actually I know, his looks much better, Maarten has a build log on SOS as well and also Greg and Alex have one as well, so all together we have four builds going at the present, so there is lots of info to process and any questions we try and help each other.
Has I said before I am building mine as the kit out of the box and it does, surprisingly look like their photo's whereas Maarten is following the Anatomy plans which are in the kit, and his model looks excellent, so it is up to you which way you want to go, any questions just ask,
best regards john,
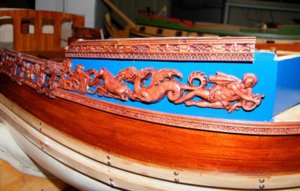
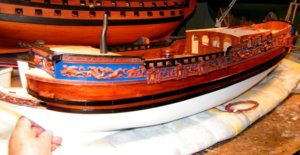
I chose the cheapest Pear wood carvings and and waxed them with Rose wood wax, this pic shows
the gaps at the top and bottom of the forward carvings,
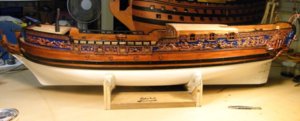
and the same on the other side,
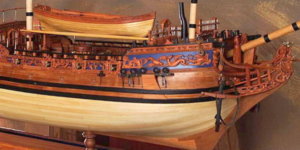
and a overall pic, I'm quite happy with her,
And this is a pic from the manual, which I think looks the same as mine although I might be a little
bit prejudiced, just a little,
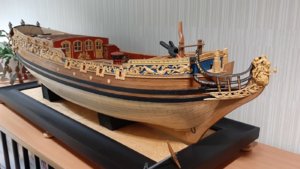
This is Maartens model, Maarten chose the Box wood version, you can see the differences with the flow of the carvings, Beautiful workmanship,
also Maarten does lots of little add on scratch builds to his model, just look at his head rails, and we both describe all our builds with lots of pics,
hope this helps you decide and don't forget any questions just ask,
best regards John,
.
Last edited:
thanks John.... it looks excellent to me. I'll keep watching and learning. I just finished a Santa Ana and just starting a Victory..... So, I'm a good year away until my next project.
The kit is very good, one of the best.What is your over all opinion of everything from ZHL.
The geometry of the ship is a big issue, and you may want to change it yourself in certain places (Drawings will not be the same as your parts)
The manual is in Chinese. Very uncomfortable.
In general this kit will require much more thinking than any other kit. It is far away from IKEA.
The solution which I will try: to put it all together into a set of documents to help those who follow. I consider it as a kind of hobby project of its own. It is a shame that we all have to do the same mental efforts.
Well, I had to learn spanish for the Santa Ana, and now Italian for the Victory. Why not Chinese.


Better join forces with me and let's put all knowledge together, from all the blogs published here.Well, I had to learn spanish for the Santa Ana, and now Italian for the Victory. Why not Chinese.
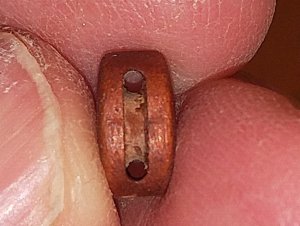
Well I have decided to go with these blocks that I bought a few years ago, there are a lot better in shape than the
ones I got in the kit and are the same size that I need ,
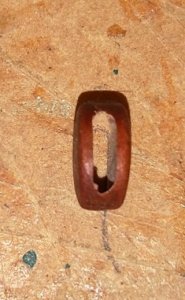
So I have milled them out and will buy new sheaves to fit,
I'll find a use for the larger sheaves on another build,
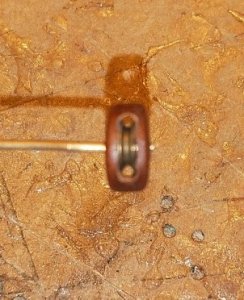
Fitting the sheave,
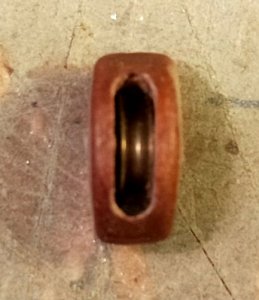
and after fitting,
.
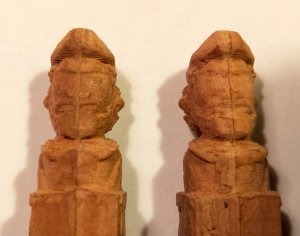
This is a part of the build that I have not been looking forward to, I hate carving, I am totally useless, this is what
you get, all the other carvings in the kit are a lot better,
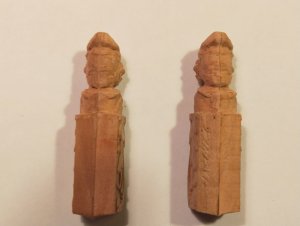
another view of the entire figures,
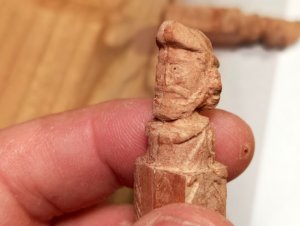
I downloaded some of Maartens pics to get something to follow, so this is the start of one side,
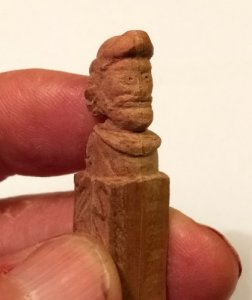
I found it very hard because there didn't seem to be enough wood for his nose,
it might just be me,
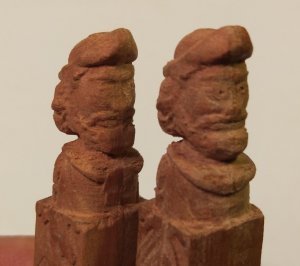
first figure roughed out, with his mate waiting for his turn,
.


