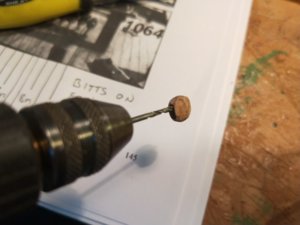
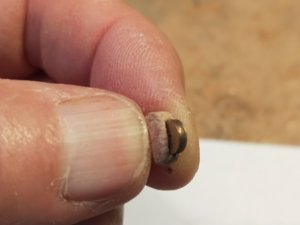
Very interesting\unusual technology producing blocks, I guess if manufacturer drilled the holes, it would serve as the guide...Oh well... Most important is the 'end' results. looking really good, John.ontinuing on with gluing up the rigging blocks and identifying them as I go, they come milled in two halves, so i have found it easier to just glue the two halves together then when the glue is dry I drill all the holes needed before separating the blocks,
-

Win a Free Custom Engraved Brass Coin!!!
As a way to introduce our brass coins to the community, we will raffle off a free coin during the month of August. Follow link ABOVE for instructions for entering.
-

PRE-ORDER SHIPS IN SCALE TODAY!
The beloved Ships in Scale Magazine is back and charting a new course for 2026!
Discover new skills, new techniques, and new inspirations in every issue.
NOTE THAT OUR FIRST ISSUE WILL BE JAN/FEB 2026
You are using an out of date browser. It may not display this or other websites correctly.
You should upgrade or use an alternative browser.
You should upgrade or use an alternative browser.
ZHL Royal Caroline Kit, scale 1/30
- Thread starter neptune
- Start date
- Watchers 57
-
- Tags
- royal caroline
Like Jim already mentioned.... a very unusual way, but maybe because of the bigger scale necessary.
I am looking forward to see the final result.....
I am looking forward to see the final result.....
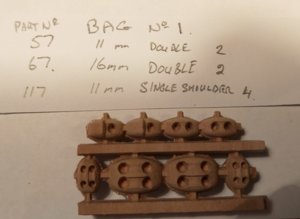
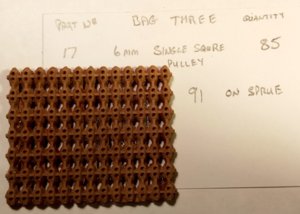
I have been trying to match the blocks to their part numbers, this might be of some help to others building the Royal Caroline,
I have marked the part numbers and the amounts, it seems as if they have provided more of some of the blocks and I have
noted that on the side, also where I have marked the bag number that is just my own bags that I am using, all the blocks are
on the sprues as supplied in the kit,
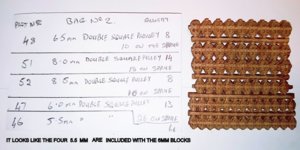
as you can see part No 48 need 8 blocks but there are 10 on the sprue, and the No's 47 and 46 look the same size
so I imagine you just have to sand four of the 6mm blocks a bit more to get them to 5.5mm,
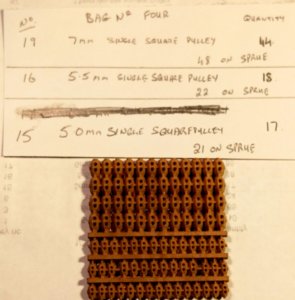
on this sprue you can see the second line up there are some of the 5.5mm blocks in the middle of the line,
and the rest of the 5.5mm are on the bottom line, and actually there are 23 of the 5.5mm and 20 of the 5.0mm.
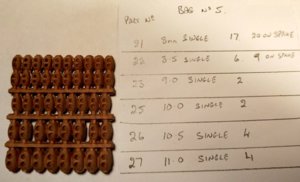
see pic below for clarification of this pic for the number of blocks,
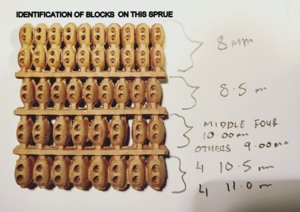
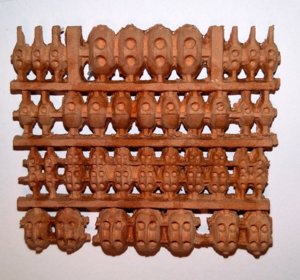
This set of blocks I still have to identify, the second row up from the bottom have some weird blocks, I think
the two sets on the outside at each end of the row are sister blocks, but the ones in between I have never seen
anything like them before, they look like double sister blocks, maybe someone might know, any questions or
suggestions are welcome,
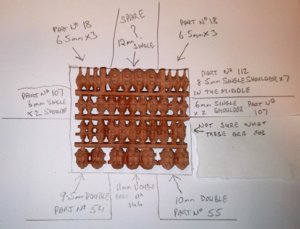
This is the best that I can do to identify these blocks, maybe when i get onto the rigging a lot of them will be then
identified,
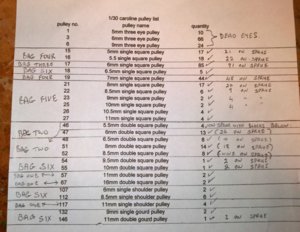
This is the list of the blocks, I've found most of the one's on it plus a couple that must be spare, all these blocks
are for the use up in the rigging and the yards, note that No's 1, 3 and 6 are the deadeyes, and also just to remind
you that the bag No's are my own bags that I have put these parts into till I need them, if anything is not clear just
ask and I will try and answer your question,
best regards john,
.
I have marked the part numbers and the amounts, it seems as if they have provided more of some of the blocks and I have
noted that on the side, also where I have marked the bag number that is just my own bags that I am using, all the blocks are
on the sprues as supplied in the kit,


as you can see part No 48 need 8 blocks but there are 10 on the sprue, and the No's 47 and 46 look the same size
so I imagine you just have to sand four of the 6mm blocks a bit more to get them to 5.5mm,


on this sprue you can see the second line up there are some of the 5.5mm blocks in the middle of the line,
and the rest of the 5.5mm are on the bottom line, and actually there are 23 of the 5.5mm and 20 of the 5.0mm.

see pic below for clarification of this pic for the number of blocks,


This set of blocks I still have to identify, the second row up from the bottom have some weird blocks, I think
the two sets on the outside at each end of the row are sister blocks, but the ones in between I have never seen
anything like them before, they look like double sister blocks, maybe someone might know, any questions or
suggestions are welcome,

This is the best that I can do to identify these blocks, maybe when i get onto the rigging a lot of them will be then
identified,

This is the list of the blocks, I've found most of the one's on it plus a couple that must be spare, all these blocks
are for the use up in the rigging and the yards, note that No's 1, 3 and 6 are the deadeyes, and also just to remind
you that the bag No's are my own bags that I have put these parts into till I need them, if anything is not clear just
ask and I will try and answer your question,
best regards john,
.
Last edited:
Dear John,I have been trying to match the blocks to their part numbers
It's a fantastic job! Let's leverage it!
I have a proposal for you: could you please also upload all these findings/ideas to the table I have created here (it's Google Docs). It means just a little step for you, but huge jump for me and anyone who will follow us in the SOS ecosystem.
It is as simple as Excel, but you can edit it online, in your browser.
You can:
- check the part numbers in the list
- add some comments
- add pictures
I know that this work is ahead of me and I am already terrified to struggle through the Chinese manuals. Therefore I will be very very grateful to you.
Of course, any other part number investigations could be reflected in this shared document. I think it will save many hours of frustration for those who follow you.
Yours,
Alex
Great work and help for others - I say many thanks already in the name of all others building this modelI have been trying to match the blocks to their part numbers, this might be of some help to others building the Royal Caroline,
I have marked the part numbers and the amounts, it seems as if they have provided more of some of the blocks and I have
noted that on the side, also where I have marked the bag number that is just my own bags that I am using, all the blocks are
on the sprues as supplied in the kit,
View attachment 136730
View attachment 136731
as you can see part No 48 need 8 blocks but there are 10 on the sprue, and the No's 47 and 46 look the same size
so I imagine you just have to sand four of the 6mm blocks a bit more to get them to 5.5mm,
View attachment 136732
View attachment 136733
on this sprue you can see the second line up there are some of the 5.5mm blocks in the middle of the line,
and the rest of the 5.5mm are on the bottom line, and actually there are 23 of the 5.5mm and 20 of the 5.0mm.
View attachment 136734
see pic below for clarification of this pic for the number of blocks,
View attachment 136735
View attachment 136736
This set of blocks I still have to identify, the second row up from the bottom have some weird blocks, I think
the two sets on the outside at each end of the row are sister blocks, but the ones in between I have never seen
anything like them before, they look like double sister blocks, maybe someone might know, any questions or
suggestions are welcome,
best regards john,
.

Dear John,
It's a fantastic job! Let's leverage it!
I have a proposal for you: could you please also upload all these findings/ideas to the table I have created here (it's Google Docs). It means just a little step for you, but huge jump for me and anyone who will follow us in the SOS ecosystem.
It is as simple as Excel, but you can edit it online, in your browser.
You can:
- check the part numbers in the list
- add some comments
- add pictures
I know that this work is ahead of me and I am already terrified to struggle through the Chinese manuals. Therefore I will be very very grateful to you.
Of course, any other part number investigations could be reflected in this shared document. I think it will save many hours of frustration for those who follow you.
Yours,
Alex
G'day Alex, I'm sorry but as I have said before I'm not very good with computers, and I do not understand about the document you refer to, I look after my Admiral ( Wife ) and that takes a lot of time, I won't go into the details, and what time I have left I like to build and update my build logs, but feel free to take any of this information and upload it if you feel it would be of benefit to you,
best regards John,
I have edited post 703 a couple of posts back just to keep all the main blocks together,
best regards john,
best regards john,
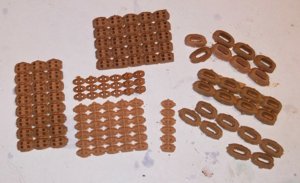
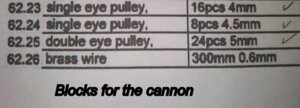
All the previous blocks that i have shown are as i said for up in the rigging, but there is another set of blocks that
are for the rigging of the cannon, the small doubles and the small singles, the larger singles to the left of the pic
are 7mm and 8mm blocks that go at the base of the masts,
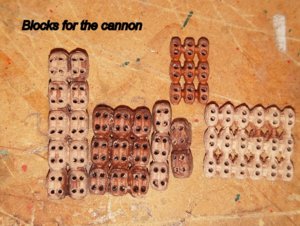
The cannon blocks glued up,
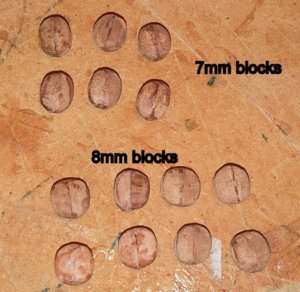
these are the 7mm and 8mm blocks glued up,
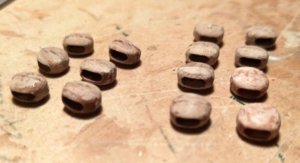
and a side view after they have been cleaned for the sheaves to fit,
.
This post is to identify where the 7mm and 8mm blocks are positioned at the base of the masts,
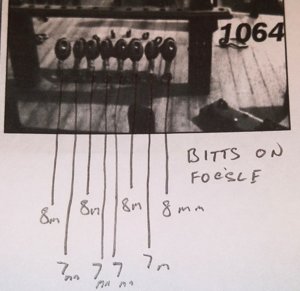
I've attached this pic so you can see the photo reference No in the manual,
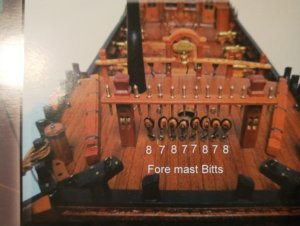
and this is the pic from the instruction book, a little bit clearer, I've just noticed this pic is reversed,
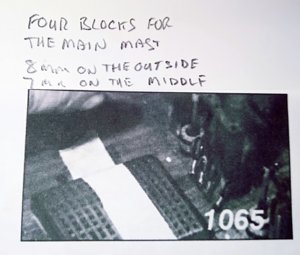
and the base of the main mast,
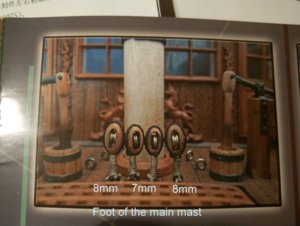
and again from the manual,
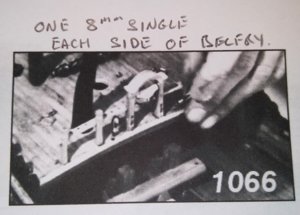
and there is a 8mm block that goes each side of the belfry,
.

I've attached this pic so you can see the photo reference No in the manual,

and this is the pic from the instruction book, a little bit clearer, I've just noticed this pic is reversed,

and the base of the main mast,

and again from the manual,

and there is a 8mm block that goes each side of the belfry,
.
Dear John,but feel free to take any of this information and upload it if you feel it would be of benefit to you
I fully understand you.
Yes, I will process your blog and I will update those documents myself. No problems! It's good that we have info in any form, and processing it from blog to tables etc is not a big deal, as I do understand how computers work.
My best wishes to your Admiral, as in some parts of this world the 8 March is considered to be the Women Day!
Great work John, saves us a lot of time to sort out. Currently also working on the gun carriage blocks.
Just to whet your appetites a little bit, I made Cheesy Potato Bake today, I do approx 95% of the cooking and
I do it in large amounts so that I can freeze some down for later ,
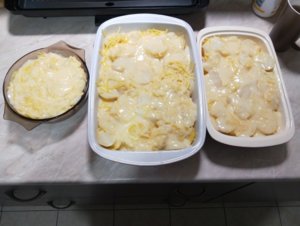
ready to go into the oven,
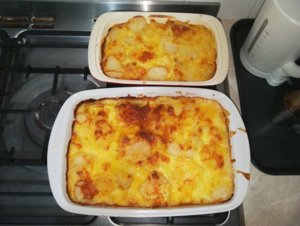
and after, the Admiral loves this and it comes in handy when I have to the shopping as there is always something
in the freezer that she can just put in the microwave,
.
I do it in large amounts so that I can freeze some down for later ,

ready to go into the oven,

and after, the Admiral loves this and it comes in handy when I have to the shopping as there is always something
in the freezer that she can just put in the microwave,
.
Pity that our Batavia ship is in poor condition nowadays (the museum has issues with funding) and we cannot immediately go to Australia again...I made Cheesy Potato Bake today
I tried to mill out the blocks in the kit a little bit more but it was getting close to near impossible, maybe they
have put the wrong sheaves in the kit, I even turned some new sheaves at 4mm dia and they were still to big to fit,
I know if anyone can make them work it will be Maarten,
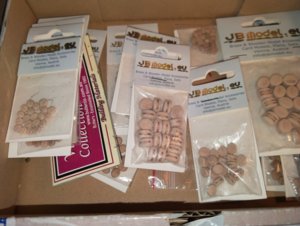
So on to plan B, a few years ago I bought some very nice blocks from Jerzy a member on the other Forum, I bought
a lot of different sizes and some of them were 7mm and 8mm so I am thinking of using these for the blocks at the
base of the masts, they are CNC milled with the sheave,
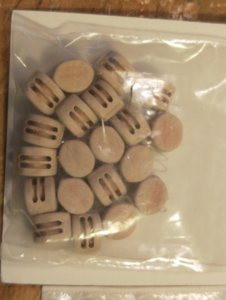
this pic is some of the larger double blocks,
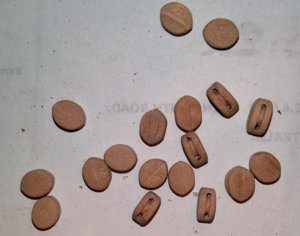
These are the 8mm singles,
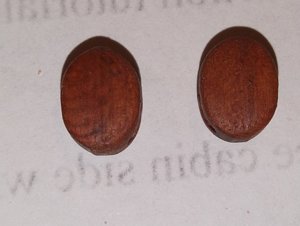
and with a coat of varnish,
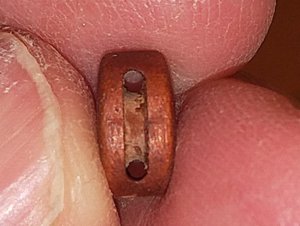
close up view,
once again thank you for looking and all the comments and the likes,
best regards john,
.
have put the wrong sheaves in the kit, I even turned some new sheaves at 4mm dia and they were still to big to fit,
I know if anyone can make them work it will be Maarten,

So on to plan B, a few years ago I bought some very nice blocks from Jerzy a member on the other Forum, I bought
a lot of different sizes and some of them were 7mm and 8mm so I am thinking of using these for the blocks at the
base of the masts, they are CNC milled with the sheave,

this pic is some of the larger double blocks,

These are the 8mm singles,

and with a coat of varnish,

close up view,
once again thank you for looking and all the comments and the likes,
best regards john,
.
Hello John! These are very nice blocks. They looks like a blocks! I am wonder if there is a way to purchase them, still.
Pity that our Batavia ship is in poor condition nowadays (the museum has issues with funding) and we cannot immediately go to Australia again...
G'day Alex, I would be a bit wary of coming to Australia on the Batavia, history has a way of repeating itself,
best regards john,
Hi John, I mis the recipe.Just to whet your appetites a little bit, I made Cheesy Potato Bake today, I do approx 95% of the cooking and
I do it in large amounts so that I can freeze some down for later ,
View attachment 137153
ready to go into the oven,
View attachment 137154
and after, the Admiral loves this and it comes in handy when I have to the shopping as there is always something
in the freezer that she can just put in the microwave,
.
These blocks look great, but the kit ones are beautiful also.I tried to mill out the blocks in the kit a little bit more but it was getting close to near impossible, maybe they
have put the wrong sheaves in the kit, I even turned some new sheaves at 4mm dia and they were still to big to fit,
I know if anyone can make them work it will be Maarten,
View attachment 137156
So on to plan B, a few years ago I bought some very nice blocks from Jerzy a member on the other Forum, I bought
a lot of different sizes and some of them were 7mm and 8mm so I am thinking of using these for the blocks at the
base of the masts, they are CNC milled with the sheave,
View attachment 137157
this pic is some of the larger double blocks,
View attachment 137158
These are the 8mm singles,
View attachment 137159
and with a coat of varnish,
View attachment 137160
close up view,
once again thank you for looking and all the comments and the likes,
best regards john,
.
I will have a look at my 7 and 8 mm blocks and if mine will fit. To be continued.
...and, i missed the taste!Hi John, I mis the recipe.


