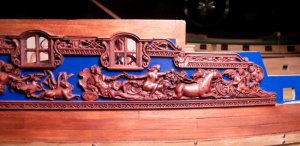
Looks like a great planking job. By the picture, it looks like the larger one is better planked and I guess that has to do with the building material.
-

Win a Free Custom Engraved Brass Coin!!!
As a way to introduce our brass coins to the community, we will raffle off a free coin during the month of August. Follow link ABOVE for instructions for entering.
-

PRE-ORDER SHIPS IN SCALE TODAY!
The beloved Ships in Scale Magazine is back and charting a new course for 2026!
Discover new skills, new techniques, and new inspirations in every issue.
NOTE THAT OUR FIRST ISSUE WILL BE JAN/FEB 2026
You are using an out of date browser. It may not display this or other websites correctly.
You should upgrade or use an alternative browser.
You should upgrade or use an alternative browser.
ZHL Royal Caroline Kit, scale 1/30
- Thread starter neptune
- Start date
- Watchers 57
-
- Tags
- royal caroline
GaryM said:Looks like a great planking job. By the picture, it looks like the larger one is better planked and I guess that has to do with the building material.
G'day Gary, thanks for the nice comment, The ZHL RC is supposed to be double planked on the hull, on this pic she is single planked with 8mmx 2.5mm planks, on the instructions you are then supposed to second plank with veneer planks, but these planks are lighter colour than the the stem, stern post and keel, so I decided to paint it off white from the Wales down, it is a credit to developement skills that when I checked the bulkheads all the planks ran smoothly and after planking only had to lightly sand the hull before painting, I will upload some pics of her with the two tone planking, it does look nice but I prefer the one colour, thanks for dropping by,
best regdards John.
It is just amazing what quality these ZHL kits provide. Like it or not this will be the golden standard for modern kits and the other non-Chinese kit suppliers have to try to change speed to catch up. Looking at this kit it is simply crazy NOT to buy the Chinese kit if it is the type of ship we want to build. That completely carved aft carving is just awesome! I also built Royal Caroline based on the Panart kit (and bashed to death  ) but there is just no comparison between these two. And John you are doing a perfect job. I am looking forward very much to see how she will advance.
It is hard to see the quality of the metal decos, first of all the gun barrels because of the plastic. Could you please give a 'naked' photo about it sometimes?
What is going to happen to the cabins? Are the inside pieces (parquetry, wall decos, furniture) also included?
Keep up the good work!
Janos
I don't think he would laugh at that, :text-lol:
A
Aussie048
Guest
John
To me that looks like excellent quality.
Cheers
Geoff
To me that looks like excellent quality.
Cheers
Geoff
Yes to your question Janos,
What is going to happen to the cabins? Are the inside pieces (parquetry, wall decos, furniture) also included?
It is all included, they also include all the LEDs and wiring even the battery box.
What is going to happen to the cabins? Are the inside pieces (parquetry, wall decos, furniture) also included?
It is all included, they also include all the LEDs and wiring even the battery box.
A
Aussie048
Guest
Those carvings look superb John
They have definitely taken to the rest of the world to improve there kits.
Cheers
Geoff
They have definitely taken to the rest of the world to improve there kits.
Cheers
Geoff
Hi John, GREAT KIT LOOKS WONDERFULL, i have purchased one kit from ZHL the french long boat, due to my abities I think a build like that IS BYOND ME TO BUILD BUT VERY INTERESTED IN THIS BUILD BY A QUALITY CRAFTSMAN, I WILL BE ORDERING 2 more kits from ZHL simpler ones for christmass presents, HAVE 5 GRANDSONS, 2SONS and ONE SON-IN-LAW wh look forward to my ships, do not know if I can get that many done in time but will give it a try. THANKS FOR SHARING THIS BUILD. Don
The casting of the Cannon is super and so are the carving. Far above anything I have seen in the Mantua kit.
Well I'd like to see him keep going with this build,so exciting.
Geoff, Don, zoly, Gary and Janos, thank you all for the comments, and thanks for dropping in.
I've got to find some time to have a look around all your builds as well, have fun,
best regards John.
I've got to find some time to have a look around all your builds as well, have fun,
best regards John.
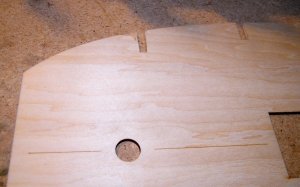
Next up was the deck, as I said before the plywood was great and the deck had a line etched down the centre.
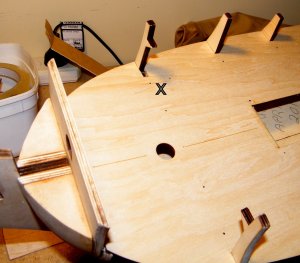
I had one little problem and I had to cut the slot in the deck a little longer to manage to get it over the bulkhead and down to where it had to go, X marks the spot they say, you can see how I had to cut it.
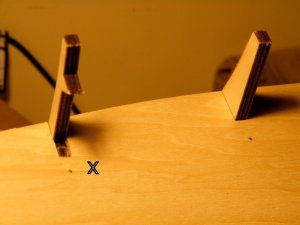
A close up view
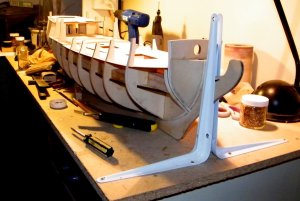
I dont have any pics of the lower deck going on, but had no problems, after fitting the lower deck and with the wood pieces clamped along both sides of the keel, I then cut some wood blocks to strengthen the assembly, you can just make them out in the pic, maybe a bit of overkill, but when I removed the keel supports, the whole assembly was as ridgid as, very strong. From then on I found I only needed two shelf supports at each end.
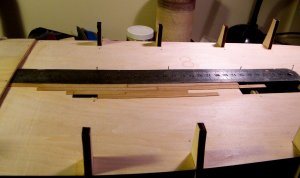
After the main deck was on I started on the planking, the planks all come cut to lenght and have two nail holes at one end and one at the other, you can either leave them as they are, they are quite small, or you can use them as a guide for drilling and inserting Trunnels, you can just see them on the ends of the planks,
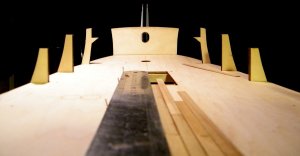
View from aft, I lightly pinned a steel rule up against the centre line, and i used a four butt shift
.
Last edited:
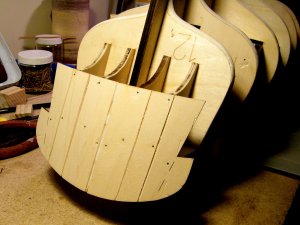
The ply was so strong that I ended up scoring from top to bottom of the transom piece, and pinning it and gluing it, I then filled in the scores and gave it a good sand.
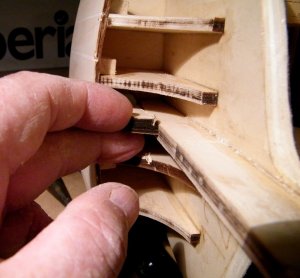
If by chance you buy this kit, I'll tell you now you have to be able to work things out and decide what to do, just like a bit of scratch building really, the part that is in my fingers I did'nt realise it had to come off, so I had to get in with a mini saw and rip it out, so the rudder can go up through, I will try and find a pic to show what I mean
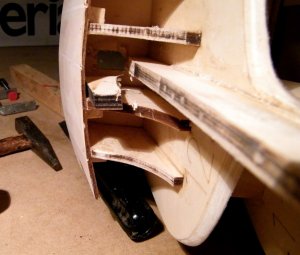
shows the piece cut away.
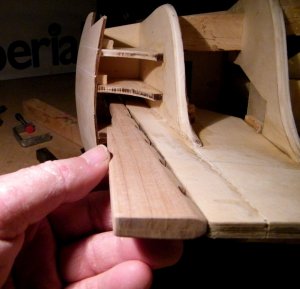
and showing how the ruder goes up through.
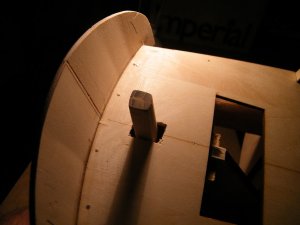
The deck with the ruder post being tried for fit.
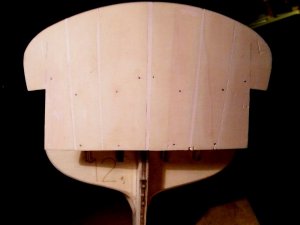
View of the transom in place.
.
Last edited:
G'day Janos, I started this build a few months ago, so this is just posting the work that has been already done. See below the introduction post.
I bought this kit off ebay just after last Christmas, after buying it I now feel impelled to do a build log just to show model builders what you get in these kits, and it is not about saving money, because some of these kits are not cheap and most certainly the wood and fittings are not crap, so here goes, I'm not going to say anything else or get down in the gutter with them, I just want to build and enjoy sharing the build with the crew.
best regards John.
Well said JOHN. Don
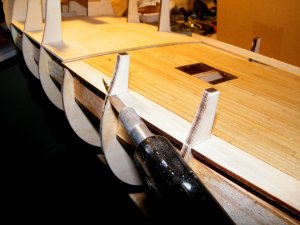
Before I started the planking, I cut part way through the bulkheads on the deck area between the focsle and the where the cabin will go, there are four of them each side that will be removed later on, I also covered the outside edge of each of them with some electricians tape to prevent the glue adhering to them.
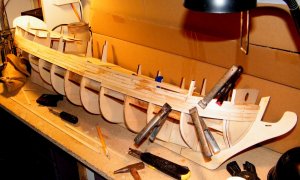
planking under way
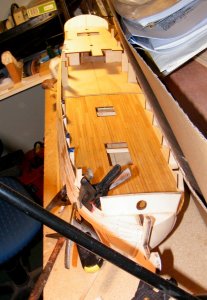
looking down along the deck
Last edited:
A
Aussie048
Guest
Nice little tip there with the insulation tape John
Cheers
Geoff
Cheers
Geoff


