ZHL Royal Caroline

Hi Bob,

I more or less started like you did by .....

Hope it helps.
Thanks Maarten. I'll probably bug you some more from time to time as I progress. I wondered about the rudder and saw that it was going to be necessary to remove a part of the sternpost on the center keel in order to get the rudder to fit inside the hull. I'll tackle that when I get to it.

So you removed the bulkhead tops after you got the external first layer of upper planking on. That's good to know. Therefore, I'll hold off fitting my floors to the subdeck after I've added that upper planking.

Thanks again,

Bob
 
Hallo Bob,
good to see you back working on a model and enjoying the hobby.
Very good model kit you decided to build - I am pretty sure you will find a lot of enjoyment in the project - I will follow with big interest.
Thanks for the welcome back. The RC is really an amazing kit. I've built a lot of kits over the years (one of the reasons I stopped building them a few years ago -- too much of the same old thing) but I've never seen one like this with so many parts and so much detail. I've always been a very detail oriented builder wanting to take my models to the next level. This kit certainly fits that bill. Just hope I don't get carried away;)

Anyway, thanks for chiming in.

Take care,

Bob
 
Hi Bob,
that ZHL Royal Caroline is one of the best model ship kits available on the market. I have friends from the other forum building it discreetly. Hahaha...
Hi Brian,

I certainly agree with you on that. Three boxes of stuff. I was like a kid in a candy factory when I received the kit and poured over all those parts. Wow! Too bad other kit makers can't make such large and detailed kits. I just wish it had come in 1:24 scale though. Tough to find out of the box details for 1:30 scale.

Take care,

Bob
 
Thanks Maarten. I'll probably bug you some more from time to time as I progress. I wondered about the rudder and saw that it was going to be necessary to remove a part of the sternpost on the center keel in order to get the rudder to fit inside the hull. I'll tackle that when I get to it.

So you removed the bulkhead tops after you got the external first layer of upper planking on. That's good to know. Therefore, I'll hold off fitting my floors to the subdeck after I've added that upper planking.

Thanks again,

Bob
Hi Bob,

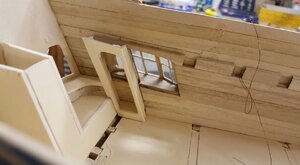
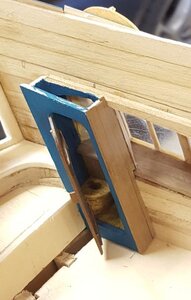
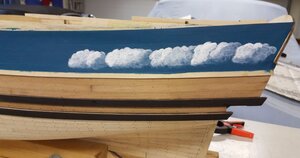
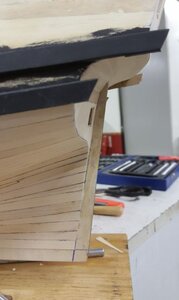
See here the pictures of these items, they speak for themselve.
Rear Cabin.JPGStern cabin 3.JPGStern cabin 4.JPGRudder post casing.JPGtoilet 2.JPGToilet 7.JPGClouds hull.JPGModified stern side view.JPG
 
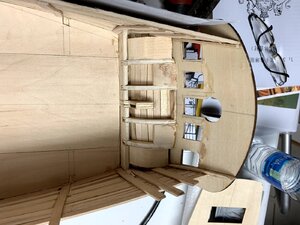
Thanks Maarten. I modified the stern post yesterday to fix that problem so that the rudder will fit inside the stern area. I've also cut out the window openings in the stern transom plywood piece using the boxwood carving piece to mark the area, and I cut out the center area for the large queen figure carving. It's been soaking in water all night so I will clamp it down as you did this morning to bend it to the curved shape of the transom. Once the part dries, I'll glue it in place.

And once the stern transom is glued in place, I'll begin adding the upper planking. I've got lighting to install as you did so plenty to do in the weeks ahead. Meanwhile, I've been working on the rug drawing for the aft deck area, slowly but surely. Those drawings take a long time to create.

We'll keep you posted,

Bob
 
Thanks for the info, I will look into ordering ASAP
Hi Kurt. I don't mean to hijack Bob's build log but I don't think he will mind. Here is a link to my Bluenose build log from back in the day using Bob Hunt's Practicum you can buy from LSS. I have gotten a lot of positive feedback for this build log over the years and it really shows the nice results you can achieve using one of Bob's Practicums.

 
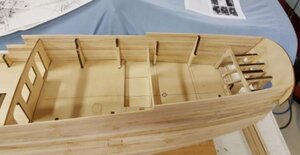
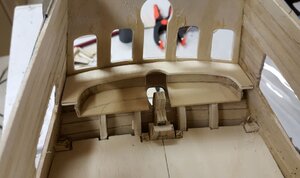
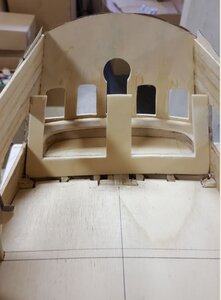
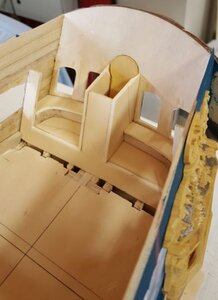
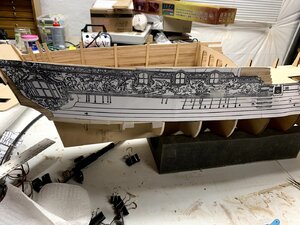
Made some progress this week finishing out the basic two great cabins and vestibule area between them as well as laying out the planking profile so that the carvings fit. That's the part that gave me a fit. The problem was the middle carving set. Finally, by comparing it to the drawing, I found two areas that were causing this carving set not to fit. First, the two dragons on the left hand side are too large and I had to thin their heads and necks down some. The real trouble was the ribbon at the right side. After careful study I found that there were additional ribbon parts that didn't belong there. I trimmed and reworked the shape of the ribbon, and that fixed the fit problem. Here are some progress photos.

IMG_0784.jpg
This first photo shows the drawing of the carvings attached to the plain drawing that shows the wales. Notice that the plain drawing is under scale. I used these drawings to establish the upper profile of the hull planking.

IMG_0785.jpg

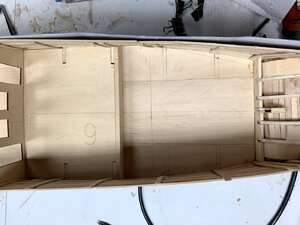
This photo shows the forward bulkhead (on the left) in place and pieces of planking material used to create the framework for the interior walls.This planking material is thin enough to leave a gap between the outer planking and inner planking to run wires for the lighting.

IMG_0786.jpg

This photo shows the aft area. I've planked the counter on the outside but still need to thin down the inner frames for the interior counter. I used some basswood to help strengthen the area. Also notice that all bulkheads have been removed now so that the interior is completely open and clean of any obstructions.

When I create the internal walls at the side of the hull, I will use thin plywood with planking strips and such attached to the plywood. This will enable me to create nice panels to fit inside so that I can work on the walls flat on my work table rather than trying to deal with the details inside the hull. I'll use cardstock to make templates for the panels.

I've only planked the upper starboard hull area with the first layer of planking down to the main deck line. I still have to duplicate the upper profile on the port side and then do the forward hull area. The next thing I have to do is assemble a cannon to make sure that it is aligned with the gunport openings when I lay down the first layer of planking on the fore end.

Bob
 
G'day Bob, its nice to see you back on the Forum and building The Royal Caroline, it will be interesting to see your take on this model, I bet you will enjoy every minute of it,

best regards john,
Thanks John. Yeah, I'm enjoying it immensely and plan to do a lot of things a bit differently. For one thing, I plan to paint the carvings gold with a nice black wash. Certain trim areas in the carvings will also be painted black with gold highlights. There's a scratch built POF model in 1/2" scale that is very inspiration to me at https://www.shipmodell.com/index_files/SHIPMODELL_ROYAL_CAROLINE.htm . It has the look that I want to try and replicate. I imagine the original ship had gilded carvings as well so that's the look I'm going for. Of course it's going to be quite a while before I get to that stage of construction.

I did manage to put a cannon carriage together since posting these pictures but it's more or less a prototype as I haven't added all of the details to it. I always like to build one cannon before I get into planking and cutting ports open to make sure the cannon is going to fit through the gunports. So far, so good.

We'll keep you posted,

Bob
 
Hi Bob,
Great to hear from you again, and congratulations on your retirement! You and Peggy have put in a very hard shift, and it must be so therapeutic to be doing something solely for your own pleasure.
I'll be following your posts - always something to learn.
Best to you both

Ted
 
G'day Bob
I have to put my impressions of the ZHL ROYAL CAROLINE kit in as well.
As you know, I have been quite sick, and (hopefully) very soon ill be making sawdust on my RC.
I just about done doing the alterations to the stern, which includes the King's Cabin. It appears that you are doing something very similar to me.
I have just completed (yesterday in actual fact) a English translation of the instructions and part list.
This was a HUGE undertaking, about 150 hours. If you or any else would like a copy, send me your private email address and I will send you a 180 page PDF.
The transition is not 100% corection but its close enough to ne a great help.
Looking forward to see your version in the future.
Happymodeling
Greg
Hallo Greg,
good to hear that you feel better and that you will come back to your modeling work
I am looking forward.....
 
Hi Bob,
Great to hear from you again, and congratulations on your retirement! You and Peggy have put in a very hard shift, and it must be so therapeutic to be doing something solely for your own pleasure.
I'll be following your posts - always something to learn.
Best to you both

Ted
Hi Ted,

Don't know if I can do as great of a job on RC as you did on the Kingfisher but I'm certainly going to try. Thanks for chiming in. We'll keep you posted.

Take care,

Bob
 
G'day Bob
I have to put my impressions of the ZHL ROYAL CAROLINE kit in as well.
As you know, I have been quite sick, and (hopefully) very soon ill be making sawdust on my RC.
I just about done doing the alterations to the stern, which includes the King's Cabin. It appears that you are doing something very similar to me.
I have just completed (yesterday in actual fact) a English translation of the instructions and part list.
This was a HUGE undertaking, about 150 hours. If you or any else would like a copy, send me your private email address and I will send you a 180 page PDF.
The transition is not 100% corection but its close enough to ne a great help.
Looking forward to see your version in the future.
Happymodeling
Greg
Hi Greg,

Sorry to hear about your recent illness. Hope you'll be making sawdust again soon. Wow on the translation of the instructions. I'll certainly be in touch with my email as I would love a copy. The printed instructions that came with the kit are useless because even the pictures are so dark and small that you can't make out most of the important details.

Talk to you soon,

Bob
 
Back
Top