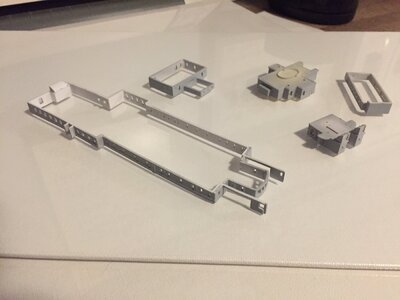
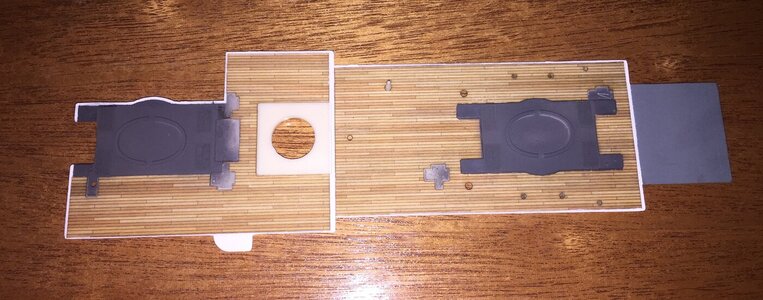
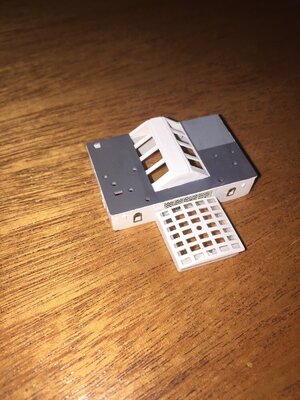
I glued the main deck super strucltures on then tried installing the deck. Much better this time. It seems to have taken most of the warp from the main deck.
-

Win a Free Custom Engraved Brass Coin!!!
As a way to introduce our brass coins to the community, we will raffle off a free coin during the month of August. Follow link ABOVE for instructions for entering.
-

PRE-ORDER SHIPS IN SCALE TODAY!
The beloved Ships in Scale Magazine is back and charting a new course for 2026!
Discover new skills, new techniques, and new inspirations in every issue.
NOTE THAT OUR FIRST ISSUE WILL BE JAN/FEB 2026
You are using an out of date browser. It may not display this or other websites correctly.
You should upgrade or use an alternative browser.
You should upgrade or use an alternative browser.
Titanic 1/350 MiniCraft Kit build
Looking good. Working on the super structures now, getting the deck in was a royal pain as both hull and deck were warped. it's amazing the difference the Scale Decks make!
One of the things I hated is that monofilament rigging. It was hard to see and knot. I went down to Hobby Lobby and got some of the smallest beads they had and threaded the monofilament through the beads, tied it off at the bead, pulled the bead down to give me two equal lengths, and added a dollop of CA. I glued the bead and all to the underdeck. The only issue now is still seeing the monofilament.
I am using "header white" on the walls. Yours are looking good.
I am using "header white" on the walls. Yours are looking good.
- Joined
- Aug 1, 2020
- Messages
- 108
- Points
- 88

Thanks. I haven't done much with the rigging yet except threading it thru the deck in the steps I have gotten to. I used an idea similar to your bead - I made a square knot around a thin piece of styrene to keep thread from coming back thru hole. added a bit of plastic cement for good measureOne of the things I hated is that monofilament rigging. It was hard to see and knot. I went down to Hobby Lobby and got some of the smallest beads they had and threaded the monofilament through the beads, tied it off at the bead, pulled the bead down to give me two equal lengths, and added a dollop of CA. I glued the bead and all to the underdeck. The only issue now is still seeing the monofilament.
I am using "header white" on the walls. Yours are looking good.
- Joined
- Aug 1, 2020
- Messages
- 108
- Points
- 88

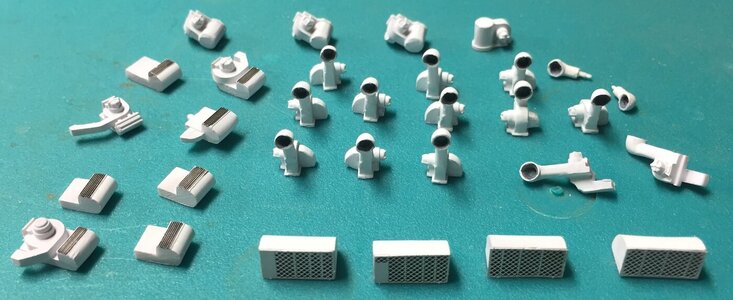
These vents/funnels have been keeping me busy of late. They required a LOT of cleanup and filling of mold holes (forget the term). I also drilled out the funnels to give them some depth. I used Mr Surfacer 500 to fill the holes/defects. Some were deep enough to require 2 applications as it shrinks a little when it dries. It sands/machines very well and sets up fairly hard. I will primer with Mr Surfacer 1200 - mainly so that remaining defects will stand out.
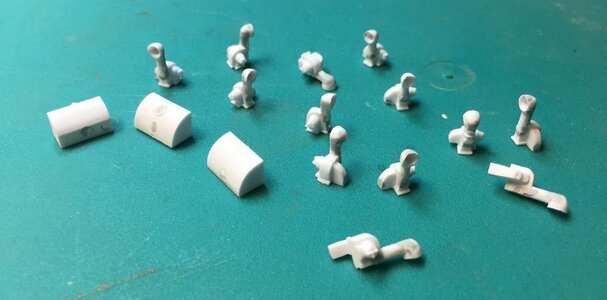
Miscellaneous deck pieces with primer. It makes me a little nervous taking all these parts off the sprues but I wanted to paint them all at the same time. I scribed the part numbers on the bottoms in case I forget what they are. Now if I can keep from losing them I'll be ok


Miscellaneous deck pieces with primer. It makes me a little nervous taking all these parts off the sprues but I wanted to paint them all at the same time. I scribed the part numbers on the bottoms in case I forget what they are. Now if I can keep from losing them I'll be ok

Put them on a strip of blue masking tape, works well. I sprayed mine on the sprue. But they will need to be touched up.
Have you started your etched parts yet? That looks scary. I ordered from the Small Company a brass etched part bender.
What have you used to glue the scale decks down? I used Gorilla glue and a few of them came up.
Have you started your etched parts yet? That looks scary. I ordered from the Small Company a brass etched part bender.
What have you used to glue the scale decks down? I used Gorilla glue and a few of them came up.
- Joined
- Aug 1, 2020
- Messages
- 108
- Points
- 88

I have an Etchmate 3C from Mission Models ( made in USA - I like that!) that I bought some time ago for bending photo-etch. check ART BRAUNSCHWEIGER's Titanic build site - he made some jigs to shape the benchs. The only photo-etch I have done on this build are the windows and grills. I built the USS Indianapolis years ago and I used the GMM photo etch set for that. Most wasn't that difficult (stairs/ladders/aircraft catapult) but some of the thin fragile stand type structures are quite challenging. I use the Gorilla wood glue that was recommended by Scale Decks. As I mentioned earlier I scraped off the plank detail then roughed up the surface with coarse sand paper. So far the decking has been the easiest, most pleasant part of the build. I just paint the glue on with a small flat brush, stick the deck material on and press it down my fingers (or some credit card material in the tight places). Any excess glue can be removed with a damp Q-tip. After a few minutes it has set up enough to put it aside for complete drying. I'm a little concerned that your decking came off ( I'm using the same glue!). Was any stress applied or did it just fall off?Put them on a strip of blue masking tape, works well. I sprayed mine on the sprue. But they will need to be touched up.
Have you started your etched parts yet? That looks scary. I ordered from the Small Company a brass etched part bender.
What have you used to glue the scale decks down? I used Gorilla glue and a few of them came up.
It just lifted. I glued it back and we'll see. This is the first photo etch kit for me, and the pieces look so small! I used the Scale Decks on my Constitution and on that kit had no problems with the Scale Decks staying down. I'm still working on that one, doing the Connie while waiting for glue to set or paint to dry on the Titanic, then working the Titanic while waiting on the Connie.
I have some photos of the Connie in here.
I have some photos of the Connie in here.
Looking good. The decks have much deeper lining than the Constitution, Adding more glue seems to have solved that problem. Search Constitution by Don Ricardo if you would like to see the Connie decks.
- Joined
- Aug 1, 2020
- Messages
- 108
- Points
- 88

Well I've crossed the Rubicon on the funnels. I just couldn't accept the way they filled the space between the tubing and the funnel itself. I didn't see anyway of cleaning that up w/o making a mess of it. So I decided to just remove the tubing and add my own. The challenge to me will be the connecting pieces.
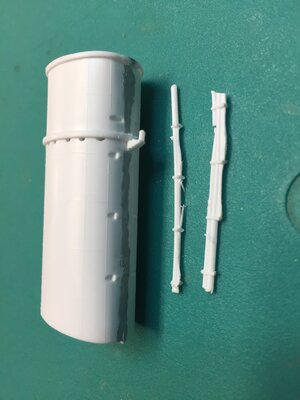

I haven't started the funnels yet, but I read one builder who said he had trouble with the funnel tubing. That might be a common issue. So far the main problem I ran into was a warped hull and decking. I have read of similar complaints there too.
I braced the decking below the surface to eliminate the deck warpage. The decking is made of soft plastic and was sagging in the middle. That helped in gluing the decks in. There was a small issue with the Scale Decks staying glued at first and they had to be carefully lifted and re-glued. So far that seems to have worked. I have the boat deck in, and to take a break, started the photo etched bench work.
Talk about tiny! That photo etched stuff can make you cross eyed!
- Joined
- Aug 1, 2020
- Messages
- 108
- Points
- 88

That's the nice thing about this build. If you get tired of one thing there are half a dozen other things you can do. Cranes/benches/chairs/stairs/lifeboats/windows/...I haven't started the funnels yet, but I read one builder who said he had trouble with the funnel tubing. That might be a common issue. So far the main problem I ran into was a warped hull and decking. I have read of similar complaints there too.
I braced the decking below the surface to eliminate the deck warpage. The decking is made of soft plastic and was sagging in the middle. That helped in gluing the decks in. There was a small issue with the Scale Decks staying glued at first and they had to be carefully lifted and re-glued. So far that seems to have worked. I have the boat deck in, and to take a break, started the photo etched bench work.
Talk about tiny! That photo etched stuff can make you cross eyed!
The photo etched windows are a thing!
@Booboisie Do you use any aftermarket PE parts to enhance your model? When I build plastic models, mostly in scale 1/350, I found an ample of products\suppliers for the aftermarket PE products. Those are indispensable to show up some details like ladders assembly guns etc.
- Joined
- Aug 1, 2020
- Messages
- 108
- Points
- 88

Yes, this is what I bought:@Booboisie Do you use any aftermarket PE parts to enhance your model? When I build plastic models, mostly in scale 1/350, I found an ample of products\suppliers for the aftermarket PE products. Those are indispensable to show up some details like ladders assembly guns etc.
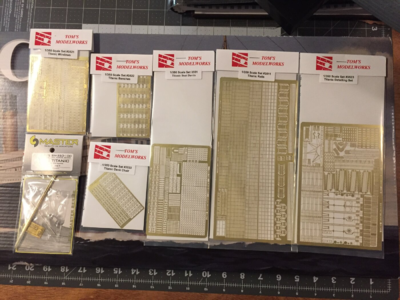
About the only thing I have gotten to so far are the windows and some grill work. I think they take a build to the next level.
- Joined
- Aug 1, 2020
- Messages
- 108
- Points
- 88

yeah, especially increasing the size of the openings so that they fit properly. And then there are the opening that are already too large! The wax pencil idea I got here for picking up and placing the windows was a life saver. Are you using CA glue? I use Elmer's white glue that has been watered down slightly. I allows you to move the part around to get it just where you want it. I'm not sure of the pros/cons of using CA. Maybe I am missing a better way of doing it.The photo etched windows are a thing!


