-

Win a Free Custom Engraved Brass Coin!!!
As a way to introduce our brass coins to the community, we will raffle off a free coin during the month of August. Follow link ABOVE for instructions for entering.
-

PRE-ORDER SHIPS IN SCALE TODAY!
The beloved Ships in Scale Magazine is back and charting a new course for 2026!
Discover new skills, new techniques, and new inspirations in every issue.
NOTE THAT OUR FIRST ISSUE WILL BE JAN/FEB 2026
You are using an out of date browser. It may not display this or other websites correctly.
You should upgrade or use an alternative browser.
You should upgrade or use an alternative browser.
Titanic 1/350 MiniCraft Kit build
Wow! Looking good!
- Joined
- Aug 1, 2020
- Messages
- 108
- Points
- 88

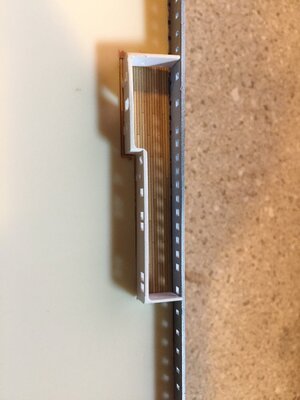
After a fair amount of trial and error I am satisfied with the window "glass" in the PE window frames. I am using Model Master Window maker. I was initially trying to apply it directly from the applicator to the parts. When it dried it was not smooth. I thought that adding more would smooth it out. Big mistake. I finally read the instructions on the container! Not sure about using brush handle - I used a fine tipped brush. I used a mixture of isopropyl alcohol and Dawn to removed the botched Window Maker
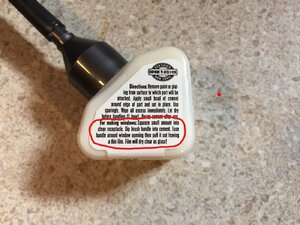
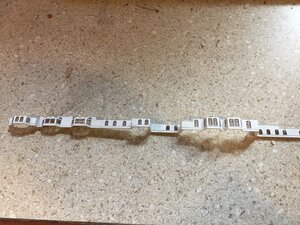


I use a small bamboo stick to spread the wiindow maker in thin coats,
Your windows look good.
- Joined
- Aug 1, 2020
- Messages
- 108
- Points
- 88

the magic of photography!Your windows look good.
Your ship is doing well. I had to repaint the hull, the water line was too low.
- Joined
- Aug 1, 2020
- Messages
- 108
- Points
- 88

That's what I like about this hobby - there is usually no limit to "do overs"! The exception would be the Scale Deck - "do over" there = $85. The most important skills/qualities seem to be patience and perseveranceYour ship is doing well. I had to repaint the hull, the water line was too low.
- Joined
- Aug 1, 2020
- Messages
- 108
- Points
- 88

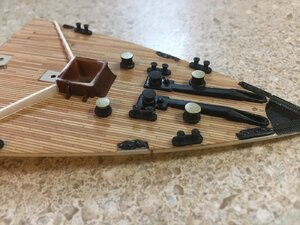
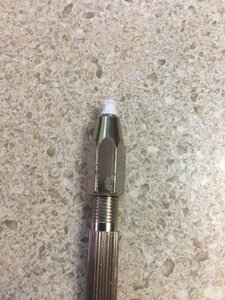
I borrowed from Art Braunschwieger on remaking the capstans. He made new ones from brass, I just reshaped the kit parts using the same method. I really wasn't happy with that ledge under the top surface. I placed the kit parts in a pin vise and chucked that into my drill press. I tried using a hand drill but had difficult holding everything steady.


That's a great job and the Scale Deck looks terrific. I set my Dremel workstation up for the same reason, pin drills are hard to control! Did you get your decks to fit properly? They don't seem to line up out of the box.
- Joined
- Aug 1, 2020
- Messages
- 108
- Points
- 88

thanks. I haven't put any of the decks on yet so I can't say anything about the fit. My next project is the steam wenches. still deciding how much I want to do to them. At a minimum I will replace those ball thingy's with the concave pulleys.That's a great job and the Scale Deck looks terrific. I set my Dremel workstation up for the same reason, pin drills are hard to control! Did you get your decks to fit properly? They don't seem to line up out of the box.
- Joined
- May 26, 2020
- Messages
- 202
- Points
- 143

Enjoying your build. You have me thinking maybe I’ll give it a try
- Joined
- Aug 1, 2020
- Messages
- 108
- Points
- 88

I haven't posted anything for a while but I still working on it. Honest! I'm getting lost in the weeds messing with the steam wenches. IMO the kit parts are just funny looking. Pictured are the kit part, my first attempt and the second attempt. still not satisfied so I will give it one more try. I want to use watch gears for the drive wheels but haven't found any yet - I know I have some old wind up watches around the house somewhere.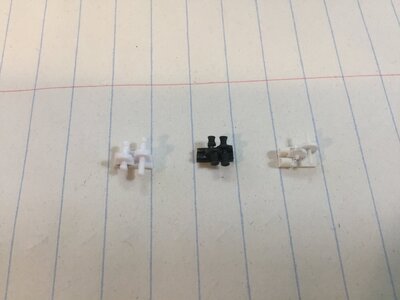
Another sticking point is the pedestals for the base. I found some nice looking lamp parts online for $2 a piece. Looked great until I saw the shipping cost - over $8! I hate paying that much for shipping. In order to proceed with getting the decking on I pre-drilled the location holes and glued some styrene to the inside bottom of the hull so that I can screw the supports in no matter what I finally decide on:
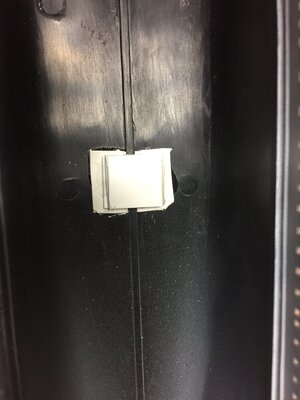

Another sticking point is the pedestals for the base. I found some nice looking lamp parts online for $2 a piece. Looked great until I saw the shipping cost - over $8! I hate paying that much for shipping. In order to proceed with getting the decking on I pre-drilled the location holes and glued some styrene to the inside bottom of the hull so that I can screw the supports in no matter what I finally decide on:

- Joined
- Aug 1, 2020
- Messages
- 108
- Points
- 88

thanks. I haven't put any of the decks on yet so I can't say anything about the fit. My next project is the steam wenches. still deciding how much I want to do to them. At a minimum I will replace those ball thingy's with the concave pulleys.
I am just at the point where I am ready to install the main deck (kit parts D1/2) I am curious what issue(s) you ran into. There are 2 ledges along the inside of the hull - I'm not sure why the lower one is there (other than to add confusion). The ledge in the hull for the fore section of D1 appears to be too low to be useful.That's a great job and the Scale Deck looks terrific. I set my Dremel workstation up for the same reason, pin drills are hard to control! Did you get your decks to fit properly? They don't seem to line up out of the box.
still trying to get the main deck to sit right.
I bought some strip styrene to glue onto the hull, to see if that will make it fit better.
- Joined
- Aug 1, 2020
- Messages
- 108
- Points
- 88

I hope that helps. Getting the main deck on was like releasing a log jam. I'm making good progress nowI bought some strip styrene to glue onto the hull, to see if that will make it fit better.
The hull was warped and the main deck slightly twisted.


