YEA HEINRICH, ONE TOOK AWAY MY M&Ms AND BREAD, THE OTHER TOOK AWAY MY CHINESE FOOD LOL. GOD BLESS STAY SAFE YOU AND YOURS DON
-

Win a Free Custom Engraved Brass Coin!!!
As a way to introduce our brass coins to the community, we will raffle off a free coin during the month of August. Follow link ABOVE for instructions for entering.
-

PRE-ORDER SHIPS IN SCALE TODAY!
The beloved Ships in Scale Magazine is back and charting a new course for 2026!
Discover new skills, new techniques, and new inspirations in every issue.
NOTE THAT OUR FIRST ISSUE WILL BE JAN/FEB 2026
- Home
- Forums
- Ships of Scale Group Builds and Projects
- Bluenose PoF Group Build
- Bluenose Group Build Logs
You are using an out of date browser. It may not display this or other websites correctly.
You should upgrade or use an alternative browser.
You should upgrade or use an alternative browser.
- Joined
- May 26, 2020
- Messages
- 202
- Points
- 143

Great explanation of the jig.Good morning my dear friends. I will try to the best of my ability to explain the jig. On any jig, the main purpose is to support/guide and ensure alignment of most the upper part of the ribs. On a normal-style build, that would require a "high" jig with a proper floor, substantial sides and "roof" section into which the upper parts parts of the ribs will be inserted. Because of the severe curvature of Bluenose's keel which is not a flat or level keel, the normal build-style cannot be used - hence it is built upside down. With the jig placed upside down, the floor lies absolutely flat on working surface and the upper parts of the ribs indeed fit into the slots of the jig until they are flush with the underside - i.e. until they press flat against the working surface (table).
View attachment 197935
All the ribs go into the provided slots of the "upside-down" jig and protrude all the way through the floor section until they press flat against the working surface. The keel at the bow and stern end though, do NOT go into the jig, but are "suspended" above it.
Let us now re-look at the picture @Dematosdg Daniel mentioned, to explain the above drawing more clearly.
View attachment 197936
The black arrows point to where the ribs go through the floor of the building jig and press flat against the table. The two red arrows indicate the bow and stern sections of the keel which are both suspended and do NOT go into the jig.
If we take the above picture and turn it the right way up, it looks like this:
View attachment 197937
Here you can see the fully-supported ribs extending all the way through the floor.
And from another angle:
View attachment 197938
@Kkonrath Kurt, I hope that explains everything.
@Dematosdg Daniel, thank you for your well-considered question!It forced me to have another look at everything and make sure that I pass on the correct information!
- Joined
- Jan 9, 2020
- Messages
- 10,565
- Points
- 938

@marter1229 Hi Terry. I am very happy that you find the explanations clear and useful! 

- Joined
- Jan 9, 2020
- Messages
- 10,565
- Points
- 938

Hello Everyone
Today was a day spent in front of a classroom. I have managed to fit Parts #20 and #21 to the Port Side as well this morning before work. Further to request of @DonRobinson , I have also beveled the tips of Part#20 - it came out beautifully! I promise to post pictures tomorrow night with all relevant info.
But today, the action is on the Payment and Order page where three kits have been sent out to:
@Davefx35 Dave Melcher - USA
@flyboy441 Keith Moss - Canada and
@Peter Voogt Peter Voogt - Netherlands.
Check out the pictures!
- Joined
- Jan 9, 2020
- Messages
- 10,565
- Points
- 938

Hello Friends
As promised, I said that I would give you an update. So let us just recap. The inner keel section has been completed and I have finished the outer keel cheeks on the BOTTOM of the starboard side. See the picture below which was also the last picture of my previous post.
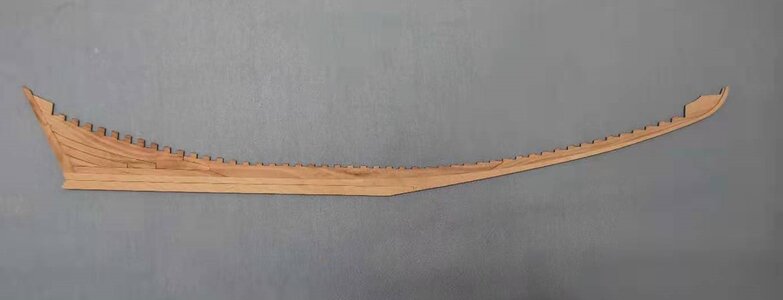
Outer cheeks (comprising of Parts #20 and #21) installed at the bottom of the keel.
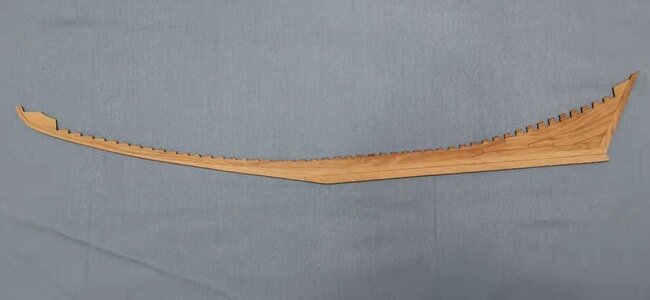
And yesterday I finished the outer keel cheeks on the BOTTOM of the Port side.

Here are the parts that we have used in the construction of the bottom-end outer cheeks - Part #20 marked in Green and Part #21 marked in Red. So from this sheet (there are obviously two such sheets - one for starboard and one for port) we have thus used only two pieces from each sheet. These two sheets can now be put away until later.
On the above drawing however, you will notice that Part #20 needs to be beveled. @DonRobinson Don has asked for additional information on the beveling and I agree fully. This is often something that is not done right or accurately enough and which then leads to detrimental effects later in the build.
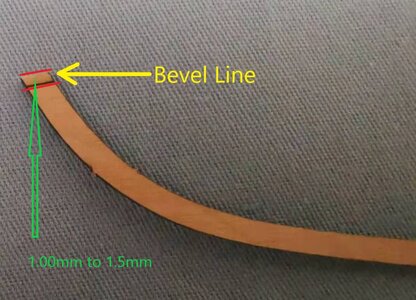
The black line (just above the lower red line) is the actual bevel line on Part #20. The distance from that bevel line to the tip of Part #20 is 1.0mm to 1.5mm depending on whether you include the actual thickness of the bevel line. If you bevel so that the line is still visible, the distance is 1.0mm - if you bevel until the line is gone the bevel will measure 1.5mm. I have opted for the latter, but honestly - I do not believe that 0.5mm is going to make a difference either way.
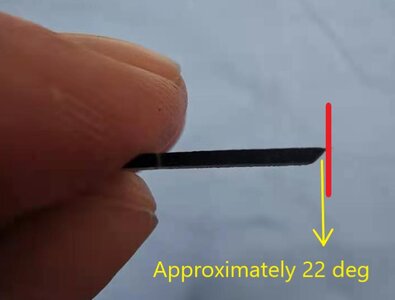
For the benefit of all, I have measured the angle after I had beveled it and it came to approximately 22 degrees. Once again, I don't believe this measurement is cast in stone, but it does give you some indication.
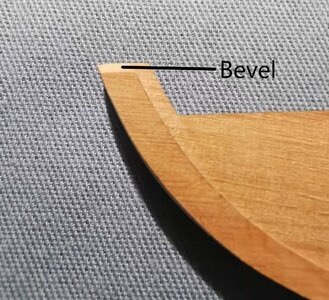
The beveling shown from the side.
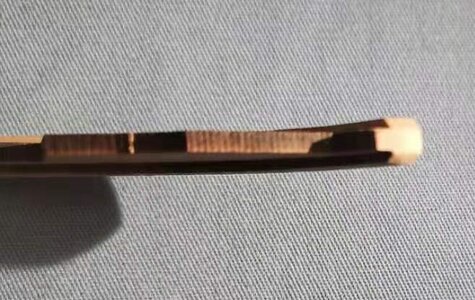
From the top (I do apologize for the quality of this picture - I just could not get it any clearer.)
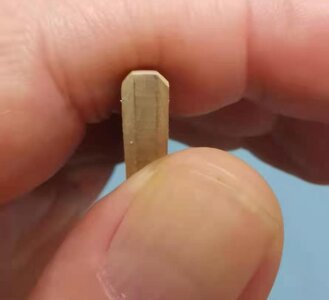
And from the front. Obviously I still have to give all parts a final sanding, but I'm very happy with how this turned out.
SUGGESTION. Even though I beveled Part#20 first before gluing it to the inner keel, I would advise you to attach Part #20 first to the inner keel and do the beveling on the keel when the glue has dried. That way you eliminate all possibilities of breaking the tip while you do the beveling.
This is where I am now - I will continue work and keep you posted. Thank you all for watching, following, supporting and making suggestions. We already have an excellent interaction going here - keep it going!
Until later. keep well my friends and take care!
As promised, I said that I would give you an update. So let us just recap. The inner keel section has been completed and I have finished the outer keel cheeks on the BOTTOM of the starboard side. See the picture below which was also the last picture of my previous post.

Outer cheeks (comprising of Parts #20 and #21) installed at the bottom of the keel.

And yesterday I finished the outer keel cheeks on the BOTTOM of the Port side.

Here are the parts that we have used in the construction of the bottom-end outer cheeks - Part #20 marked in Green and Part #21 marked in Red. So from this sheet (there are obviously two such sheets - one for starboard and one for port) we have thus used only two pieces from each sheet. These two sheets can now be put away until later.
On the above drawing however, you will notice that Part #20 needs to be beveled. @DonRobinson Don has asked for additional information on the beveling and I agree fully. This is often something that is not done right or accurately enough and which then leads to detrimental effects later in the build.

The black line (just above the lower red line) is the actual bevel line on Part #20. The distance from that bevel line to the tip of Part #20 is 1.0mm to 1.5mm depending on whether you include the actual thickness of the bevel line. If you bevel so that the line is still visible, the distance is 1.0mm - if you bevel until the line is gone the bevel will measure 1.5mm. I have opted for the latter, but honestly - I do not believe that 0.5mm is going to make a difference either way.

For the benefit of all, I have measured the angle after I had beveled it and it came to approximately 22 degrees. Once again, I don't believe this measurement is cast in stone, but it does give you some indication.

The beveling shown from the side.

From the top (I do apologize for the quality of this picture - I just could not get it any clearer.)

And from the front. Obviously I still have to give all parts a final sanding, but I'm very happy with how this turned out.
SUGGESTION. Even though I beveled Part#20 first before gluing it to the inner keel, I would advise you to attach Part #20 first to the inner keel and do the beveling on the keel when the glue has dried. That way you eliminate all possibilities of breaking the tip while you do the beveling.
This is where I am now - I will continue work and keep you posted. Thank you all for watching, following, supporting and making suggestions. We already have an excellent interaction going here - keep it going!
Until later. keep well my friends and take care!
Hi Heinrich,
”Outer Cheeks”, dumb question— is their purpose the same as cutting in the edge or “Babbet”??
Jan
”Outer Cheeks”, dumb question— is their purpose the same as cutting in the edge or “Babbet”??
Jan
- Joined
- Jan 9, 2020
- Messages
- 10,565
- Points
- 938

Hello Jan. No they are definitely not intended to form the rabbet line, because at the bottom of the keel, there is absolutely no tapering or sanding away of material. At the bottom and the top of the keel everything is completely square. I would assume that the two outer keels (cheeks) are intended to provide the correct thickness in order to fit securely into the notches of the frames. At the same time they provide great rigidity to the whole keel construction. In the next steps you will see that there is indeed tapering involved, but it takes place from the top to the middle of the keel!
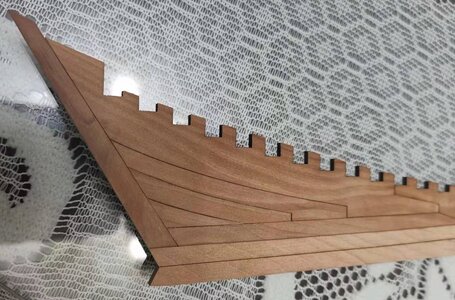
The fit of the joints is beautifull my friend, this promisses to become a beautifull build of the Bluenose
Canoe21
Lawrence
Hello Ship Mates
Well after UPS telling me that my Bluenose package would not arrive until Monday. Late this afternoon The UPS truck pulled up in front of our home with my copy of the Bluenose, this was quite a surprise.
I thank you Xiuli and Heinrich for making this all possible. Also for your very personal attention that you have given me, for this I thank you very much.
My kit was opened in customs, however they only opened the outside carton, the cello's around the Bluenose was not touched so I would presume that this kit arrived in one piece. As this is a Christmas gift from my Admiral Bernadette I shall put it aside until Christmas Day, this will be a hard thing to do but that would keep her very happy.
Heinrich I have a question for you and that is will the build instructions that you have posted on the SOS Form, will these instructions stay posted or should I copy them?
Thanks again and from what I have seen with my quick peak inside the Bluenose box I am very pleased both with the quality and the great packing method, THANKS.
Regards Lawrence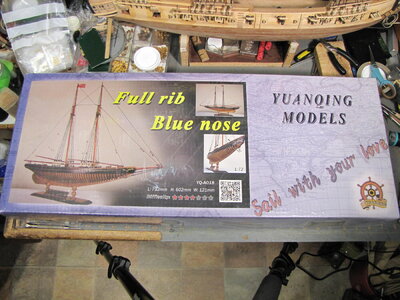
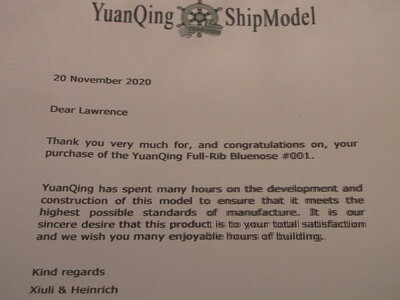
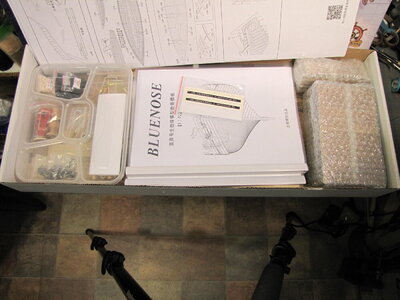
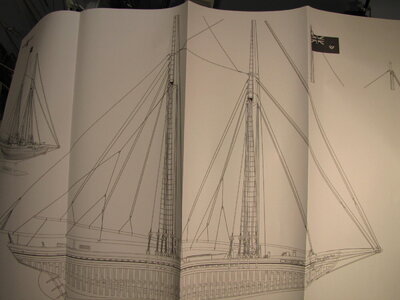


I’m so jealous!!! Congrats on #001 and for having the ship in hand!!! Frame that to keep next to ship.Hello Ship Mates
Well after UPS telling me that my Bluenose package would not arrive until Monday. Late this afternoon The UPS truck pulled up in front of our home with my copy of the Bluenose, this was quite a surprise.
I thank you Xiuli and Heinrich for making this all possible. Also for your very personal attention that you have given me, for this I thank you very much.
My kit was opened in customs, however they only opened the outside carton, the cello's around the Bluenose was not touched so I would presume that this kit arrived in one piece. As this is a Christmas gift from my Admiral Bernadette I shall put it aside until Christmas Day, this will be a hard thing to do but that would keep her very happy.
Heinrich I have a question for you and that is will the build instructions that you have posted on the SOS Form, will these instructions stay posted or should I copy them?
Thanks again and from what I have seen with my quick peak inside the Bluenose box I am very pleased both with the quality and the great packing method, THANKS.
Regards LawrenceView attachment 198378View attachment 198379View attachment 198380View attachment 198381
HI HEINRICH, I HAVE THE SAME QUESTION AS LAWRENCE DOES. GOD BLESS YOU AND YOURS STAY SAFE DON
Hello guys ,is it possible not mix up the threads ,this is Heinrich s Bluenose build log,forward all the questions about the purchase here,I can move these posts there
PAYMENT AND ORDERING
Hello Gents. The moment you have been waiting for has arrived. The PayPal is fully functional. The one requirement that I do need is your e-mail addresses. This is so that the official PayPal bill can be sent to you! Please PM (Private Message - Conversations) me with your e-mail addresses (see...
shipsofscale.com
- Joined
- Nov 15, 2018
- Messages
- 259
- Points
- 168

They may have been referring to access to the English building instructions...not sure.Hello guys ,is it possible not mix up the threads ,this is Heinrich s Bluenose build log,forward all the questions about the purchase here,I can move these posts there
PAYMENT AND ORDERING
Hello Gents. The moment you have been waiting for has arrived. The PayPal is fully functional. The one requirement that I do need is your e-mail addresses. This is so that the official PayPal bill can be sent to you! Please PM (Private Message - Conversations) me with your e-mail addresses (see...shipsofscale.com
Lets see what Heinrich says but feels like all this quesr’tions hijacking the logThey may have been referring to access to the English building instructions...not sure.
- Joined
- Jan 9, 2020
- Messages
- 10,565
- Points
- 938

Dear Peter. Thank you so much for your kind words. I must agree with you! The joints are absolutely perfect and the joint-lines are hair thin! It's so funny - I took this picture for my own reference yesterday (that is why there is no blue background!), but found that it actually shows the joint-lines better than any of my "official" pictures! I am super-happy with this!The fit of the joints is beautifull my friend, this promisses to become a beautifull build of the Bluenose
- Joined
- Jan 9, 2020
- Messages
- 10,565
- Points
- 938

Dear Lawrence - thank you VERY MUCH for this - you have made my day!Hello Ship Mates
Well after UPS telling me that my Bluenose package would not arrive until Monday. Late this afternoon The UPS truck pulled up in front of our home with my copy of the Bluenose, this was quite a surprise.
I thank you Xiuli and Heinrich for making this all possible. Also for your very personal attention that you have given me, for this I thank you very much.
Regards Lawrence


 I am very happy that you have received your Bluenose all in good order - this is the moment that to me makes everything worthwhile and is the very reason for me becoming involved in the first place..
- Joined
- Jan 9, 2020
- Messages
- 10,565
- Points
- 938

Lawrence. From my side, they will remain permanently on the forum as a reference to all builders out there. However, I do think it is a good idea to copy and save them for your personal records - one never knows what can happen in the IT world!Hello Ship Mates
Heinrich I have a question for you and that is will the build instructions that you have posted on the SOS Form, will these instructions stay posted or should I copy them?
Regards Lawrence
- Joined
- Jan 9, 2020
- Messages
- 10,565
- Points
- 938

Hello Don. As I have said to Lawrence, from my side, they will remain permanently posted on the forum, but personally, I would copy and save them to be sure! Better safe than sorry!HI HEINRICH, I HAVE THE SAME QUESTION AS LAWRENCE DOES. GOD BLESS YOU AND YOURS STAY SAFE DON
- Joined
- Jan 9, 2020
- Messages
- 10,565
- Points
- 938

Hello Zoly - thank you for your suggestion. I actually asked Lawrence to let me know ASAP when he receives the kit - so I don't mind that at all. I think that Lawrence's Bluenose #1 ties in quite well with Build Log #1!Hello guys ,is it possible not mix up the threads ,this is Heinrich s Bluenose build log,forward all the questions about the purchase here,I can move these posts there
PAYMENT AND ORDERING
Hello Gents. The moment you have been waiting for has arrived. The PayPal is fully functional. The one requirement that I do need is your e-mail addresses. This is so that the official PayPal bill can be sent to you! Please PM (Private Message - Conversations) me with your e-mail addresses (see...shipsofscale.com


