- Joined
- Jan 9, 2020
- Messages
- 10,566
- Points
- 938

Hello Reg. Welcome on the group build and for your first post here! You most certainly have a point!They may have been referring to access to the English building instructions...not sure.
 |
As a way to introduce our brass coins to the community, we will raffle off a free coin during the month of August. Follow link ABOVE for instructions for entering. |
 |
 |
The beloved Ships in Scale Magazine is back and charting a new course for 2026! Discover new skills, new techniques, and new inspirations in every issue. NOTE THAT OUR FIRST ISSUE WILL BE JAN/FEB 2026 |
 |

Hello Reg. Welcome on the group build and for your first post here! You most certainly have a point!They may have been referring to access to the English building instructions...not sure.

Hi Zoly. I think moving forward, I agree with you to place the arrivals in the Payment and Ordering section - not for my sake as I don't mind at all - but maybe for members who want to copy and save the instructions for their own records.Lets see what Heinrich says but feels like all this quesr’tions hijacking the log
From being out of touch with our Bluenose since Wednesday. . . a Saturday scan shows that there has been some excellently well asked and answered with illustrations progress. When those of us receiving the kit down the road have it in place to begin being able to look back in our forum logs will be a tardy tutorial, possibly much needed by me. I also just read and saw of the Administrative Appointment of our illustrious forum moderator. Well deserved and recognized. Rich (PT-2)Hi Zoly. I think moving forward, I agree with you to place the arrivals in the Payment and Ordering section - not for my sake as I don't mind at all - but maybe for members who want to copy and save the instructions for their own records.

It would be a pleasure in any event. Rich@PT-2 I am very happy if the tutorial can be of help. "Illustrious" forum moderator?Naah ... If I have the privilege of meeting you some day (and there are actually some wild thoughts running around in my mind as to this), you will see that I am the exact opposite.


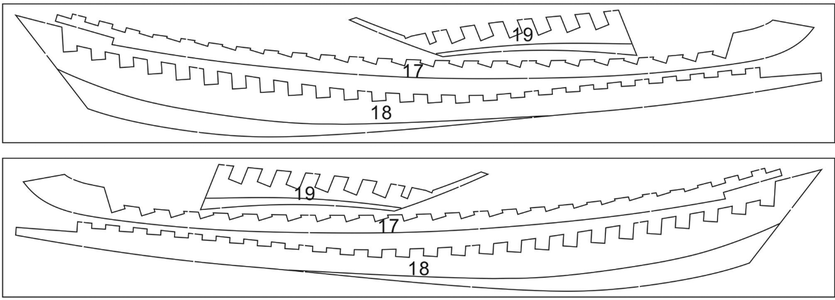
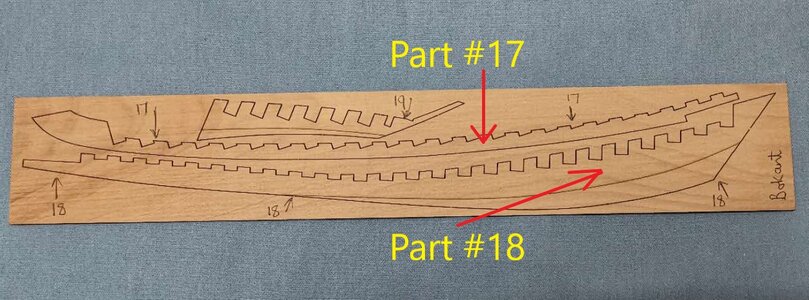
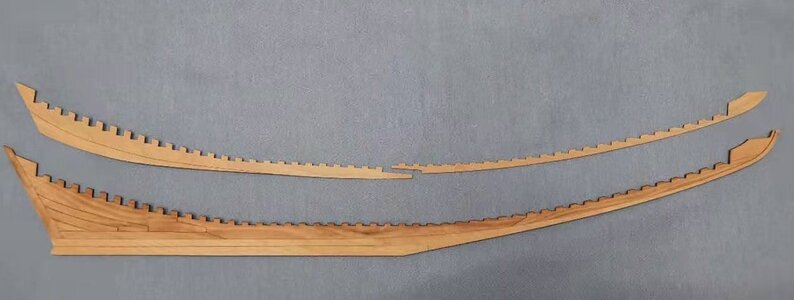
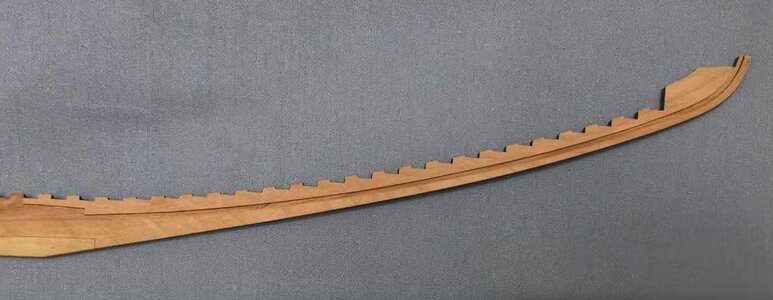 And there you go! Gents, the fit on this kit has been PERFECT so far. The notches line up beautifully. Tomorrow morning I will attach Part #17 on the Port Side. I do not like doing this in artificial light, because you can imagine that any shadow or reflection cast by light will wreak havoc on the notch-alignment. I have already discovered that if you work slowly and as accurately as you can, the kit will deliver the goods.
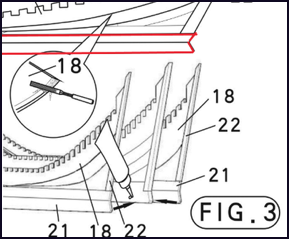
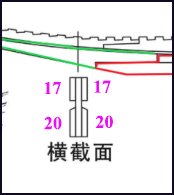
Just for fun with an English teacher writing about the bevel on #20. . . I believe that things are "Carved in Stone" and "Cast in Concrete" . . . . . I greatly appreciate your lead and explanations of this build as to progresses from "step to step" or rather "task to task". I will need all of the guidance that I can obtain and the with age probably forget most of it. (I shouldn't end that comment with a preposition. . . sorry. )Thanks, Rich (PT-2)Hello Friends
As promised, I said that I would give you an update. So let us just recap. The inner keel section has been completed and I have finished the outer keel cheeks on the BOTTOM of the starboard side. See the picture below which was also the last picture of my previous post.
View attachment 198305
Outer cheeks (comprising of Parts #20 and #21) installed at the bottom of the keel.
View attachment 198306
And yesterday I finished the outer keel cheeks on the BOTTOM of the Port side.
View attachment 198307
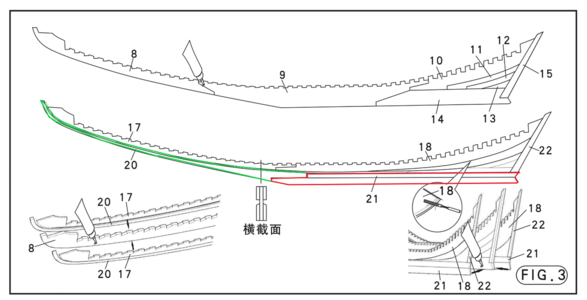
Here are the parts that we have used in the construction of the bottom-end outer cheeks - Part #20 marked in Green and Part #21 marked in Red. So from this sheet (there are obviously two such sheets - one for starboard and one for port) we have thus used only two pieces from each sheet. These two sheets can now be put away until later.
On the above drawing however, you will notice that Part #20 needs to be beveled. @DonRobinson Don has asked for additional information on the beveling and I agree fully. This is often something that is not done right or accurately enough and which then leads to detrimental effects later in the build.
View attachment 198308
The black line (just above the lower red line) is the actual bevel line on Part #20. The distance from that bevel line to the tip of Part #20 is 1.0mm to 1.5mm depending on whether you include the actual thickness of the bevel line. If you bevel so that the line is still visible, the distance is 1.0mm - if you bevel until the line is gone the bevel will measure 1.5mm. I have opted for the latter, but honestly - I do not believe that 0.5mm is going to make a difference either way.
View attachment 198309
For the benefit of all, I have measured the angle after I had beveled it and it came to approximately 22 degrees. Once again, I don't believe this measurement is cast in stone, but it does give you some indication.
View attachment 198310
The beveling shown from the side.
View attachment 198311
From the top (I do apologize for the quality of this picture - I just could not get it any clearer.)
View attachment 198313
And from the front. Obviously I still have to give all parts a final sanding, but I'm very happy with how this turned out.
SUGGESTION. Even though I beveled Part#20 first before gluing it to the inner keel, I would advise you to attach Part #20 first to the inner keel and do the beveling on the keel when the glue has dried. That way you eliminate all possibilities of breaking the tip while you do the beveling.
This is where I am now - I will continue work and keep you posted. Thank you all for watching, following, supporting and making suggestions. We already have an excellent interaction going here - keep it going!
Until later. keep well my friends and take care!

Hi Rich I would have thought the expression was "Set in Stone" it is certainly the one I know.Just for fun with an English teacher writing about the bevel on #20. . . I believe that things are "Carved in Stone" and "Cast in Concrete" . . . . . I greatly appreciate your lead and explanations of this build as to progresses from "step to step" or rather "task to task". I will need all of the guidance that I can obtain and the with age probably forget most of it. (I shouldn't end that comment with a preposition. . . sorry. )Thanks, Rich (PT-2)
Continuing the concept. . . I can see "Set on Stone" or in the example of a stone masonry wall one stone could be set within others but how could you set something in stone unless it was carved out or surrounded by other stones? Maybe that is the context of "Set in Stone". Something to think about every day. Thanks for the opportunity. Rich (PT-2)Hi Rich I would have thought the expression was "Set in Stone" it is certainly the one I know.
Allan
