YUANQING BLUENOSE - Don Robinson

Don you have made superb progress. Sometimes a project like this requires gritting the teeth - and coupled with a few walk-aways and a few shots of Vodka - an endless amount of perseverance. But like you said - when finished, the sense of accomplishment is great and then comes to the savor the moment! Well done, my friend! :) Thumbsup
Hey Heinrich, you are so right about the walk-aways, as for the vodkas I'm switching over to the Ontario this week to give my liver a break!! ROTF
 
Good morning All, Thanks for dropping by and checking things out. A small update mostly a little deconstruction then followed by reconstruction.IMG_4084.JPG
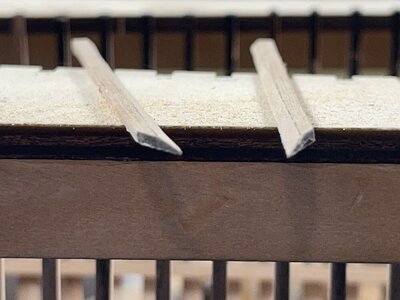
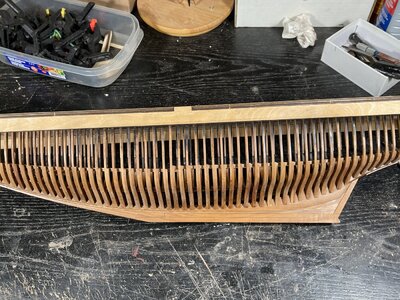
When I last left off I had these two pieces(136) attached to the inside of the hull at the bow, I had forgot to bevel them. I safely removed them and did the bevelling, here it is showing the bevel at the bow end of the strips.

IMG_4085.JPG
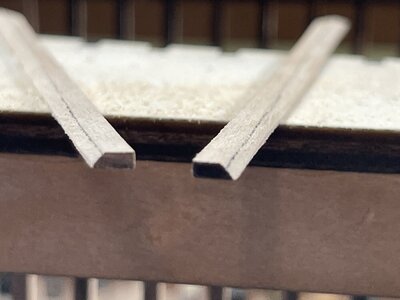
And this is the aft end of the strips, if you look close I have sanded past the etch line. I did this to try and get rid of the laser etching but it was to deep to sand off completely without ruining the piece. I do not believe this will be noticed in the final outcome of things so I was fine with this.

IMG_4086.JPG
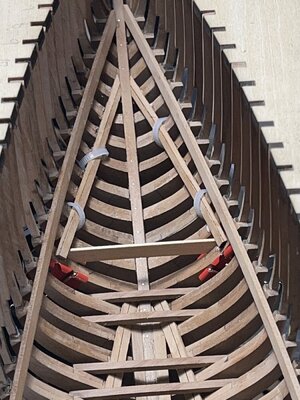
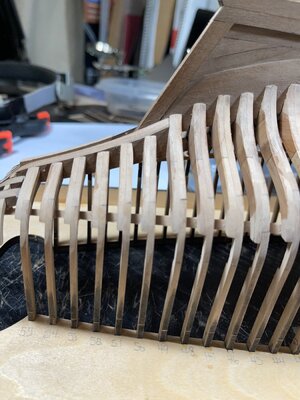
Here they are reinstalled, I should have been cleaning up excess glue rather than taking pictures! A quick trip to the local lumberyard to pick up some zip ties made clamping a little easier.

IMG_4089.JPG
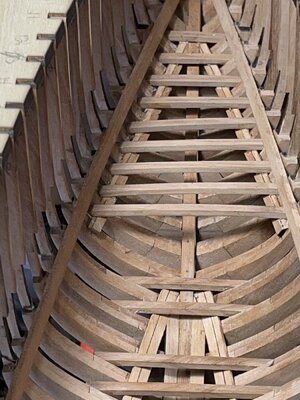
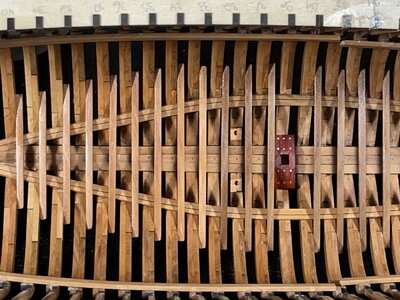
Floor beams 66-74 installed. Unlike the lower ones where there was lots of length to overlap the frames on either side for gluing some of these were just barely long enough to reach each frame making it very important to bevel pieces 136. Again I should have been cleaning glue rather than attempting to be a photographer!! :p
Thanks again for visiting
 
IMG_4087.JPG
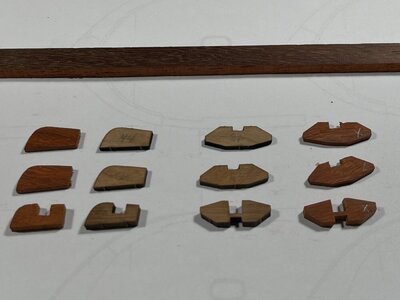
Making the mast feet pieces 43, 44, 46, 47. I decided to scratch build a set out of padauk wood. At the top of the picture is a piece that I made these from. As you can see, as with most exotic woods, it loses it bright colour after time but I can enjoy it for now!

IMG_4088.JPG
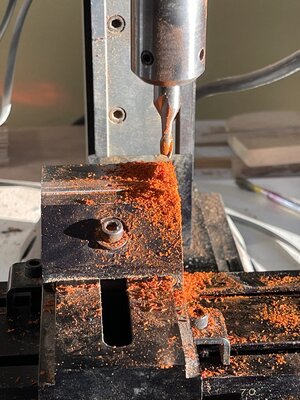
I turned around once to grab something off my other bench and seen this, the morning sun shining on the padauk wood sawdust. I thought it looked cool.

IMG_4091.JPG
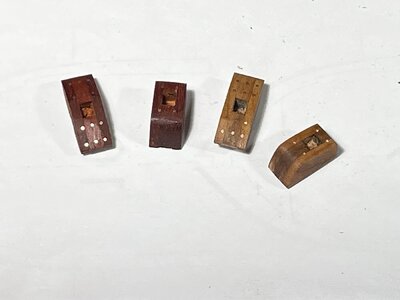
Here they are finished, I used 90 mm or 20 gauge copper wire to simulate the bolts. A little large but looks fine from a normal distance.

IMG_4098.JPG
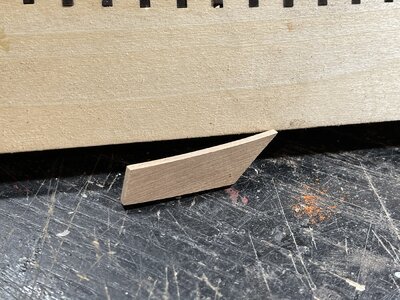
Piece 53, char has been removed and ready for installation

IMG_4100.JPG
This inserted in the gap at the stern leaving 1 mm protruding on the outside, as seen here, and flush to the frames on the inside.

IMG_4102.JPGIMG_4103.JPGIMG_4104.JPG
Then I gave it all a coat of wipe on poly. Some cleaning up was done, mostly glue spots, after these pictures and the interior got a second coat then.

IMG_4099.JPG
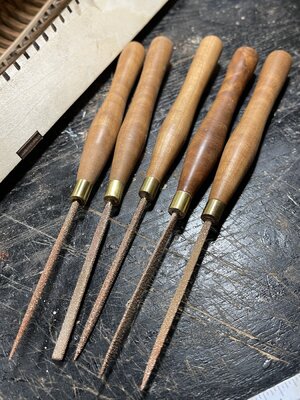
And finally for Lou @Stargazer a picture of the perma grit files with cherry handles

Thanks so much for checking in, the likes and the comments very much appreciated

Have a Good One!
 
Man oh man! There are so may things to comment on. You are right - that sawdust looks almost surreal - so bright in colour! Secondly that mast foot made out of the padauk wood looks like a million dollars. The contrast with the pear wood is vivid! Thumbs-Up Then the hull after the application of the poly has an incredible lustre to it and finally those file handles look they were made by Peter Hofer - the Austrian gunmaker. And if you don't know about him - Google him - and you will; see what I mean. Wonderful work, Don!
 
Man oh man! There are so may things to comment on. You are right - that sawdust looks almost surreal - so bright in colour! Secondly that mast foot made out of the padauk wood looks like a million dollars. The contrast with the pear wood is vivid! Thumbs-Up Then the hull after the application of the poly has an incredible lustre to it and finally those file handles look they were made by Peter Hofer - the Austrian gunmaker. And if you don't know about him - Google him - and you will; see what I mean. Wonderful work, Don!
Thanks so much Heinrich. The addition of the poly really made me aware of the quality of this kit, the wood is just beautiful! I have more uses planned for the padauk wood so hopefully they turn out as well. Thanks again.
 
Hi Don,
Good to see you have done the restauration. Otherwise, you have always looked at it and ........
Nice work and progress.
Regards, Peter
Hey Peter, thanks. I'm glad now I did change that as there would not have been a surface to glue to otherwise. The only other option would have been to make new longer beams that overlapped the frames more.
 
View attachment 219690
Making the mast feet pieces 43, 44, 46, 47. I decided to scratch build a set out of padauk wood. At the top of the picture is a piece that I made these from. As you can see, as with most exotic woods, it loses it bright colour after time but I can enjoy it for now!

View attachment 219691
I turned around once to grab something off my other bench and seen this, the morning sun shining on the padauk wood sawdust. I thought it looked cool.

View attachment 219693
Here they are finished, I used 90 mm or 20 gauge copper wire to simulate the bolts. A little large but looks fine from a normal distance.

View attachment 219694
Piece 53, char has been removed and ready for installation

View attachment 219695
This inserted in the gap at the stern leaving 1 mm protruding on the outside, as seen here, and flush to the frames on the inside.

View attachment 219696View attachment 219697View attachment 219698
Then I gave it all a coat of wipe on poly. Some cleaning up was done, mostly glue spots, after these pictures and the interior got a second coat then.

View attachment 219699
And finally for Lou @Stargazer a picture of the perma grit files with cherry handles

Thanks so much for checking in, the likes and the comments very much appreciated

Have a Good One!
Looks fantastic Don! Great work!
 
View attachment 219699
And finally for Lou @Stargazer a picture of the perma grit files with cherry handles

Thanks so much for checking in, the likes and the comments very much appreciated

Have a Good One!
I knew they would be sexy! Awesome handles Don! I like Padauk as well, but I have found that Redheart stays red (well more than padauk) and is not quite as brown when fully oxidized.
 
Last edited:
I knew they would be sexy! Awesome handles Don! I like Padauk as well, but I have found that Redheart stays red (well more than padauk) and is not quite as brown when fully oxidized.
Thanks Lou. I have never tried Redheart but will have to pick some up. I have had this padauk for over forty years now so I thought it may be time to use some of it!
 
Hello everyone hope your day is going good so far and the modelling also is going great.
It has been an extremely slow period here, the energy level has fallen to a scary low that needs to be corrected!! I have accomplished some and also acquired a new tool/toy that has perked me up somewhat. I'm thinking one more tool/toy this month and I should be back to normal once again. :) ROTF
IMG_4110.JPG
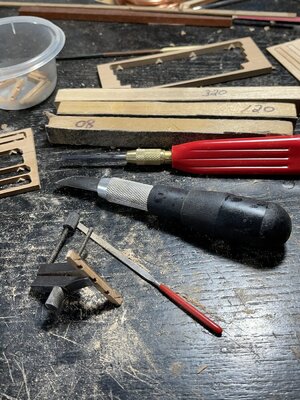
I have now gone from cleaning char to cleaning up cnc cut pieces, jury is still out as to which is more work!! The tools I used for this work: The little camp to hold the pieces(your fingers do get sore otherwise), file, exacto knife, homemade 2 mm chisel and various grits of sanding blocks

IMG_4105.JPG
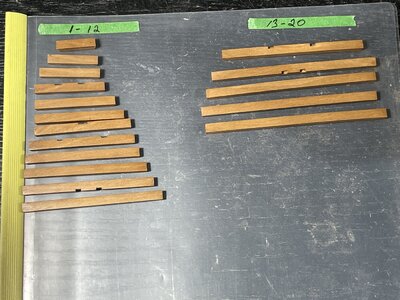
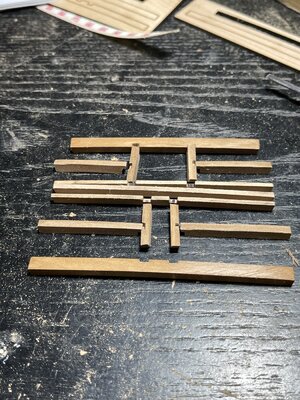
pieces cleaned up and a coat of wipe on poly

IMG_4108.JPG
installed

IMG_4107.JPG
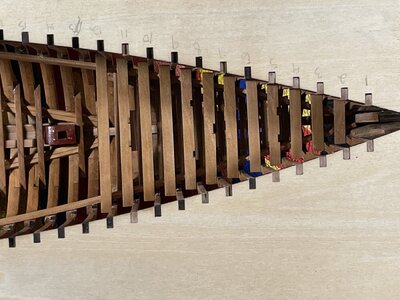
next set of frames, other than the cleaning this is a fairly easy process.

IMG_4122.JPG
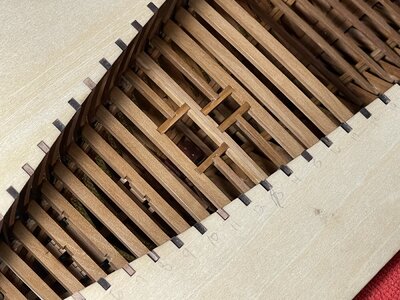
And installed, I'll need to investigate the suspicious white dots that are visible.

IMG_4115.JPG
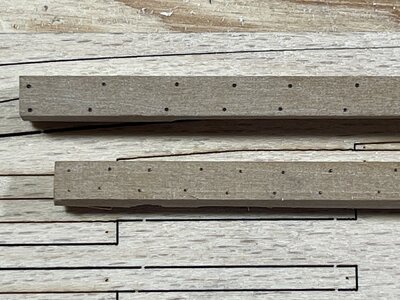
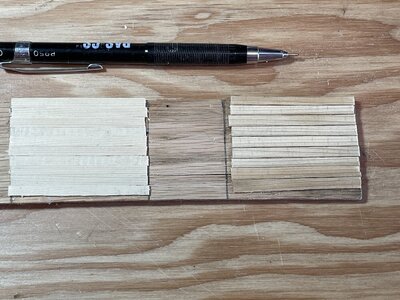
Here I am playing around trying to simulate trenails. The top two pieces are scraps of cherry from the kit and the piece lying underneath is the actual deck from the kit.

IMG_4116.JPG
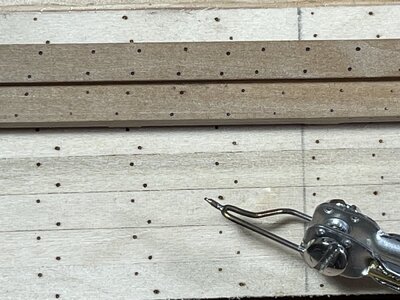
Some more practising and the tool I used. This is a wood burning pen with a .4 mm ball tip, temperature setting was at four.

IMG_4119.JPG
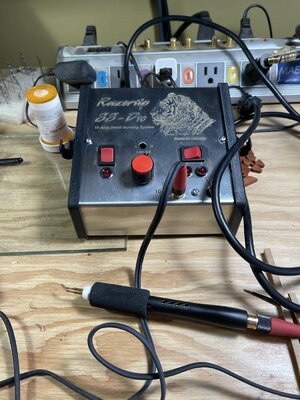
And this is the new tool/toy!! A new wood burning kit or better called pyrography. I think it has lots of possibilities. Not only wood burning but also with a max temperature of 720 C/1400 F soldering could easily be done. There is a wide range of tips to suit many needs.

IMG_4121.JPG
Here I tried it on simulating caulking on some yellow cedar. To me it looks not too bad and it was very easy to do.
Anyways I thought I would share this with you.
Have a good one and thanks for stopping in!!:):)
 
Hello everyone hope your day is going good so far and the modelling also is going great.
It has been an extremely slow period here, the energy level has fallen to a scary low that needs to be corrected!! I have accomplished some and also acquired a new tool/toy that has perked me up somewhat. I'm thinking one more tool/toy this month and I should be back to normal once again. :) ROTF
View attachment 222262
I have now gone from cleaning char to cleaning up cnc cut pieces, jury is still out as to which is more work!! The tools I used for this work: The little camp to hold the pieces(your fingers do get sore otherwise), file, exacto knife, homemade 2 mm chisel and various grits of sanding blocks

View attachment 222263
pieces cleaned up and a coat of wipe on poly

View attachment 222264
installed

View attachment 222265
next set of frames, other than the cleaning this is a fairly easy process.

View attachment 222266
And installed, I'll need to investigate the suspicious white dots that are visible.

View attachment 222267
Here I am playing around trying to simulate trenails. The top two pieces are scraps of cherry from the kit and the piece lying underneath is the actual deck from the kit.

View attachment 222268
Some more practising and the tool I used. This is a wood burning pen with a .4 mm ball tip, temperature setting was at four.

View attachment 222269
And this is the new tool/toy!! A new wood burning kit or better called pyrography. I think it has lots of possibilities. Not only wood burning but also with a max temperature of 720 C/1400 F soldering could easily be done. There is a wide range of tips to suit many needs.

View attachment 222270
Here I tried it on simulating caulking on some yellow cedar. To me it looks not too bad and it was very easy to do.
Anyways I thought I would share this with you.
Have a good one and thanks for stopping in!!:):)
Looking great Don! I know about losing momentum. I have been very busy at home planting fruit trees since it’s spring, and putting mulch in the flower beds, etc.
 
Looking great Don! I know about losing momentum. I have been very busy at home planting fruit trees since it’s spring, and putting mulch in the flower beds, etc.
When time and energy return I think that you will be well rewarded by planking your own deck an bypassing the pressed sheet piece. The new tool sounds very flexible. Have fun with experimenting. Rich
 
Hello everyone hope your day is going good so far and the modelling also is going great.
It has been an extremely slow period here, the energy level has fallen to a scary low that needs to be corrected!! I have accomplished some and also acquired a new tool/toy that has perked me up somewhat. I'm thinking one more tool/toy this month and I should be back to normal once again. :) ROTF
View attachment 222262
I have now gone from cleaning char to cleaning up cnc cut pieces, jury is still out as to which is more work!! The tools I used for this work: The little camp to hold the pieces(your fingers do get sore otherwise), file, exacto knife, homemade 2 mm chisel and various grits of sanding blocks

View attachment 222263
pieces cleaned up and a coat of wipe on poly

View attachment 222264
installed

View attachment 222265
next set of frames, other than the cleaning this is a fairly easy process.

View attachment 222266
And installed, I'll need to investigate the suspicious white dots that are visible.

View attachment 222267
Here I am playing around trying to simulate trenails. The top two pieces are scraps of cherry from the kit and the piece lying underneath is the actual deck from the kit.

View attachment 222268
Some more practising and the tool I used. This is a wood burning pen with a .4 mm ball tip, temperature setting was at four.

View attachment 222269
And this is the new tool/toy!! A new wood burning kit or better called pyrography. I think it has lots of possibilities. Not only wood burning but also with a max temperature of 720 C/1400 F soldering could easily be done. There is a wide range of tips to suit many needs.

View attachment 222270
Here I tried it on simulating caulking on some yellow cedar. To me it looks not too bad and it was very easy to do.
Anyways I thought I would share this with you.
Have a good one and thanks for stopping in!!:):)
The white looks like it is from super glue out gassing? Did you use super glue on the deck beam notches?
 
Back
Top