Thank you for the best wishes, Mike!
-

Win a Free Custom Engraved Brass Coin!!!
As a way to introduce our brass coins to the community, we will raffle off a free coin during the month of August. Follow link ABOVE for instructions for entering.
-

PRE-ORDER SHIPS IN SCALE TODAY!
The beloved Ships in Scale Magazine is back and charting a new course for 2026!
Discover new skills, new techniques, and new inspirations in every issue.
NOTE THAT OUR FIRST ISSUE WILL BE JAN/FEB 2026
- Home
- Forums
- Ships of Scale Group Builds and Projects
- HMS Alert 1777 1:48 PoF Group Build
- HMS Alert 1777 1:48 Group Build Logs
You are using an out of date browser. It may not display this or other websites correctly.
You should upgrade or use an alternative browser.
You should upgrade or use an alternative browser.
such moments are the best in life - we have to enjoy them as much as possibleTo all of my fellow friends. I am touched by your attention and best wishes on my special day. I would like to thank all of you!I cannot wish for a better day.
View attachment 225472
Happy belated Birthday Jimsky!
Thank you, my friend.Happy belated Birthday Jimsky!
Greetings all,
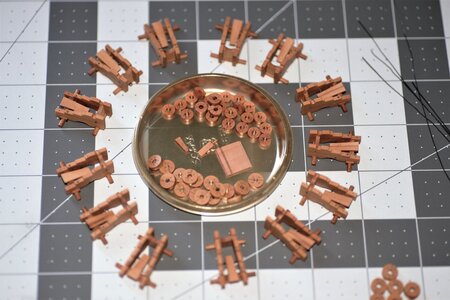
Today, I posted a small tutorial on making the trucks for cannon cartridges. Check it out. Hope you will find it useful.
Today, I posted a small tutorial on making the trucks for cannon cartridges. Check it out. Hope you will find it useful.
Making trucks for your cannon carriages
Greeting everyone. Today, I will show you a couple of ways to make your own tracks (wheels) for cannon carriages. How many times we saw the tracks supplied with the kit are out of scale, made with plywood, and not perfectly round both outside and inside? Those required some improvements so they...
shipsofscale.com
I have to say your cannons are the best I have ever seen! Fantastic craftsmanship at scale!Greetings all,
Today, I posted a small tutorial on making the trucks for cannon cartridges. Check it out. Hope you will find it useful.
Making trucks for your cannon carriages
Greeting everyone. Today, I will show you a couple of ways to make your own tracks (wheels) for cannon carriages. How many times we saw the tracks supplied with the kit are out of scale, made with plywood, and not perfectly round both outside and inside? Those required some improvements so they...shipsofscale.com
Thanks so much, Dean. It is just a visual illusion, my big guess.I have to say your cannons are the best I have ever seen! Fantastic craftsmanship at scale!
If it's illusion, then we got new David CopperfieldThanks so much, Dean. It is just a visual illusion, my big guess.
...Jim CopperfieldIf it's illusion, then we got new David Copperfield
I'm catching up on Your build log as well. This looks to be an awesome and interesting read too. I have to agree with the rest of Your fanbase about the quality of the build itself as well as the quality and amount of information.
By the way: those doors and cannons look amazing!
By the way: those doors and cannons look amazing!
Many thanks, Dan! We making those build logs in mind for others, who will build from the same kit. Hope it will help them in their future endeavorI'm catching up on Your build log as well. This looks to be an awesome and interesting read too. I have to agree with the rest of Your fanbase about the quality of the build itself as well as the quality and amount of information.
By the way: those doors and cannons look amazing!
Greetings all! I saw that the trucks tutorial get interested for many members so I decided to continue with the tutorial of making naval cannons (the way I do).  Today's topic is cannon carriages. Well, I found that making the carriages is time-consuming and becomes a burden in repetition, specifically if you have to make them for a three-decker.
  But even for Alert, I am assembling, 12 cannons are quite enough to get bored with the redundant tasks. The problem, however, that all those cannons are in the upper deck and will be exposed to the viewer's eyes. They must be presentable and somewhat identical. This might not be necessary the way, your carriages should be built, but I like this method, and I would like to share it with you. Check out my posting in the Tools lathes and techniques forum.
Hi Jim,Well, I found that making the carriages is time-consuming and becomes a burden in repetition, specifically if you have to make them for a three-decker.But even for Alert, I am assembling, 12 cannons are quite enough to get bored with the redundant tasks. The problem, however, that all those cannons are in the upper deck and will be exposed to the viewer's eyes. They must be presentable and somewhat identical.
It was some time ago I visited your build-log. I am reread.
For the last 2 weeks, it was quite here, but I think you are busy with the cannons and there carriages?
It’s like a Endless River but It’s What We (have to) Do.
Regards, Peter
Thanks, PeterHi Jim,
It was some time ago I visited your build-log. I am reread.
For the last 2 weeks, it was quite here, but I think you are busy with the cannons and there carriages?
It’s like a Endless River but It’s What We (have to) Do.
Regards, Peter


Enjoy the day ahead...
- Joined
- Apr 20, 2020
- Messages
- 6,220
- Points
- 738

my dear friend JimMany thanks for your 'likes' and valuable commentsI can't be happier!
...we shall continue with Ironworks from post #514
Earlier, we have identified the bolt passed horizontally through the 'Transom', binding the Brackets together. In our carriage, we will only imitate the bolt passed and making the bolt heads from both sides of the brackets. Another horizontal bolt passed between the brackets just behind the center of the carriage. This bolt also supported the Stool bed, which supported the Quoin.
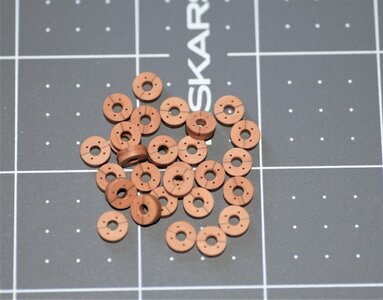
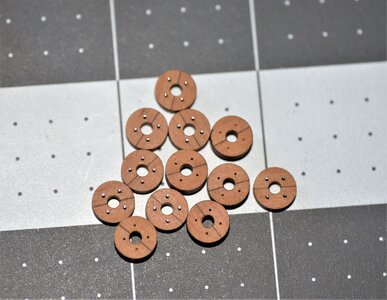
We will use the washers, we made in the previous post. First, make necessary adjustments to the sickness and the inside diameter of the washer. The washer should go pretty tight on the rod designated as the bolt. This will ensure proper soldering and horizontal alignment. Yes, that's right, you guessed it right, we will solder the washer to the rod.
View attachment 223149 View attachment 223150
View attachment 223147
The head of the bolt should be a half-round shape (like a rivet's head). This can be done in few ways: before the washer soldering or after. I found, a better way to make the head after soldering the washer. The soldering piece can be further adjusted in the lathe or any rotary tool. For example, make the washer smaller\ perfectly round, and round the bolt's head. Just leave about 1.00mm from the washer, and using the round bur make a nice bolt's head.
View attachment 223151
View attachment 223148 View attachment 223152
Unlike the first bolt, where we just imitate the heads, this bolt must be passed through both brackets as it will hold the Stool bed. This can be resolved by soldering only one side of the bolt. Another side just cut for the required size accounting for the sickness of the washer and rounded head. Then the washer will hold in place tight.
View attachment 223155View attachment 223156 View attachment 223157
View attachment 223165
Two vertical bolts passed through both halves of each bracket and through the rear axles. I represent those bolts using the square brass wire. For this wire, you need to make the square holes. This was accomplished using the simple tool from the same stock of wire. The end was sharpened however as the chisel. In the predrilled holes insert this tool until you have the perfect square, that simple.
View attachment 223164
View attachment 223162 View attachment 223163
Alright, we are pretty much done implementing upgrades. The gun's breeching rope passed through a large eyebolt which was fitted on each side of the carriage, about halfway between the two trucks.
View attachment 223168
Some other improvements are the iron Axletree loop and Linch Pin. the loop was made using brass tubing with a suitable size. The Linchpins made out of leftover PE parts fret. The holes for linchpins made when the axletree already glued. This shouldn't be the way to drill the holes for the rest of the cannons. The proper way, however, is to make the holes first (before the assembly). Because this is POC (Proof Of Concept), I drilled the holes this way (ouch!!!!!)
View attachment 223171 View attachment 223172
And here is the cartridge fully assembled with all improvements installed
View attachment 223173
View attachment 223174
.... and the barrels installed, and supervisor makes the inspection... Hope he likes it!
View attachment 223175
View attachment 223176
View attachment 223177
View attachment 223178
View attachment 223179
View attachment 223180
Well...with this, we reached the end of our cannon improvements. Hope you will find it useful for your builds... Thank you!
you are doing amazing things and I'm learning a lot from you. thank you very much

Thank you, my friend!amazing job. Love it.
This kind of quality work is rarely seen, particularly in 1:48. Outstanding! Thanks for sharing.Thanks, Peter...And after a while, you (I) can work on points for style... Yes, Mon Ami, cannons are pretty much coupled with my time while I am taking a break from the hull construction. The cannons, the way I would like to represent them in my build, have too many parts. The challenging part is to make yet another 'jigs' for later fabrications. For example Stool Bed, bolster, and Quoin, the odd parts. The good news is, I am almost done and will return to the hull assembly this week
View attachment 233793
View attachment 233794 View attachment 233795
Enjoy the day ahead...


