• LUCZORAMA SHIPWRECK SCAVENGER HUNT GIVEAWAY. 4 Weeks of Fun • 1 Legendary Prize ((OcCre’s Fram Ship)) • Global Crew Welcome!
    **VIEW THREAD HERE**

Le Saint Philippe 1693 after Jean-Claude Lemineur (Ancre) in scale 1:48

I thought you were leaning toward La Renommée
Greetings Wojitas! You are most welcome to pull up a chair.

La Renommee is certainly on the short list for a future build - but for that model I'd want to build the full ship. Or maybe L'Ambitieux? Or maybe I'll take up wood turning ROTF...

Anyway, I am unlikely to ever build SP as a full ship, so I thought it was a suitable subject for a stern section.
 
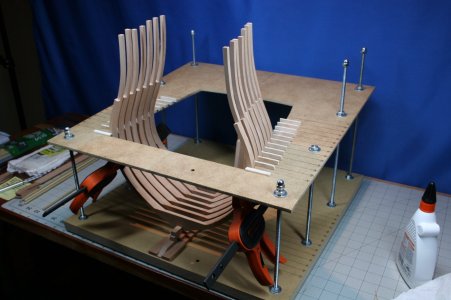
In a moment of confusion/foolishness, I decided it was OK to start glueing up frames.
How long will it be before I figure out this was a mistake ROTF :rolleyes:?

IMG_1341.JPG

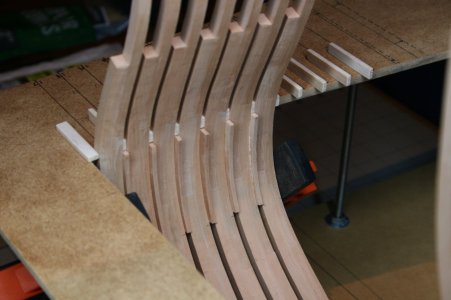
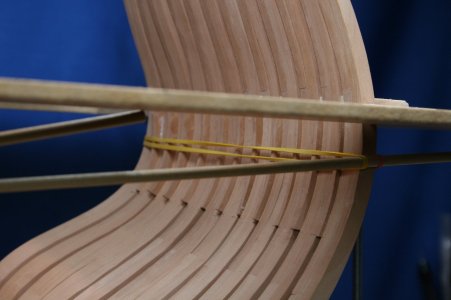
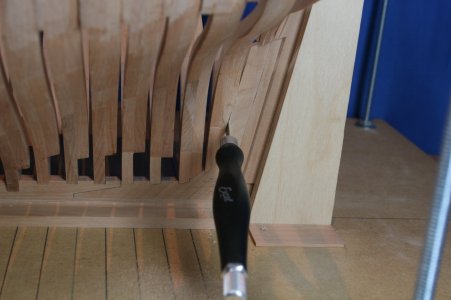
For a ship of considerable size, the SP has rather light framing. There are a number of design features that intend to reduce hogging - and I'm confident the light framing finds its origin in that place. But that leaves this warship vulnerable to cannon fire, so the framing was reinforced along the waterline with fillers:

IMG_1342.JPG

Earlier I shared an epiphany I had about scratch building: there are no instructions. Making these fillers brought to mind my second epiphany: scratch building requires making everything ROTF. These fillers should have been fast and easy...
 
Last edited:
…….. With all that said, it is enormously satisfying to look at the above images and know that I started with a few pieces of one-inch-thick lumber :) leaning against my work bench about two months ago.

… and enormously satisfying for us to look at your images and follow your fine work Paul. You’re off to a wonderful start.
 
Or maybe L'Ambitieux?
With this period and you can't choose wrong, frigate or a 3 decker either is a deadly work of art

Earlier I shared an epiphany I had about scratch building: there are no instructions. Making these fillers brought to mind my second epiphany: scratch building requires making everything ROTF. These fillers should have been fast and easy...
That's why it's called a scratch building, you do a lot of head scratching before gluing pieces..... and after too ROTFROTF
 
Well, you may be on to something, Maarten. The stern of the ship does indeed sit deeper in the water than the bow (the waterline does not parallel the keel just as you anticipated). But when I measure the frames relative to the waterline now they tip backward...perhaps even a bit more than they tip forward relative to the keel.

As for the building solution...now both you and Nigel have suggested the very same remedy. Consider it done :).
that the keel is not as a waterline is a peculiarity that few people adopt it ( for lack of information).Frank
 
Today's posting will bring this build report up to the current day...

The keel of the SP was of four segments joined in series via hooked scarf joints. Even though I am only building the stern section it happens that one of these hooked scarf joints fell within the scope of my work (I'm building a somewhat longer stern section than more typical examples).

I've made hooked scarfs by hand in the past - but have seen others fabricate them using a mill and a tilting table. I gave that a go...
While I was at it, I also milled a normal scarf into the knee of the sternpost...

View attachment 526429

View attachment 526430

View attachment 526431

An unexpected first-time success!

View attachment 526432

If you look carefully, you can see that I have also completed some preliminary shaping/tapering of the aft deadwood (and also created the rabbet at the keel and sternpost). The Saint Philippe has a (mostly) square tuck.

It is interesting to me that the monograph refers to the deadwood (edit - should have said rising wood) as a false keel. I'm not sure if this is a translation issue (my version of the monograph was translated from French) or if there was a different nomenclature in use at that time in history. I also learned that it was a known practice (late 17th century) to add a full keel (not a false keel) to the underside of an existing keel to mitigate hogging.

Anyway, here is the other side of the assembly with some of the details visible:

View attachment 526433

View attachment 526434

View attachment 526435

View attachment 526436

Where the rabbet is straight, I used my little mill. Where the rabbet is curved, I used a v-gouge (very carefully as not to ruin a piece with much already invested in it).


Finally (on the SP), the frames seat into notches along the rising wood. These were cut in with a mill - though there are two that will need to be done by hand because I can't get the mill where it needs to go because the sternpost is in my way).

The following images also show my solution to the fact that the frames are not perpendicular to the keel (they tip forward 1.2 degrees). Under the keel you will notice a 1.2 degree ramp... Now I can erect the frames perpendicular to the build-board and when I remove the ramp I'll have a forward tip to the frames.

View attachment 526437

View attachment 526438

Thanks for visiting!

P.S. My oldest grandson and I just finished his first ship model. Here we are showing off our work ROTF:

View attachment 526428
all these details are tarred with pannolate .Frank
 
all these details are tarred with pannolate .Frank
As you can see I used black tissue paper as a liner though I have seen some builders of French ships take the position that there should not be tarred joints for the centerline timbers. I happen to like the look so I included it. I hope this translates well into Italian!
 
Thanks, Mike. I’ve been making the dog’s breakfast out of this build this week so some better chairs should open soon. I had more do-overs in the last month than I did in my previous four years of ship modeling. I’ll get around to posting a progress report when I’ve made actual progress. That said, this might all be a Viking funeral.
 
Back
Top