• LUCZORAMA SHIPWRECK SCAVENGER HUNT GIVEAWAY. 4 Weeks of Fun • 1 Legendary Prize ((OcCre’s Fram Ship)) • Global Crew Welcome!
    **VIEW THREAD HERE**

HMS ENTERPRISE by Keith 1:48 scale. New Kit from M.D.

ive tappered the bottom of the deadwood to 3mm added the G parts and tapered to 4mm and its too narrow for the Ster
n post

Tearing my hair out
Cut the inner deadwood to 3 mm then added G parts and cut down to 4mm
WHY
if we are not quite correctly trimming the stern post Have i cut too much off (AGAIN)
Stern post is not attached but as you can see with the 3mm (and 4mm) it m/looks to much
But not enough higher up
I made sure the bottom was 3mm

View attachment 530724

View attachment 530725

View attachment 530726

View attachment 530727
It looks like the taper is slightly wrong on parts G1-8, there needs to be more taken from the top on both sides, so that the top is the same thickness as A-13. The deadwood assembly is centred widthwise onto A-13
 
Hi Keith, I'm jumping in late but wanted to say wow, you have another great build going here. Good looking joinery with husky framework. she looks fantastic!
 
Hi Keith, I'm jumping in late but wanted to say wow, you have another great build going here. Good looking joinery with husky framework. she looks fantastic!
thank you Need a bit of encourgement
It looks like the taper is slightly wrong on parts G1-8, there needs to be more taken from the top on both sides, so that the top is the same thickness as A-13. The deadwood assembly is centred widthwise onto A-13
You look so sad on your photo Please Smile !!
Thanks
 
It looks like the taper is slightly wrong on parts G1-8, there needs to be more taken from the top on both sides, so that the top is the same thickness as A-13. The deadwood assembly is centred widthwise onto A-13
does it need to be thinned down to take the planking later on

thanks
 
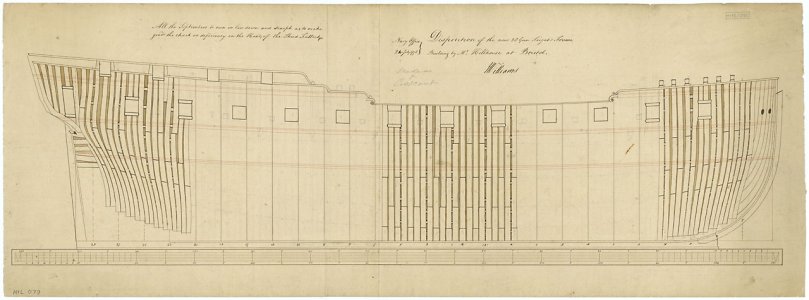
A bit late, but maybe the following will help. It is from the original contract for her sister ship Aurora.

The Stern Post to be of good sound Oak timber of the best kind, free from Defects, square at the head 15 ½ ins, fore & aft on the keel the back or false post, if any, included, 2 ft 6ins abaft the rabbet, of the wing transom 9 ins which is to run up to bolt to the quarter deck beam, & on the Keel 2ft 1 in, not to have less than 11 ins Main Post abaft the Rabbit there, the Breadth athwartships at the head to be continued down as low as the deck Transom from thence to beginst tapering to 10 ins, as before observed that the main keel is to be wrought at that place, not to be bearded until the Back is on, & then to be no more than the tapering of the keel requires.


The Inner Post to run up to the underside of the Wing Transom to be 9 ins fore & aft there, & 11 ins on the Keel, to be of the same breadth athwartships, as the Main Post from the Deck Transom up, from thence down as the body requires.
 
Jeff & all

My shaping/sanding is coming along. Started back at it since I returned from Montana.
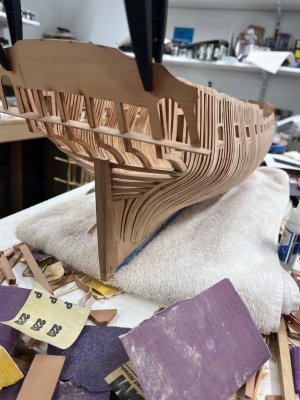
All the sanding is pretty tedious so I tackled some fitting to the transom to see if the transition from the hull flowed reasonably well.
All the counter timbers were glued up/pinned with bamboo pins and spaced out according to the dry fit transom piece with windows and everything seems to fit reasonably well and seems symmetrical so I'll finish framing and doorway next then back to finish sanding.....probably go down to 600 grit.
That's about it for now and thanks to Jeff for allowing me to jump on

Jeff & all

My shaping/sanding is coming along. Started back at it since I returned from Montana.
All the sanding is pretty tedious so I tackled some fitting to the transom to see if the transition from the hull flowed reasonably well.
All the counter timbers were glued up/pinned with bamboo pins and spaced out according to the dry fit transom piece with windows and everything seems to fit reasonably well and seems symmetrical so I'll finish framing and doorway next then back to finish sanding.....probably go down to 600 grit.
That's about it for now and thanks to Jeff for allowing me to jump on here together with his fine work.

Tim

View attachment 530699
If I may interrupt the framing progression one last time….a continuation of above photo.
As stated to finalize framing process, it lead me to installing counter timbers, last framing/ doorway etc. and simply dry fitting transom after I scratch built the trim piece which locates beneath it ( it is not supplied in the kit).
This lead to some confusion, about all the side/top trim pieces that surround three sides of the transom.
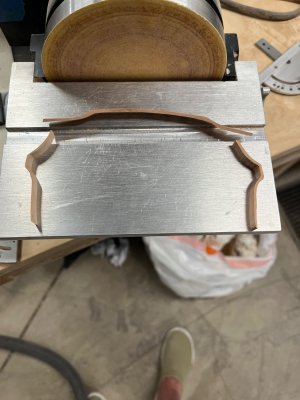
After some head scratching I decided I was not going to undertake all of the heating/bending required to get, what are flat pieces, to fit all those complex curves so I fired up the scroll saw and cut out three pieces, easily traced out using the transom as a form.
Be aware, because the transom fits the timbers on a curve, if you find this approach useful you need to cut the top piece quite wide and then trim it to proper width representing the curve and flow of the transom.
These parts are fresh off the saw and need sanding, final shaping, fitting but I think it’s a decent start.

IMG_0713.jpeg

IMG_0715.jpeg
 
Last edited:
Back
Top