• Win a Free Custom Engraved Brass Coin!!!
    As a way to introduce our brass coins to the community, we will raffle off a free coin during the month of August. Follow link ABOVE for instructions for entering.

School for Shipmodel Building School for model ship building

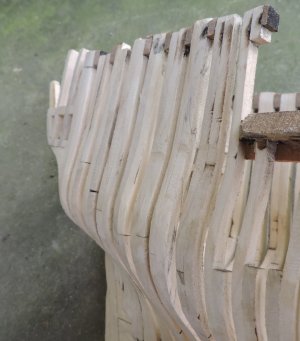
Looking at the green spot at the start makes you wonder how will all this flow together? The rough chunky build once sculpted and finished it does all come together with tight joinery and a smooth flowing shape.
stern51.jpg

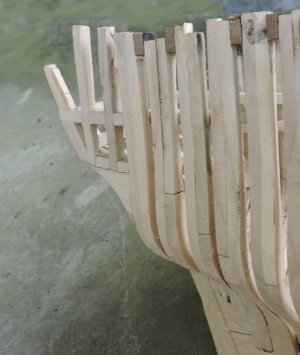
This is why the shaping of the hull stops short of the final shape and finish. once the stern is tied into the hull is when you sand the hull to it final shape. By not shaping the hull bulkheads or frames depending on your build, it give you that little extra material to blend everything together. The block at the bottom is now nicely shaped and a perfect backing for the end of the wale
.

stern52.jpg
 
Last edited:
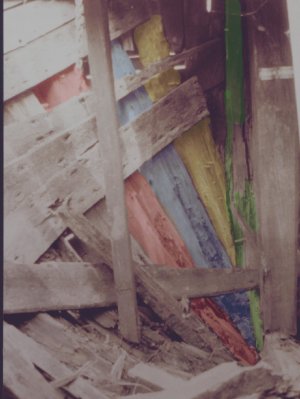
Now that the stern is part of the hull there is one more area to look at. Here is a picture i took of a shipwreck looking at the inside of the bow. The tinted timbers are the cant frames and the green timber is the knighthead which runs up both sides of the stem and holds the bow sprit from moving from side to side. It is that dark area between the first (yellow) frame and the knighthead that is of interest.

A23B.jpg

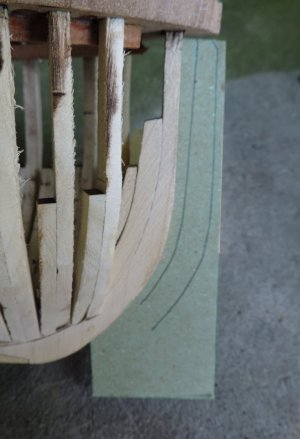
that dark area is the open spot in the hull between the first cant frame and the stem. so the first thing is to trace the shape of the stem


shaping1.jpg

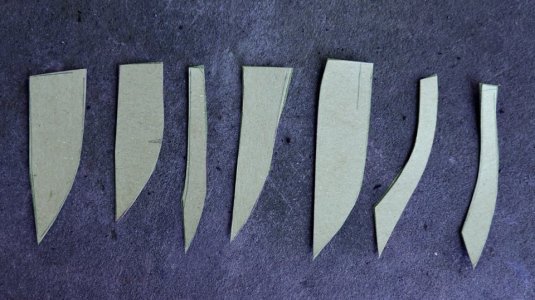
fitting the knighthead took a few tries at a pattern to get it just right.

shaping2.jpg

One i got the pattern i liked i traced it on to wood and cut out the knightheads

shaping3.jpg

The dark area in the wreck is filled in with a bow timber also known as the hawse timber because a hawse hole is bored through the top part for the anchor rope or chain.

shaping4.jpg

This last timber in the bow is tough to fabricate and fit. It took me several tries to get it just right.

shaping5.jpg

This is the final results of semi-scratch building a plank on frame hull. The wood used in this project is Red Maple which as you can see is not red, the wood is also called Soft Maple and unlike the name it is not "soft" it is softer than Hard Maple which is in fact hard, it is like Cherry in hardness. In time the whitish color will oxidize to a honey color.

shaping6.jpg
 
Last edited:
That ends todays class on art copies art and building the green spot.

Next Saturday it is about adding gun port sills and the wales.

so until then happy modeling to you all. i am off to the power museum to photograph and study the engine used in the White Swan to continue that class with the design and fabrication of an engine room diorama. Whoever thought research was boring is so wrong, it is road trip time.
 
Next Saturday it is about adding gun port sills and the wales.

Well it is next Saturday and it will not be about the gun port sills and wales.

so

welcome all to this Saturday's class it is about a step before adding wales

if you are building a kit some instructions will suggest beveling the edges of the bulkheads, some instructions say nothing and expect you to know what to do. For beginners they might find themselves having problems with planking and will come to a forum such as this and the advice will be simple "you have to bevel the bulkheads". This is true but a very simplified answer to what actually has to be done.
 
This class today is titled

Faring the Hull

A step in finishing a hull is almost impossible with a plank on bulkhead kit with bulkheads spaced far apart. Kit makers approach the problem by double planking the hull, the first layer of planking provides a surface that has to be corrected and fared. No matter how careful you are you still will not end up with a fared hull. The next step would be to use a wood filler to coat the hull and a final sanding before the final layer of planking is applied. Another approach is to fill the spaces between the bulkheads with filler blocks. I have done this and i found out if your using a softer material than the plywood bulkhead the filler sands quicker and leave a slight raised edge at the bulkhead. Out of the two methods above double planking and a wood filler over the hull gives the best results. Planking will follow the shape of the hull so if you have to force the run of planking your hull is not fare.

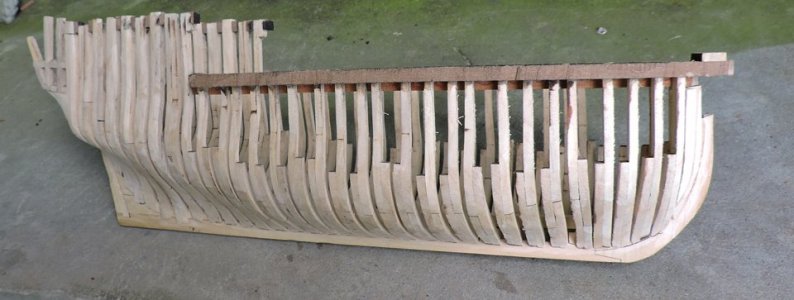
Take a look at the framed hull of the Sir Edward Hawke it looks good but if i tried to plank this hull i would run into all kinds of problems. Just looking at the hull you do not see the problems so let's see what happens from building a hull and faring a hull.

shaping7.jpg
 
Last edited:
in actual wooden ship building the term DUBBING: which is the process of dressing the frame timbers with an adz. so the planking will lay fare and flat to the hull. This is what has to be done to the hull and not using an adz just sanding. Another tool will be a batten which is nothing more than a thin piece of wood. Now all the imperfection will show.
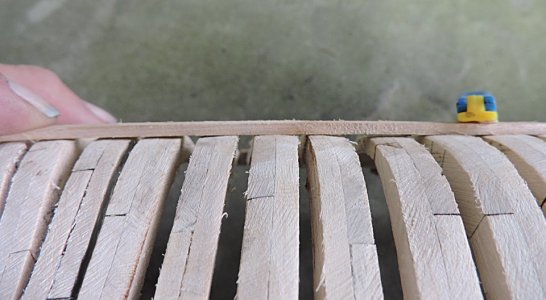
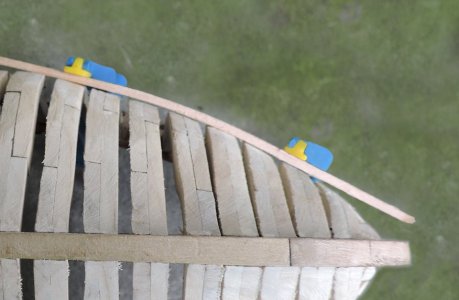
you can see to the right one frame to the left of the clamp is low to the left we have a low spot right before my fingers. Looking at the batten if i were to clamp a plank to the hull at the blue clamp i would end up with a low spot i the finish planking

shaping8.jpg

In this area the higher planks in the middle are sanded down and the batten is touching all the frames


shaping9.jpg

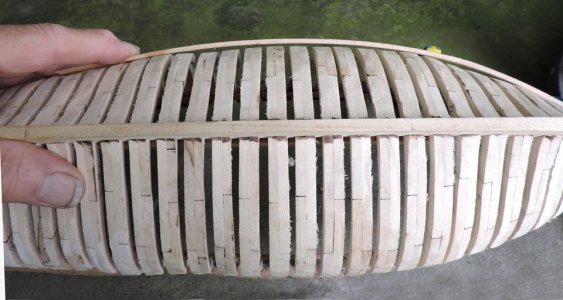
expanding the area making sure the batten is touching all the frames. You can also check the hull shape by watching the curve of the batten. You want to watch for a smooth continuing flow with no high or low spots. The batten is the clue as to how the planking will lay and follow the run of the hull.

shaping10.jpg
 
Last edited:
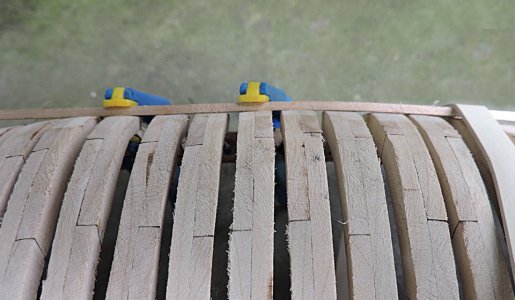
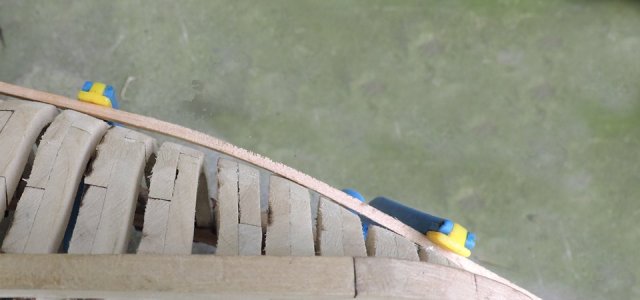
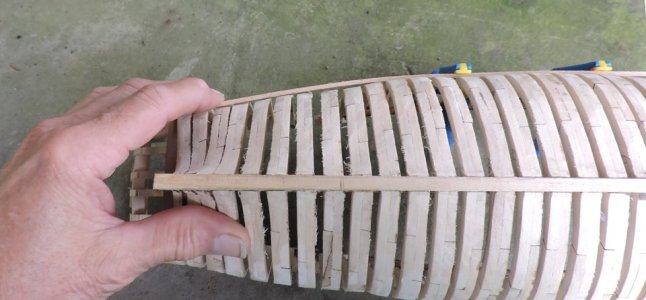
Where you will see problems is at the bow and stern where the frames are taking a drastic change in shape. This area of a hull's problems starts on the drawing board because the frame shape is changing from frame to frame. Just using light pressure from the clamp causes the batten to bend upward. So the problem is not as drastic as you see.

shaping11.jpg

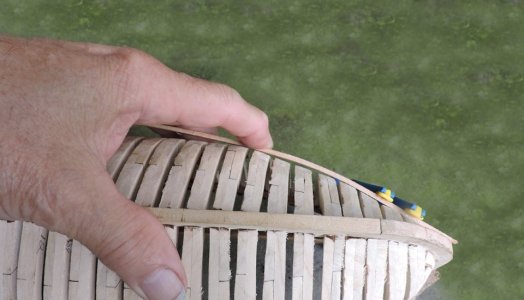
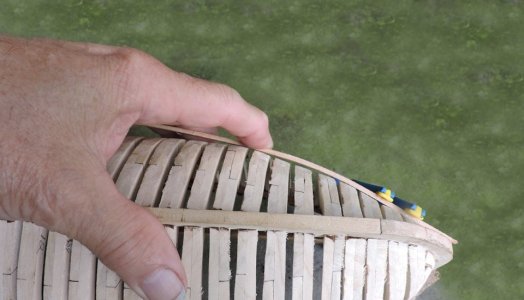
A little more pressure with a touch of a finger does give a little more accurate shape to the problem area. It is still there but fixable.


shaping12.jpg

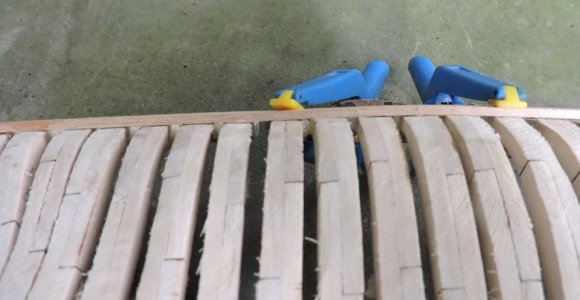
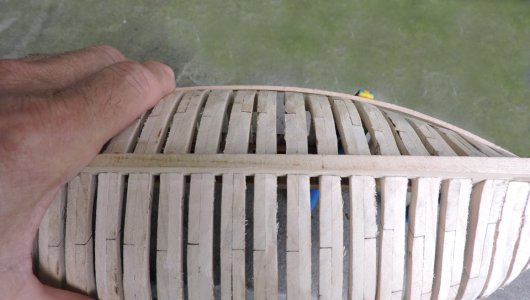
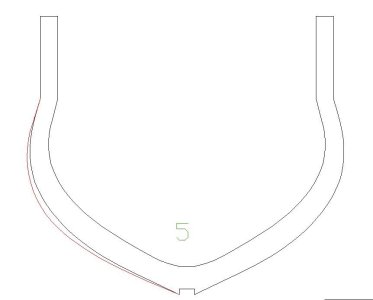
Moving further back on the hull the batten is showing a smooth curve, so the problem are frames 5 , 6 and 7 are low. Looking at the hull you would not see the low spot thus the use of a batten. If this were a plank on bulkhead odds, are you would not catch the error until the final planking goes on and at that point it is too late.

shaping13.jpg
 
Last edited:
Ways to fare the hull the problem is with the frames so sanding down the frames before and after the low spot by my finger and by the clamps.

shaping14.jpg

By sanding it is bringing the hull to a fare curve, we are looking very close so the slight gap is easily filled with glue if the hull is to be planked. One thing to consider by sanding the higher areas of the hull to fare into the lower areas you removing material from those higher frames and depending how much material you have to work with you may end up sanding the molded dimension of the frame to thin. What Hahn did when he drew the frames shapes for the Sir Edward Hawke is he drew them heavy to allow for problems such as this. So there is enough material on the frames to build the hull with a margin of + or_ and enough material to fare the hull. This is a typical technique is scratch building to build oversize to allow for a finer and finer finish.

shaping17.jpg
 
The school project is a prototype for anyone wanting to build the Sir Edward Hawke so finding the errors in frames 5, 6 and 7 the best thing to do is correct the frames before a set of frames are offered. There was enough material to fare the hull as is in the prototype but at this stage i did go back to the drawing board and make an adjustment by adding to the frame shape.

If you are building a framed hull it is a good idea to keep checking the frames as they are installed into the hull with a batten. finding an error at this point would require ripping out the frames and replacing them. Which comes to mind from the expert builders "learning how to take apart a model is as important as building one"

new frame 5.JPG
 
Last edited:
Here we see low frames approaching the stern. The difference here from the bow is the distance between the last clamp and my fingers. This is telling me the frames aft of the clamp and in front of my fingers are to bold and once this larger section is sanded those low frame will disappear. At the bow the distance was very short fore and aft of the low section so there was not enough of a run to fare them in. At the stern i have a long run to fare the hull.


shaping15.jpg
 
What we have here is showing what happens when faring a hull using a batten or what happens when planking a hull. The plank or batten will always bow outward and never inward. A ship's hull is not a bulging shape it has areas that are both concave and convex and they have to flow into one another. So you have to mindful when faring a hull it depends on the area being fared and how it relates to the entire hull. Dubbing is done in short runs and then in long runs to make sure what you did in a small area flows into the over all shape.

faring a hull is a step necessary for both plank on frame and plank on bulkhead. I have heard it said i don't need to know or understand ship building nomenclature or how it was really done. All i need is to follow the provided instructions found in the box. Well good luck with that those instructions are simplified and you as the builders in most cases are expected to fill in the blanks.

now you know dubbing and faring and what it means for a successful planking job.

shaping16.jpg
 
Last edited:
ok class dismissed please feel free to add to the lesson plan or ask questions.

my wife is involved in the local theater and i am often drafted into making props so it will be a busy week. Hopeful i can get to those wales.

happy building
 
oops i forgot to mention a sanding sled. When faring a hull POB or POF i do not use a sanding block the flat edges might get caught in the edged of frames or dig in whare i do not want. a sled with rounded ends slide along. Jusy make sure the flat mid section of a sled spans at least 4 frames. This works if you have filler blocks on a POB hull or sanding the first layer of planking.

shaping18.jpg
 
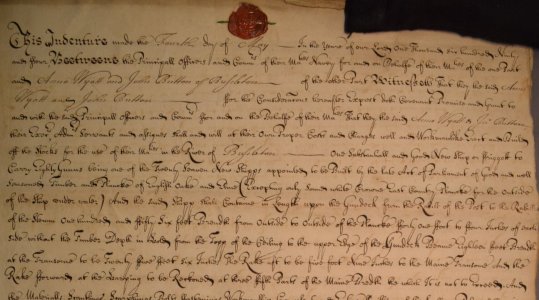
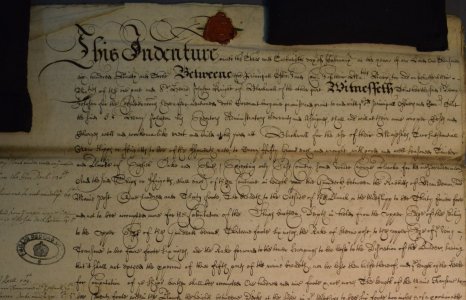
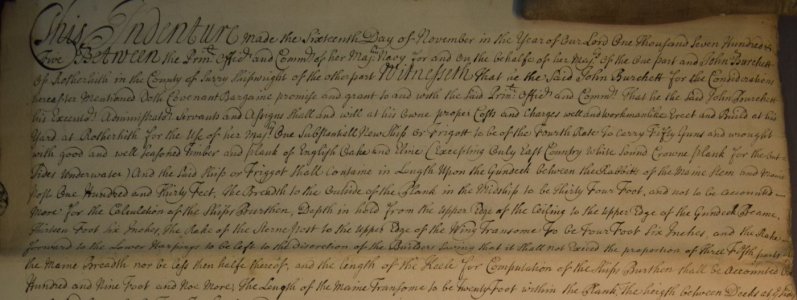
a note when using books on ship building some dating a hundred or so years old spelling becomes questionable. Trying to read old contracts or what was called a daybook which was a book of notes by a master shipwright dating back to 1780s gets hard to follow.

Brought to my attention the word baton and batten were used. either the writers misspelled a term or that term or word was a locally used. Same with the word fare and fair either one is correct, i guess.
 
Trying to read old contracts
Great suggestion Dave! Reading them can be a frustrating experience and the older they are the harder they are to read in my experience. Little or no punctuation, capitalizing unlike today, amd abbreviations with or without a tilde, makes for an interesting way to spend some hours/days. The website for the National Archives in Kew, England offers a free tutorial in paleography that is a big help.
Allan

Some samples

Cumberland (80) 1694
1756138629205.jpeg


Romney (50) and Colchester (50) 1693
1756138778182.jpeg
St. Albans (54) 1705

1756138898999.jpeg
 
Another Saturday and another class this will be about those wales no not the whales this is about
In a maritime context, wales (also spelled “wales” or “wale”) refer to the thick planks or strakes running horizontally along the side of a ship, typically part of the hull. These are often thicker or broader than the other planks to provide extra strength and protection to the hull. Key points about wales include:

Structural Integrity: Wales help to reinforce the structure of the ship, providing support and stability.
Protection: They act as a protective barrier against damage from minor collisions, such as bumping into a pier or fending off floating debris.
Aesthetic and Functional Role: Wales can also play a role in the aesthetic design of a ship and are crucial for the functional aspect of distributing stress and strain across the ship’s hull.
 
Back
Top