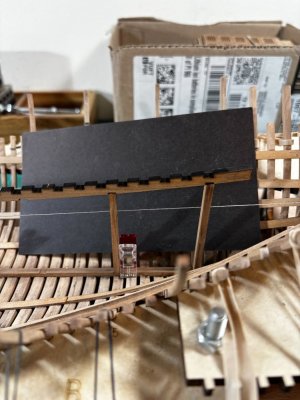
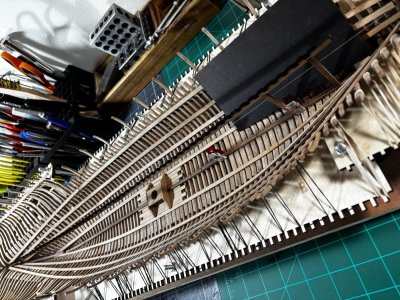
I know what you mean Grant. I have now spent 3 days on 4 little gun ports, the jig itself runs through the ports hindering access which I can't remove just yet, I need to install the rear deck beams first. Oh well, enough wining on my part, next I get to set vertical supports down on the center of the keelson in preparation for the deck beams.I sometimes think it is more fun to have these challenges and at other times my swear jar just fills up
-

Win a Free Custom Engraved Brass Coin!!!
As a way to introduce our brass coins to the community, we will raffle off a free coin during the month of August. Follow link ABOVE for instructions for entering.
-

PRE-ORDER SHIPS IN SCALE TODAY!
The beloved Ships in Scale Magazine is back and charting a new course for 2026!
Discover new skills, new techniques, and new inspirations in every issue.
NOTE THAT OUR FIRST ISSUE WILL BE JAN/FEB 2026
You are using an out of date browser. It may not display this or other websites correctly.
You should upgrade or use an alternative browser.
You should upgrade or use an alternative browser.
Good evening all,
I reset the vertical partial ribs by filling in with additional ribs sections, this made more sense than removing and replacing the pieces. The width of the aft openings is still 2mm too narrow. I will adjust this after I remove the upper section of the jig giving me room to operate.
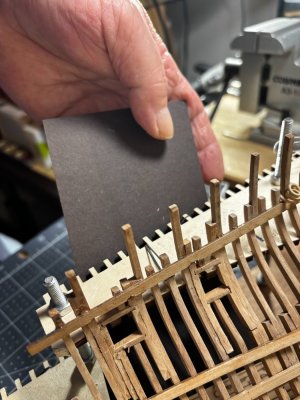
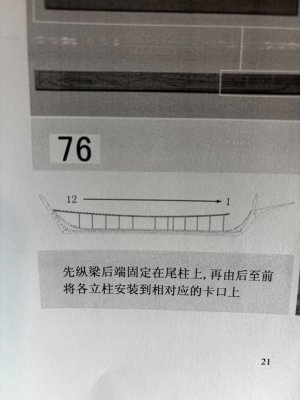
I began setting the lower support columns, they are heavily charred. For alignment I set a stringline on the port side of the keelson and used a 90deg angle off the top of the keelson.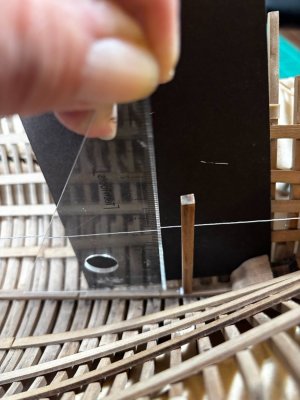
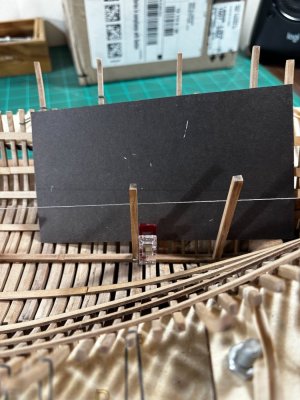
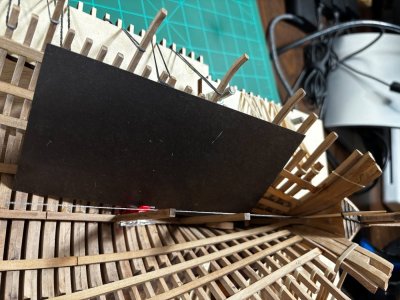
This shows the layout. Typically, one would need to wait till all columns are set and the top longitudinal beam set on them before you would know for sure if the deck beams will set in correctly. I'll need to find a way to periodically check this deck beam fit, it's a lot of work to go through to not have a good fit.
Thanks for checking, till next time!
What's up with having to use the attachment editor on almost every photo??
I reset the vertical partial ribs by filling in with additional ribs sections, this made more sense than removing and replacing the pieces. The width of the aft openings is still 2mm too narrow. I will adjust this after I remove the upper section of the jig giving me room to operate.

I began setting the lower support columns, they are heavily charred. For alignment I set a stringline on the port side of the keelson and used a 90deg angle off the top of the keelson.


This shows the layout. Typically, one would need to wait till all columns are set and the top longitudinal beam set on them before you would know for sure if the deck beams will set in correctly. I'll need to find a way to periodically check this deck beam fit, it's a lot of work to go through to not have a good fit.

Thanks for checking, till next time!
What's up with having to use the attachment editor on almost every photo??
Hi Daniel. Don’t the heights of the posts need to be customized for each deck beam before gluing them in place?
Good morning Daniel. Whew some serious accuracy needed here. Look like you have it sorted tho. Maybe check each beam as you lay each column - just in case? Cheers GrantGood evening all,
I reset the vertical partial ribs by filling in with additional ribs sections, this made more sense than removing and replacing the pieces. The width of the aft openings is still 2mm too narrow. I will adjust this after I remove the upper section of the jig giving me room to operate.
View attachment 543571
I began setting the lower support columns, they are heavily charred. For alignment I set a stringline on the port side of the keelson and used a 90deg angle off the top of the keelson.View attachment 543572View attachment 543573View attachment 543574
This shows the layout. Typically, one would need to wait till all columns are set and the top longitudinal beam set on them before you would know for sure if the deck beams will set in correctly. I'll need to find a way to periodically check this deck beam fit, it's a lot of work to go through to not have a good fit.
View attachment 543585
Thanks for checking, till next time!
What's up with having to use the attachment editor on almost every photo??
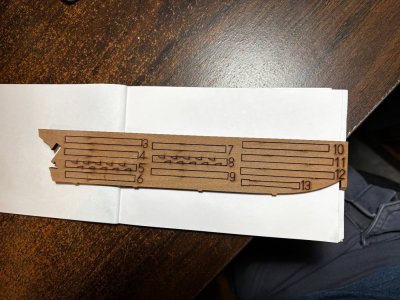
Thats a great question Paul. The post are numbered and have differing lengths. This leads me to assume they have been pre customized but I will not make that assumption. I've set post 1&2 so ill jump over and set the aft post #12 then dry set the longitudinal beam on and check the fit not only of the rest of the post but the deck beams as well.Hi Daniel. Don’t the heights of the posts need to be customized for each deck beam before gluing them in place?
Thank you Günther.Hey Daniel,
As always, the work you're showing is beautiful. Really beautiful ...
Hi Grant, the way I see this now is it's not 1 deck beam per post. I have to set a notched longitudinal beam down first, notched on the bottom to match the post and notched on the top to match the deck beams.Good morning Daniel. Whew some serious accuracy needed here. Look like you have it sorted tho. Maybe check each beam as you lay each column - just in case? Cheers Grant
Daniel,
That full view image just above WOW!!!
That full view image just above WOW!!!
John, this ship is full of ribs and char!Daniel,
That full view image just above WOW!!!
Good afternoon all,
I installed all the post and the main longitudinal timber that sits on them. A whole lot of de-char with a file.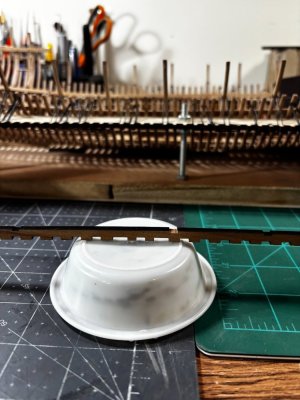
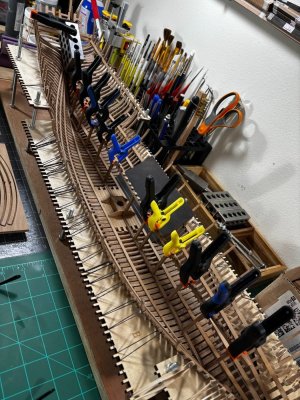
Then it became time to check cross beams and sure enough the built in curvature did not work with the center support and the clamp strakes. I used the monograph to get my clamp heights and obviously there is a disconnect between the kit and ANCRE. Not to be detoured I carefully laid out the new required clamp strake alignment, cut the repair piece which is a long-honed strake and glued it down on top of the previous clamp. Towards midship the deck beams fit just fine as you can see by the shape of the fix.
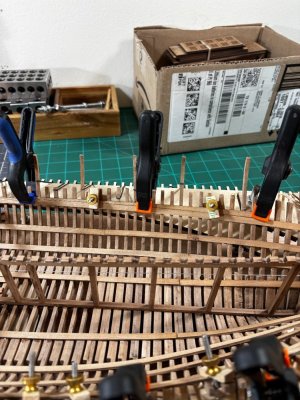
Then I set the first deck beam in, trimmed it to fit and she's good to go. I chose every 5th deck beam to determine the profile of the honed addon clamp.
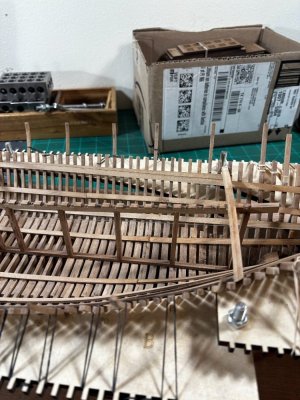
These challenges weather due to the kit, ANCRE, or bad judgement on my part will not hold me back. Its wood, I can deal with it.
Thanks for looking in on me, have a great one!
I installed all the post and the main longitudinal timber that sits on them. A whole lot of de-char with a file.


Then it became time to check cross beams and sure enough the built in curvature did not work with the center support and the clamp strakes. I used the monograph to get my clamp heights and obviously there is a disconnect between the kit and ANCRE. Not to be detoured I carefully laid out the new required clamp strake alignment, cut the repair piece which is a long-honed strake and glued it down on top of the previous clamp. Towards midship the deck beams fit just fine as you can see by the shape of the fix.

Then I set the first deck beam in, trimmed it to fit and she's good to go. I chose every 5th deck beam to determine the profile of the honed addon clamp.

These challenges weather due to the kit, ANCRE, or bad judgement on my part will not hold me back. Its wood, I can deal with it.
Thanks for looking in on me, have a great one!
That looks wonderful !
It needs a lot of measuring to get all those parts together in a good alignment, Daniel. At the end your step-by-step approach will give a acceptable result. The sheer of the cross beam looks nice. But it’s a big challenge to make a combination of both ZHL and the ANCRO plansets.Good afternoon all,
I installed all the post and the main longitudinal timber that sits on them. A whole lot of de-char with a file.View attachment 544334View attachment 544335
Then it became time to check cross beams and sure enough the built in curvature did not work with the center support and the clamp strakes. I used the monograph to get my clamp heights and obviously there is a disconnect between the kit and ANCRE. Not to be detoured I carefully laid out the new required clamp strake alignment, cut the repair piece which is a long-honed strake and glued it down on top of the previous clamp. Towards midship the deck beams fit just fine as you can see by the shape of the fix.
View attachment 544336
Then I set the first deck beam in, trimmed it to fit and she's good to go. I chose every 5th deck beam to determine the profile of the honed addon clamp.
View attachment 544337
These challenges weather due to the kit, ANCRE, or bad judgement on my part will not hold me back. Its wood, I can deal with it.
Thanks for looking in on me, have a great one!
Regards, Peter
Good morning Daniel. I see how it all fits together now. It makes sense with all the curves in the decking of these ships. It certainly looks like you have owned this -Way to go. I don't know if you are going to leave some of the ship open to see the internal frames etc, but it looks impressive. Cheers GrantGood afternoon all,
I installed all the post and the main longitudinal timber that sits on them. A whole lot of de-char with a file.View attachment 544334View attachment 544335
Then it became time to check cross beams and sure enough the built in curvature did not work with the center support and the clamp strakes. I used the monograph to get my clamp heights and obviously there is a disconnect between the kit and ANCRE. Not to be detoured I carefully laid out the new required clamp strake alignment, cut the repair piece which is a long-honed strake and glued it down on top of the previous clamp. Towards midship the deck beams fit just fine as you can see by the shape of the fix.
View attachment 544336
Then I set the first deck beam in, trimmed it to fit and she's good to go. I chose every 5th deck beam to determine the profile of the honed addon clamp.
View attachment 544337
These challenges weather due to the kit, ANCRE, or bad judgement on my part will not hold me back. Its wood, I can deal with it.
Thanks for looking in on me, have a great one!
Thank you Jeff.That looks wonderful !
2.75 is about a good average Rob. They all have the same width of 3mm which is the thickness of the planks they were laser cut out of, and they taper down to 2.5 to 3mm at the top. They are very skinny, every so often I get too close and pluck a few of the taller ones but haven't broken any yet which is amazing.Daniel, how thick are those ribs? I was looking at the monograph I just got and in there Boudriot states they are 5 French inches which scales out to .11 imperial inches or 2.75mm at 1/48th.
Hi Peter, the sheer of the main support beam looks very good, and it dictates the longitudinal sheer. The curvature of the deck cross beams is in my mind severe, so by adjusting the clamp strakes relative to the main support beam and curvature of the deck beams should yield a pleasing look to the fully planked deck. At some point I will need to cut out a section of the main support beam to allow for the main mast to come through as well as the other openings in the central part of the deck.It needs a lot of measuring to get all those parts together in a good alignment, Daniel. At the end your step-by-step approach will give a acceptable result. The sheer of the cross beam looks nice. But it’s a big challenge to make a combination of both ZHL and the ANCRO plansets.
Regards, Peter


