• Win a Free Custom Engraved Brass Coin!!!
    As a way to introduce our brass coins to the community, we will raffle off a free coin during the month of August. Follow link ABOVE for instructions for entering.

HMS ENTERPRISE 1774 by RichardJJS 1:48 scale. New Kit from M.D

Thats CRAP
The Illustations are totally different from what is provided in the Kit
No doors There arnt even any illustrations So ive produced some 3D printedView attachment 553417Where is all the detail shown in the Instructions which i downloaded before buying the Kit

View attachment 553418
Then i looked at the Beams which in Branford are Great
BUT they arnt even marked
THe Instructions are available to download before buying and this is what i did

THE KIT INSTRUCTIONS are almost from another kit

I hoped this would be a model i could be proud of
Ive been building kits for 50 years
One Victory sold at Sotherbies for 5000 pounds
Just so disappinting as Ive finally run out of money

I will send photos of my Current Victory whigh i eed to Finish Rigging and a San Filepe Hull whic i built

View attachment 553419View attachment 553420

View attachment 553416
Hi Richard, please refer to the reply I provided here: https://shipsofscale.com/sosforums/...prize-1774-the-1-48-version.13661/post-473690
 
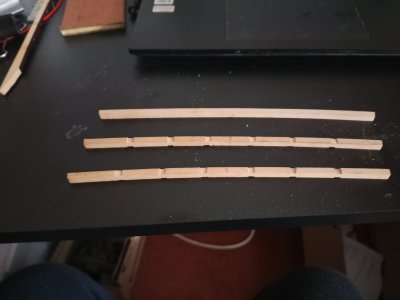
While i am waiting for the Hawse Pieces i decided to start Cutting the BEAMS
So Its the instructions that are not good
With help there are three sets of Beams
D1 and D2 LOWER DECK the illustration show how to cut a (Fore) and b Stern Cut outs for Carlings
D3 and D4 GUN DECK
E1 Is UPPER DECK
Unlike the Brandford where its a sandwich of 1Thin 1 Medium and 1 Thin which puts the Cut outs on the beam correctly placed
I guess because of wood colours people didnt like this so we cut them out ourselves
Once i worked it out its VERY easy made a jig for 4mm Carlins and flicked the middle out with a number 22 blade (Which id curved)

I Just wish it was in the instructions Not everybody has build POF Ships

IMG_20251029_123543.jpg
 
Last edited:
While i am waiting for the Hawse Pieces i decided to start Cutting the BEAMS
So Its the instructions that are not good
With help there are three sets of Beams
D1 and D2 LOWER DECK the illustration show how to cut a (Fore) and b Stern Cut outs for Carlings
D3 and D4 GUN DECK
E1 Is UPPER DECK
Unlike the Brandford where its a sandwich of 1Thin 1 Medium and 1 Thin which puts the Cut outs on the beam correctly placed
I guess because of wood colours people didnt like this so we cut them out ourselves
Once i worked it out its VERY easy made a jig for 4mm Carlins and flicked the middle out with a number 22 blade (Which id curved)

I Just wish it was in the instructions Not everybody has build POF Ships

View attachment 553474
You have skills Richard.
 
HAWSE PIECES HAVE ARRIVED
Thanks Victor
Finishing off inner planking
Ill build the hawse and no 1 on inner planking
 
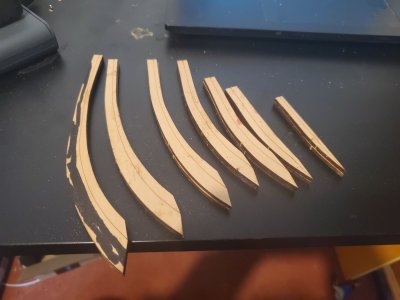
restarting the Hawse Pieces
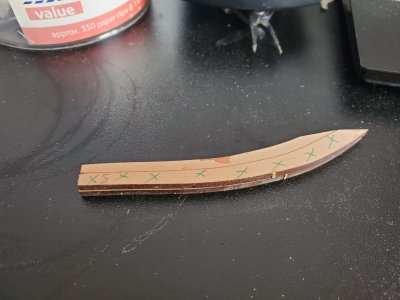
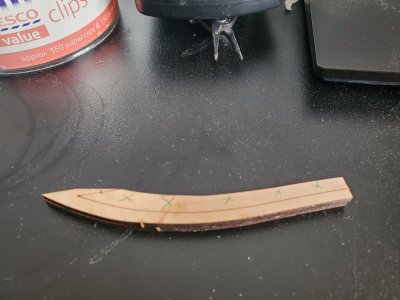
Like others i cut the wrong side so marking the side that needs triming might help

Just a hint When you do your hawse pieces
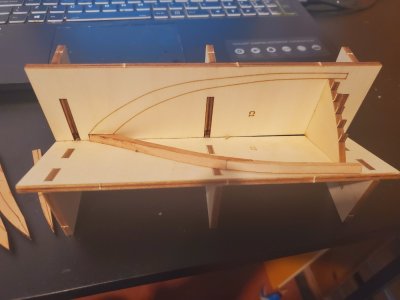
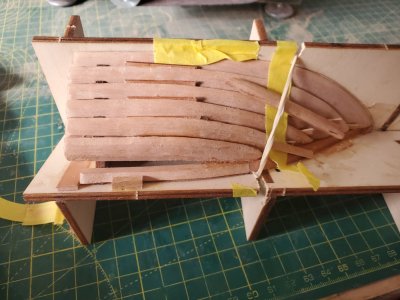
Ive very lightly tacked 6 and together while i do X8 and 1 to 5 so i can place it instead of it slipping off the joig
Just seems to help

20251105_191025.jpg

20251105_191055.jpg
 
I have suggested to Victor that on their next build they mark the part to remove on the Hawse pieces

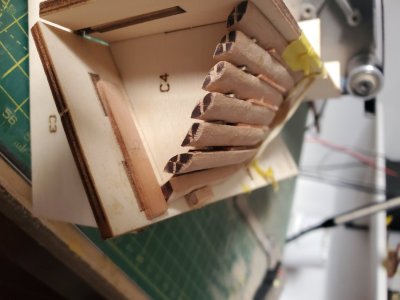
Also Ive built the first side - needs tidying up
The X8 is shorter

Incidentally should the top of the hawse Pieces be square

20251108_121649.jpg

20251108_121655.jpg

20251108_121716.jpg

20251108_122312.jpg
 
Incidentally should the top of the hawse Pieces be square
Hi Richard,
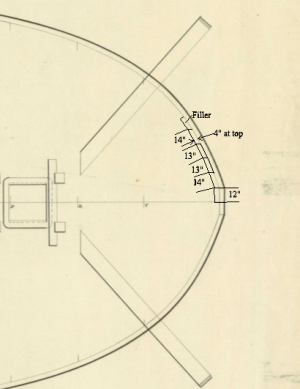
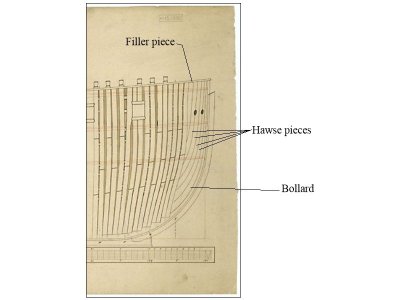
The top of the hawse pieces formed nearly a parallelogram. There would be a slight curve when finally shaped though. From the contract for Enterprise class vessels, on each side there is a bollard sided 12", then a 14" hawse piece, then two 13" hawse pieces, then a 14" hawse piece <and filler piece> The top of the top timbers forward was 4" thick so I am assuming the top of the hawse pieces would match so the planking would run smoothly inboard and outboard.
Allan
1762607514538.png
 
Hi Richard,
The top of the hawse pieces formed nearly a parallelogram. There would be a slight curve when finally shaped though. From the contract for Enterprise class vessels, on each side there is a bollard sided 12", then a 14" hawse piece, then two 13" hawse pieces, then a 14" hawse piece <and filler piece> The top of the top timbers forward was 4" thick so I am assuming the top of the hawse pieces would match so the planking would run smoothly inboard and outboard.
Allan
View attachment 555506
if you look mne have gaps did the filler come up to the top
But different height is intetsing
Got the Amazin Historic Ship Models but it doent show the Hawse Pieces
8 Double pages with illustations but NO Hawse Detail
 
am sorry Allan I dont understand
THose pieces - are they the Hawse pieces that come in the kit
Only there are 7 of them
Would the planking go over the top of the Hawse pieces
Will look further into thhe buld
I am also having a bit of trouble getting the lower end onto X8a
Luckily I am using glue that i can remove
Slowly getting these
Will look at it more and report
 
Sorry Richard, I have no idea what the kit provides. The contemporary framing plan HIL0079 which was for Medea and others in the Enterprise class below might be some help.
Allan
Hawse & Bollard.JPG
 
Thanks Jeff,
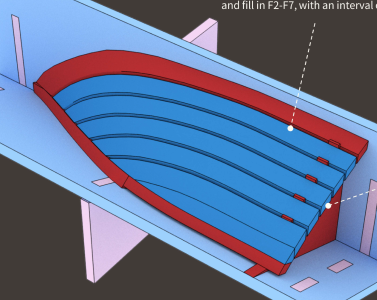
Unfortunately, per the contract and drawings what they expect is wrong. There were four hawse pieces plus the bollard and filler piece on each side, not five hawse pieces, This will create problems getting the hawse holes in the right place between the appropriate hawse pieces with the correct distance center to center.
Allan
 
I should be able to get the correct spacing between the hawse holes since I'm putting a 3/4" tall piece between each of the hawse pieces right along where the holes will need to be drilled.
I think they are using 2 pieces for the filler piece so they don't need to provide another thickness of timber in their kit. But, that is just a guess on my part.

I did notice that nowhere in the instructions to they mention the hawse holes. :)
But that's not too hard to fix.
 
This may be a repeat, if so, my apologies.
From the contract:
the diatr of the Hawse Holes to be 11ins & 13ins asunder at least on a square, the holes to be lined with thick Lead, not less than ¾ ins .

I was surprised the space between the 11 inch holes was only 13 inches.

Allan
 
This may be a repeat, if so, my apologies.
From the contract:
the diatr of the Hawse Holes to be 11ins & 13ins asunder at least on a square, the holes to be lined with thick Lead, not less than ¾ ins .

I was surprised the space between the 11 inch holes was only 13 inches.

Allan
Thank you very much ! I only have the holes shown on a side view in the plans. So, to be accurate, they need to be 0.2291666666666667 inches in diameter on the model... ROTF ROTF ROTF
 
Havig a bit of a problem with the Hawse Pieces
Very carefully Trimmed Top and understide as per Marks

THis includes the "Step" on the Inner Pieces

When i came to fit them the step was apparenly wrong and fits better and neater without
BUT it shows on the inner side by the Bow

JUst be cafreful to get this right before you cut these pieces
I have glued the Bow side of the Hawse set to the Bow and then waitec for it to dry so i can "Stretch " X8A to Meey X8B
I think then is the time to fit the Fillers on the Upper Hawse Pieces

Anybody else working on Enterprize at present

Will post pictures later

The instructions are really basic - could have done with an example of the inner Haswe
 
Back
Top