• Win a Free Custom Engraved Brass Coin!!!
    As a way to introduce our brass coins to the community, we will raffle off a free coin during the month of August. Follow link ABOVE for instructions for entering.
  • PRE-ORDER SHIPS IN SCALE TODAY!

    The beloved Ships in Scale Magazine is back and charting a new course for 2026!
    Discover new skills, new techniques, and new inspirations in every issue.

    NOTE THAT OUR FIRST ISSUE WILL BE JAN/FEB 2026

HMS Alert [1777] 1:48 POF by serikoff. (Two hulls: skeleton and fully rigged)

Hooray! I'm done drilling, and by my count, there are 3,222 holes in total. Considering that 3/4 of the holes were drilled in two passes, that means there were at least 5,500 such drillings.

20251223_131402.jpg

20251223_134456.jpg

20251223_134648.jpg

No pencil lines.

The meditation is complete ROTF , and now it's time to polish everything and get back to work.

Merry Christmas to all my colleagues! May you achieve new heights and achieve all your plans for this year!
 
Last edited:
Simply beautiful Sergey!

As I sit here watching the snow gently fall outside, I cannot even begin to imagine the difficulties you and your countrymen are facing. I truly hope you and your family are able to find some joy and peace this holiday season and perhaps a lasting peace with the new year.
 
Simply beautiful Sergey!

As I sit here watching the snow gently fall outside, I cannot even begin to imagine the difficulties you and your countrymen are facing. I truly hope you and your family are able to find some joy and peace this holiday season and perhaps a lasting peace with the new year.

Merry Christmas to you and your family as well, Sergey. Let's all pray for peace in Ukraine and throughout the world.

Thank you, friends.

Thank you sincerely for your understanding and best wishes! Yes, unfortunately, by the fourth year of the war in Ukraine, everyone has gradually become accustomed to this situation, not to mention the rest of the world. And in these dark times, we, more than anyone, appreciate the words "peace" and "wishes for peace," when we used to hear them from our grandfathers who fought in the war.

But I'm holding on, and my hobby is my only true joy (after my family). When I model, I completely disconnect from the outside world, and it helps me cope psychologically and not go crazy.

Right now I'm sanding the hull individually with a fine-grained sandpaper... a never-ending task, but very calming.

Thank you again from the bottom of my heart!

20251223_155725.jpg

20251223_161256.jpg
 
Thank you sincerely for your understanding and best wishes! Yes, unfortunately, by the fourth year of the war in Ukraine, everyone has gradually become accustomed to this situation, not to mention the rest of the world. And in these dark times, we, more than anyone, appreciate the words "peace" and "wishes for peace," when we used to hear them from our grandfathers who fought in the war.
Bless you Sergey. I hope you guys will have a wonderful Christmas and may 2026 grant you a cease fire and peace.

Wow your holes are perfect. Such a beautiful build. Cheers Grant
 
Bless you Sergey. I hope you guys will have a wonderful Christmas and may 2026 grant you a cease fire and peace.

Wow your holes are perfect. Such a beautiful build. Cheers Grant
Thank you very much for your appreciation and thank you so much for your congratulations and wishes of peace. I really hope that will be the case.

Wishing you a safe and hopefully peaceful Christmas Sergey.
Thank you very much! I really hope that your words come true.


Friends, I wish you all good health, a lot of strength and the desire to fulfill all your most ambitious dreams.
 
Chapter 7. Gratings

1. Rear Grating.

1/3


I'm waiting for a vise for the milling machine, so I can't start working on it. I've already installed the bearings, but it's difficult without a good vise. I think I'll have to make jigs; I can't wait that long...
In the meantime, I've decided to make a rear grating, or rather its frame, for the first hull, which won't have the grating itself.

Alert 1689.jpg

Having calculated the distance between the beams and the carlings, I cut out a groove for the connection.

Alert 1690.jpg

I assembled and glued it with liquid CA. I cleaned the inside corners of the board with a scalpel to remove any glue. This is important!

Alert 1691.jpg

Then I sanded the surfaces to a thickness of 3 mm on both sides so that the joint remained in the center.

Alert 1692.jpg

Afterwards, I sanded down the protruding edges with a machine.

Alert 1693.jpg

Then I reduced the thickness to 2.3 mm, and with this the joint still remains in the center.

Alert 1694.jpg

I didn't profile the deck because it's completely invisible at this size. And since this grating was walked on while steering, I doubt it was curved (it would be practically straight or have a very slight curve, and this particular one).

Alert 1695.jpg

Then I glued the stoppers for the grating, first the side ones and after cutting them off, the front and back ones.

Alert 1696.jpg

After cutting off the excess stoppers and sanding the bottom surface, I sanded the entire frame with 1500 grit sandpaper, lightly smoothing the corners and edges.

Alert 1697.jpg

Although this is the simplest of all the gratings and frames, it is also the smallest, so it is not so simple.

Alert 1698.jpg

Alert 1699.jpg

Alert 1700.jpg

Alert 1701.jpg

I haven't drilled the holes to simulate the mounting bolts yet; I need to figure out how and what works best, but overall, the first part is ready. As a reminder, the hull "skeleton" will only contain the frames for the gratings, but there will be no gratings. This was done to avoid blocking the lower deck and to clearly show the structure of the frames beneath the gratings.
 
Last edited:
I want to try this vise. I'll print it out when i have a moment. Not everything fits into steel one Proxxon.

 
I want to try this vise. I'll print it out when i have a moment. Not everything fits into steel one Proxxon.

Hmmm. I've already started to imagine something similar in my head and I'm thinking of making something similar out of wood for now. I think it would be fine for milling grill frames. But the jig isn't bad.
 
Quickest solution is simply an L-shaped aluminum profile.
So far, I've been making most of elements using Kudin method, on reinforced double-sided tape. It's quality, but you also lose a lot, a lot of good finish material when peeling it off.
 
Rear Grating.

2/3

The frame for the first hull is ready; now it's time to make the grating and frame for the second hull.

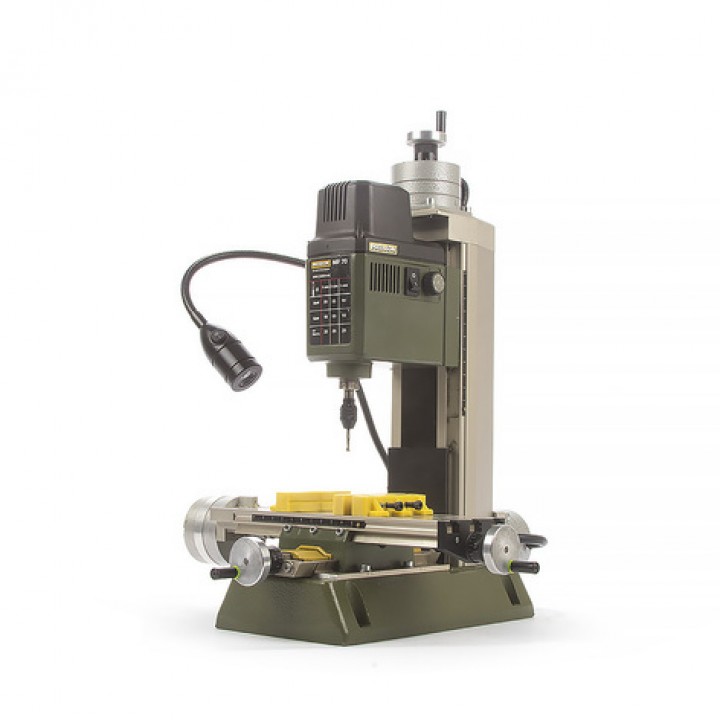
All work was done on a Proxxon MF 70 milling machine.

I filmed a short tutorial; I hope someone finds it useful.

Since the grating is not simple and has complex side sections, we need to start with those.

Alert 1702.jpg

I secured both pairs of these pieces against the glued-on strip, and placed another strip between the pairs to separate one pair from the other.

A 1 mm router bit is the width of the strip and the width of the gap between them.

Alert 1703.jpg

For beginners, it's important to set the zero. This will allow you to make two full turns to move the dial by 1 mm. Without setting the zero, it will be difficult to maintain consistent movement. To set the zero anywhere, hold the handle and rotate the black cylinder with the numbers to zero.

Alert 1704.jpg

For my grating, I needed to make 5 and 8 passes.
Then sand the lint off with 600-grit sandpaper.

Alert 1705.jpg

Passes in the main part (base) must be made gradually (preferably 0.5 mm per pass to avoid breaking the cutter).

Alert 1706.jpg

To create a complex grating, you need to understand the principle of the sequence of work.

Cutter HMS Alert 1777 31.jpg

The idea is to leave 1.5 mm strips along the edges so that 0.5 mm of them fit into the side pieces. This needs to be taken into account when milling the grooves.

Alert 1707.jpg

This is one of the most important points. I recommend studying all the material before your first attempts.

Alert 1708.jpg

For future fixing of the side parts, I made free space around the perimeter.

Alert 1709.jpg

Before milling perpendicularly, you need to fix the zero again by running the milling cutter along the edge.

Alert 1710.jpg

I first go across the grain halfway for the longitudinal slats, and then along the grain the entire depth. And again, at 0.5 mm per pass, so that not a single tooth breaks off.

Alert 1711.jpg

At the end, you can carefully remove lint and dust.

Alert 1712.jpg

After this, you can glue the slats, leaving more than 2 mm at the edges.

Alert 1713.jpg

I use very thin CA, not PVA. I like that it penetrates by capillary action and bonds parts that are already firmly in place. It also creates a thin, fine line of glue to visualize the joint.

But be sure to apply the glue only to joints and areas that will be sanded, and avoid surfaces that can't be cleaned.

Alert 1714.jpg

Then I cut the ends of the glued slats so that 1.5 mm remained.

Alert 1715.jpg

And I glued the front and back parts to these edges with liquid CA at the joints.

Alert 1716.jpg

I cut off the excess height.

Alert 1717.jpg

Before fixing the side pieces, you need to pre-cut the edges of the front and back so that 1 mm remains (but later I noticed that you need to leave 1.1 mm).

Cutter HMS Alert 1777 32.jpg

Alert 1718.jpg

Afterwards, you need to trim off the excess material from the top and sides to level it.

This completes the grille (I'll show the result in Part 3).

But this particular grille has a thin frame and can be installed right away.

First, I glued the side frame pieces...

Alert 1719.jpg

cut to length...

Alert 1720.jpg

and glued the front and back parts of the frame and cut them to length.

Alert 1721.jpg

Finally, I smoothed the top surface with a face mill and separated it from the base...

Alert 1722.jpg

... sanded the edges with a sander.

Alert 1723.jpg

Finally, you need to cut off the base (the lower surface) and profile the upper surface if necessary. In this particular case, the grating is almost flat.

Alert 1724.jpg

Continued in the next post.
 
Last edited:
Rear Grating.

3/3

But during the manufacturing process, I realized the grating was a bit wide, so I decided to cut the frame and trim some of the side pieces. I'll show you a few more things while I'm at it.

I initially cut a groove to fit the grating into.

Alert 1725.jpg

I installed a grating there, glued the side stopper with CA gel and cut off the side part of the frame and part of the side piece.

Alert 1726.jpg

After that, the grating fit the frame perfectly (for the first case).

In terms of width...

Alert 1727.jpg

...and in length.

Alert 1728.jpg

Then I turned the grating over, secured it and cut off the bottom plane (base) so that the grating became see-through.

Alert 1729.jpg

After sanding with a flat surface and 600-grit sandpaper, here's the final result.

From the bottom:

Alert 1730.jpg

... and from above, together with the frame (it’s from the first hull):

Alert 1731.jpg

Alert 1732.jpg

Alert 1733.jpg

Alert 1734.jpg

As you know, I am building two hull s in parallel, and in the photo above, the frame is for the first hull, and the lattice is for the second, and now I need to make a frame for this grating.

Cutter HMS Alert 1777 33.jpg

Alert 1735.jpg

Since the grating and frame on the second hull will be one piece, you need to glue the side parts of the frame first, cut them flush, and then glue the other two and also cut them flush.

Alert 1736.jpg

Finally, lightly round off the edges and corners with 1500-grit sandpaper (very lightly).

This resulted in two sets:

Alert 1737.jpg

On the left is the frame for the first skeleton hull and on the right is the frame with a lattice for the second hull.

Alert 1738.jpg

The photo above visually shows which part of the grating will be visible and on which hull. The idea is to show two options...

...and these two options are completely finished, hooray.

P.S. Today marks a year since I bought the Alert kit. I started building the model in March, but I experienced the joy exactly a year ago...

Ship-1
 
Last edited:
Back
Top