• Win a Free Custom Engraved Brass Coin!!!
    As a way to introduce our brass coins to the community, we will raffle off a free coin during the month of August. Follow link ABOVE for instructions for entering.
  • PRE-ORDER SHIPS IN SCALE TODAY!

    The beloved Ships in Scale Magazine is back and charting a new course for 2026!
    Discover new skills, new techniques, and new inspirations in every issue.

    NOTE THAT OUR FIRST ISSUE WILL BE JAN/FEB 2026

Constitution Cross Section MS20245 Model Expo

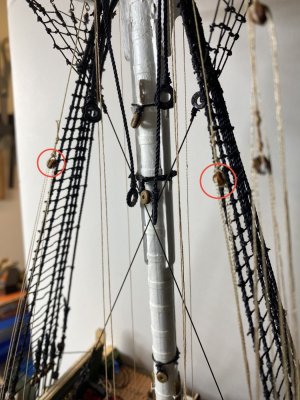
The ratlining is going slowly but steady. I am doing a few on each side, making sure they are even then applying some dilute PVA glue to the knots, allowing them to dry and cutting off the excess line. I am currently using a different thread I picked up at Michaels. It is mostly cotton and is much more forgiving in it does not spring back as much as the previous line I used which was, I believe 70% polyester. I run the line through a damp sponge first and it makes it easier to work with. I am tying the line to the shroud using cow hitches. They are not as secure as a clove hitch but for this application they are fine, and easy to do.
View attachment 565730

I tried using two pieces of wood with the proper spacing for the lines, but I have found it cumbersome and certainly not a time saver.
View attachment 565731

however my biggest concern is the tension between the shroud line not to make the rat lines too slack or to pull in the shrouds getting an hourglass look. I mat redo some of the ratline after I finish doing the whole thing.

View attachment 565732

So far using the ratline scale provided on the plans seems to work the best for me.
like the cow hitch.
 
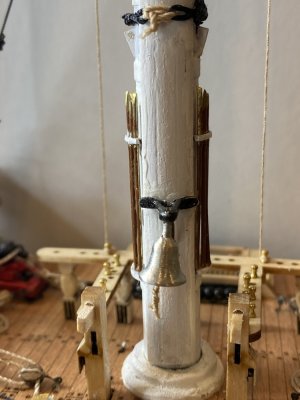
Before the spar deck becomes too filled with lines I decided to glue the ships bell in place.
IMG_1463.jpeg

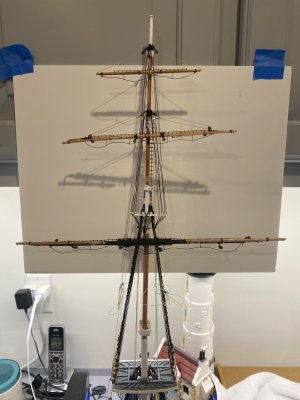
I then glued the Topgallant yard into place. As with the other yards I drilled a hole in the yard and mast and inserted a pin to help hold the two together.

IMG_1483.JPG

As you can see, the royal yard helped to hold the halyard and lift lines out of the way!
 
Last edited:
A few observations I have from working on the lines and blocks.

1) I am very very glad I decided not to put the hammock nets on the ship until later. I defiantly would have damaged them while I am tying lines on to the belaying pins. The same goes for the rail guard for the fighting top.

2) It really pays to do as much work on the masts and yards as you can do when they are off the ship.

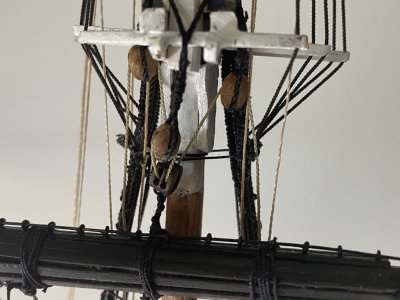
3 ) It helps to make sure the holes in the blocks are reamed out and will accept the size line you want to use before you put them on the mast or yard. I find I can enlarge the holes of the wooden made blocks much easier than the 3D printed ones. The 3D printed ones are really nice looking but brittle.

4) Making the ends of the line sharp with a diagonal cut and stiffening the ends by smearing a bit of CA on them will ease the ability of threading the lines through the block considerably.

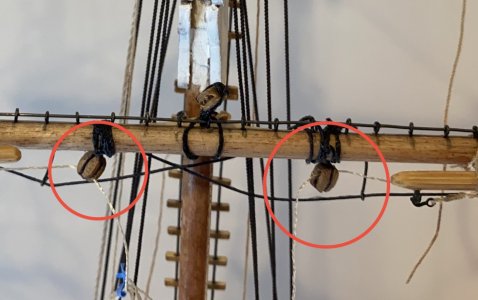
5) Try to make sure you thread the line through the proper hole in the block. As pointed out to me in a private message, BigJake noticed that I has threaded some of the lines in the incorrect or bottom hole of the block sheave. Below is a picture of my topgallant yard. The block on the left has the line rove through the bottom or incorrect hole. In real life a line would not go there. The right hand block has the line reeved the proper way.

Icorrect block.JPG
 
The actual reeving of the lines for the Topgallant went well. I think the most important thing is to take it slowly and make sure you know where every line is going. For instance "does this line go in front of this crosstrees or behind? Does it go to the forward part of the fighting top space or the rear part. How would this line reeve through this block in reality" Most of these line come in pairs port and starboard and if you look at the layout of each section individually you can see the logic of the arrangement.

For the topgallant studding sail boom there is a pair of halyards left and right that run from their blocks on the yard, down just outside the forward topsail crosstrees, through the front of the spaces on either side of the fighting top, ahead of the futtock shrouds, and down to the fife rail. The belaying pin diagram on the plans show where each line ends up.

The topgallant lift lines run again port and starboard, from their blocks on either side of the mast, to the block on the yard and back to the mast block. They then go down and behind the topsail crosstrees, through the aft end of the open spaces in the fighting top and inside the royal lifts, and on down to the aft side of the fife rail and are belayed to the pins just outside where the royal lifts were belayed.

Finally the single topgallant yard halyard runs from the block on the mast to the block on the sling and then back to the mast block. It then goes down parallel to the royal yard halyard to its jig tackle next to the royal yard jig tackle.

IMG_1486.jpeg

IMG_1487.jpeg

IMG_1489.jpeg
 
Last edited:
Preparing to install the topsail yarn. One major difference here is that the halyard is actually 2 halyards, each that start by being clove hitched to the mast. each then pass through a double block on the yard and go back to a single block on each side of the mast then down to be secured. Probably the reason for 2 halyards was the wight of the yard and the power needed to hoist it up and down would be too much for a single halyard. There is already a large amount of rigging on the mast at this location.

IMG_1504.jpeg

Tom Culb in his build had a more elegant (for me at least) solution. He turns it into a double ended halyard (by hanging a single block on the front of the mast). After passing through the double block on the yard, each halyard runs below the crosstrees and through a single block hanging below and between the middle and aft crosstrees. Ive decided to go that route.

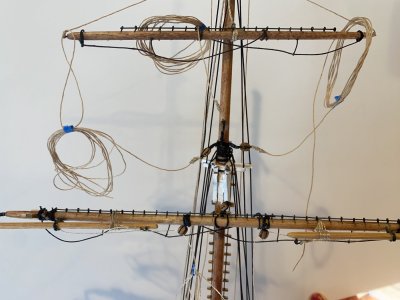
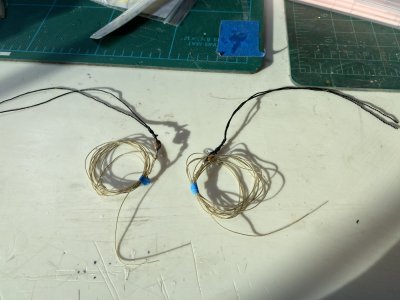
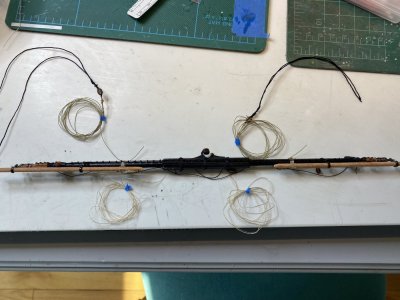
Before attaching 2 single block for the topsail lift lines to the mast the lift lines were seized to the blocks and coiled up for installation.

IMG_1510.jpeg

Just like the topgallant yard, the topsail yard has a pair of studding sail booms that have their own lines that need to be installed. these were also attached to the yard and coiled up to ease installation. There is a hole in the mast and yard for a locating pin.
IMG_1509.jpeg
 
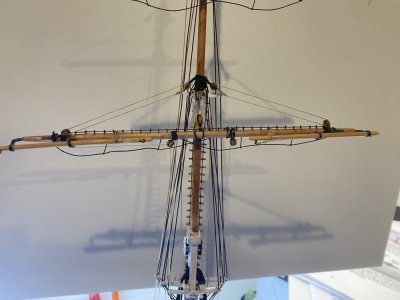
I pinned the topsail yard into place without gluing it yet. I wrapped the parrel line around the mast and secured it.

IMG_1518.jpeg

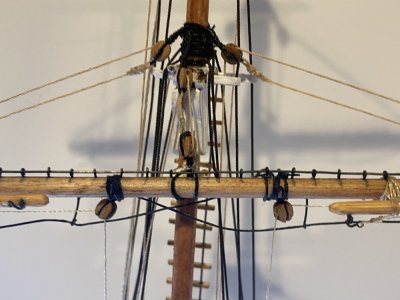
I then threaded the halyard line starting at the single block on the mast, through the double block on the yard then back onto the single block just behind the cross tree. the line then went down towards the rear of the fighting mast well. I then threaded the line on the other side in a similar fashion.

IMG_1514.jpeg

You have to be careful that the lines go the proper way and not interfere or go behind the shroud lines.

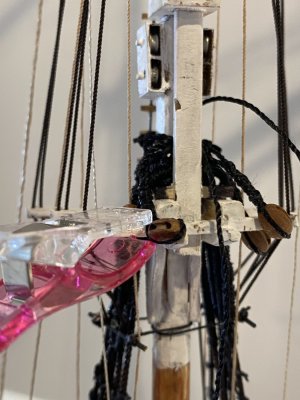
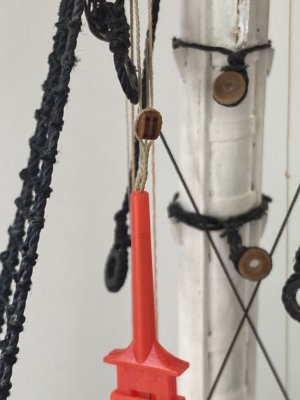
The ends of these halyards are stropped like the other two to a double block to attach to 2 jig tackles, port and starboard. Try to make sure that both double blocks hang about the same distance, level with the lower pendants. I have just gotten some mini electric test clamps to try holding the lines as I strop the blocks.

IMG_1512.jpeg

I found them easier to use than alligator clamps. The hold the thin line securely, something the alligator clamps had a hard time with. I think they are a good item to have.
 
Last edited:
The port and starboard ends of the topsail halyards were then attached to jig tackles, as was previously done with the royal and topgallant halyards. I threaded the halyard lines to the rear inside opening of the fighting top, as it seemed a neater arrangement. It also appears (at least to my eyes) to thread that way in the plans. The instructions do not appear to mention it one way or the other.

IMG_1523.jpeg

As with the other jig tackles, they were hooked onto eyebolts on the port and starboard channels and then belayed to nearby fife rails.

IMG_1521.jpeg

IMG_1526.jpeg
 
The topsail lift lines and the block for them were attached to the mast and the lines were threaded through the upper single blocks on the yard. The lines were then threaded down towards the rear area of the fighting top hole and belayed to the proper pin.

IMG_1528.jpeg

After that was done the lines for the studding sails were fed down to the front of the fighting top space and belayed to their pins.

With that the rigging of the topsail yard was completed.

IMG_1530.jpeg
 
Securing the main yard to the mast is certainly the most complex rigging I have come across. Thankfully Tom Culb's build site has an extensive description and commentaries from other builders that go a long way to clarifying some issues.


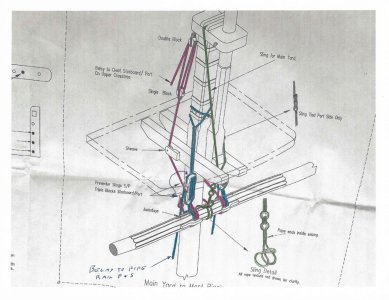
The instructions and plans apparently have mislabeled some of the rigging. It is also not made very clear exactly how the complex system wraps around the rear of the mast. Once again Mr. Culb's explanations help tremendously. I have taken the liberty of using one of Mr. Culb's pictures to help clarify things. This is a copy of the picture on the plans that Mr. Culb colored the 3 different systems that hold the yard in place.

427775449_slingstrusses.thumb.jpeg.3157ce413a85cf1ef6028ff68b4f0c3f.jpeg

Breaking this down a bit.

The rigging colored in green marked sling is what is called a preventer. It is the simplest rigging of this area. It is there in effect so that the yard does not fall if the jeers (The main support setup) are severed in battle. This is basically 2 heavy support loops with a thimble stropped to them. The smaller one is looped around the main yard, similar to the halyards for the previous yards, with the thimble behind the jackstays. This thimble is lashed to another thimble that is stropped to a longer line that loops around a support structure that sits upon top of the main mast cap. One end of the line is formed as a loop and the other end loops into it and is then seized to itself.

The two supports colored in blue which are labeled "preventer slings" are actually more accurately called jeers. Each jeer is a pair of triple blocks, one lashed to the top of the yard and inside the cleat of the main yard, the other just above it, hanging from the mast. The jeers raise and lower the main yard. The sets of triple blocks are lashed together with a long line that then is fed down the port and starboard fife rails where they are belayed. I believe what might be the easiest thing to do is to lash the triple blocks together with the yard off the mast. Once the yard is installed I will secure the upper triple blocks to the main mast and then thread the lines between the triple blocks down.


The third component in red is probably the most complex. These are the truss tackles and they function to pull the yard in close to the mast. These also follow a complex path wrapping around the yard on both sides and crossing in the back of the main mast to hold the yards to the main mast. one end then goes upward and is stropped to a single block. Another line is stropped to the top of this single block and it threads through a double block attached to the mast cap. Thisis eventually belayed to a cleat on the fighting top. I will probably also do most of the work assembling this component with the yard off the mast to ease assembly (I hope).

This wordy description gives you and idea of the complexity of the task at hand. I believe if each component is done separately and then integrated onto the yard before the yard is attached to the mast it will make it the simplest way to install this assembly.
 
Last edited:
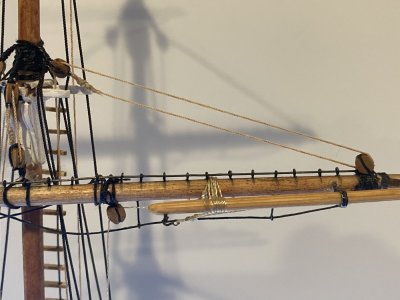
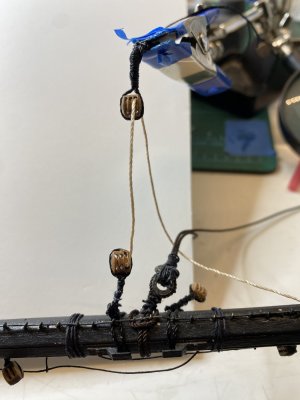
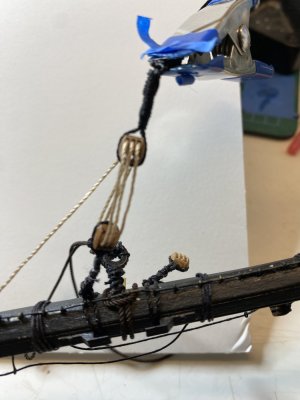
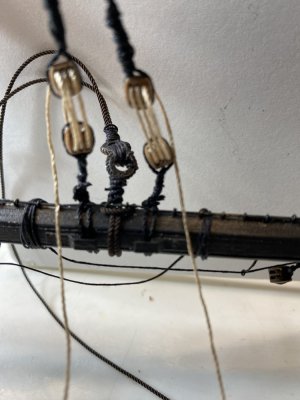
As I wrote in post #338 the preventer sling and the triple blocks for the jeers were installed on the main yard. I then stropped two other triple blocks to some black rigging line that will act as a sling on the main mast. Between the sets of blocks on the yard and the main mast is a length of running rigging line reeved through the triple blocks. These 2 line will eventually go down to the fife rails. I started by making a simple knot and reaving the line from the hole closest to the mast on the triple block on the yard.

IMG_1543.jpeg

This was reeved through the triple blocks so that the line running to the fife rails would be as far from the mast as possible on both sides.

IMG_1544.jpeg

I made sure that both sides had a similar spacing. Once the yard has been set on the mast I will tighten them up and make them as symmetrical as I can.

IMG_1545.jpeg
 
Where does the line going thru right side of pulley attach, I haven't seen rigging starting in a pully sheeve before.
The instructions have you use a simple knot behind the triple block, similar to lanyards with deadeyes. I looked at the Peterson book on rigging of ships and it shows the line first wrapped around the yard with probably a clove hitch before being reeved onto the blocks. That is probably the correct way to do it.

Rob
 
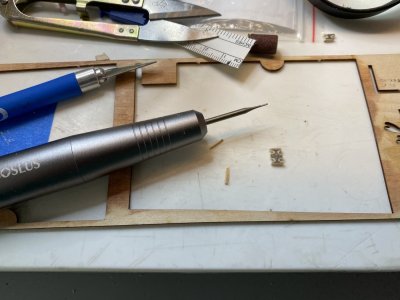
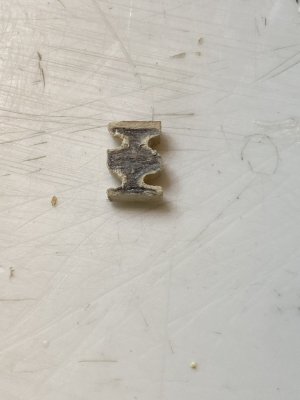
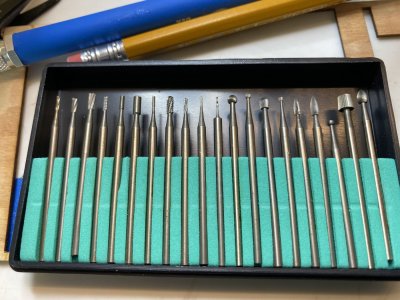
The instructions have you use some cleats buried on the fighting top to secure the ends of the truss tackle lines. I am positive that I would not be able to do that. I decided to follow Tom Culb's build and install some cleats on the topsail mast for these lines. Of course I had no such cleats so i decided to make some. The wood for the cleats provided were made from 1/32" material which is probably too thin. (perhaps sealed with CA may make them stronger) I used the cut outs for the original cleats and using a pencil I filled the design of the cleats on some 1/16" scrap and cut it out. I tried several times to cut out the notched area of the cleats with no success. I then remembered that I had some burrs that I recently purchased for my nail drill.

IMG_1552.jpeg

These worked well for cutting the notches in the cleats.

IMG_1550.jpeg

IMG_1548.jpeg

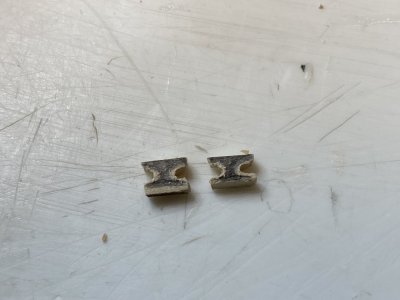
This was then cut to make the two cleats.
IMG_1551.jpeg

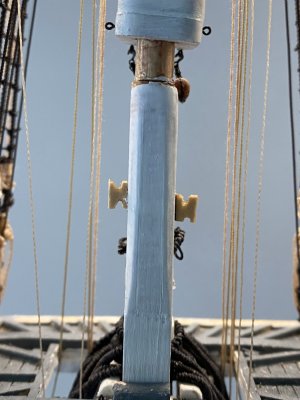
I put small pins into the bottom of each cleat. I then coated the cleats with thin CA to strengthen them. The cleats were then attached to areas of the mast that I had drilled a small hole into.

IMG_1555.jpeg
 
Back
Top