Thanks! Just hope it will help others from making mistakes I've made.Love the inclusion of these details, Rob! Bravo!
Rob

 |
The beloved Ships in Scale Magazine is back and charting a new course for 2026! Discover new skills, new techniques, and new inspirations in every issue. NOTE THAT OUR NEXT ISSUE WILL BE July/August 2026 |
|
 |
As a way to introduce our brass coins to the community, we will raffle off a free coin during the month of August. Follow link ABOVE for instructions for entering. |
|
Thanks! Just hope it will help others from making mistakes I've made.Love the inclusion of these details, Rob! Bravo!

like the cow hitch.The ratlining is going slowly but steady. I am doing a few on each side, making sure they are even then applying some dilute PVA glue to the knots, allowing them to dry and cutting off the excess line. I am currently using a different thread I picked up at Michaels. It is mostly cotton and is much more forgiving in it does not spring back as much as the previous line I used which was, I believe 70% polyester. I run the line through a damp sponge first and it makes it easier to work with. I am tying the line to the shroud using cow hitches. They are not as secure as a clove hitch but for this application they are fine, and easy to do.
View attachment 565730
I tried using two pieces of wood with the proper spacing for the lines, but I have found it cumbersome and certainly not a time saver.
View attachment 565731
however my biggest concern is the tension between the shroud line not to make the rat lines too slack or to pull in the shrouds getting an hourglass look. I mat redo some of the ratline after I finish doing the whole thing.
View attachment 565732
So far using the ratline scale provided on the plans seems to work the best for me.


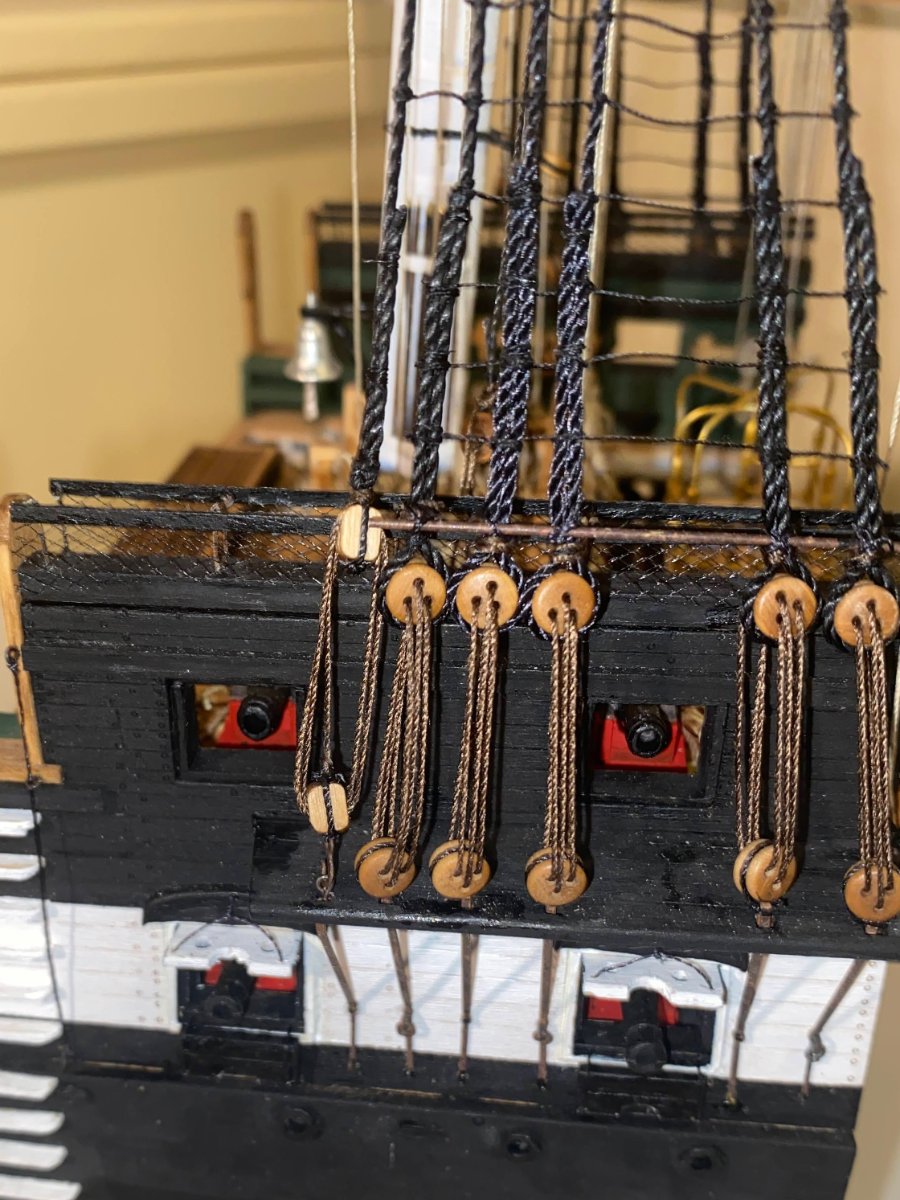
The instructions have you use a simple knot behind the triple block, similar to lanyards with deadeyes. I looked at the Peterson book on rigging of ships and it shows the line first wrapped around the yard with probably a clove hitch before being reeved onto the blocks. That is probably the correct way to do it.Where does the line going thru right side of pulley attach, I haven't seen rigging starting in a pully sheeve before.


You are right! These burrs look like they came from my dentists office!Next you will be using your tiny tools to do Doc K's dental work for him!
As I have posted elsewhere... time to find a new dentistYou are right! These burrs look like they came from my dentists office!
 .
.