• Ships of Scale has incorportated an extra level of security when you log In. Please follow on-screen prompts to acknowledge that you are not a robot via a "Check Box" or a "Pictorial Check Box Puzzle". This is needed due to higher level of AI Activity Security.
  • SUBSCRIBE TO SHIPS IN SCALE TODAY!

    The beloved Ships in Scale Magazine is back and charting a new course for 2026!
    Discover new skills, new techniques, and new inspirations in every issue.

    NOTE THAT OUR NEXT ISSUE WILL BE July/August 2026
  • Win a Free Custom Engraved Brass Coin!!!
    As a way to introduce our brass coins to the community, we will raffle off a free coin during the month of August. Follow link ABOVE for instructions for entering.

Bluenose Schooner 1921 - Model Shipways 1:64 by TexBilly

Bill your paint job is amazing. I hope I can do half as well as you when I get to that point! For the stern rail I would seriously consider splitting it and pitting in some thin scrap "wedge pieces to get the angle and width you need.

Rob
Hi Rob, thanks for the nice words on my paint. What a journey!

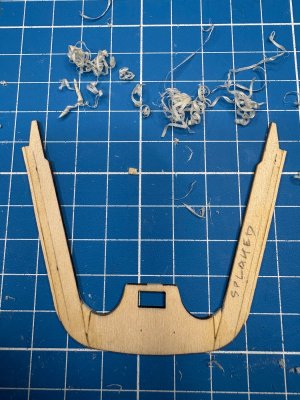
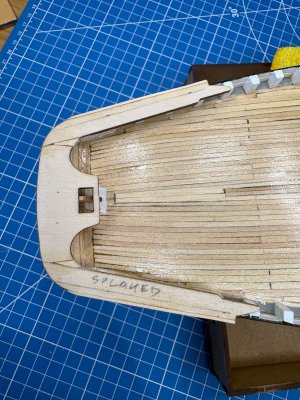
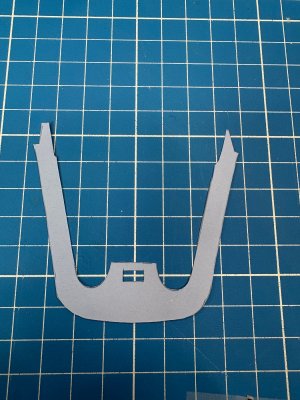
As for your suggestion on the rail piece, your timing couldn't be more perfect as guess what I'm now doing? Option 2 - Modify the existing stern piece. The minute I dove into this option, and consistent with @Rob444 's suggestion, I knew this may be the most straightforward method. Still, I did take the time for a "trial run" albeit with card stock.

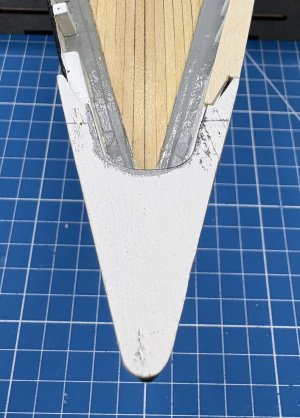
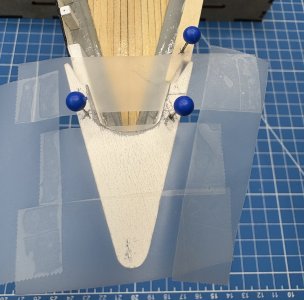
I had earlier cut templates using the kit's part so I drew in my overhang edges, highlighted the seam in red, then attached it to a print of my scan at the transom. In that pic you can see the splay of the legs is too narrow.
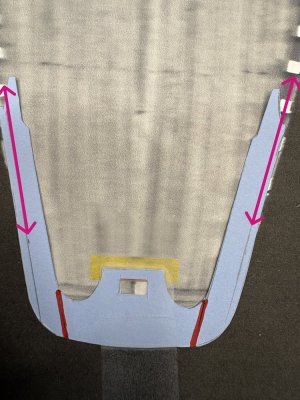
IMG_1568.jpegIMG_1551.jpeg

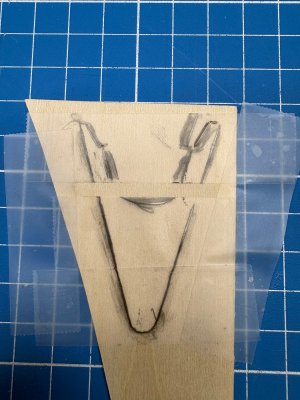
Then I partially cut the back of the transom area even with the inside edge of each leg and pivoted the legs outward until my edge lines aligned with the scan's hull edge - then taped it down. You can see the narrow gap within the red line. Finally I taped everything down and cut it out.
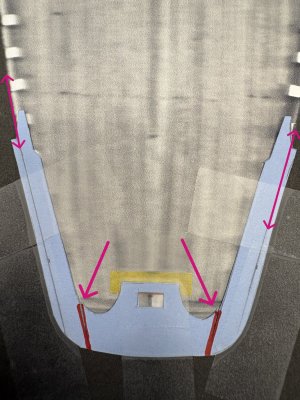
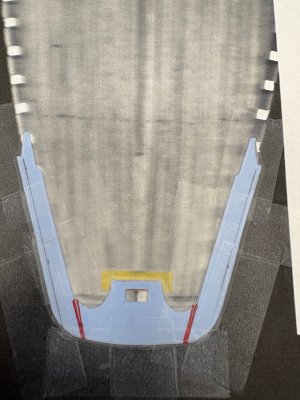
IMG_1552 1.jpegIMG_1553.jpeg

I added the same edge lines to the actual part. I then taped my new template on my mat, aligned the actual part over it, taped it down in the middle, cut the seams, then repeated the adjustment process. Currently I've left the seams accessible so I can insert and glue a piece to join the split parts. There may be a little bit of cleanup/fill to make the inside arc transitions nice and smooth but not much by my eye. I'll loop back once I join everything together as one (modified) piece.
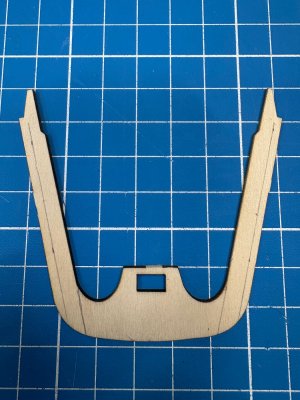
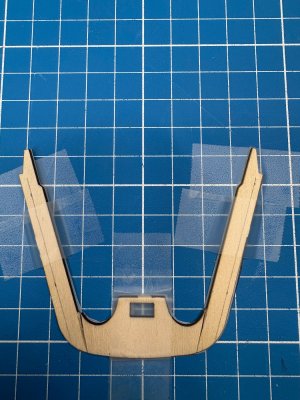
IMG_1566.jpegIMG_1567.jpeg
 
Last edited:
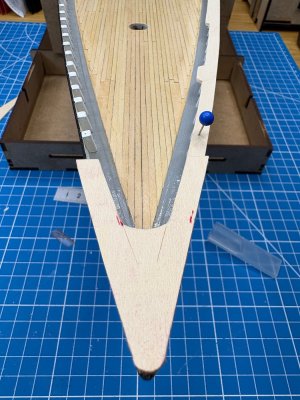
My modified stern piece aligned nicely with the stanchions but was a little too borderline at the hull edges so I glued some 1/32 scrap to the outside edges to give me more of a reveal - and a bit more wiggle room when I fit the long rail pieces between stern and bow. A tiny bit of fill and sand around the transom and we'll be good.

IMG_1576.jpegIMG_1580.jpeg
 
Last edited:
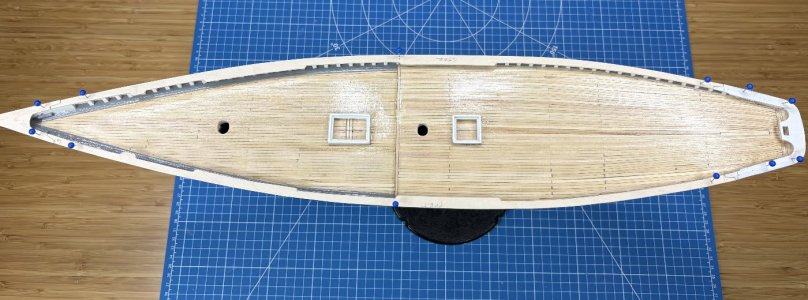
Moving on to the long rail pieces...

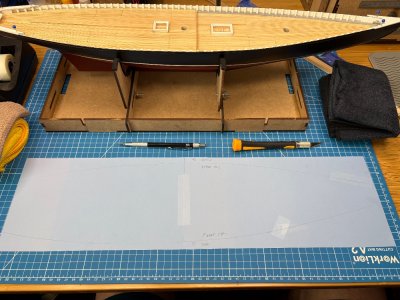
I taped cardstock to the top and traced it upside down by laying it on some folded up towels.

IMG_1584.jpegIMG_1585.jpeg

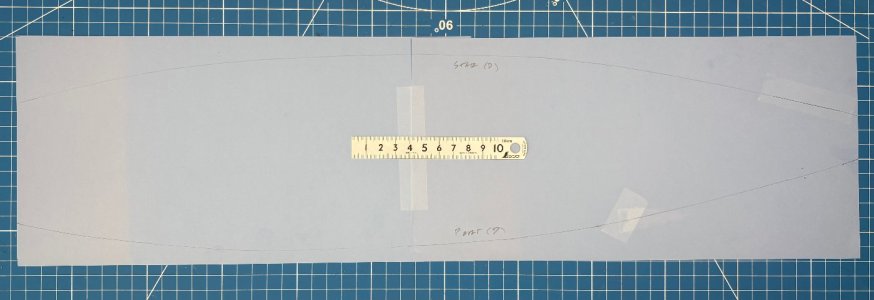
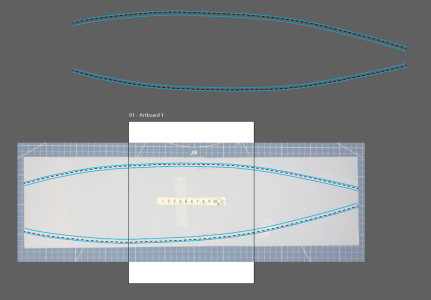
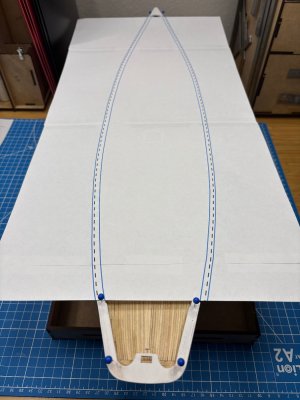
I then took a photo of the tracing and imported it into Illustrator. I followed the same process as the stern piece and traced/offset copied lines to create my outer and inner edges. Now since I traced it upside down, I flipped the geometry (top outlines in the photo) so the lines are visible on top, for alignment. I then printed the flipped geometry and stitched it together. Between tracing errors, asymmetry of the as-built hull, photo alignment and any error from aligning printouts, the port and starboard outlines do not align with the hull at the same time but individually, they do align nicely. This is what I want anyway as I'll mark and cut out one side at a time.

Hull Scan Original and Flipped.pngIMG_1590.jpeg

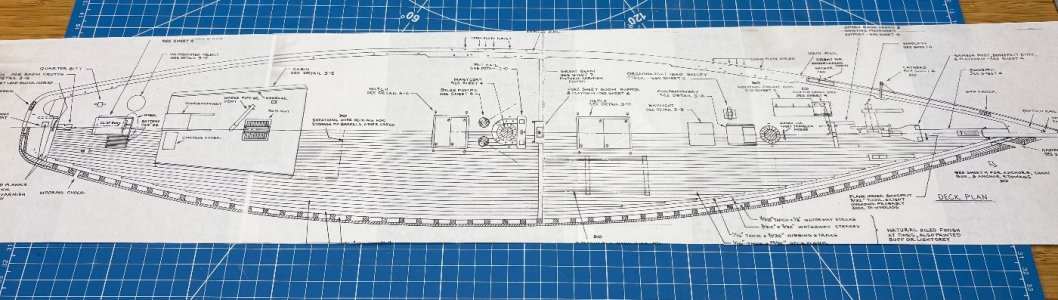
Just for grins, I also copied and stitched together the plan view of the railing to transfer the position of the wider rail details. Once I secure my pattern to the ship, I'll choose a registration point that I can use as a datum (the sides of the hatches for instance).

IMG_1591.jpeg
 
Last edited:
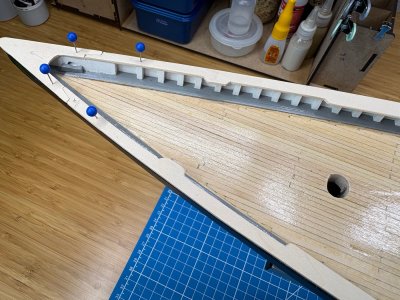
Moving on to the long rail pieces...

I pinned cardstock to the top and traced it upside down by laying it on some folded up towels.

View attachment 627847View attachment 627848

I then took a photo of the tracing and imported it into Illustrator. Then I followed the same process as the stern piece and traced/offset copied lines to create my outer and inner edges. Now since I traced it upside down, I flipped the geometry (top outlines in the photo) so the lines are visible on top, for alignment. I then printed the flipped geometry and stitched it together. Between manual tracing errors, asymmetry of the as-built hull and any error form printing/aligning, the port and starboard outlines do not align with the hull at the same time but individually, they do align nicely. This is what I want anyway as I'll mark and cut out one side at a time.

View attachment 627846View attachment 627849

Just for grins, I also copied and stitched together the plan view of the railing to transfer the position of the wider rail details. Once I secure my pattern to the ship, I'll choose a registration point that I can use as a datum (the sides of the hatches for instance).

View attachment 627850
Great Ideas and plans. I am sure I will be shamelessly using them! :rolleyes:

Rob
 
Progress on the main rail.

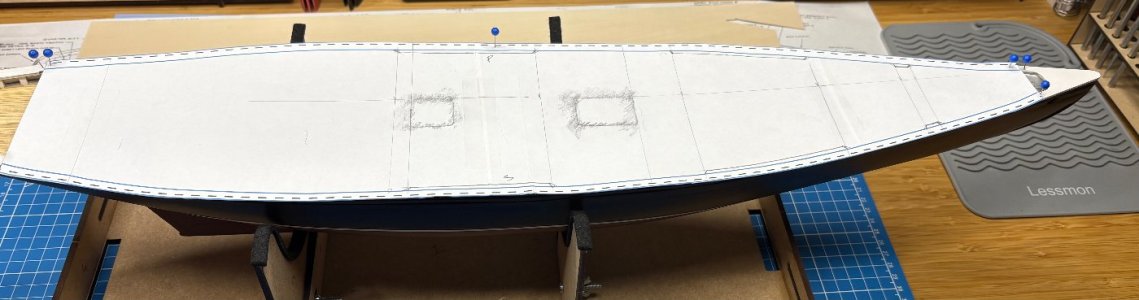
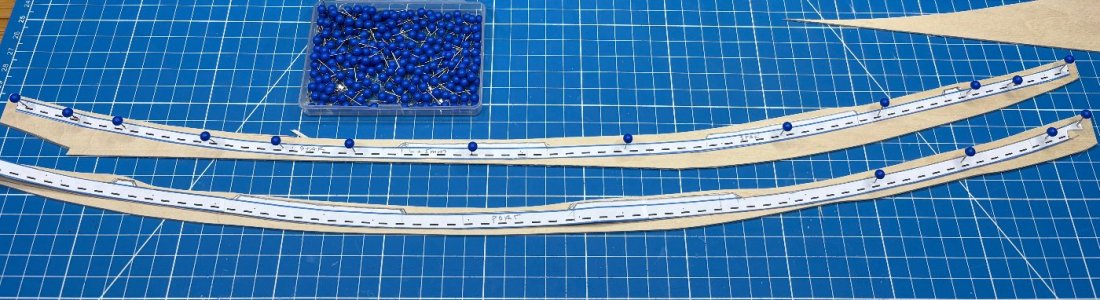
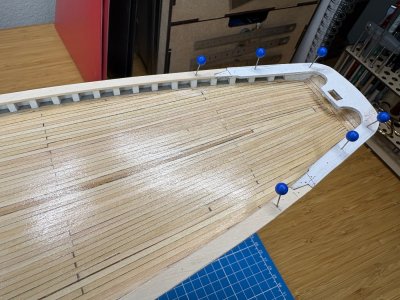
After I was comfortable with the alignment on each side, I pencil rubbed the outline of the hatches, which I used as datums to lay out the wider areas of the rails. Of course this was made more complicated by Bill since he had glued the printouts to card stock. :rolleyes: But, a little pressure made it work. I luckily caught a layout error on the aft end of the middle starboard feature, so I later corrected it when I cut the rails.

IMG_1597 1.jpeg

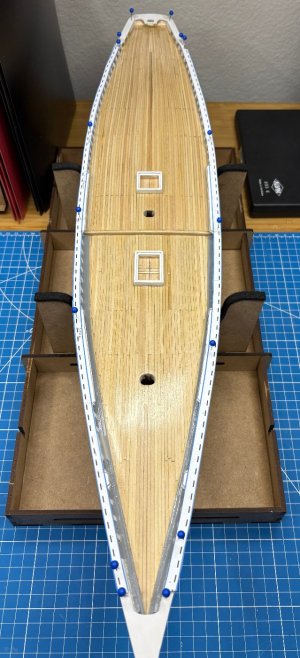
I then cut out the rail templates and pinned them in place for a quick sanity check.

IMG_1603.jpeg

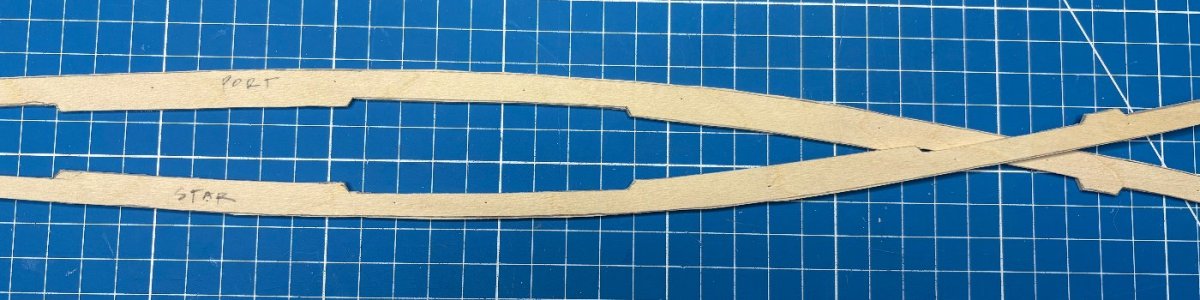
I decided to create the actual rails from one piece of basswood so I'll soon determine whether to cut actual joints or just score the joints in place (leaning to the later option). Left some width so I can sneak up on my final geometry during fit up. I'm happy with the overall fit of the rough cut pieces and the symmetry of those feature areas. I'll be registering the rails using the forward end of the aft-most feature, which straddles the great beam/deck transition.

Next up is carefully cutting the joints at bow and stern.

IMG_1604.jpeg

IMG_1605.jpeg

IMG_1606.jpeg
 
Last edited:
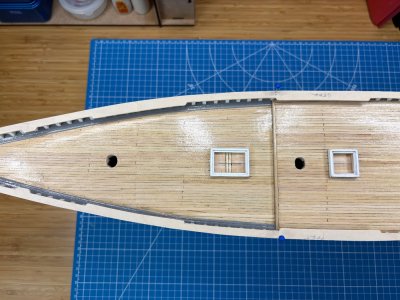
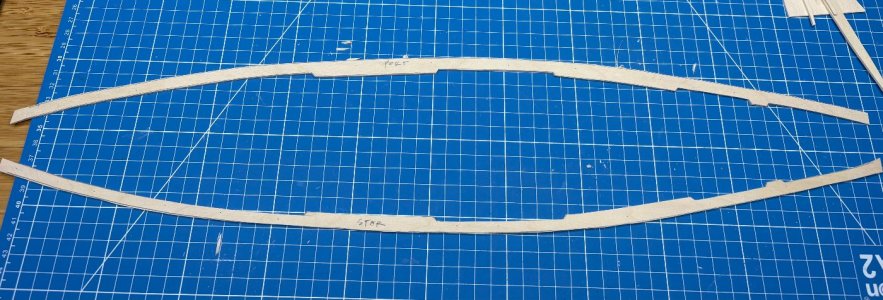
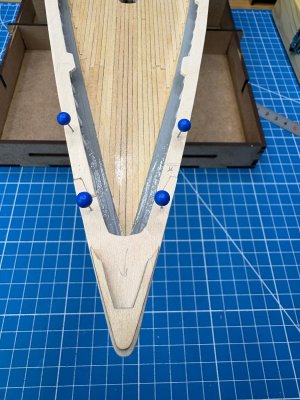
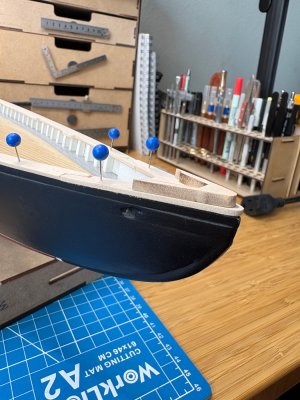
I decided to base my rail fitting on my modified stern piece as I had my doubts the kit's bow piece's arms were going to fit my model's geometry - plus it's width is more narrow than that of the stern piece. After trimming, fitting, planing, fitting, sanding, fitting the port side main rail and joint at the stern, I was finally satisfied with the fit...until I wasn't. :rolleyes: More and more fiddly work and I eventually got there. Then I repeated the whole process at starboard. Hey, we love this, right? ROTF

IMG_1639.jpeg

At the bow, I did in fact need some more width to fit my rail so I cut a new piece out of my basswood sheet. Once I dialed in the joints, I was happy with the results, even though I left some minor gaps that I'll deal with before painting.

IMG_1615.jpegIMG_1616.jpegIMG_1618.jpegIMG_1619.jpeg

Overall, I like the curves and I'll be doing some finer sanding before I decide on a sequence to paint and install with as little touch up as possible.

IMG_1637.jpeg
IMG_1638.jpegIMG_1640.jpegIMG_1639.jpeg
 
Last edited:
Hi Bill, I don't post here much but I've been following along. I appreciate your keen eye and attention to detail. You seem to have the requisite patience for this hobby. Things don't always go the way we hoped - but finding a solution rather than melting down is creditable. I'm a fan.
 
Hi Bill, I don't post here much but I've been following along. I appreciate your keen eye and attention to detail. You seem to have the requisite patience for this hobby. Things don't always go the way we hoped - but finding a solution rather than melting down is creditable. I'm a fan.
You’re too kind, Paul. My standards and patience don’t always play nicely but I try to make it work!
 
I decided to base my rail fitting on my modified stern piece as I had my doubts the kit's bow piece's arms were going to fit my model's geometry - plus it's width is more narrow than that of the stern piece. After trimming, fitting, planing, fitting, sanding, fitting the port side main rail and joint at the stern, I was finally satisfied with the fit...until I wasn't. :rolleyes: More and more fiddly work and I eventually got there. Then I repeated the whole process at starboard. Hey, we love this, right? ROTF

View attachment 628864

At the bow, I did in fact need some more width to fit my rail so I cut a new piece out of my basswood sheet. Once I dialed in the joints, I was happy with the results, even though I left some minor gaps that I'll deal with before painting.

View attachment 628858View attachment 628859View attachment 628860View attachment 628861

Overall, I like the curves and I'll be doing some finer sanding before I decide on a sequence to paint and install with as little touch up as possible.

View attachment 628862
View attachment 628863View attachment 628865View attachment 628864
A lot of measuring, fitting and adjustments, but the result looks very promising, Bill. A solid base for installing and painting.
Regards, Peter
 
More thinking than doing the last couple days but one subject in focus is the buffalo rail (and still to come the aft monkey rail), especially as it relates to my goal of maximizing pre-painting and minimizing touch ups.

The current shape of the kit's buffalo rail piece is encouraging and I'll soon measure and glue up the legs from provided stock, then fit it in place.

IMG_1650.jpeg IMG_1652.jpeg

Thinking ahead, is it possible to prep a main rail and buffalo rail assembly (and a complimentary monkey rail/main rail assembly), then remove, paint and finish it before re-attaching it to my ship? Multiple variables are in motion but it's an idea. Sure, I can just focus on the painting and installation just the main rail, do the same thing for the next level of railing etc. but handling always leads to touch up or worse yet, damage. More soon!
 
Last edited:
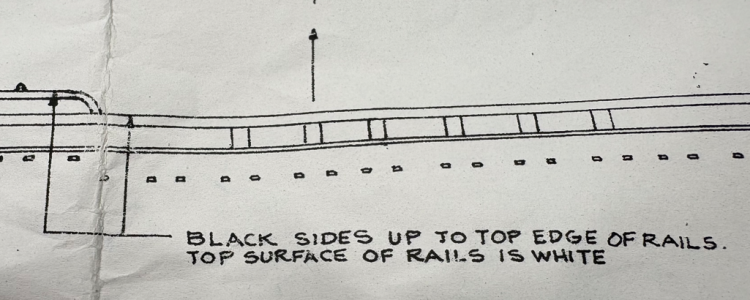
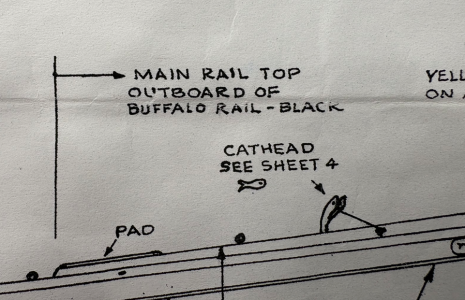
And then there is the subject of rail color. I went back and looked at the 1970 Smith & Rhuland letter on BN colors and what did I notice?

1787533265668.png

But the MS plans show:

1787533606107.png

Wait, and this?

1787533648991.png

I actually think the varnished edges would look cool. Even the black edges. But the black main rail outboard of the buffalo rail? I know most modelers just paint everything white but I like the possibilities. Coffee
 
Back
Top