-

Win a Free Custom Engraved Brass Coin!!!
As a way to introduce our brass coins to the community, we will raffle off a free coin during the month of August. Follow link ABOVE for instructions for entering.
-

PRE-ORDER SHIPS IN SCALE TODAY!
The beloved Ships in Scale Magazine is back and charting a new course for 2026!
Discover new skills, new techniques, and new inspirations in every issue.
NOTE THAT OUR FIRST ISSUE WILL BE JAN/FEB 2026
You are using an out of date browser. It may not display this or other websites correctly.
You should upgrade or use an alternative browser.
You should upgrade or use an alternative browser.
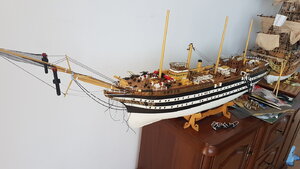
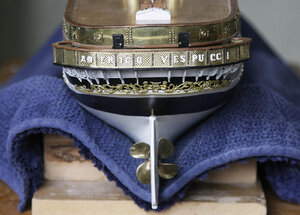
Amerigo Vespucci, Panart 1:84 scale
- Thread starter Ken
- Start date
- Watchers 38
-
- Tags
- amerigo vespucci panart
Nice to see, Ken. The stern gallery and now filling up the deck.
Regards, Peter
Regards, Peter
- Joined
- Dec 16, 2016
- Messages
- 1,179
- Points
- 493

Hi Mike, Thanks for your kind comment. I think that you would need a pretty big model shipyard for this monster, it really is big. The upside is that there’s plenty of room for detail and there’s lots of it,Great Ken. I always enjoy seeing such nice clean work in such a small scale. 1:84... almost perfect for an HO scale shipyard!!!!
Ken
Thats what I love about this ship, it mixes the goodies of old and new in one model. All these finely detailed deck structures etc etc. Just fantastic to see.
- Joined
- Dec 16, 2016
- Messages
- 1,179
- Points
- 493

Hi, Again thanks for the many likes and comments on my build, as I’ve said they are encouraging.
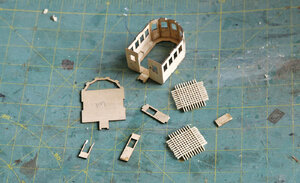
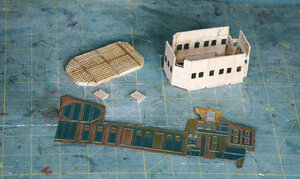
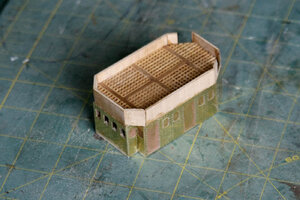
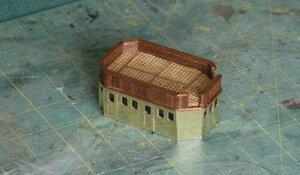
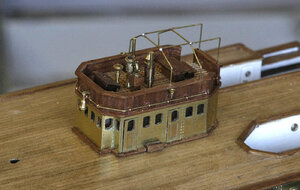
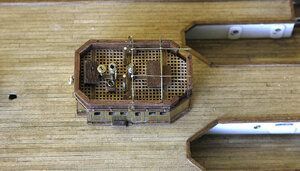
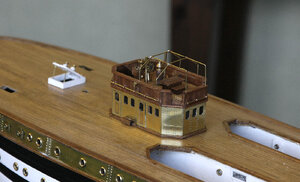
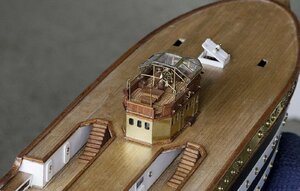
Here we go on to something that I’ve been looking forward to making, the wheelhouse. It’s one of the main detailed features on the deck and it gives me the chance to see how my brass and mahogany theme looks.
Whilst the plans looked simple enough I found them hard to follow. All the detail and measurements were present but because they were spread out over three sheets like a mad woman’s diary and not shown to scale they were confusing, many of the small parts that were made up were not shown where they actually went.
In spite of that the wheelhouse turned out better looking than I had expected, I put quite a bit of work and thought into it and I’m rather pleased with myself. I’ve shown the process in pictures as I think that this explains better than words.
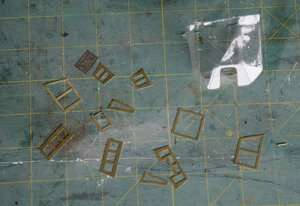
The glass canopy is another issue. A moulded acetate plastic one is supplied, with photo etch pieces meant to be stuck to the outside to look like the frame, that’s always going to end up messy. The moulded piece is misshapen, the wrong size with rounded and not defined edges, I’ve seen better jelly moulds. I think that I will have to make my own so watch this space.
Ken


The theme works great. Maybe you can try to build the canopy yourselve from thin acryl cover sheet.Hi, Again thanks for the many likes and comments on my build, as I’ve said they are encouraging.
Here we go on to something that I’ve been looking forward to making, the wheelhouse. It’s one of the main detailed features on the deck and it gives me the chance to see how my brass and mahogany theme looks.
Whilst the plans looked simple enough I found them hard to follow. All the detail and measurements were present but because they were spread out over three sheets like a mad woman’s diary and not shown to scale they were confusing, many of the small parts that were made up were not shown where they actually went.
In spite of that the wheelhouse turned out better looking than I had expected, I put quite a bit of work and thought into it and I’m rather pleased with myself. I’ve shown the process in pictures as I think that this explains better than words.
The glass canopy is another issue. A moulded acetate plastic one is supplied, with photo etch pieces meant to be stuck to the outside to look like the frame, that’s always going to end up messy. The moulded piece is misshapen, the wrong size with rounded and not defined edges, I’ve seen better jelly moulds. I think that I will have to make my own so watch this space.
Ken
View attachment 173406View attachment 173407View attachment 173408View attachment 173409View attachment 173410View attachment 173411View attachment 173412View attachment 173413
- Joined
- Apr 20, 2020
- Messages
- 6,241
- Points
- 738

Dear KenHi, Again thanks for the many likes and comments on my build, as I’ve said they are encouraging.
Here we go on to something that I’ve been looking forward to making, the wheelhouse. It’s one of the main detailed features on the deck and it gives me the chance to see how my brass and mahogany theme looks.
Whilst the plans looked simple enough I found them hard to follow. All the detail and measurements were present but because they were spread out over three sheets like a mad woman’s diary and not shown to scale they were confusing, many of the small parts that were made up were not shown where they actually went.
In spite of that the wheelhouse turned out better looking than I had expected, I put quite a bit of work and thought into it and I’m rather pleased with myself. I’ve shown the process in pictures as I think that this explains better than words.
The glass canopy is another issue. A moulded acetate plastic one is supplied, with photo etch pieces meant to be stuck to the outside to look like the frame, that’s always going to end up messy. The moulded piece is misshapen, the wrong size with rounded and not defined edges, I’ve seen better jelly moulds. I think that I will have to make my own so watch this space.
Ken
View attachment 173406View attachment 173407View attachment 173408View attachment 173409View attachment 173410View attachment 173411View attachment 173412View attachment 173413
The pictures shown the delicate and complex process you went through. The result is very beautiful, also because of the combination of brass and wood.
I would love to understand how do you create the glass canopy yourself
- Joined
- Dec 16, 2016
- Messages
- 1,179
- Points
- 493

- Joined
- Dec 16, 2016
- Messages
- 1,179
- Points
- 493

Hi, Thanks again for your likes on my build.
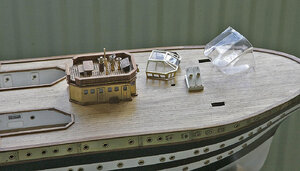
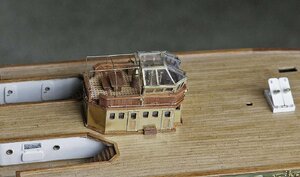
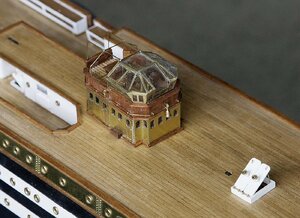
As you know I was unhappy with what Panart wanted me to use as a canopy for the wheelhouse. I decided that I would make up my own frame and use acetate sheet to glaze the individual windows. I used a mixture of the kit photo etch brass for the top and sides and some brass strip for the rest, soldering them together. The outcome was successful but was far from easy. My soldering skills are very basic and leave a lot to be desired. It looked easy but in the end it took about four hours to solder together. Making up a 3D structure with many differing angles by eye proved a challenge, with many solder, de-solder, re-solder and swear moments, it was only with the help of my wife’s extra pair of hands that I managed. It was messy and needed a great deal of filing to get a decent finish, it was worth the effort. You can see the difference with the kit version from the photos.
On reflection it would have been easier to make a wooden mock up and use that to rest the pieces against as you solder, you would end up with the correct shape and fit first go, hind sight is wonderful.
Ken


Hi Ken,
I think that gives you a lot of satisfaction, build your own in scratch!
And to do it with the help of your wife.
My wife helped me with the sails of my ‘le Mirage’:
“Here's my sewing machine, try to sew the sails yourself”
Regards, Peter
I think that gives you a lot of satisfaction, build your own in scratch!
And to do it with the help of your wife.
My wife helped me with the sails of my ‘le Mirage’:
“Here's my sewing machine, try to sew the sails yourself”
Regards, Peter
Excellent work Ken.Other builds I have seen had an issue with the brass parts fitting over that horrible clear vac forming.It is a shame Panart doesn't get with the program and offer a photo etched "development" of the assembly with tabs and bend lines like photo etch for plastic kits.At least it would hold itself together if you chose to solder the corners and joints
Kind Regards
Nigel
Kind Regards
Nigel
Great job Ken! Sooooooo much better.
- Joined
- Dec 16, 2016
- Messages
- 1,179
- Points
- 493

Hi, Again thanks for your likes.
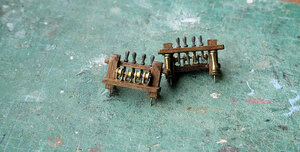
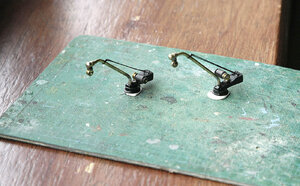
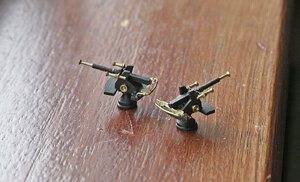
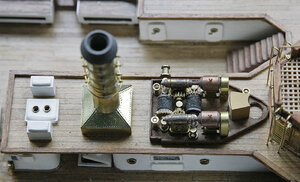
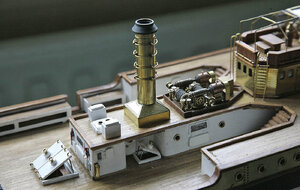
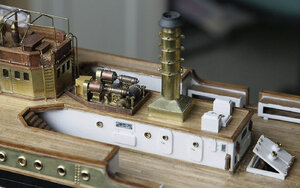
I’ve been putting in the hours on the build over the last few days and have got quite a bit done. The powered winch, the funnel structure and a few deck fittings were made up and fitted in place. I took quite a few photos as I built them up but unfortunately deleted them before I had downloaded them, a senior moment, so I only have the finished items to show. I’ll try and do better, as I used to say to my teachers.
I made the winch platform then worked out how to assemble the many metal parts. This looked simple on the plan but caused much head scratching, like those silly impossible puzzles you got for Xmas. I wanted the individual parts to have contrast with each other rather than just brass or plain black, more detail gets noticed that way so I blackened each part differently and got the effect that I wanted, I then assembled them. Again to get contrast rather than leave the platform a deck colour I stained it light teak.
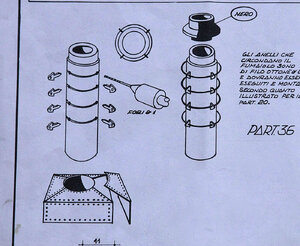
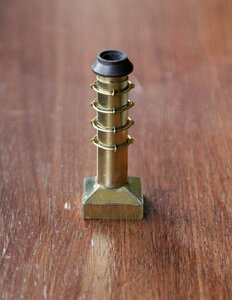
Next was the funnel assembly. The funnel was a very nice brass one with a separate brass piece as the head, I left the funnel brass as that’s my theme but again for contrast I blackened the head. There are four sets of brass rings around the funnel and these are held in place with eyelets. Gluing the eyelets into the thin sided funnel wasn’t a good option so I glued a wooden dowel inside to give them more of a hold, I could also cut off the dowel and that would leave a good substantial area for fixing later. The funnel housing is made up from brass sheet, I first made up the housing to the correct size from a block of wood then glued the exterior brass sheet to that before finally fixing the funnel to it.
I’ve fixed these and the wheelhouse into place on the deck. I have made up a few deck fittings as well as the wheelhouse ladders and put these into place.
Ken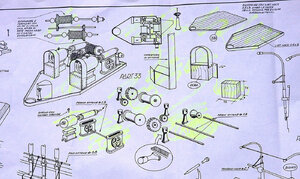


Wonderful workmanship, Ken!
Great work Ken.I love all the polished brass, very in keeping with a builder's model of the period.I wonder how much of this is replaced with plywood in a new kit?I know the hull pieces are ply in a newer kit although the brass parts for the hull are available as a separate extra for a substantial additional expense
Kind Regards
Nigel
Kind Regards
Nigel
- Joined
- Dec 16, 2016
- Messages
- 1,179
- Points
- 493

Hi Nigel, Thanks for your kind comment. As I understand the newer kit from Panart does not include the brass sheeting, its now just all ply. I think that the kit has been dumbed down, easier to build and cheaper to produce, it even has I think four sheets less of plans. All the Mantua groups top kits have gone the same way, balsa instead of lime, etched ply for decks and hull sides instead of planks etc. no wonder modellers are now looking at Chinese kits. This is just my perception.Great work Ken.I love all the polished brass, very in keeping with a builder's model of the period.I wonder how much of this is replaced with plywood in a new kit?I know the hull pieces are ply in a newer kit although the brass parts for the hull are available as a separate extra for a substantial additional expense
Kind Regards
Nigel
ken
Looks like they are digging there own grave. This looks stunning and if the kit was still like yours they most probably would have sold a few based onvyour blog.Hi Nigel, Thanks for your kind comment. As I understand the newer kit from Panart does not include the brass sheeting, its now just all ply. I think that the kit has been dumbed down, easier to build and cheaper to produce, it even has I think four sheets less of plans. All the Mantua groups top kits have gone the same way, balsa instead of lime, etched ply for decks and hull sides instead of planks etc. no wonder modellers are now looking at Chinese kits. This is just my perception.
ken
Keep the pictures coming, lovely work.
- Joined
- Dec 16, 2016
- Messages
- 1,179
- Points
- 493


