A very happy birthday Donnie.
-

Win a Free Custom Engraved Brass Coin!!!
As a way to introduce our brass coins to the community, we will raffle off a free coin during the month of August. Follow link ABOVE for instructions for entering.
-

PRE-ORDER SHIPS IN SCALE TODAY!
The beloved Ships in Scale Magazine is back and charting a new course for 2026!
Discover new skills, new techniques, and new inspirations in every issue.
NOTE THAT OUR FIRST ISSUE WILL BE JAN/FEB 2026
You are using an out of date browser. It may not display this or other websites correctly.
You should upgrade or use an alternative browser.
You should upgrade or use an alternative browser.
AUGURI!!!
Wonderful Donnie! I'll add my birthday wishes to those already offered. Hope you have a great day celebrating with family and friends!
Happy Birthday Donnie


Hope you are having a good one
Best Wishes
Nigel


Hope you are having a good one
Best Wishes
Nigel
Good evening Donnie. Best wishes and have a blast of a Birthday. Cheers Grant
A very Happy Birthday to you.
Happy Birthday, Donie! 

Happy birthday!!
Donnie, happy birthday. Good health, creative success and all the best. 


Happy Birthday Donnie
WOW - thank you all for the Happy Birthdays's !!!
Well, a little update. I went ahead and contacted Sail and Sail for some replacement parts (X2, X3, X4 and X5) and they were gracious enough to replace them - I only had to pay shipping. So thank you Sail and Sail. It is great doing business with these folks. For those that are just turning in. I made a big mistake and glued those parts to the wrong section of the bow. Zoltan also helped be the mediator to S & S so I could get the parts (that I messed up).
S & S has been excellent in keeping me up to date on the tracking too.
Kurt Konrath
Kurt Konrath
Great to hear of great customer service from a company.
Good word of mouth advertising is the best way to get others to look at a companies products.
Good word of mouth advertising is the best way to get others to look at a companies products.
Finally - an update -
Sail and Sail are great to work with as they sent me the spare parts X2, X3, X4, and X5 that I so messed up. They actually sent me two sets in case. Thumbs up for
S & S (and for Zoltan to get the ball rolling on this one).
So, here is the good, bad, and ugly - mostly ugly of the repair. Cameras do not lie. I hate using wood filler as I think it is a NO-NO, but in this case, I felt like I had to resort. But, I am not finished with it. The only reason I resorted to filler as this section is going to be painted or stained black. But, in using wood filler, you do not want to cover up the natural joints and it is (to me at least) to sand down as much as possible. Oh, paint also does not hide either - but can actually expose flaws worse !!!
So, here it is in all of its nasty exposure.
ONE SIDE IS FINISHED. What can I say - the best I could do.
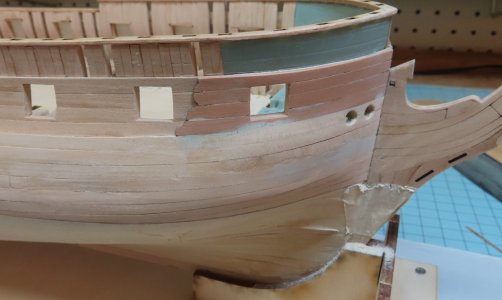
YIKES - I DO NOT WANT TO SHOW THIS --- BUT ---THIS SIDE IS STILL A TOTAL MESS AND IT IS NEXT TO WORK ON. THIS IS WHAT I GET FOR NOT PAYING ATTENTION.
STAY TUNED FOR THE CLEAN-UP. NOTE: IF I HAD USED WOOD GLUE, THIS WOULD NOT LOOK LIKE THIS - BUT CA !!! NO GOOD - MY BAD.
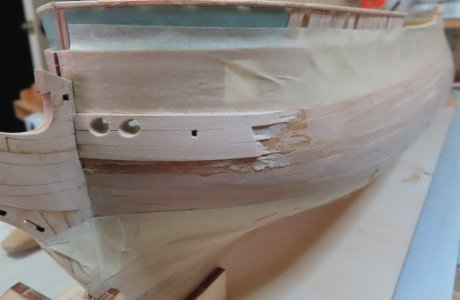
Sail and Sail are great to work with as they sent me the spare parts X2, X3, X4, and X5 that I so messed up. They actually sent me two sets in case. Thumbs up for
S & S (and for Zoltan to get the ball rolling on this one).
So, here is the good, bad, and ugly - mostly ugly of the repair. Cameras do not lie. I hate using wood filler as I think it is a NO-NO, but in this case, I felt like I had to resort. But, I am not finished with it. The only reason I resorted to filler as this section is going to be painted or stained black. But, in using wood filler, you do not want to cover up the natural joints and it is (to me at least) to sand down as much as possible. Oh, paint also does not hide either - but can actually expose flaws worse !!!
So, here it is in all of its nasty exposure.
ONE SIDE IS FINISHED. What can I say - the best I could do.

YIKES - I DO NOT WANT TO SHOW THIS --- BUT ---THIS SIDE IS STILL A TOTAL MESS AND IT IS NEXT TO WORK ON. THIS IS WHAT I GET FOR NOT PAYING ATTENTION.
STAY TUNED FOR THE CLEAN-UP. NOTE: IF I HAD USED WOOD GLUE, THIS WOULD NOT LOOK LIKE THIS - BUT CA !!! NO GOOD - MY BAD.

REPAIR ONGOING
1. Filling a major gouge with strips of wood.
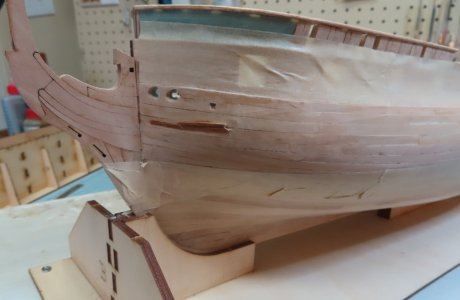
2. Sanding down the filled gap
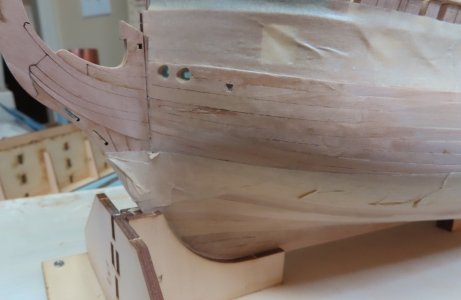
3. Using that 'stuff' again - I hate doing this filler. The filler is probably not needed, but I wanted to smooth out any remaining imperfections. (Yeah Right !!!)
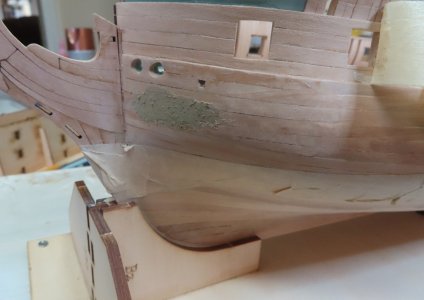
4. Stay tuned as I try to make this look better. . . .
5. Then add X2 - X5 and final clean up.
1. Filling a major gouge with strips of wood.

2. Sanding down the filled gap

3. Using that 'stuff' again - I hate doing this filler. The filler is probably not needed, but I wanted to smooth out any remaining imperfections. (Yeah Right !!!)

4. Stay tuned as I try to make this look better. . . .
5. Then add X2 - X5 and final clean up.
UPDATE ON DISASTER !!!
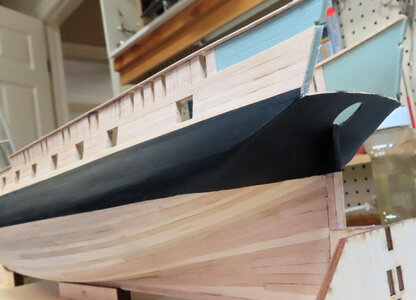
I skipped over showing all the details of the repair. Basically, I added strips to the hull and sanded the strips down to match the existing surface contours.
Therefore, I went ahead (and follow instructions) and painted the wales. Some of you might not want to accomplish this, but I guess I could not wait.
THIS IS THE FIRST PAINT RAW USING MASKING TAPE AND MANUAL PAINTING. TOUCH-UP WORK WILL BE NECESSARY.


