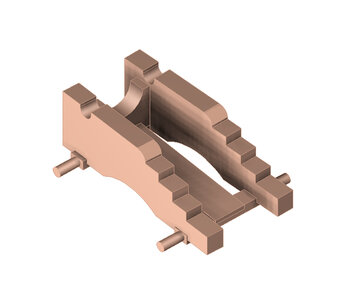
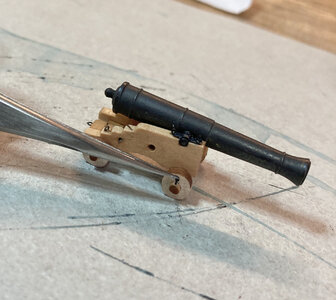
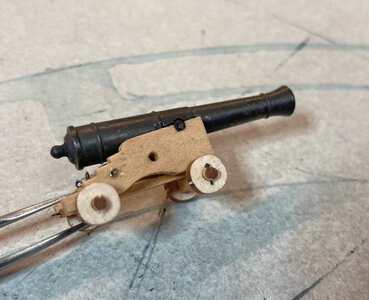
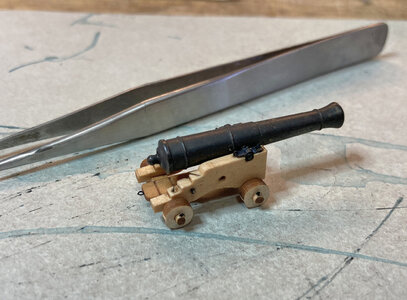
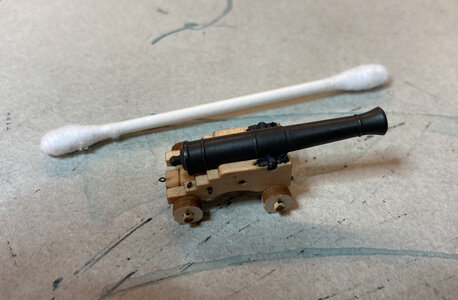
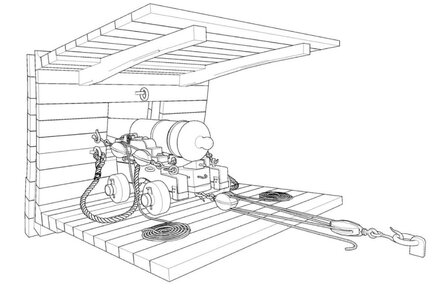
So, I was able to draw a fairly accurate 3D drawing - making a pdf from the manual page and tracing out parts. I will add the wheels. But, the main thing I am working towards (if I continue this 3D) is to show the rigging and eye bolts. It is certainly not "exact" but for about an hour's worth of drawing, I guess it is close enough. The fore trucks stick out a little too much and should be flush. I also relized that I did not include the hole for the breech. I will add that later when I do the rigging. Now, to figure out how to make "rope" with CAD - Ha !!!
-

Win a Free Custom Engraved Brass Coin!!!
As a way to introduce our brass coins to the community, we will raffle off a free coin during the month of August. Follow link ABOVE for instructions for entering.
-

PRE-ORDER SHIPS IN SCALE TODAY!
The beloved Ships in Scale Magazine is back and charting a new course for 2026!
Discover new skills, new techniques, and new inspirations in every issue.
NOTE THAT OUR FIRST ISSUE WILL BE JAN/FEB 2026
You are using an out of date browser. It may not display this or other websites correctly.
You should upgrade or use an alternative browser.
You should upgrade or use an alternative browser.
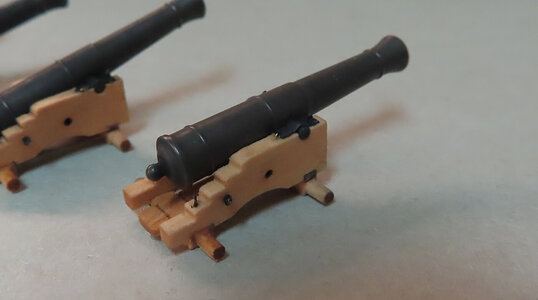
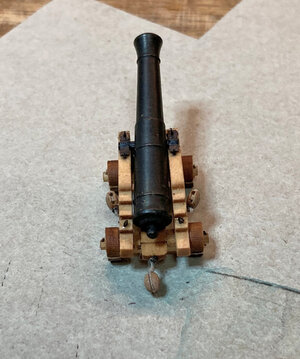
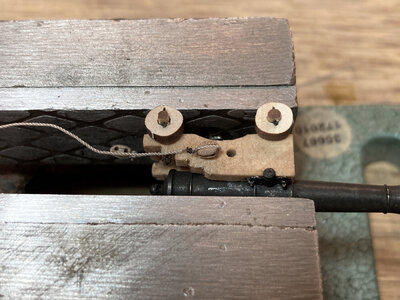
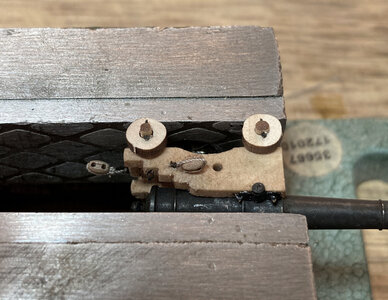
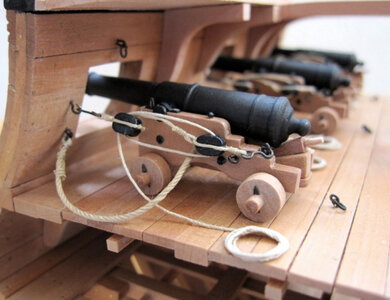
Fitting out the carriages with the hardware. My apologies for not showing the details on this. Its just too tedious enough just to make them. The parts are VERY tiny.
This camera (as I always say) must be replaced. Most gosh awful pictures and too soft. Wheels coming soon. I am turning my own. The kit wheels are too square(ish) and not round.
This camera (as I always say) must be replaced. Most gosh awful pictures and too soft. Wheels coming soon. I am turning my own. The kit wheels are too square(ish) and not round.
I decided to order the Blocks (Pulleys) and Rigging line from

 drydockmodelsandparts.com
What I like about the shipping is that you will get an email at each checkpoint along the way (at least I did) - your results might differ. Of course, it had to go through customs, but the package came with no harm done to it and was fresh - no bends or anything.
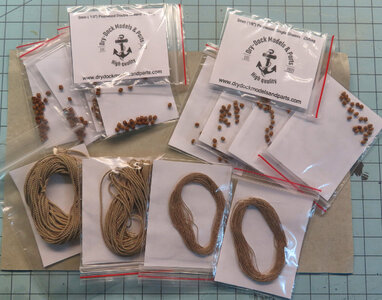
I got my package today and these are the contents I ordered.
3mm single and 3mm double blocks.
several sizes of rigging lines.
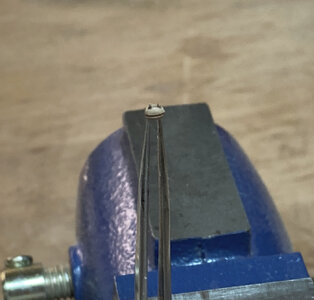
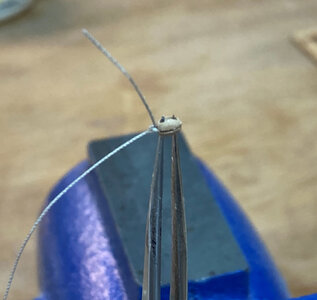
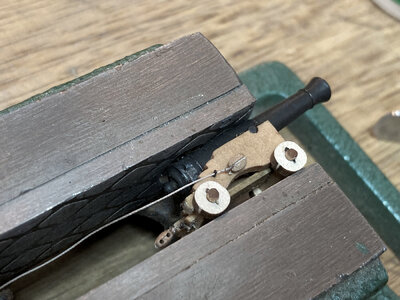
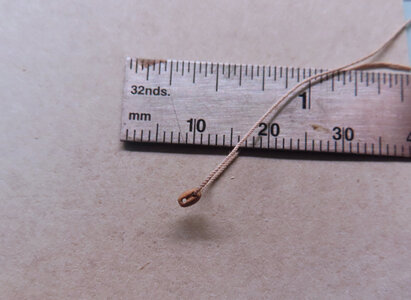
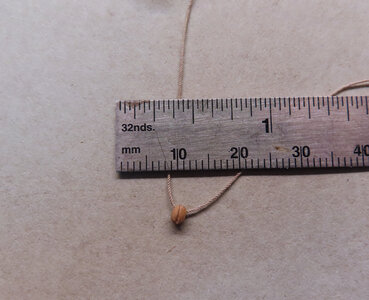
For this demo, I am using the .4mm rigging line and as you can see, it passes through the 3mm single block with no problems at all. Then I also passed the 1mm line through the 1mm hole in the side of the carriage as this is the way the French (Belle Poule) will rig their Breeching line. It also passes with no problems.
I am trying to decide if I want to go a little smaller on the Breeching line - we'll see.
So, I am very happy with the Blocks and the assortment of rigging lines - I will have to decide on the .4mm or .3mm and order more. The order only had one pack of each as I did not know exactly what I wanted. Zoltan and his business are great to do business with !!!

Dry-Dock Models & Parts
Dry - Dock Models & Parts is providing high quality ship model fittings and parts
 drydockmodelsandparts.com
What I like about the shipping is that you will get an email at each checkpoint along the way (at least I did) - your results might differ. Of course, it had to go through customs, but the package came with no harm done to it and was fresh - no bends or anything.
I got my package today and these are the contents I ordered.
3mm single and 3mm double blocks.
several sizes of rigging lines.
For this demo, I am using the .4mm rigging line and as you can see, it passes through the 3mm single block with no problems at all. Then I also passed the 1mm line through the 1mm hole in the side of the carriage as this is the way the French (Belle Poule) will rig their Breeching line. It also passes with no problems.
I am trying to decide if I want to go a little smaller on the Breeching line - we'll see.
So, I am very happy with the Blocks and the assortment of rigging lines - I will have to decide on the .4mm or .3mm and order more. The order only had one pack of each as I did not know exactly what I wanted. Zoltan and his business are great to do business with !!!


Yes, it is nice material to work with. You're going to enjoy it, Donny.I decided to order the Blocks (Pulleys) and Rigging line from

Dry-Dock Models & Parts
Dry - Dock Models & Parts is providing high quality ship model fittings and partsdrydockmodelsandparts.com
What I like about the shipping is that you will get an email at each checkpoint along the way (at least I did) - your results might differ. Of course, it had to go through customs, but the package came with no harm done to it and was fresh - no bends or anything.
I got my package today and these are the contents I ordered.
3mm single and 3mm double blocks.
several sizes of rigging lines.
For this demo, I am using the .4mm rigging line and as you can see, it passes through the 3mm single block with no problems at all. Then I also passed the 1mm line through the 1mm hole in the side of the carriage as this is the way the French (Belle Poule) will rig their Breeching line. It also passes with no problems.
I am trying to decide if I want to go a little smaller on the Breeching line - we'll see.
So, I am very happy with the Blocks and the assortment of rigging lines - I will have to decide on the .4mm or .3mm and order more. The order only had one pack of each as I did not know exactly what I wanted. Zoltan and his business are great to do business with !!!
View attachment 336542
View attachment 336543
View attachment 336544
View attachment 336545
Regards, Peter
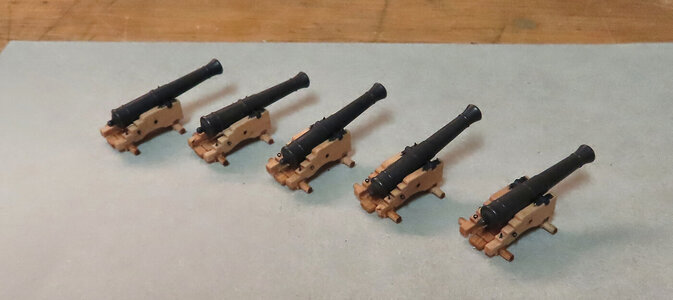
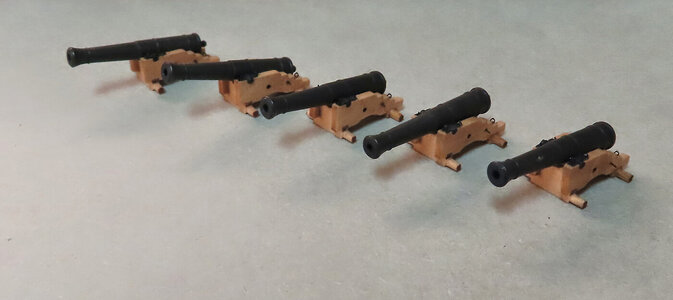
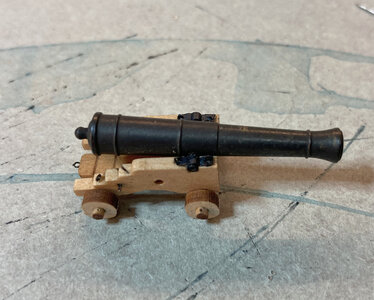
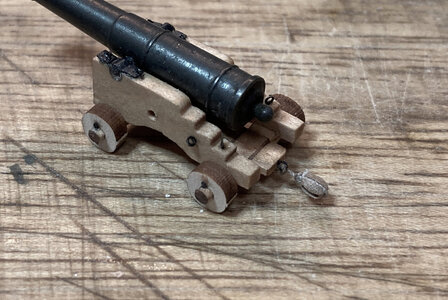
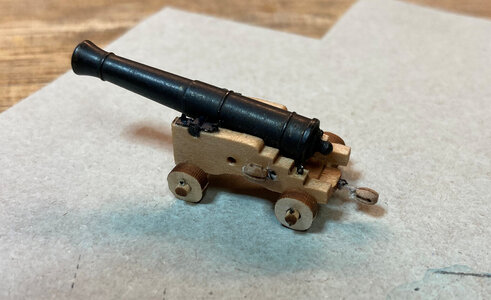
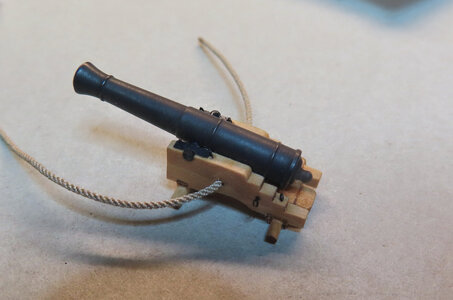
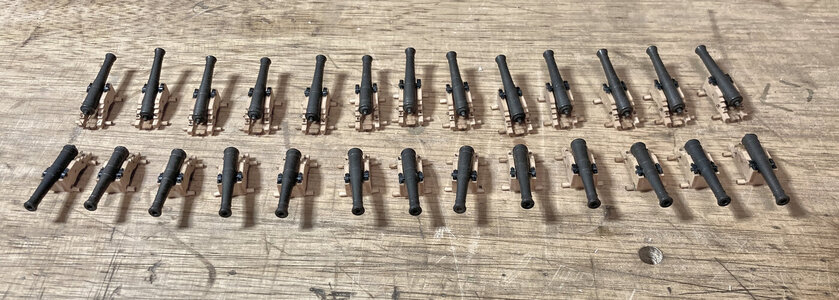
So, this is just an overall picture of the cannons. They lack two things. The wheels as you can see, and also the rigging of the Blocks. I will demonstrate next how I am going to do this. The picture does not show (too tiny) the ring bolt attached to the rear of the carriage. I plan to show a very close-up of that in a while.
I bought a basic 6.25 or 1/4-inch dowel to turn my own wheels. I will show that as well.
The carriages were stained with Linseed oil. It gives just the right amount of depth of color naturally.
I bought a basic 6.25 or 1/4-inch dowel to turn my own wheels. I will show that as well.
The carriages were stained with Linseed oil. It gives just the right amount of depth of color naturally.

As it turns out, I decided to use the kits wheels. I should know better by now that regular store-bought dowels are not going to work - what was I thinking?
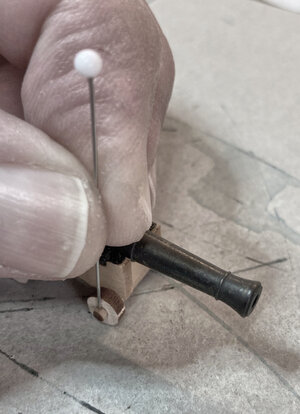
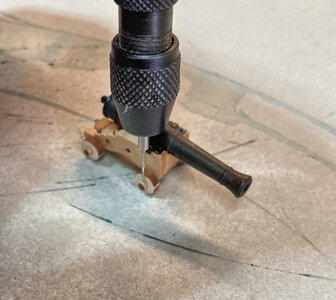
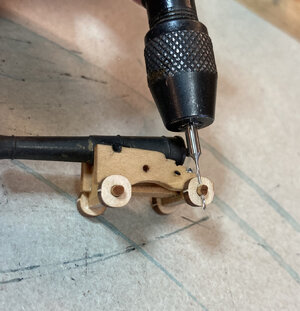
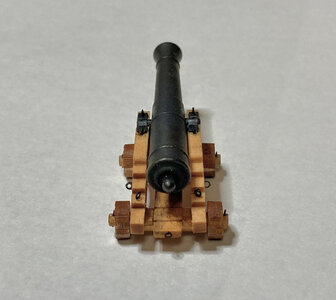
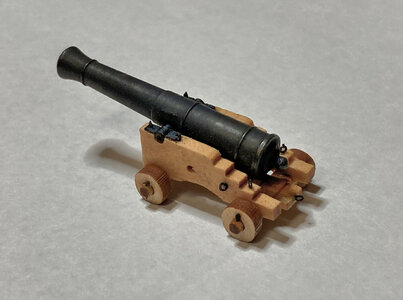
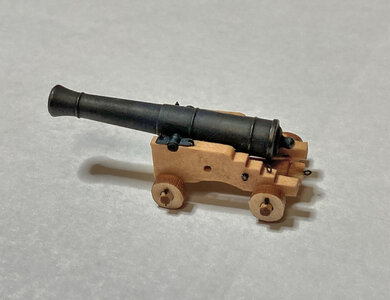
So the "linch pins" had to be installed and I used a .48 mm bit for those to drill all the way into the axels. I started the hole with a fine needle to make an impression and as a guide for the tip of the bit.
For the sake of size reference, I forgot to put a ruler or some other thing next to it. If you want to rig out your cannons like this - just realize that the PE parts are in the order of some as small as .5mm x .5 mm and even less. Using tweezers is a must.


Impressive Donnie!
I agree with Paul, quite an impressive view. QQ what did you use to blacken the barrels and other brass parts, unless you paint them?
Thank you all the comments and likes - you all are too nice.
The blackening was done with "Caseys Brass Black". It can be a little temperamental in the fact that the brass has to be really clean (using like an emery cloth). Even with that it seems the (brass part) can have perhaps some impurities or something as the Brass Black does not want to blackening it. Therefore, the parts have to be dipped again.
The Capsquares (the small hinged lid) over the trunnion was dipped in Brass Black, but eventually, I had to use Testors Gun Metal to touch up some spots that did not do well.
For those that are interested, here is the workflow for the cannon barrels.
1) Mounted each barrel in my lathe (set speed to about 500RPM) and used emery cloth to polish the brass (as they were a little oxidized).
2) wiped the barrel off with Acetone.
3) soaked in Blackening in a small cup for about a minute.
4) removing the cannon and tapped it around on a paper towel to remove excess. Let dry for a few min.
5) Use a regular cotton hand towel to wipe off. (actually rubbed it fairly hard).
6) Dip in Blackening again for about 30 seconds.
7) when dried off again using towel, I put 3-in-1 machine oil on the cannon and let it soak for a while and dried off. It kind of produces a sheen -
The oil is completely wiped off and will not soak into the carriage - but somehow it does make a little natural sheen to the cannon.
I did not go through this much trouble for the Capsquares.
There is also a "gun bluing" agent, but I have never tried that before.
Starting now to rig up the carriages. I am using "Dry Dock Model & Parts" Blocks and cotton line. Specific items are listed below. This is for the carriages only for now.
- 3mm Single Sheave Pearwood
- 0.3 mm, Beige, cotton, 6 meter
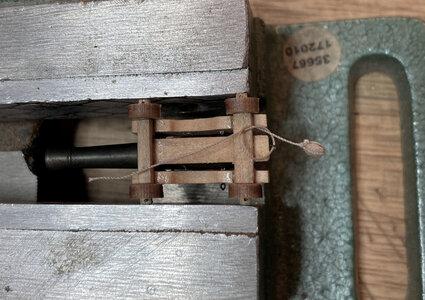
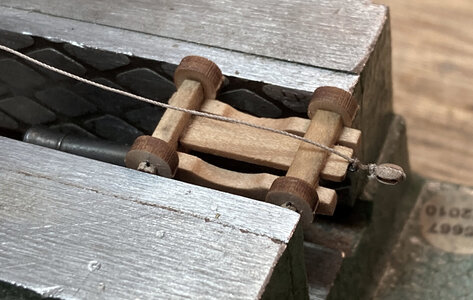
Thank you for all the likes - it is much appreciated. I thought I should go back and show the process of rigging the blocks to the side of carriages. The Eye Bolts have an eye opening of about .5mm and the line is .3 mm.
I could tie a knot like the others, but I felt like it would look too messy and bulky. Therefore, I opted for this technique and after running the line through the eye, I used THICK CA glue to fill the eye. When the CA dried in a matter of less than a min, it produced what I thought was a snug fit, and even gently pulling on the Block it was not going to come loose.
I know that some will cringe at this idea as there is really no knot of any kind holding it and some might wonder (even me) as to how long this will last. Well, to me, there will not be hardly any pressure on the block(s).
So, with that said, here are the pics. As a matter of fact, yes, I actually did try other methods and just could not come up with any other solution since these are so very tiny. Another idea that I had was to use a PIN Vise and make a .3mm hole in the carriage and pass the line through it and glue from the other side. However, I have already done half of them already.
- Joined
- Oct 17, 2020
- Messages
- 1,691
- Points
- 488

Ciao Donni, scusa, i blocchi devono essere assemblati come in questa immagine, che non vedo bene in foto, grazie per l'attenzioneGrazie per tutti i Mi piace - è molto apprezzato. Ho pensato che dovevo tornare indietro e mostrare il processo di montaggio dei blocchi ai lati delle carrozze. I golfari hanno un'apertura dell'occhio di circa 0,5 mm e la linea è di 0,3 mm .
Potevo fare un nodo come gli altri, ma mi sembrava che sarebbe sembrato troppo disordinato e ingombrante. Pertanto, ho optato per questa tecnica e dopo aver eseguito la linea attraverso l'occhio, ho usato la colla THICK CA per riempire l'occhio. Quando il CA si è asciugato in meno di un minuto, ha prodotto quello che pensavo fosse un adattamento aderente e anche tirando delicatamente il Block non si sarebbe allentato.
So che alcuni rabbrividiranno a questa idea perché non c'è davvero nessun nodo di alcun tipo che la trattiene e alcuni potrebbero chiedersi (anche me) quanto durerà. Bene, per me, non ci sarà quasi nessuna pressione sui blocchi.
Quindi, detto questo, ecco le foto. In effetti, sì, in realtà ho provato altri metodi e non sono riuscito a trovare nessun'altra soluzione poiché questi sono molto piccoli. Un'altra idea che ho avuto è stata quella di usare una morsa PIN e fare un foro di 0,3 mm nel carrello e passare la linea attraverso di essa e incollare dall'altro lato. Tuttavia, ne ho già fatti metà.
[ALLEGARE=completo]340218[/ALLEGARE]
[ALLEGARE=completo]340217[/ALLEGARE]
[ALLEGARE=completo]340215[/ALLEGARE]
[ALLEGARE=completo]340220[/ALLEGARE]
[ALLEGARE=completo]340219[/ALLEGARE]
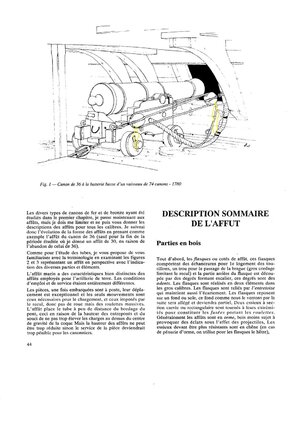
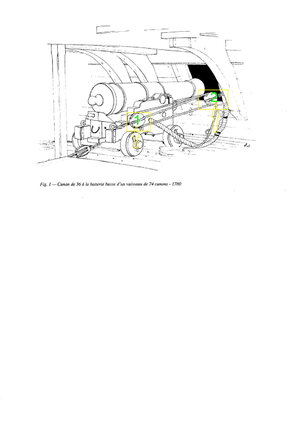
Hi Donni, sorry, the blocks must be assembled as in this image, which I don't see well in the picture, thanks for your attention
Last edited by a moderator:
Thank you again "Frank" and "Thomas" for showing that to me -
well, the deal is that what is real on a ship does not always looks "good" on the model due to restraints of parts and miniaturization. It is a balance of "Representation and Scale". The larger the component, the more lifelike scale you can afford, the smaller the scale, then things can only become "representative" unless a person has access to micro miniature parts.
Additionally: anyone building this model will see that Sail & Sail does not include the rigging plans for the Cannons. They only have PE parts for the carriages. Which is more than fair. The rigging is left up to the modeler - the images in the back of the manual as well as the "Plan View" on the plans do not show the rigging plan. No complaints here really, but it would have been nice to include this. They only show the Cannons placed in position on the deck with no rigging. However, in being "fair" judgement, Sail and Sail did an excellent representation of the carriages and also the PE hardware (eyebolts, Capsquares, trunnions, Linch Pins, etc)
Last edited:
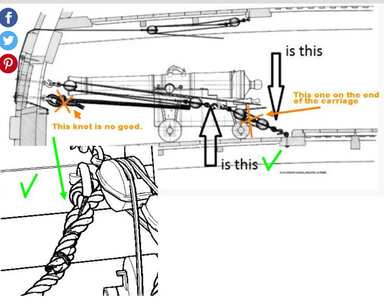
Greetings Tobi,The picture of Thomas is, as far as I remember correctly, the English lashing technique.
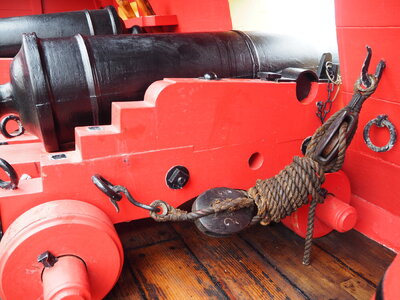
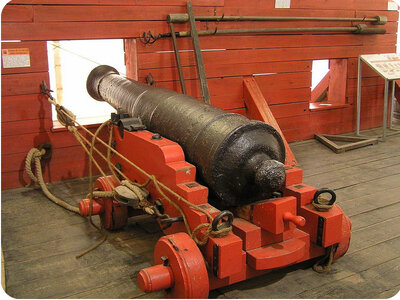
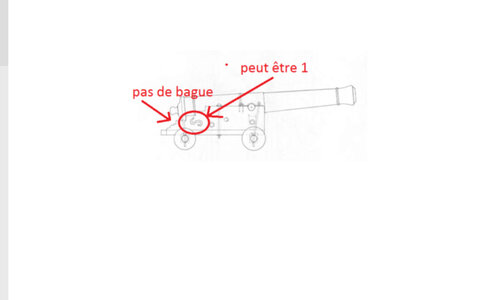
In Thomas's image, it is a French cannon rigged. There are two major differences between rigging Continental and English naval guns. Continental method (French specifically) breeching their guns thru holes in the middle of the carriages, while the English method of breeching their guns using the cascable's neck for Armstong pattern barrels, and using the breeching ring on cascabel for Blomfileds barrels.
Both English and Continental make their sides (brackets) from two halves, but only on continental carriages, they made two halves using one or two scarf joints (depending on the caliber).


