I’d stop but then the OCD part of me would not be able to restThis is the exact reason I don’t keep track of hours…
-

Win a Free Custom Engraved Brass Coin!!!
As a way to introduce our brass coins to the community, we will raffle off a free coin during the month of August. Follow link ABOVE for instructions for entering.
-

PRE-ORDER SHIPS IN SCALE TODAY!
The beloved Ships in Scale Magazine is back and charting a new course for 2026!
Discover new skills, new techniques, and new inspirations in every issue.
NOTE THAT OUR FIRST ISSUE WILL BE JAN/FEB 2026
You are using an out of date browser. It may not display this or other websites correctly.
You should upgrade or use an alternative browser.
You should upgrade or use an alternative browser.
Bluenose 1:64 by Model Shipways - Build log
- Thread starter HughLo
- Start date
- Watchers 25
-
- Tags
- bluenose model shipways
Nicely done. This step was the one I lost the most sleep thinking about how to do it well.6/11 to 7/2
I’m back from Vallarta but it took almost a week for me to get my hands on my Bluenose… just too much stuff that needs my attention after being gone for over two months. I’m glad in many ways of being home, but I’ll be glad when it feels like home again.
First up is “what” exactly should I work on first? I decided to work on the chainplates followed by the eyelets.
Lots of written text (even for me) for what ended up a fairly small amount of work.
I liked the way Gary Brinker did them on his YouTube channel (BLUENOSE PART 19… Deadeyes & Chainplates) which is similar to what is shown in the instructions. Looks nice and the deadeyes are functional. The first one took about an hour (minus the three holes) and while I know I’d improve on the time and appearance, I wasn’t super impressed by my work. I also knew duplicating them (there are a total of 20) would be difficult and time consuming.
Then I built one like many builders do including the Suburban Ship Modeler. The first one took about 20 minutes (minus the three holes), and just like the other method I knew I’d improve upon the time and look, but I also felt in addition to looking better, they would be easier to duplicate.
The test came when I put both of these on the ship side by side. Bottom line the second method looked better. Plus I felt it would be easier to duplicate.
View attachment 457009
Building them is involved but fairly straightforward except for the drilling of the holes. More on that later.
I started building them out and I’m halfway done (8 large and 2 small) with the first part of the chainplates.
- Wrap wire around the deadeye
- Twist the ends of the wire tightly together
- Drill a hole about 1/4” from the end in the brass strip
- Feed the twisted ends through the hole in the brass strip
- Fold the end of the brass strip over upon itself trapping the twisted wire
- Measure and cut the chainplate to the proper length
- Cut the tip into a point
- Drill three (or two for the smaller ones) holes in the strip on the opposite end as the deadeye
- Secure the deadeye to the brass strip with a drop of superglue holding the twisted wire between the folds of the strip
The second part is drilling the holes for mounting them to the hull - each needs either 2 or 3 holes. Drilling the holes was the most difficult part of the overall process not just because drilling with a pin vice was proving to be difficult, but more importantly, if the hole wasn’t right in the middle of the strip, the brass strip would break when I folded it over. I used a push pin as a center punch, but the drilling was still daunting. I even tried using my GOXAWEE Rotary Tool (a Dremel-like tool) but it was still difficult.
View attachment 457010 View attachment 457011 View attachment 457012
I’m sure it would have been easier if I had a pair of magnifying glasses and a drill press - neither of which I currently have. I believe my local club (Rocky Mountain Shipwrights) has a drill press that I can borrow so I will wait on drilling the attachment holes.
Saturday June 15th was the club meeting where I picked up the drill press. Hopefully it will make things easier.
There was a learning curve on using the drill press (after all, I’m still drilling into a 1/16” strip), but I was able to finish the 2nd half of the chainplates (other than the 3 holes) in about an hour.
I build a small jig to help with the 3 holes… and yes it’s just stiff cardboard taped to a board but it does the trick.
View attachment 457014
As long as I take it slowly, I am able to drill the holes in one chainplate. I really need to focus on taking my time. One poorly drilled hole and I have to completely rebuild the chainplate. Of the 20, I end up needing to rebuild 5. The biggest take away is that with such a small drill bit, it tends to be flexible. When it touches the brass strip, it can very easily bend slightly and move off center. To resolve this, I have to tightly hold the strip against the table which is a bit difficult as the strip gets hot plus I have to hold it very close to the desired location of the hole… right next to the drill’s chuck. I end us using some old tweezers that have a bent tip.
After all 20 are drilled, I add a drop of super glue to where the twisted wire of the deadeye is located in folded strip. This goes fairly smoothly although the glue fills a few of the holes in the deadeyes. I’m able to drill these out on all of them except for one which I have to rebuild.
View attachment 457013
I then paint the brass black.
View attachment 457015
Looking at the rails that they will go through before being attached to the hull, I notice that while I made the slits for the chainplates for the foremast, I did not do it for the mainmast. And these slits actually need to go through two rails. Ugh. Since it’s been a few months since cut the slits, I looked back at my log to see if I could remember doing (and not doing) them, but somehow I didn’t write anything about them. I’m assuming I did them after painting the hull but before varnishing it.
Putting the slits in isn’t too difficult using a very narrow knife blade, but because of the way I made the chainplates (folding the strip over the twisted wire), the slits need to be more than slits; they need to be wide enough to let the folded section slide into the rail, at least partially. I use a variety of tools to make these holes in the rails; a small drill bit in a pin vice, two different files, one circular and the other flat, and the very narrow knife.
View attachment 457020
And even though I force myself to make these holes slowly, I still break through the side of the rail in a few places. These I close up with glue and a clamp.
View attachment 457016 View attachment 457017 View attachment 457019View attachment 457018
While test fitting the chainplates in place, I break one off them causing me to have to rebuild it.
Attaching the chainplates is fairly straightforward as they are glued and nailed to the hull. For the nailing, I get to use a pair of pin insertion pliers that I bought a while back from Micro-Mark. I only had about 60 pins to insert, but these pliers were great. I whole-heartily endorse them.
View attachment 457021
As for the super glue, I haven’t use it very much, so it is still a learning experience. One thing I learned from last time was to invest in some long skinny tips for the glue. This seems to have helped a lot.
View attachment 457022
After all of the chainplates are attached, I touch up the paint (black, white, and yellow) followed by a touch up of the satin varnish.
View attachment 457023 View attachment 457024View attachment 457026
View attachment 457027
The nail heads need a little touch up, but overall I’m pleased with them.
If I had a mulligan, I would have slid a card behind the chainplates before I attached them and touched up the black paint at that point. Live and learn.
Work time: 15 hours
Total work time: 244 hours
After each step I have the sense of joy and accomplishment but it’s followed quickly by a sense of apprehension as I start thinking about the next step. I know it’s not next, but I’m already thinking about the deck furniture, especially the stuff at the bow. And don’t get me thinking about riggingNicely done. This step was the one I lost the most sleep thinking about how to do it well.
7/4 to 8/5
The Rocky Mountain Shipwrights workshop is on Saturday (7/6), and I thought I would use the time to catch up with friends and figure out what I would work on next. Even though I had planned to work on the eyelets next, I was not sure they would be the best fit for the workshop. After a bit of research, I decided to do prep work for the rudder.
At the workshop I sanded the rudder to taper it from front to back as well as top to bottom. I still need to shape and glue a dowel near the top, but I did not bring one so it will have to wait. Once I get home, I will attach a sanded 5/32” dowel to the top of the rudder after using my GOXAWEE to carve a small gouge into it and add a little filler. I will wrap it up by sanding everything smooth and then adding two coats of gray primer.
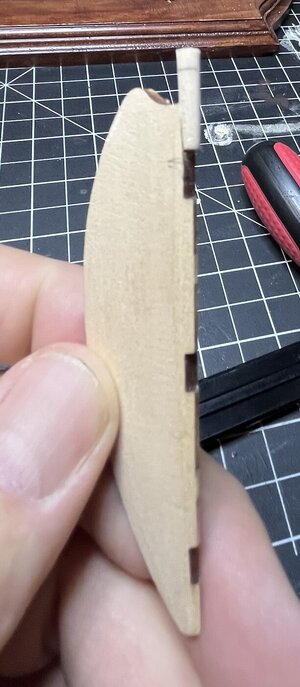
It still needs to be painted red and a touch of black, but that can wait.
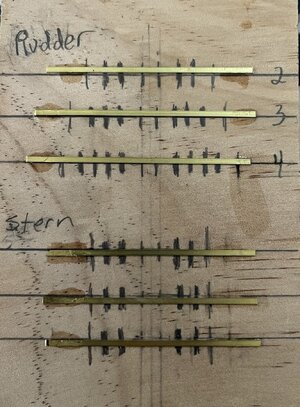
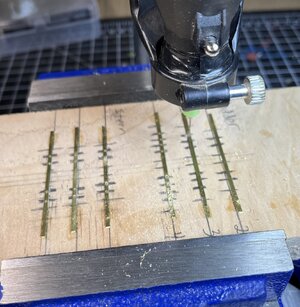
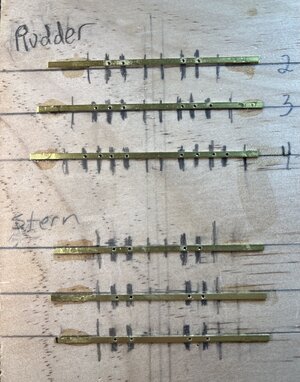
Next up are the pintles and gudgeons, and based on a number of build logs, including the Suburban Ship Modeler and GGibson over on MSW, I decided to glue the brass strips to a piece of wood and mark out where the holes will go on the pintles and gudgeons. The pictures in their build logs helped plot this out plus GGibson stated his measurements between the holes so I was able to draw it out on a board once I got home.
I am hopeful this method will go smoother than my drilling did for the chainplates. I was able to drill the holes in them, but I fought with it throughout the entire process.
If this method works better (low bar in my opinion), I will go back and edit my last post recommending drilling the chainplates in the same fashion.
So, about an hour prepping to board and glueing the six strips down, and then about an hour to drill the thirty holes - without an error. I definitely recommend this method for the pintles and gudgeons as well as any future chainplates.
At this point, I have come to the realization that I am struggling to find time for building. I know they are excuses, but life is getting in the way. From some painful teeth/jaw issues (compounded by the fact that my dental insurance doesn’t kick in until August 1st), to our 100 pound Great Pyrenees getting sprayed by a skunk three days before a trip to North Carolina to visit family, to some major on-going renovations to our patio and deck (including preparing to add a 12x20 gazebo), compounded by some child custody and support issues for my daughter and her kids that have been in the court system since January of 2023 - yes over a year and a half and he hasn’t physically seen the kids or helped financially at all, not even a bag of diapers. Deadbeat in every sense of the word - and that comes from a single dad who raised two daughters with truly little assistance from their mom and even less that was not court enforced. And did I mention my wife has Parkinson’s and had Deep Brain Stimulation surgery recently?! I am not looking for sympathy, just stating some facts.
But with the bad comes the good… I’m getting closer to my dentist appointment and have done ok on a combination of OxyContin and klonipin, we were able to get rid of most of the skunk smell with a combination of hydrogen peroxide, baking soda, and dawn dish soap, the NC trip was great (other than the CrowdStrike issue that occurred right after takeoff while we were in the air), the patio and deck are coming together nicely, and we believe the courts are finally catching up with Mr Deadbeat (but in the meantime we’ve been able to spend a lot more time with the grandkids - I even started a wooden boat model with my grandson - more on that in a separate post), and my wife is doing great. It is just a lot of stuff that is not letting me focus on my Bluenose.
And then just as things started to move in the positive direction, COVID hit me with a vengeance. I am up to date with my boosters and have had it previously, but this was a bad bout of it for me. I was able to get on paxlovid and at least it made me feel a bit better, but it’s expensive ($200) and one of the side effects is that it leaves a really nasty taste in your mouth - a taste that does not go away until it’s almost time to take the next dose. I am feeling better, but it knocked me down for a solid 4 days and made me miss my dentist appointment as well as our club’s workshop on Saturday.
So finally, after a number of days lying in bed, today was the first day where I felt like doing anything other than napping. I.E. - It is Bluenose time.
With my scattered mind I decide to get things ready for the bowsprit. I cut it from a kit supplied 3/16 dowel. I drill the hole for the bowsprit at the tip of the bow and widen it until the dowel will fit through it.

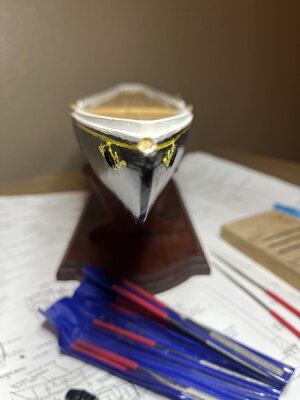
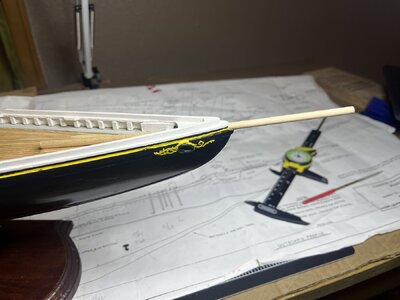
It will need to be shaped, but right now I'm just getting the bowsprit and creating the hole.
I drilled out the Britannia mooring chocks, first with a 1/64” drill bit then followed with a 3/64” bit. I cleaned them up with some 400-grit sandpaper and then used a 1/16” bit to drill the hole for it in the rail then widened it with a small file.
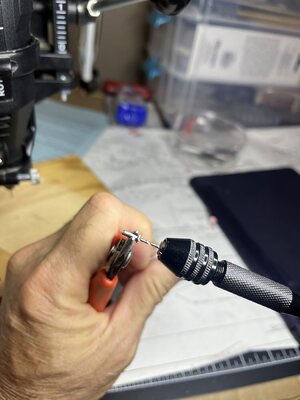
I will paint them yellow on the outside of the hull as they line up perfectly with the yellow line of the hull once they are installed.
I then marked and drilled the holes in the stanchions for the eyebolts and rings using a 0.5mm micro drill bit. I spent quite a bit of time trying to make sure I was going to put them on the correct stanchion, only to find out that while I am sure they were used on the actual ship, nothing connects to them on the model - so they are just for decoration.
I then added the rings to the eyebolts and cut about a third of the shaft of the eyebolts off.
A drop of CA glue on the shaft and slide it into the predrilled holes… but no, the 0.5mm holes were too small. And given the tiny diameter of the eyebolt shaft, if you try to push it in, it bends. Argh.
On a test piece of wood, I drill a 0.6mm hole (the next bigger size that I have) and check to see if an eyebolt will fit - and it does! So, I re-drilled the holes using the 0.6mm bit and started glueing in the eyebolts and rings. Most of them go in as expected, but four of them do not slide into the holes and the shaft bent. Instead of connecting four rings to four eyebolts to replace the bent ones, I decided to do them separately. I trim the shaft and glue the eyebolt into the hole and then attach the ring.
These four replacements are a pain as it is difficult to pinch the ring closed while the eyebolt is already attached, but at least there are only four of them.
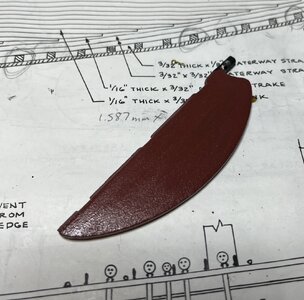
Jumping back to the rudder, I paint the small shaft black.

Once dried, I add two coats of clear satin finish. Now it is really time for the pintles and gudgeons, but I will cover that in my next write up.
Grandson’s 1st model
A while back I picked up a youth kit of the "Bermuda" from Alice Sampson's (a Rocky Mountain Shipwright's club member) company Seaworthy Small Ships. Alice and her business partner Julius Spradley recently took the helm of the company and will continue the production of a wide range of wooden toy boat model kits. These high-quality kits allow new and younger modelers the ability to discover the joys of modeling plus their model can sail in about any body of water.
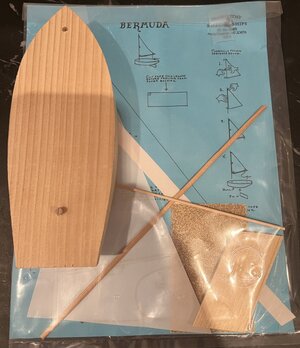
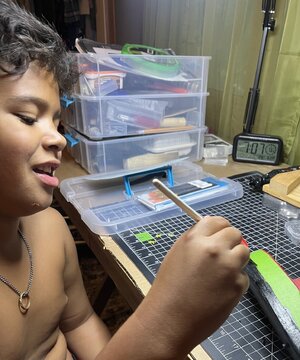
Since my grandson is seven ½ (he will tell you that he is 8), I thought I would give it a go. He knows about my ship models and was excited to start his own build. After a quick rundown of the overall process, he started sanding... and sanding, and even more sanding. After he was a bit tired of hand sanding, I let him use my hand-held orbital sander.
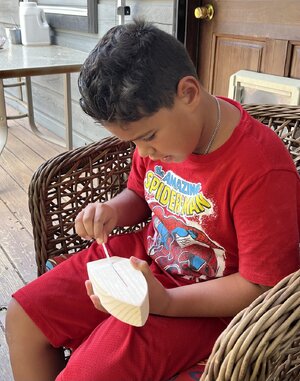
He enjoyed using a power tool "all by himself” and heard more than a few times that the tool we will use most often is our patience.
We then added the fin and talked about painting. He wanted a rainbow pattern but accepted my idea of a red hull with a black stripe. The rainbow would be on the "deck" and "sail". I then explained why we needed to first paint it with a primer.
And while he asked a couple of times "why is it grey?", he humored his grandfather, especially when I gave him the can of spray paint. I wish I would have taken some pictures, but my hands were full of a 7 1/2 year old holding a live can of spray paint...
We then let a few coats of primer dry.
On his next visit, we went after the red hull - which first meant taping it off. As with the primer being grey, he asked a few times about the green tape, but again humored me. I put the first piece of tape on, while he did the rest, although I helped keep it where we wanted it. I then let him loose with the brush-on acrylic red paint and he did a few coats.
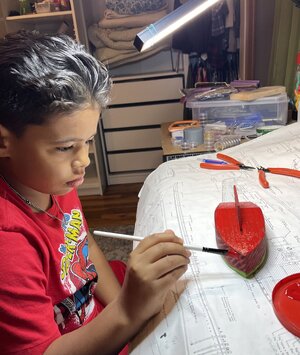
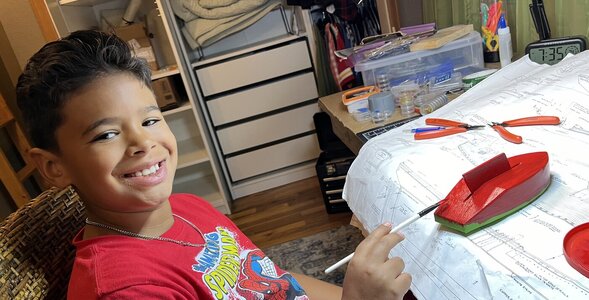
On his next visit, we removed the tape, and he was AMAZED at the results - saying they looked "like an artist had done them". I pointed out that "he" was the artist.
We then taped off for the black stripe and again I let him do a few coats.
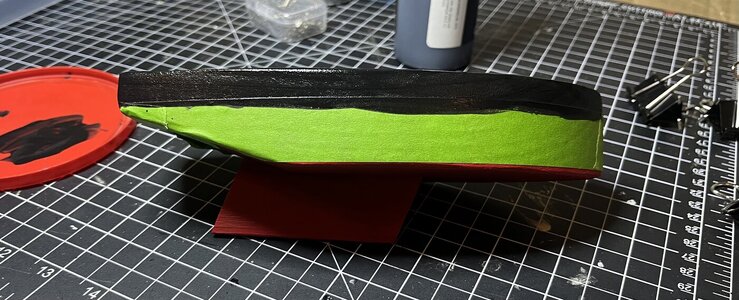
Unfortunately, that is where we stand as both of our lives have been busy plus I have had covid. Next up will be taping off the deck for the rainbow pattern.
Work time: 7.5 hours
Total work time: 251.5 hours
The Rocky Mountain Shipwrights workshop is on Saturday (7/6), and I thought I would use the time to catch up with friends and figure out what I would work on next. Even though I had planned to work on the eyelets next, I was not sure they would be the best fit for the workshop. After a bit of research, I decided to do prep work for the rudder.
At the workshop I sanded the rudder to taper it from front to back as well as top to bottom. I still need to shape and glue a dowel near the top, but I did not bring one so it will have to wait. Once I get home, I will attach a sanded 5/32” dowel to the top of the rudder after using my GOXAWEE to carve a small gouge into it and add a little filler. I will wrap it up by sanding everything smooth and then adding two coats of gray primer.

It still needs to be painted red and a touch of black, but that can wait.
Next up are the pintles and gudgeons, and based on a number of build logs, including the Suburban Ship Modeler and GGibson over on MSW, I decided to glue the brass strips to a piece of wood and mark out where the holes will go on the pintles and gudgeons. The pictures in their build logs helped plot this out plus GGibson stated his measurements between the holes so I was able to draw it out on a board once I got home.
I am hopeful this method will go smoother than my drilling did for the chainplates. I was able to drill the holes in them, but I fought with it throughout the entire process.
If this method works better (low bar in my opinion), I will go back and edit my last post recommending drilling the chainplates in the same fashion.
So, about an hour prepping to board and glueing the six strips down, and then about an hour to drill the thirty holes - without an error. I definitely recommend this method for the pintles and gudgeons as well as any future chainplates.


At this point, I have come to the realization that I am struggling to find time for building. I know they are excuses, but life is getting in the way. From some painful teeth/jaw issues (compounded by the fact that my dental insurance doesn’t kick in until August 1st), to our 100 pound Great Pyrenees getting sprayed by a skunk three days before a trip to North Carolina to visit family, to some major on-going renovations to our patio and deck (including preparing to add a 12x20 gazebo), compounded by some child custody and support issues for my daughter and her kids that have been in the court system since January of 2023 - yes over a year and a half and he hasn’t physically seen the kids or helped financially at all, not even a bag of diapers. Deadbeat in every sense of the word - and that comes from a single dad who raised two daughters with truly little assistance from their mom and even less that was not court enforced. And did I mention my wife has Parkinson’s and had Deep Brain Stimulation surgery recently?! I am not looking for sympathy, just stating some facts.
But with the bad comes the good… I’m getting closer to my dentist appointment and have done ok on a combination of OxyContin and klonipin, we were able to get rid of most of the skunk smell with a combination of hydrogen peroxide, baking soda, and dawn dish soap, the NC trip was great (other than the CrowdStrike issue that occurred right after takeoff while we were in the air), the patio and deck are coming together nicely, and we believe the courts are finally catching up with Mr Deadbeat (but in the meantime we’ve been able to spend a lot more time with the grandkids - I even started a wooden boat model with my grandson - more on that in a separate post), and my wife is doing great. It is just a lot of stuff that is not letting me focus on my Bluenose.
And then just as things started to move in the positive direction, COVID hit me with a vengeance. I am up to date with my boosters and have had it previously, but this was a bad bout of it for me. I was able to get on paxlovid and at least it made me feel a bit better, but it’s expensive ($200) and one of the side effects is that it leaves a really nasty taste in your mouth - a taste that does not go away until it’s almost time to take the next dose. I am feeling better, but it knocked me down for a solid 4 days and made me miss my dentist appointment as well as our club’s workshop on Saturday.
So finally, after a number of days lying in bed, today was the first day where I felt like doing anything other than napping. I.E. - It is Bluenose time.
With my scattered mind I decide to get things ready for the bowsprit. I cut it from a kit supplied 3/16 dowel. I drill the hole for the bowsprit at the tip of the bow and widen it until the dowel will fit through it.


It will need to be shaped, but right now I'm just getting the bowsprit and creating the hole.
I drilled out the Britannia mooring chocks, first with a 1/64” drill bit then followed with a 3/64” bit. I cleaned them up with some 400-grit sandpaper and then used a 1/16” bit to drill the hole for it in the rail then widened it with a small file.

I will paint them yellow on the outside of the hull as they line up perfectly with the yellow line of the hull once they are installed.
I then marked and drilled the holes in the stanchions for the eyebolts and rings using a 0.5mm micro drill bit. I spent quite a bit of time trying to make sure I was going to put them on the correct stanchion, only to find out that while I am sure they were used on the actual ship, nothing connects to them on the model - so they are just for decoration.
I then added the rings to the eyebolts and cut about a third of the shaft of the eyebolts off.
A drop of CA glue on the shaft and slide it into the predrilled holes… but no, the 0.5mm holes were too small. And given the tiny diameter of the eyebolt shaft, if you try to push it in, it bends. Argh.
On a test piece of wood, I drill a 0.6mm hole (the next bigger size that I have) and check to see if an eyebolt will fit - and it does! So, I re-drilled the holes using the 0.6mm bit and started glueing in the eyebolts and rings. Most of them go in as expected, but four of them do not slide into the holes and the shaft bent. Instead of connecting four rings to four eyebolts to replace the bent ones, I decided to do them separately. I trim the shaft and glue the eyebolt into the hole and then attach the ring.
These four replacements are a pain as it is difficult to pinch the ring closed while the eyebolt is already attached, but at least there are only four of them.
Jumping back to the rudder, I paint the small shaft black.

Once dried, I add two coats of clear satin finish. Now it is really time for the pintles and gudgeons, but I will cover that in my next write up.

Grandson’s 1st model
A while back I picked up a youth kit of the "Bermuda" from Alice Sampson's (a Rocky Mountain Shipwright's club member) company Seaworthy Small Ships. Alice and her business partner Julius Spradley recently took the helm of the company and will continue the production of a wide range of wooden toy boat model kits. These high-quality kits allow new and younger modelers the ability to discover the joys of modeling plus their model can sail in about any body of water.

Since my grandson is seven ½ (he will tell you that he is 8), I thought I would give it a go. He knows about my ship models and was excited to start his own build. After a quick rundown of the overall process, he started sanding... and sanding, and even more sanding. After he was a bit tired of hand sanding, I let him use my hand-held orbital sander.

He enjoyed using a power tool "all by himself” and heard more than a few times that the tool we will use most often is our patience.
We then added the fin and talked about painting. He wanted a rainbow pattern but accepted my idea of a red hull with a black stripe. The rainbow would be on the "deck" and "sail". I then explained why we needed to first paint it with a primer.
And while he asked a couple of times "why is it grey?", he humored his grandfather, especially when I gave him the can of spray paint. I wish I would have taken some pictures, but my hands were full of a 7 1/2 year old holding a live can of spray paint...
We then let a few coats of primer dry.
On his next visit, we went after the red hull - which first meant taping it off. As with the primer being grey, he asked a few times about the green tape, but again humored me. I put the first piece of tape on, while he did the rest, although I helped keep it where we wanted it. I then let him loose with the brush-on acrylic red paint and he did a few coats.


On his next visit, we removed the tape, and he was AMAZED at the results - saying they looked "like an artist had done them". I pointed out that "he" was the artist.
We then taped off for the black stripe and again I let him do a few coats.


Unfortunately, that is where we stand as both of our lives have been busy plus I have had covid. Next up will be taping off the deck for the rainbow pattern.
Work time: 7.5 hours
Total work time: 251.5 hours
Looks like a lot of fun building with your grandson.7/4 to 8/5
The Rocky Mountain Shipwrights workshop is on Saturday (7/6), and I thought I would use the time to catch up with friends and figure out what I would work on next. Even though I had planned to work on the eyelets next, I was not sure they would be the best fit for the workshop. After a bit of research, I decided to do prep work for the rudder.
At the workshop I sanded the rudder to taper it from front to back as well as top to bottom. I still need to shape and glue a dowel near the top, but I did not bring one so it will have to wait. Once I get home, I will attach a sanded 5/32” dowel to the top of the rudder after using my GOXAWEE to carve a small gouge into it and add a little filler. I will wrap it up by sanding everything smooth and then adding two coats of gray primer.
View attachment 464835
It still needs to be painted red and a touch of black, but that can wait.
Next up are the pintles and gudgeons, and based on a number of build logs, including the Suburban Ship Modeler and GGibson over on MSW, I decided to glue the brass strips to a piece of wood and mark out where the holes will go on the pintles and gudgeons. The pictures in their build logs helped plot this out plus GGibson stated his measurements between the holes so I was able to draw it out on a board once I got home.
I am hopeful this method will go smoother than my drilling did for the chainplates. I was able to drill the holes in them, but I fought with it throughout the entire process.
If this method works better (low bar in my opinion), I will go back and edit my last post recommending drilling the chainplates in the same fashion.
So, about an hour prepping to board and glueing the six strips down, and then about an hour to drill the thirty holes - without an error. I definitely recommend this method for the pintles and gudgeons as well as any future chainplates.
View attachment 464836 View attachment 464837 View attachment 464838
At this point, I have come to the realization that I am struggling to find time for building. I know they are excuses, but life is getting in the way. From some painful teeth/jaw issues (compounded by the fact that my dental insurance doesn’t kick in until August 1st), to our 100 pound Great Pyrenees getting sprayed by a skunk three days before a trip to North Carolina to visit family, to some major on-going renovations to our patio and deck (including preparing to add a 12x20 gazebo), compounded by some child custody and support issues for my daughter and her kids that have been in the court system since January of 2023 - yes over a year and a half and he hasn’t physically seen the kids or helped financially at all, not even a bag of diapers. Deadbeat in every sense of the word - and that comes from a single dad who raised two daughters with truly little assistance from their mom and even less that was not court enforced. And did I mention my wife has Parkinson’s and had Deep Brain Stimulation surgery recently?! I am not looking for sympathy, just stating some facts.
But with the bad comes the good… I’m getting closer to my dentist appointment and have done ok on a combination of OxyContin and klonipin, we were able to get rid of most of the skunk smell with a combination of hydrogen peroxide, baking soda, and dawn dish soap, the NC trip was great (other than the CrowdStrike issue that occurred right after takeoff while we were in the air), the patio and deck are coming together nicely, and we believe the courts are finally catching up with Mr Deadbeat (but in the meantime we’ve been able to spend a lot more time with the grandkids - I even started a wooden boat model with my grandson - more on that in a separate post), and my wife is doing great. It is just a lot of stuff that is not letting me focus on my Bluenose.
And then just as things started to move in the positive direction, COVID hit me with a vengeance. I am up to date with my boosters and have had it previously, but this was a bad bout of it for me. I was able to get on paxlovid and at least it made me feel a bit better, but it’s expensive ($200) and one of the side effects is that it leaves a really nasty taste in your mouth - a taste that does not go away until it’s almost time to take the next dose. I am feeling better, but it knocked me down for a solid 4 days and made me miss my dentist appointment as well as our club’s workshop on Saturday.
So finally, after a number of days lying in bed, today was the first day where I felt like doing anything other than napping. I.E. - It is Bluenose time.
With my scattered mind I decide to get things ready for the bowsprit. I cut it from a kit supplied 3/16 dowel. I drill the hole for the bowsprit at the tip of the bow and widen it until the dowel will fit through it.
View attachment 464847
View attachment 464848 View attachment 464850
It will need to be shaped, but right now I'm just getting the bowsprit and creating the hole.
I drilled out the Britannia mooring chocks, first with a 1/64” drill bit then followed with a 3/64” bit. I cleaned them up with some 400-grit sandpaper and then used a 1/16” bit to drill the hole for it in the rail then widened it with a small file.
View attachment 464839
I will paint them yellow on the outside of the hull as they line up perfectly with the yellow line of the hull once they are installed.
I then marked and drilled the holes in the stanchions for the eyebolts and rings using a 0.5mm micro drill bit. I spent quite a bit of time trying to make sure I was going to put them on the correct stanchion, only to find out that while I am sure they were used on the actual ship, nothing connects to them on the model - so they are just for decoration.
I then added the rings to the eyebolts and cut about a third of the shaft of the eyebolts off.
A drop of CA glue on the shaft and slide it into the predrilled holes… but no, the 0.5mm holes were too small. And given the tiny diameter of the eyebolt shaft, if you try to push it in, it bends. Argh.
On a test piece of wood, I drill a 0.6mm hole (the next bigger size that I have) and check to see if an eyebolt will fit - and it does! So, I re-drilled the holes using the 0.6mm bit and started glueing in the eyebolts and rings. Most of them go in as expected, but four of them do not slide into the holes and the shaft bent. Instead of connecting four rings to four eyebolts to replace the bent ones, I decided to do them separately. I trim the shaft and glue the eyebolt into the hole and then attach the ring.
These four replacements are a pain as it is difficult to pinch the ring closed while the eyebolt is already attached, but at least there are only four of them.
Jumping back to the rudder, I paint the small shaft black.
View attachment 464840
Once dried, I add two coats of clear satin finish. Now it is really time for the pintles and gudgeons, but I will cover that in my next write up.
View attachment 464858
Grandson’s 1st model
A while back I picked up a youth kit of the "Bermuda" from Alice Sampson's (a Rocky Mountain Shipwright's club member) company Seaworthy Small Ships. Alice and her business partner Julius Spradley recently took the helm of the company and will continue the production of a wide range of wooden toy boat model kits. These high-quality kits allow new and younger modelers the ability to discover the joys of modeling plus their model can sail in about any body of water.
View attachment 464852
Since my grandson is seven ½ (he will tell you that he is 8), I thought I would give it a go. He knows about my ship models and was excited to start his own build. After a quick rundown of the overall process, he started sanding... and sanding, and even more sanding. After he was a bit tired of hand sanding, I let him use my hand-held orbital sander.
View attachment 464853
He enjoyed using a power tool "all by himself” and heard more than a few times that the tool we will use most often is our patience.
We then added the fin and talked about painting. He wanted a rainbow pattern but accepted my idea of a red hull with a black stripe. The rainbow would be on the "deck" and "sail". I then explained why we needed to first paint it with a primer.
And while he asked a couple of times "why is it grey?", he humored his grandfather, especially when I gave him the can of spray paint. I wish I would have taken some pictures, but my hands were full of a 7 1/2 year old holding a live can of spray paint...
We then let a few coats of primer dry.
On his next visit, we went after the red hull - which first meant taping it off. As with the primer being grey, he asked a few times about the green tape, but again humored me. I put the first piece of tape on, while he did the rest, although I helped keep it where we wanted it. I then let him loose with the brush-on acrylic red paint and he did a few coats.
View attachment 464854 View attachment 464855
On his next visit, we removed the tape, and he was AMAZED at the results - saying they looked "like an artist had done them". I pointed out that "he" was the artist.
We then taped off for the black stripe and again I let him do a few coats.
View attachment 464856 View attachment 464857
Unfortunately, that is where we stand as both of our lives have been busy plus I have had covid. Next up will be taping off the deck for the rainbow pattern.
Work time: 7.5 hours
Total work time: 251.5 hours
My building has been slow this summer as well. Too much work amongst other things.
6/5/25 to 6/16/25
It’s almost impossible to believe that it has been 10 months since I last worked on my Bluenose, but somehow it has been. Six of those months we were traveling so I can't complain, but it was still difficult to believe I hadn't touched it in so long. The cruise including 4 and 1/2 months in PV and one month on a cruise around the southern tip of South America. The ship went through the Strait of Magellan and to Cape Horn.

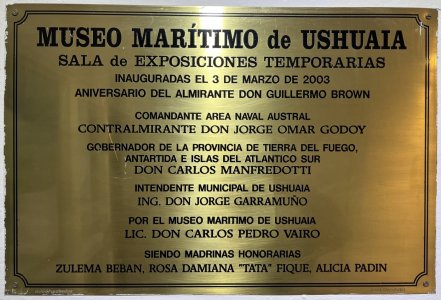
It was an amazing trip. I got to see and explore a lot of very historic maritime places, with my favorite being the maritime museum in Ushuaia. Ushuaia is nicknamed the “End of the World” as it is the furthest southern city in the world sure there are a couple of settlements, but no cities as of yet.
Now onto my Bluenose.
I had created a “what’s next” for me to do, but while I was in Vallarta beginning work on my pirate ship Molino, I switched gears and decided to follow the instructions a bit more than I had been doing. On the Molino this plan of attack worked well as it’s made by OcCre and I believe they have pretty good instructions, at least the “step by step” instructions. All the detail might not be given, but the order appears to be good.
The Bluenose is made by Model Shipways, and while the plans are pretty good, the “step by step” instructions could definitely be improved. Up to this point I had about 3 or 4 build logs that I was watching and then combining them to decide what to do next. I’m still following the build logs and taking what I like the best from each of them, but I’ve decided to use the instructions more to determine what I should be doing next. Novel idea, right? So, while I was expecting to continue working on the rudder and the pintles & gudgeons, the instructions pointed me towards the deck furniture and structures.
First up was the main cabin, but after researching it for a bit, I decided to go after the wheelhouse instead. The main cabin is the most complex structure on the ship, so I decided that it might not be the best choice for doing first. Then I decided on the wheelhouse instead, and while it is pretty basic, I was still spinning my wheels. I think mostly because of how small (around 1/4”) one side is or appears to be.
To make things easier, I decided on going after the 2 hatches, and other than their low profile (1/4”), they are very straightforward, being a square and a rectangle. Working on these will at least get me in the world of creating something around 1/4” in height.
But as with all the deck furniture, the instructions have a lot to be desired with them only saying “Build them either as planked structures or substitute 1/16” or 1/32” basswood sheets.” No other measurements or stepped instructions, just “build them.” This is where I lean on the build logs that I really like for assistance. In no particular order they are Jeff_T on Ships of Scale, Suburban Ship Modeler, and Gary Brinker on YouTube.
The hatches are both 1/4” tall and 0.95” wide. They vary in their length; one is 0.95” (making it square) and the other is 1.42”.
Here’s a list of the lumber I’ll be using:
The parts I’ll need for the 2 frames are:
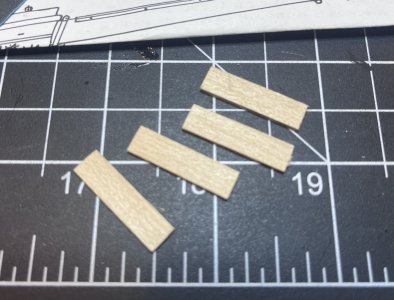
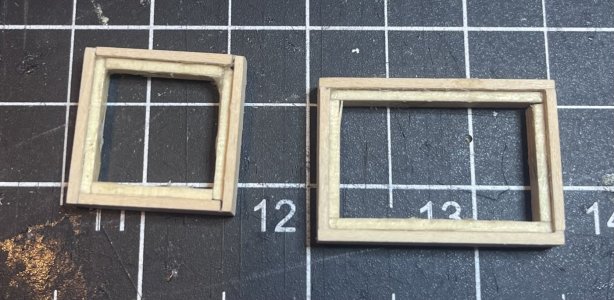
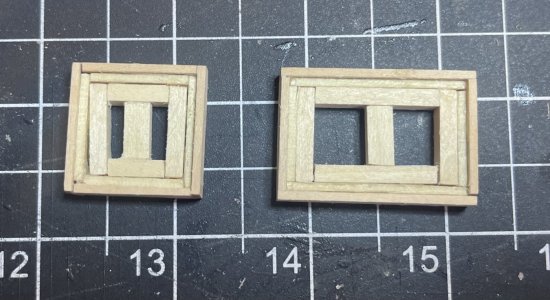
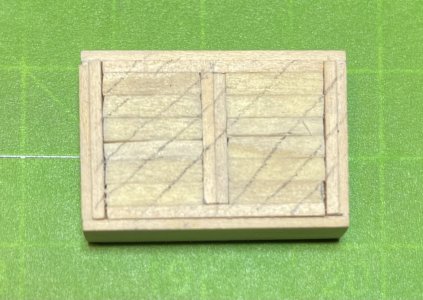
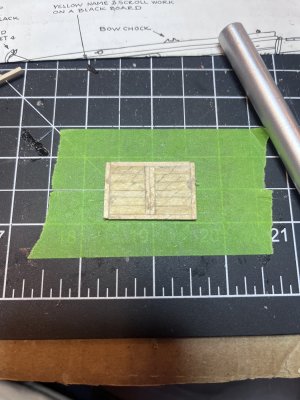
Piece by piece, I measured, cut, sanded, and dry fit all of the 18 pieces of the small hatch. I then drew a pattern on it so that I could remove the pieces from the frame and recreate it while gluing all of it together. I used two metal rectangular weights to make sure it dries square.
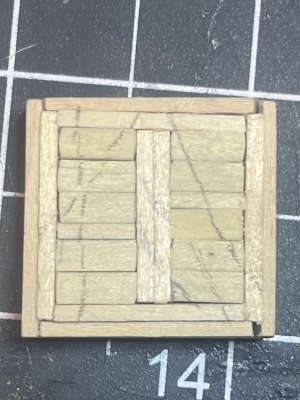
The reason it has to be removed to be glued is that the frame is painted white while the top is to be stained. I'm not sure of the color yet. I want it to be complimentary but different than the deck which was done with a Minwax polyshade; satin classic oak. Sounds like a trip to the store is in my near future.
I first tried an English chestnut, but it was just too dark (looked more like a dark walnut), then I tried a classic oak, and it too was just too dark. These were both water-based stains so I switched to an oil based one and the third time was the charm as I settled golden pecan.
To finish the frame, I used a little filler, then sanded it, and painted it white.
Once the hatch cover was dried, I sanded it, and test fit it into the frame. Although I stand by my idea to draw the little pattern on it, it did require more sanding than I had expected to be removed. Once it fits in the frame, and the pattern is removed, I stain it using a golden pecan stain.
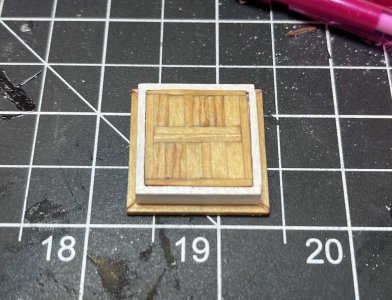
I add the coamings right at deck level (also stained with golden pecan) and once everything is dried, I place a small strip of sandpaper on the deck (approximately where the hatch will be located) and give the bottom of the hatch a little sanding to have it match the curve of the deck. Nice little trick that I can’t remember where I saw it.
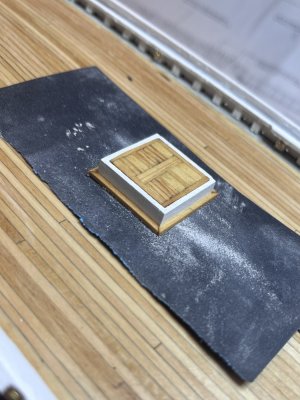
I made the larger frame at the same time I made the small frame and now completed the top in much the same manner as before and wrapped it up by sanding it to lay more securely on the deck.
I put 16 eyebolts and rings together and then drilled 0.6mm holes for them. The shafts of the eyebolts on the hatches needed to have about a 1/3rd removed, while no trimming was necessary for those in the deck. A drop of glue on each hole followed by a drop on each shaft as they were inserted into the holes.
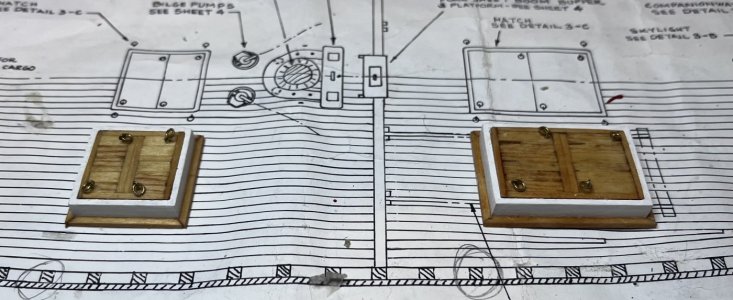
A little clean-up of the glue and the hatches are done.
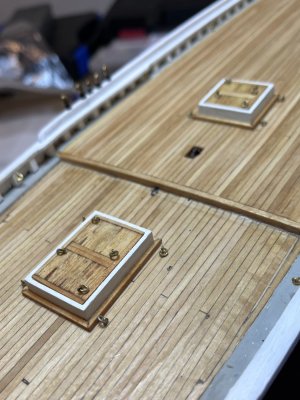
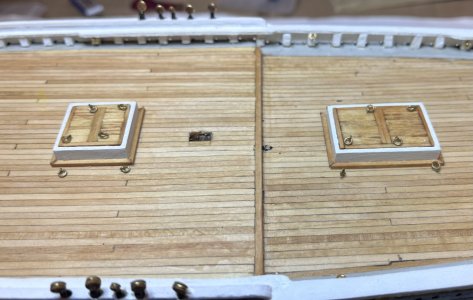
We have a trip to North Carolina in a few days so my time on the Bluenose is probably done for a week or so.
Work time: 10.5 hours
Total work time: 262 hours
It’s almost impossible to believe that it has been 10 months since I last worked on my Bluenose, but somehow it has been. Six of those months we were traveling so I can't complain, but it was still difficult to believe I hadn't touched it in so long. The cruise including 4 and 1/2 months in PV and one month on a cruise around the southern tip of South America. The ship went through the Strait of Magellan and to Cape Horn.

It was an amazing trip. I got to see and explore a lot of very historic maritime places, with my favorite being the maritime museum in Ushuaia. Ushuaia is nicknamed the “End of the World” as it is the furthest southern city in the world sure there are a couple of settlements, but no cities as of yet.

Now onto my Bluenose.
I had created a “what’s next” for me to do, but while I was in Vallarta beginning work on my pirate ship Molino, I switched gears and decided to follow the instructions a bit more than I had been doing. On the Molino this plan of attack worked well as it’s made by OcCre and I believe they have pretty good instructions, at least the “step by step” instructions. All the detail might not be given, but the order appears to be good.
The Bluenose is made by Model Shipways, and while the plans are pretty good, the “step by step” instructions could definitely be improved. Up to this point I had about 3 or 4 build logs that I was watching and then combining them to decide what to do next. I’m still following the build logs and taking what I like the best from each of them, but I’ve decided to use the instructions more to determine what I should be doing next. Novel idea, right? So, while I was expecting to continue working on the rudder and the pintles & gudgeons, the instructions pointed me towards the deck furniture and structures.
First up was the main cabin, but after researching it for a bit, I decided to go after the wheelhouse instead. The main cabin is the most complex structure on the ship, so I decided that it might not be the best choice for doing first. Then I decided on the wheelhouse instead, and while it is pretty basic, I was still spinning my wheels. I think mostly because of how small (around 1/4”) one side is or appears to be.
To make things easier, I decided on going after the 2 hatches, and other than their low profile (1/4”), they are very straightforward, being a square and a rectangle. Working on these will at least get me in the world of creating something around 1/4” in height.
But as with all the deck furniture, the instructions have a lot to be desired with them only saying “Build them either as planked structures or substitute 1/16” or 1/32” basswood sheets.” No other measurements or stepped instructions, just “build them.” This is where I lean on the build logs that I really like for assistance. In no particular order they are Jeff_T on Ships of Scale, Suburban Ship Modeler, and Gary Brinker on YouTube.
The hatches are both 1/4” tall and 0.95” wide. They vary in their length; one is 0.95” (making it square) and the other is 1.42”.
Here’s a list of the lumber I’ll be using:
- Sides: 1/4” x 1/16”
- Insets: 1/5” x 1/16” (these will hold the top)
- Brace: 1/5” x 1/8” (to help support the top)
- Tops: 1/8” x 1/16” wrapped/framed in 1/16” x 1/16”
- Coamings: 1/16” x 1/16”
The parts I’ll need for the 2 frames are:
- Small hatch frame
- 2 sides at 0.95
- 2 sides at 0.83 (0.95 - 0.12; 0.12 equals the width of the other 2 sides as 1/16” basically equals 0.06”)
- Multiple insets at either 0.83” or 0.95”
- 2 insets at 0.83” (for the 0.95” sides)
- 2 insets at 0.71” (for the 0.83” sides)
- 3 braces at 0.83
- Large hatch
- 2 sides at 0.95
- 2 sides at 1.3 (1.42 - 0.12)
- 2 insets at 0.83” (for the 0.95” sides)
- 2 insets at 1.18” (for the 1.3” sides)
- 3 braces at 0.83


Piece by piece, I measured, cut, sanded, and dry fit all of the 18 pieces of the small hatch. I then drew a pattern on it so that I could remove the pieces from the frame and recreate it while gluing all of it together. I used two metal rectangular weights to make sure it dries square.

The reason it has to be removed to be glued is that the frame is painted white while the top is to be stained. I'm not sure of the color yet. I want it to be complimentary but different than the deck which was done with a Minwax polyshade; satin classic oak. Sounds like a trip to the store is in my near future.
I first tried an English chestnut, but it was just too dark (looked more like a dark walnut), then I tried a classic oak, and it too was just too dark. These were both water-based stains so I switched to an oil based one and the third time was the charm as I settled golden pecan.
To finish the frame, I used a little filler, then sanded it, and painted it white.
Once the hatch cover was dried, I sanded it, and test fit it into the frame. Although I stand by my idea to draw the little pattern on it, it did require more sanding than I had expected to be removed. Once it fits in the frame, and the pattern is removed, I stain it using a golden pecan stain.

I add the coamings right at deck level (also stained with golden pecan) and once everything is dried, I place a small strip of sandpaper on the deck (approximately where the hatch will be located) and give the bottom of the hatch a little sanding to have it match the curve of the deck. Nice little trick that I can’t remember where I saw it.

I made the larger frame at the same time I made the small frame and now completed the top in much the same manner as before and wrapped it up by sanding it to lay more securely on the deck.


I put 16 eyebolts and rings together and then drilled 0.6mm holes for them. The shafts of the eyebolts on the hatches needed to have about a 1/3rd removed, while no trimming was necessary for those in the deck. A drop of glue on each hole followed by a drop on each shaft as they were inserted into the holes.

A little clean-up of the glue and the hatches are done.


We have a trip to North Carolina in a few days so my time on the Bluenose is probably done for a week or so.
Work time: 10.5 hours
Total work time: 262 hours
Good to see you back on the build of your BN. Nice additions on the deck.6/5/25 to 6/16/25
It’s almost impossible to believe that it has been 10 months since I last worked on my Bluenose, but somehow it has been. Six of those months we were traveling so I can't complain, but it was still difficult to believe I hadn't touched it in so long. The cruise including 4 and 1/2 months in PV and one month on a cruise around the southern tip of South America. The ship went through the Strait of Magellan and to Cape Horn.
View attachment 526248
It was an amazing trip. I got to see and explore a lot of very historic maritime places, with my favorite being the maritime museum in Ushuaia. Ushuaia is nicknamed the “End of the World” as it is the furthest southern city in the world sure there are a couple of settlements, but no cities as of yet.
View attachment 526249
Now onto my Bluenose.
I had created a “what’s next” for me to do, but while I was in Vallarta beginning work on my pirate ship Molino, I switched gears and decided to follow the instructions a bit more than I had been doing. On the Molino this plan of attack worked well as it’s made by OcCre and I believe they have pretty good instructions, at least the “step by step” instructions. All the detail might not be given, but the order appears to be good.
The Bluenose is made by Model Shipways, and while the plans are pretty good, the “step by step” instructions could definitely be improved. Up to this point I had about 3 or 4 build logs that I was watching and then combining them to decide what to do next. I’m still following the build logs and taking what I like the best from each of them, but I’ve decided to use the instructions more to determine what I should be doing next. Novel idea, right? So, while I was expecting to continue working on the rudder and the pintles & gudgeons, the instructions pointed me towards the deck furniture and structures.
First up was the main cabin, but after researching it for a bit, I decided to go after the wheelhouse instead. The main cabin is the most complex structure on the ship, so I decided that it might not be the best choice for doing first. Then I decided on the wheelhouse instead, and while it is pretty basic, I was still spinning my wheels. I think mostly because of how small (around 1/4”) one side is or appears to be.
To make things easier, I decided on going after the 2 hatches, and other than their low profile (1/4”), they are very straightforward, being a square and a rectangle. Working on these will at least get me in the world of creating something around 1/4” in height.
But as with all the deck furniture, the instructions have a lot to be desired with them only saying “Build them either as planked structures or substitute 1/16” or 1/32” basswood sheets.” No other measurements or stepped instructions, just “build them.” This is where I lean on the build logs that I really like for assistance. In no particular order they are Jeff_T on Ships of Scale, Suburban Ship Modeler, and Gary Brinker on YouTube.
The hatches are both 1/4” tall and 0.95” wide. They vary in their length; one is 0.95” (making it square) and the other is 1.42”.
Here’s a list of the lumber I’ll be using:
- Sides: 1/4” x 1/16”
- Insets: 1/5” x 1/16” (these will hold the top)
- Brace: 1/5” x 1/8” (to help support the top)
- Tops: 1/8” x 1/16” wrapped/framed in 1/16” x 1/16”
- Coamings: 1/16” x 1/16”
The parts I’ll need for the 2 frames are:
Everything went as planned until I was placing the braces and realized that the insets should have been made with 1/5” x 1/8” instead of the 1/16” square lumber. Since I’m wrapping the top with 1/16” lumber, if I were to use 1/16” for the insets, the true top (other than the “wrap”) would be sitting on nothing. By using the 1/5” it gives everything a ledge to sit on. I could have started over, but given this will be hidden, I just added additional lumber to the inside of the frames. It doesn’t look the greatest, but it will be completely hidden once the top of the hatch is in place.
- Small hatch frame
- 2 sides at 0.95
- 2 sides at 0.83 (0.95 - 0.12; 0.12 equals the width of the other 2 sides as 1/16” basically equals 0.06”)
- Multiple insets at either 0.83” or 0.95”
- 2 insets at 0.83” (for the 0.95” sides)
- 2 insets at 0.71” (for the 0.83” sides)
- 3 braces at 0.83
- Large hatch
- 2 sides at 0.95
- 2 sides at 1.3 (1.42 - 0.12)
- 2 insets at 0.83” (for the 0.95” sides)
- 2 insets at 1.18” (for the 1.3” sides)
- 3 braces at 0.83
View attachment 526237 View attachment 526238 View attachment 526239
Piece by piece, I measured, cut, sanded, and dry fit all of the 18 pieces of the small hatch. I then drew a pattern on it so that I could remove the pieces from the frame and recreate it while gluing all of it together. I used two metal rectangular weights to make sure it dries square.
View attachment 526240
The reason it has to be removed to be glued is that the frame is painted white while the top is to be stained. I'm not sure of the color yet. I want it to be complimentary but different than the deck which was done with a Minwax polyshade; satin classic oak. Sounds like a trip to the store is in my near future.
I first tried an English chestnut, but it was just too dark (looked more like a dark walnut), then I tried a classic oak, and it too was just too dark. These were both water-based stains so I switched to an oil based one and the third time was the charm as I settled golden pecan.
To finish the frame, I used a little filler, then sanded it, and painted it white.
Once the hatch cover was dried, I sanded it, and test fit it into the frame. Although I stand by my idea to draw the little pattern on it, it did require more sanding than I had expected to be removed. Once it fits in the frame, and the pattern is removed, I stain it using a golden pecan stain.
View attachment 526241
I add the coamings right at deck level (also stained with golden pecan) and once everything is dried, I place a small strip of sandpaper on the deck (approximately where the hatch will be located) and give the bottom of the hatch a little sanding to have it match the curve of the deck. Nice little trick that I can’t remember where I saw it.
View attachment 526242
I made the larger frame at the same time I made the small frame and now completed the top in much the same manner as before and wrapped it up by sanding it to lay more securely on the deck.
View attachment 526243 View attachment 526244
I put 16 eyebolts and rings together and then drilled 0.6mm holes for them. The shafts of the eyebolts on the hatches needed to have about a 1/3rd removed, while no trimming was necessary for those in the deck. A drop of glue on each hole followed by a drop on each shaft as they were inserted into the holes.
View attachment 526245
A little clean-up of the glue and the hatches are done.
View attachment 526246 View attachment 526247
We have a trip to North Carolina in a few days so my time on the Bluenose is probably done for a week or so.
Work time: 10.5 hours
Total work time: 262 hours
Regards, Peter
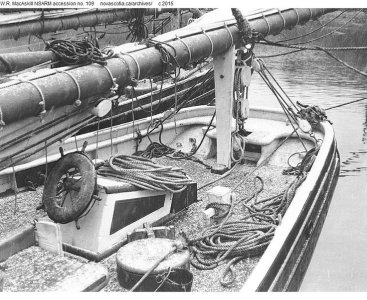
As I’m preparing to build the wheelhouse, I keep stopping whenever I read this little note saying that sometimes the area “within” the groves was painted burnt umber.
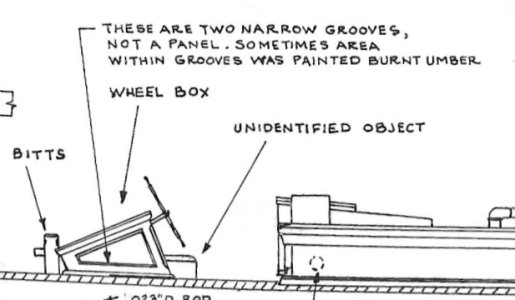
What keeps bugging me is that on all the build logs (at least those I remember) either the entire side is painted white or the middle section is stained. I don’t remember seeing one that has only the section between the grooves painted, almost like pinstripes.
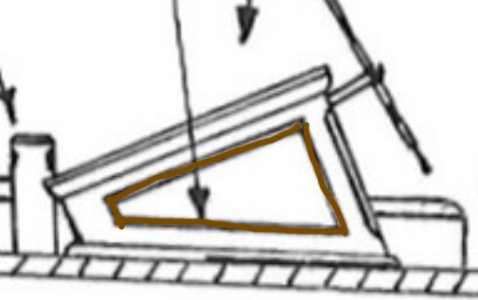
What’s everyone’s thoughts about this note? Am I reading it wrong? I know it is minuscule, but before I paint or stain the side, I wanted to throw it out to the audience.

What keeps bugging me is that on all the build logs (at least those I remember) either the entire side is painted white or the middle section is stained. I don’t remember seeing one that has only the section between the grooves painted, almost like pinstripes.

What’s everyone’s thoughts about this note? Am I reading it wrong? I know it is minuscule, but before I paint or stain the side, I wanted to throw it out to the audience.
I think it’s a FI (Free Interpretation) of MS. If you want the looks of the original then this can help you:As I’m preparing to build the wheelhouse, I keep stopping whenever I read this little note saying that sometimes the area “within” the groves was painted burnt umber.
View attachment 528666
What keeps bugging me is that on all the build logs (at least those I remember) either the entire side is painted white or the middle section is stained. I don’t remember seeing one that has only the section between the grooves painted, almost like pinstripes.
View attachment 528667
What’s everyone’s thoughts about this note? Am I reading it wrong? I know it is minuscule, but before I paint or stain the side, I wanted to throw it out to the audience.
When you enlarge the picture there is a small grove on the inside of the dark insert.
Regards, Peter
- Joined
- Jun 17, 2021
- Messages
- 3,202
- Points
- 588

Looks like a decorative (maybe) mahogany or walnut crotch veneered panel surrounded by an ogee (or double ogee) molding,
Thanks for the visual reminder. Pretty sure this is what I’m going to do.I think it’s a FI (Free Interpretation) of MS. If you want the looks of the original then this can help you:
View attachment 528671
When you enlarge the picture there is a small grove on the inside of the dark insert.
Regards, Peter
6/23/25 to 7/1/25
Time for the wheelhouse.
As was the case for the hatches (actually all of the deck furniture/structures), there are no instructions or measurements, just a statement that says, “build them.” Previously I thought I would start with the main cabin and wheelhouse, but very quickly felt in over my head just to build them, so I built the hatches first to have a victory. I assume that if I really searched through all the various build logs, I could find what I am looking for, but instead of spinning my wheels (something I highly likely to do), I decided that I would create instructions.
I had a trip to visit my family in North Carolina and knew I would have some alone time each morning since I was an early riser. With this in mind, I brought along everything I thought I would need to create instructions for the main cabin and wheelhouse.
Each morning, I broke out my caliper, t-bevel, pencil, some paper, copies of the plans of the main cabin and wheelhouse and began transferring the dimensions and angles over to a blank sheet of paper.
After just a few mornings, I had what you will find below, plus a few corrections and adjustments I ran into when actually building the wheelhouse.
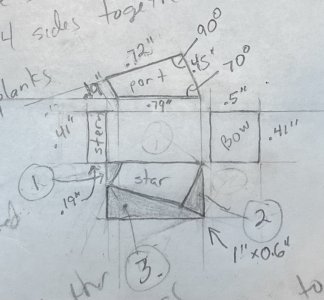
With a bit of luck, it will all go together as planned and look good without too many issues.
While some may feel like these instructions are overkill, they made putting the wheelhouse together quite easy, at least for me. For those not into instructions, look at the pictures while you scroll down. I expect the main cabin will take more time as it is a more complex structure (and so are the instructions), but hopefully the instructions lead me down the correct path.
Now on with my wheelhouse directions.
All of the wheelhouse will be made with 1/16” (0.06”) stock. Here are the parts that are needed:
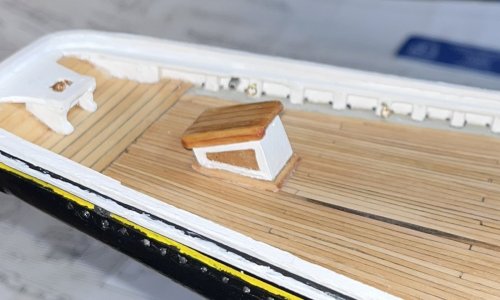
Overall, I am incredibly pleased with how it turned out.
Of the 9 hours shown below, about 3.5 hours were spent on creating the instructions leaving about 5.5 hours of actual build time. The 3.5 hours included creating not only the instructions for the wheelhouse, but for the main cabin as well. I did not separate my design time between the two structures or from the actual physical build time.
Next up… the main cabin.
Work time: 9.0 hours
Total work time: 271 hours
Time for the wheelhouse.
As was the case for the hatches (actually all of the deck furniture/structures), there are no instructions or measurements, just a statement that says, “build them.” Previously I thought I would start with the main cabin and wheelhouse, but very quickly felt in over my head just to build them, so I built the hatches first to have a victory. I assume that if I really searched through all the various build logs, I could find what I am looking for, but instead of spinning my wheels (something I highly likely to do), I decided that I would create instructions.
I had a trip to visit my family in North Carolina and knew I would have some alone time each morning since I was an early riser. With this in mind, I brought along everything I thought I would need to create instructions for the main cabin and wheelhouse.
Each morning, I broke out my caliper, t-bevel, pencil, some paper, copies of the plans of the main cabin and wheelhouse and began transferring the dimensions and angles over to a blank sheet of paper.
After just a few mornings, I had what you will find below, plus a few corrections and adjustments I ran into when actually building the wheelhouse.

With a bit of luck, it will all go together as planned and look good without too many issues.
While some may feel like these instructions are overkill, they made putting the wheelhouse together quite easy, at least for me. For those not into instructions, look at the pictures while you scroll down. I expect the main cabin will take more time as it is a more complex structure (and so are the instructions), but hopefully the instructions lead me down the correct path.
Now on with my wheelhouse directions.
All of the wheelhouse will be made with 1/16” (0.06”) stock. Here are the parts that are needed:
- Quadrilateral sides; two are needed (cut out of 1/16” x 4” board)
- Start with a rectangular piece that is 1” x 0.6”. This will then be cut and sanded down to the non-square quadrilateral shape of the wheelhouse. The odd angles are about 70 degrees.
- Bow side (made from 1/16” x 1/2” board):
- [width of wheelhouse - (2 * thickness of side boards)] x (height of side + 0.06”)
- [0.53” - (0.06 * 2)] x (0.0.44” + 0.06”) =
- 0.41” x 0.5”
- Stern side (from 1/16” x 1/4” board):
- [width of wheelhouse - (2 * thickness of side boards)] x (height of side + 0.06”)
- [0.53” - (0.06” * 2)] x (0.19” + 0.06”) =
- 0.41” x 0.25”
- Top; made with six 1/16” x 1/8” planks, not solid board. The 6 planks will cover the top of the wheelhouse plus have ~1/16” overhang on the sides. The lengths are:
- [length of wheelhouse + (1/4” overhand on aft and bow sides)]
- [0.8 + (0.06 * 2)] = 0.92”
- Top pieces; two are needed. These will be glued to the bottom of the end pieces of the top, aligning with the notches on the aft and bow sides. After sanding, these will allow for a top that looks curved. Made with the same planks as the top; 1/16” x 1/8” planks. The lengths will be the same as those on top; 0.92.”
- Coamings: These will be made from 0.06” x 0.06” (1/16” x 1/16”) boards, miter cut to size.
- Make the two quadrilateral sides, by first cutting out two 1” x 0.6” boards from the 1/16” x 4” board.
- Cut/sand off section “1”; angle is 70 degrees.
- Cut/sand off section “2”; angle is 70 degrees.
- Cut/sand off section “3”; angle is 90 degrees
- This will create a quadrilateral piece that has side lengths of 0.19” (stern), 0.72” (top), 0.45” (bow), and 0.79” bottom.
- Cut and sand bow & stern sections.
- Glue the four sides of the wheelhouse together.
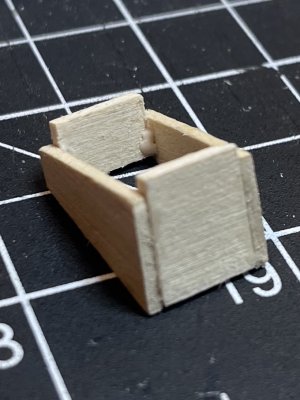
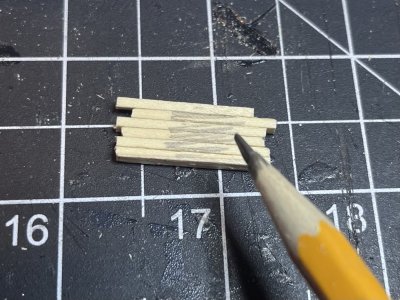
- Make the top using six of the previously cut 1/16” x 1/8” planks.
- Use a pencil to mark the plank sides.
- Glue the top pieces to the edges of the top, ensuring the top fits over the wheelhouse frame.
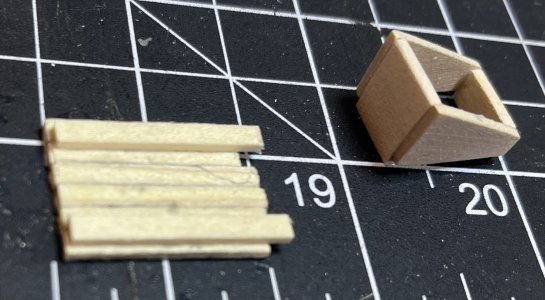
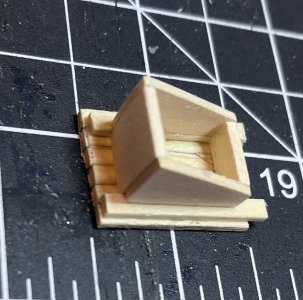
- Round thick edges and corners of top and sand.
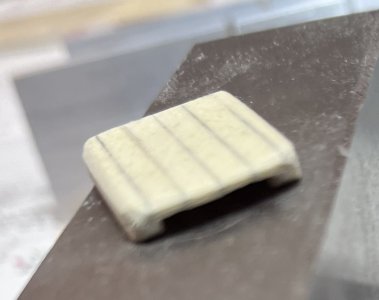
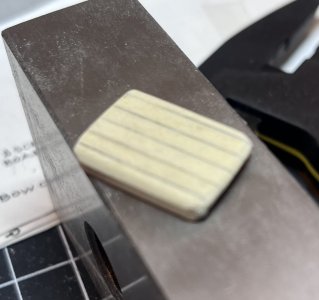
- The wheelhouse will be two colors. The main part will be white, while the center sections of the quadrilateral sides will be stained golden pecan. To get this effect, I will first stain the quadrilateral sides (2 coats).
- Ensure the stain is dried and tape off the center of the quadrilateral sides with a smaller quadrilateral. Make sure the tape is securely attached.
- Stain at the edges of the tape. This hopefully will seal any small gaps that would allow paint to bleed under the tape. This technique works very well with different colors of paint, but this is stain and paint. I tested it and it worked well on a scrap piece of wood - so hopefully it will work on the actual wheelhouse.
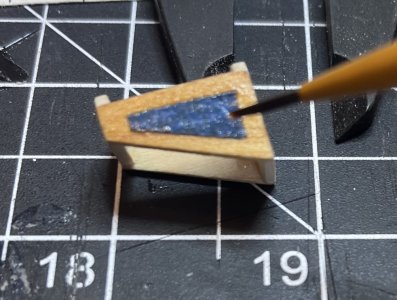
- Stain the top golden pecan (2 coats).
- Paint the wheelhouse white (2 coats).
- Here is the first item that did not go as planned. Even with two coats of white paint on the front side of the wheelhouse, I could still see where the wood was glued together at the corners. So, I sanded it a bit and then gave it a coat of white paint. Definitely better, so I wait a little and give it a second coat.
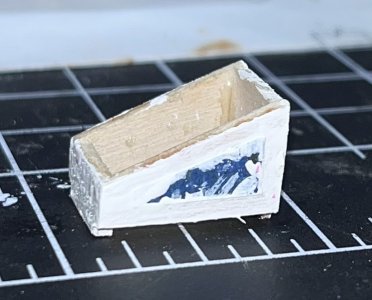
- Using a hobby knife, score along the edge of the tape.
- Remove the tape over the inset.
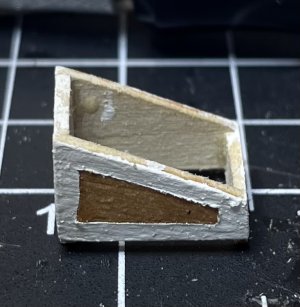
- I am extremely happy about how this turned out as I was a bit worried about taping over the stain, but it worked well. And because the paint is thicker than the stain, the stained sections actually look like they are inset.
- Glue top to wheelhouse base.
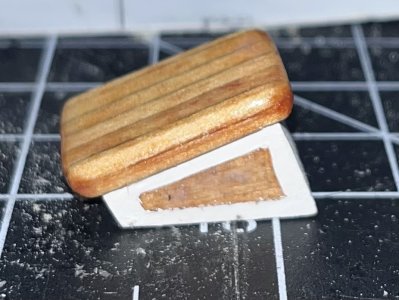
- Put satin varnish on anything that was stained.
- Quick note I just realized that I did not do this to the stained pieces of the hatches. They are done now.
- Miter cut coamings to fit.
- Stain coamings using golden pecan (2 coats).
- Glue coamings to wheelhouse base.
- Minor adjustment to the plan as even with a 1/16” coaming, most of the white of the bottom of the wheelhouse (under the stained inset) will be covered. To remedy this, I cut and sanded a 1/16” thick board that is 1/16” bigger than the wheelhouse on all four sides. I then stained it and glued it to the bottom of the wheelhouse.
- I know this makes the wheelhouse around 1/16” taller than it should be, but I am okay with it.
- Mark location of wheelhouse on deck.
- Sand bottom of wheelhouse to match curve of deck.
- Glue the wheelhouse to the deck.

Overall, I am incredibly pleased with how it turned out.
Of the 9 hours shown below, about 3.5 hours were spent on creating the instructions leaving about 5.5 hours of actual build time. The 3.5 hours included creating not only the instructions for the wheelhouse, but for the main cabin as well. I did not separate my design time between the two structures or from the actual physical build time.
Next up… the main cabin.
Work time: 9.0 hours
Total work time: 271 hours
7/4/25 to 7/22/25 – Cliff Notes
I am going to cut to the chase… I know I am long-winded and for this section I am going to change things up a bit as I am not going to give my super long and detailed log, but rather a cliff note version. The main cabin turned out to be just too long. I will be attaching the full log as a pdf for those people (okay “that” one person who may want it).
For the main cabin I am going to mostly follow what was detailed by the Suburban Ship modeler.
The main cabin will be begin being built directly over/on a copy of the plans to ensure not only its size but the angles since they are not 90 degrees.
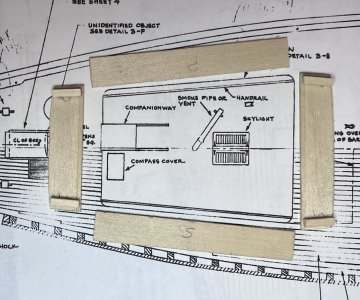
Install three supports lengthwise.
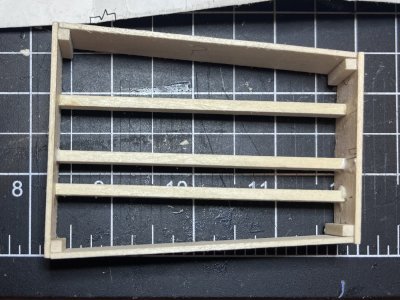
Create the entryway sides.
Cut an opening in the aft wall between the 2-port side supports.
Glue the entrance sides to the supports.
Install two additional supports widthwise between lengthwise supports.
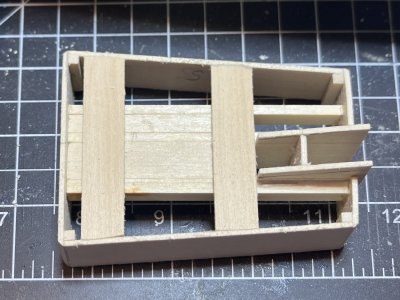
Sand the four corners of the structure to create a rounded appearance.
For the portholes, I drill two holes; one on the port side and one on the starboard sides.
The “doors” will be made from two boards.
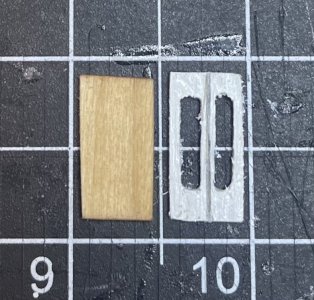
Create the base for the skylight structure (its roof will be made later).
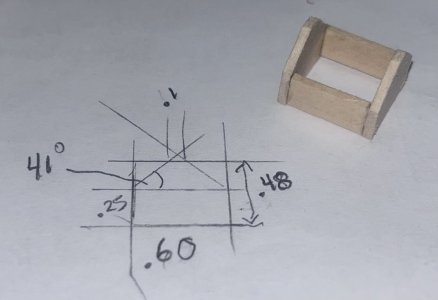
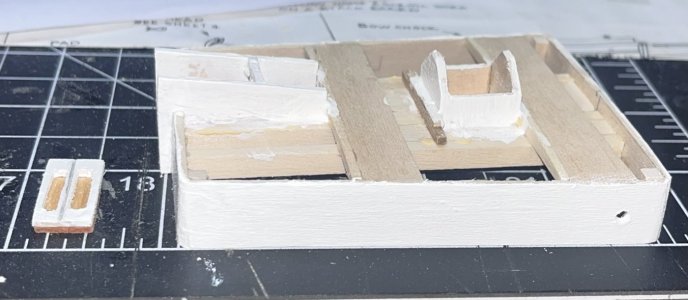
I will be using 1/16” x 1/4” planking for the main cabin’s roof, tapered down to 0.2”.
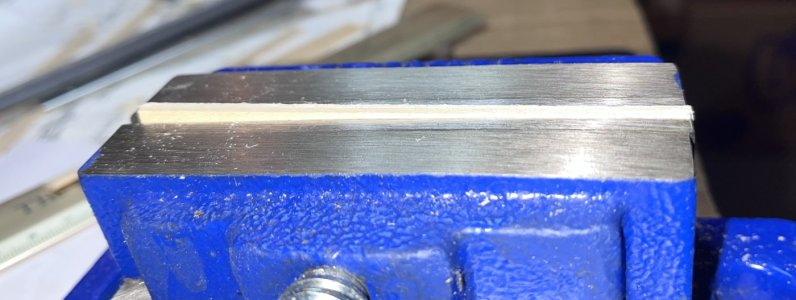
Now it is time for some rough cutting and then sanding of the roof planking.
EDIT – I noticed later on that there could be a small fascia right under the roof on all four sides. I noticed it when I was going to install the four eyebolts and rings on the fore side of the cabin.
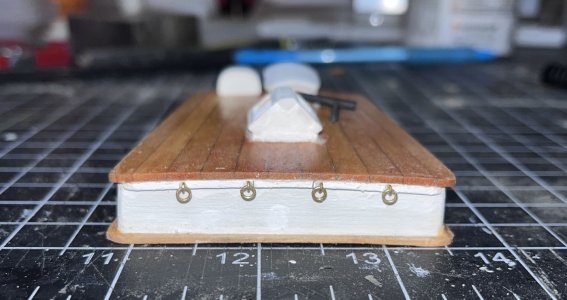
Decide now if you want this fascia. At the point that I noticed this, even though it is only a 1/16” x 1/16” board, I could not add it on all sides as the roof overhang was not big enough. Instead, I just added it on the fore side where the eyebolts and rings are.
I will have to say that I am incredibly pleased with it so far.
To make the curved entryway cover, I use 0.7”x 0.95” x 1/16” board that I soak in water for about 10 minutes and bent.
I paint the interior of the skylight black.
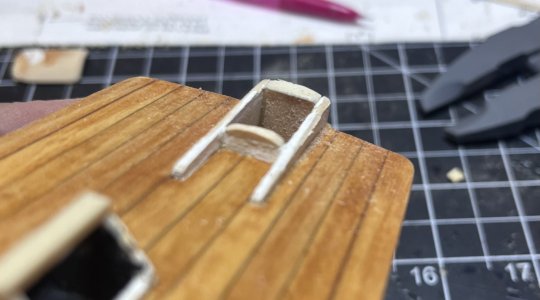
These frames are supposed to have five bars through them but the best I can do is four holes instead of five. It will have to do.
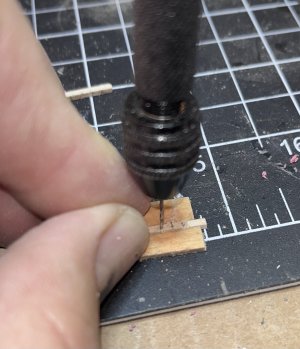
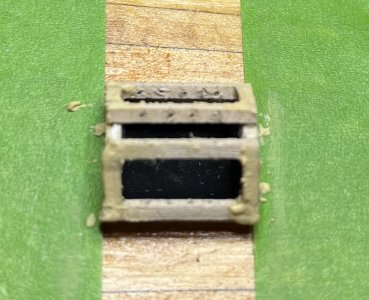
Once done I clean up the glue using a pick and a file. They look nice.
While painting the top of the skylight, I accidentally get some white paint on one of the bars… and I really like the look. With the interior painted black, the dark green of the wires/bars blends in and cannot be seen. But when they are painted white, they stand out from the interior.
After I touched up all the white paint, I installed the two portholes (thanks MIL - Alice).
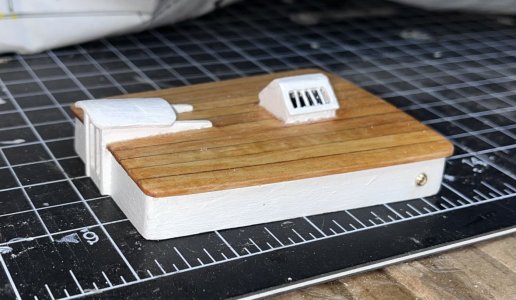
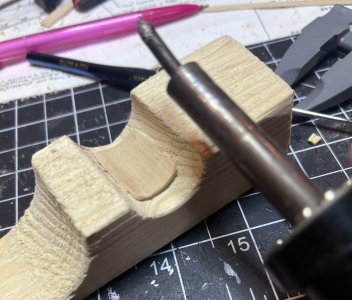
The stovepipe is made from 3/32” brass tubing. It has two sections 0.87” and 0.17”. Each one has one end at 90 degrees while the other is at 45 degrees. The ends with the 45-degree cuts are soldered together making a 90-degree turn.
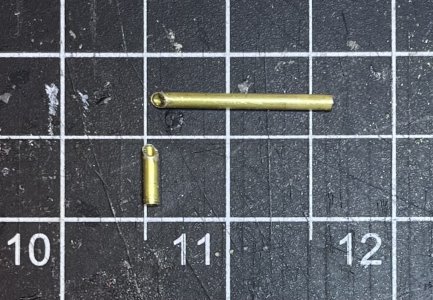
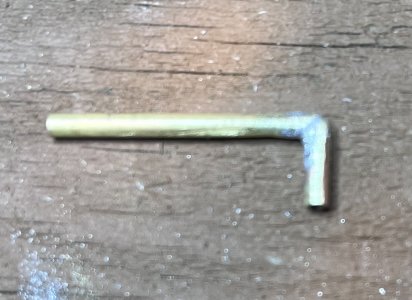
This was all painted black.
Drilled a hole in the main cabin’s roof and very slighted reamed it out with around file and glued the stovepipe in.
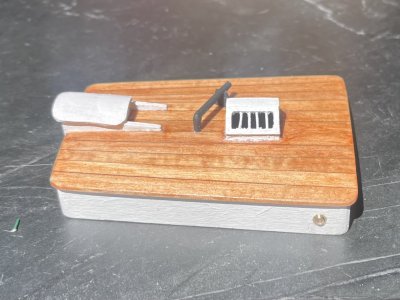
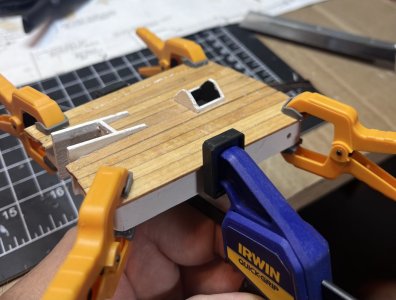
I then used two small clamps to first hold the curved sides of the roof to the curved sides of the sides, and then another clamp to hold the top of the curved roof to the top of the sides.
I drill a hole on one side and give it a little sanding with a small round file until a porthole fits into it.
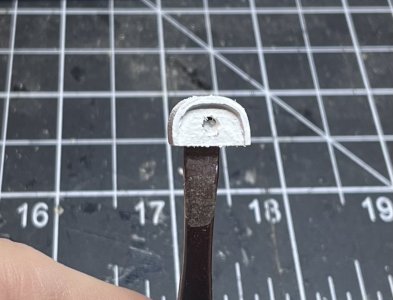
To get ready to add the coamings, I remove approximately 1/16” from the double doors using a knife and small file. This gives enough space “under” the door for the coamings.
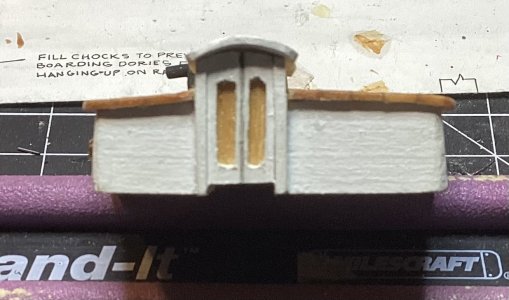
Each end/corner of the coamings will need to be sanded at an angle to match the angles of the walls.
At this stage there will be a small gap between the coamings and the rounded corners of the cabin.
Add a little filler into the gap, and the sand the corners of the coamings round to match the rounded corners of the cabin and touch up with stain as needed.
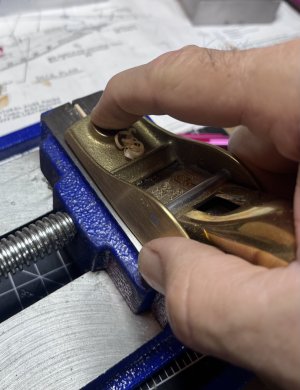
The last thing to do is to sand the bottom of the cabin to match the curve of the deck.
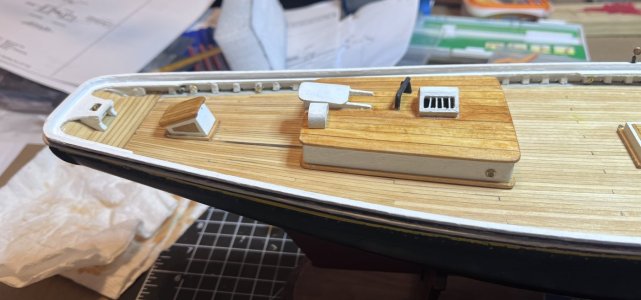
The main cabin is finished. It took about 21.5 hours.
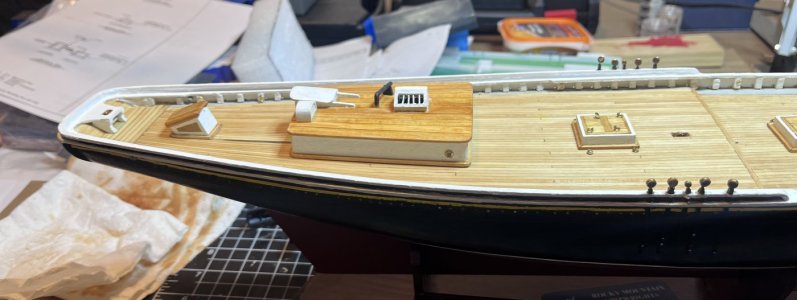
Creating this abbreviated build log really fought with my OCD around instructions, so who knows if I'll do it again. But for that one person who wants to see the full write-up, I've attached the PDF which you should be able to find below. If not, DM me.
Work time: 21.5 hours
Total work time: 292.5 hours
I am going to cut to the chase… I know I am long-winded and for this section I am going to change things up a bit as I am not going to give my super long and detailed log, but rather a cliff note version. The main cabin turned out to be just too long. I will be attaching the full log as a pdf for those people (okay “that” one person who may want it).
For the main cabin I am going to mostly follow what was detailed by the Suburban Ship modeler.
The main cabin will be begin being built directly over/on a copy of the plans to ensure not only its size but the angles since they are not 90 degrees.

Install three supports lengthwise.

Create the entryway sides.
Cut an opening in the aft wall between the 2-port side supports.
Glue the entrance sides to the supports.
Install two additional supports widthwise between lengthwise supports.

Sand the four corners of the structure to create a rounded appearance.
For the portholes, I drill two holes; one on the port side and one on the starboard sides.
The “doors” will be made from two boards.

Create the base for the skylight structure (its roof will be made later).


I will be using 1/16” x 1/4” planking for the main cabin’s roof, tapered down to 0.2”.


Now it is time for some rough cutting and then sanding of the roof planking.
EDIT – I noticed later on that there could be a small fascia right under the roof on all four sides. I noticed it when I was going to install the four eyebolts and rings on the fore side of the cabin.

Decide now if you want this fascia. At the point that I noticed this, even though it is only a 1/16” x 1/16” board, I could not add it on all sides as the roof overhang was not big enough. Instead, I just added it on the fore side where the eyebolts and rings are.
I will have to say that I am incredibly pleased with it so far.

To make the curved entryway cover, I use 0.7”x 0.95” x 1/16” board that I soak in water for about 10 minutes and bent.
I paint the interior of the skylight black.

These frames are supposed to have five bars through them but the best I can do is four holes instead of five. It will have to do.


Once done I clean up the glue using a pick and a file. They look nice.
While painting the top of the skylight, I accidentally get some white paint on one of the bars… and I really like the look. With the interior painted black, the dark green of the wires/bars blends in and cannot be seen. But when they are painted white, they stand out from the interior.
After I touched up all the white paint, I installed the two portholes (thanks MIL - Alice).

The stovepipe is made from 3/32” brass tubing. It has two sections 0.87” and 0.17”. Each one has one end at 90 degrees while the other is at 45 degrees. The ends with the 45-degree cuts are soldered together making a 90-degree turn.


This was all painted black.
Drilled a hole in the main cabin’s roof and very slighted reamed it out with around file and glued the stovepipe in.

I then used two small clamps to first hold the curved sides of the roof to the curved sides of the sides, and then another clamp to hold the top of the curved roof to the top of the sides.
I drill a hole on one side and give it a little sanding with a small round file until a porthole fits into it.

To get ready to add the coamings, I remove approximately 1/16” from the double doors using a knife and small file. This gives enough space “under” the door for the coamings.

Each end/corner of the coamings will need to be sanded at an angle to match the angles of the walls.
At this stage there will be a small gap between the coamings and the rounded corners of the cabin.
Add a little filler into the gap, and the sand the corners of the coamings round to match the rounded corners of the cabin and touch up with stain as needed.
The last thing to do is to sand the bottom of the cabin to match the curve of the deck.

The main cabin is finished. It took about 21.5 hours.

Creating this abbreviated build log really fought with my OCD around instructions, so who knows if I'll do it again. But for that one person who wants to see the full write-up, I've attached the PDF which you should be able to find below. If not, DM me.
Work time: 21.5 hours
Total work time: 292.5 hours
Attachments
Last edited:
Excellent7/4/25 to 7/22/25 – Cliff Notes
I am going to cut to the chase… I know I am long-winded and for this section I am going to change things up a bit as I am not going to give my super long and detailed log, but rather a cliff note version. The main cabin turned out to be just too long. I will be attaching the full log as a pdf for those people (okay “that” one person who may want it).
For the main cabin I am going to mostly follow what was detailed by the Suburban Ship modeler.
The main cabin will be begin being built directly over/on a copy of the plans to ensure not only its size but the angles since they are not 90 degrees.
View attachment 534283
Install three supports lengthwise.
View attachment 534284
Create the entryway sides.
Cut an opening in the aft wall between the 2-port side supports.
Glue the entrance sides to the supports.
Install two additional supports widthwise between lengthwise supports.
View attachment 534286
Sand the four corners of the structure to create a rounded appearance.
For the portholes, I drill two holes; one on the port side and one on the starboard sides.
The “doors” will be made from two boards.
View attachment 534287
Create the base for the skylight structure (its roof will be made later).
View attachment 534288
View attachment 534290
I will be using 1/16” x 1/4” planking for the main cabin’s roof, tapered down to 0.2”.
View attachment 534294
View attachment 534296
View attachment 534301
Now it is time for some rough cutting and then sanding of the roof planking.
I will have to say that I am incredibly pleased with it so far.
View attachment 534302
To make the curved entryway cover, I use 0.7”x 0.95” x 1/16” board that I soak in water for about 10 minutes and bent.
I paint the interior of the skylight black.
View attachment 534303
These frames are supposed to have five bars through them but the best I can do is four holes instead of five. It will have to do.
View attachment 534304
View attachment 534305
Once done I clean up the glue using a pick and a file. They look nice.
While painting the top of the skylight, I accidentally get some white paint on one of the bars… and I really like the look. With the interior painted black, the dark green of the wires/bars blends in and cannot be seen. But when they are painted white, they stand out from the interior.
After I touched up all the white paint, I installed the two portholes (thanks MIL - Alice).
View attachment 534306
The stovepipe is made from 3/32” brass tubing. It has two sections 0.87” and 0.17”. Each one has one end at 90 degrees while the other is at 45 degrees. The ends with the 45-degree cuts are soldered together making a 90-degree turn.
View attachment 534308
View attachment 534309
This was all painted black.
Drilled a hole in the main cabin’s roof and very slighted reamed it out with around file and glued the stovepipe in.
View attachment 534310
I then used two small clamps to first hold the curved sides of the roof to the curved sides of the sides, and then another clamp to hold the top of the curved roof to the top of the sides.
I drill a hole on one side and give it a little sanding with a small round file until a porthole fits into it.
View attachment 534311
To get ready to add the coamings, I remove approximately 1/16” from the double doors using a knife and small file. This gives enough space “under” the door for the coamings.
View attachment 534312
Each end/corner of the coamings will need to be sanded at an angle to match the angles of the walls.
At this stage there will be a small gap between the coamings and the rounded corners of the cabin.
Add a little filler into the gap, and the sand the corners of the coamings round to match the rounded corners of the cabin and touch up with stain as needed.
The last thing to do is to sand the bottom of the cabin to match the curve of the deck.
View attachment 534313
The main cabin is finished. It took about 21.5 hours.
View attachment 534314
Creating this abbreviated build log really fought with my OCD around instructions, so who knows if I'll do it again. But for that one person who wants to see the full write-up, I've attached the PDF which you should be able to find below. If not, DM me.
Work time: 21.5 hours
Total work time: 292.5 hours
A nice main cabin and top finish, Hugh.7/4/25 to 7/22/25 – Cliff Notes
I am going to cut to the chase… I know I am long-winded and for this section I am going to change things up a bit as I am not going to give my super long and detailed log, but rather a cliff note version. The main cabin turned out to be just too long. I will be attaching the full log as a pdf for those people (okay “that” one person who may want it).
For the main cabin I am going to mostly follow what was detailed by the Suburban Ship modeler.
The main cabin will be begin being built directly over/on a copy of the plans to ensure not only its size but the angles since they are not 90 degrees.
View attachment 534283
Install three supports lengthwise.
View attachment 534284
Create the entryway sides.
Cut an opening in the aft wall between the 2-port side supports.
Glue the entrance sides to the supports.
Install two additional supports widthwise between lengthwise supports.
View attachment 534286
Sand the four corners of the structure to create a rounded appearance.
For the portholes, I drill two holes; one on the port side and one on the starboard sides.
The “doors” will be made from two boards.
View attachment 534287
Create the base for the skylight structure (its roof will be made later).
View attachment 534288
View attachment 534290
I will be using 1/16” x 1/4” planking for the main cabin’s roof, tapered down to 0.2”.
View attachment 534294
View attachment 534296
View attachment 534301
Now it is time for some rough cutting and then sanding of the roof planking.
I will have to say that I am incredibly pleased with it so far.
View attachment 534302
To make the curved entryway cover, I use 0.7”x 0.95” x 1/16” board that I soak in water for about 10 minutes and bent.
I paint the interior of the skylight black.
View attachment 534303
These frames are supposed to have five bars through them but the best I can do is four holes instead of five. It will have to do.
View attachment 534304
View attachment 534305
Once done I clean up the glue using a pick and a file. They look nice.
While painting the top of the skylight, I accidentally get some white paint on one of the bars… and I really like the look. With the interior painted black, the dark green of the wires/bars blends in and cannot be seen. But when they are painted white, they stand out from the interior.
After I touched up all the white paint, I installed the two portholes (thanks MIL - Alice).
View attachment 534306
The stovepipe is made from 3/32” brass tubing. It has two sections 0.87” and 0.17”. Each one has one end at 90 degrees while the other is at 45 degrees. The ends with the 45-degree cuts are soldered together making a 90-degree turn.
View attachment 534308
View attachment 534309
This was all painted black.
Drilled a hole in the main cabin’s roof and very slighted reamed it out with around file and glued the stovepipe in.
View attachment 534310
I then used two small clamps to first hold the curved sides of the roof to the curved sides of the sides, and then another clamp to hold the top of the curved roof to the top of the sides.
I drill a hole on one side and give it a little sanding with a small round file until a porthole fits into it.
View attachment 534311
To get ready to add the coamings, I remove approximately 1/16” from the double doors using a knife and small file. This gives enough space “under” the door for the coamings.
View attachment 534312
Each end/corner of the coamings will need to be sanded at an angle to match the angles of the walls.
At this stage there will be a small gap between the coamings and the rounded corners of the cabin.
Add a little filler into the gap, and the sand the corners of the coamings round to match the rounded corners of the cabin and touch up with stain as needed.
The last thing to do is to sand the bottom of the cabin to match the curve of the deck.
View attachment 534313
The main cabin is finished. It took about 21.5 hours.
View attachment 534314
Creating this abbreviated build log really fought with my OCD around instructions, so who knows if I'll do it again. But for that one person who wants to see the full write-up, I've attached the PDF which you should be able to find below. If not, DM me.
Work time: 21.5 hours
Total work time: 292.5 hours
Regards, Peter
- Joined
- Jun 17, 2021
- Messages
- 3,202
- Points
- 588

All the above. Agreed!!
7/30/25 to 8/15/25
Before working on to the furniture/structures on the front 1/2 of the ship I must create the “unknown” piece located next to the wheelhouse. It is 1/2” in diameter and is 0.20” in height. I use a 1/2” dowel and sand a curved look to the end.
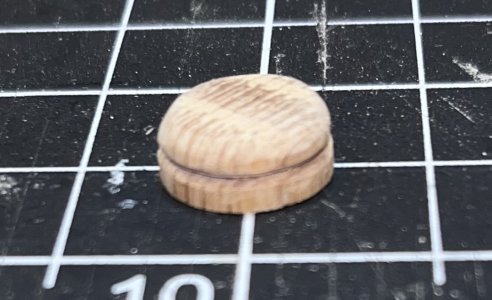
To make it look like it is two separate pieces, I hold the dowel in my miter box to cut right at where the sanded curve begins. At this point, I cut a groove using a saw completely around the dowel. I then use a small, pointed file and sand the groove a bit to open it up.
I then put a mark just a little more than 0.20” and cut completely through the dowel using a saw. I sand the entire piece until it is 0.20” in height.
Two coats of white paint, a little sanding to match the curve of the deck and it is ready to be glued in place.
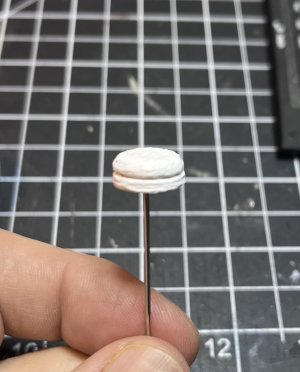
On to the skylight and companionway. Neither of these are very complex, but since there are not any instructions, I created them much like I did for the previous structures. Creating the instructions took about an hour.
During the Rocky Mountain Shipwrights workshop on Saturday, I cut and sanded the four wall pieces of the skylight and rough-cut and glued the three taller sections of the companionway (that were taller than 1/2”).
As with many of the steps of creating these two structures, I did certain tasks at the same time - for example as stated above, I cut the pieces for the walls of both structures at the same time. For the build log, I will detail the building of the two structures separately.
Skylight
The skylight walls were made with 1/16” x 1/2” sanded down to 0.3” (the height of the skylight).
I need two lengths of boards that are 0.56” and two that are 0.44”. These are glued together using 1/8” x 1/8” x 0.25” posts in the corners creating a 0.56” square base.
The sides are sanded, filler added and sanded again. The corners are then rounded using sandpaper.
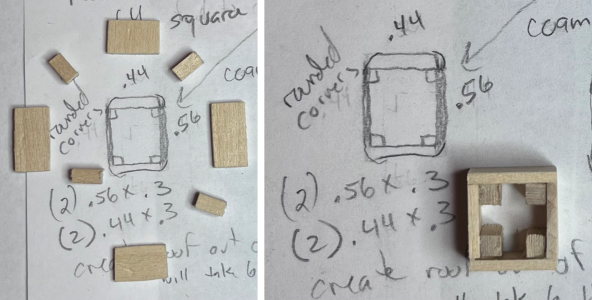
4mm holes are drilled on the port and starboard sides and given a little reaming/sanding with a small round file until the portholes fit.
The skylight is given two coats of white paint.
The roof is created using six 1/16” x 1/8” x 0.7” planks. Used pencil on the edges to look like grout. Once glued together, it is sanded down to 0.68” square and the corners are rounded.
I had built a jig to help with sanding edges square (90 degrees) and at 45 degrees. It is a shooting board, but for sanding instead of using a plane. It works ok, but I need to add some “wings” to hold the sandpaper up at the height of what I am sanding.
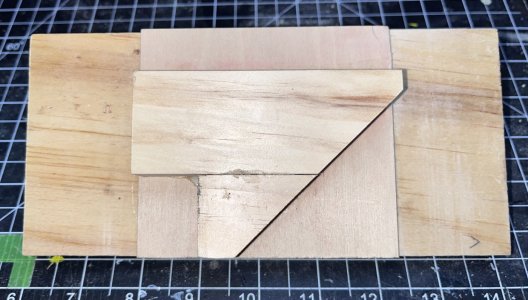
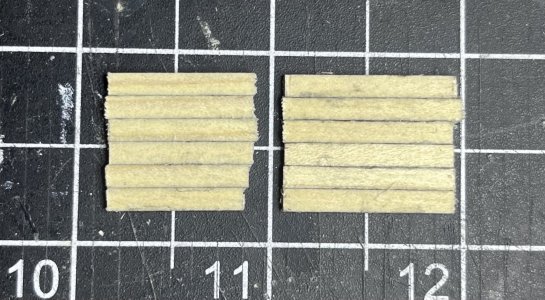
The roof is given two coats of classic pecan stain.
The portholes are glued in place and then so is the roof, leaving about 1/16” overhang on all the four sides. As before, thanks for the portholes goes to Alice, my deceased MIL, as she wanted to be part of the hobby that I get so much joy from.
I stained a couple of short (around 3”) of 1/16” x 1/16” stock which will be used for the coamings with golden pecan. These are then cut down to size, miter sanded (using the updated jig) and glued in place at the bottom of the base. This should be enough for both structures.
The bottom of the skylight is then sanded to match the curve of the deck.
The skylight is then given a coat of clear satin finish.
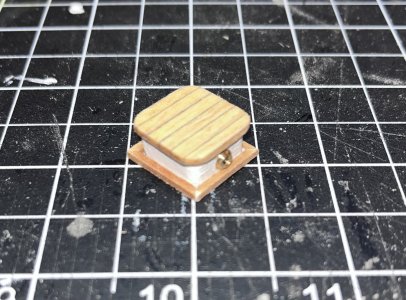
After a suggestion from Phil in the RMSW, I will hold off on glueing it in place until I determine if it will get in the way while I am rigging.
Companionway
The sides of the companionway are quadrilateral (like the wheelhouse) whose sides are 0.3” (fore) x 0.56” (aft) x 0.65” (bottom) x 0.71” (top). The top is at a slight angle, about 78 degrees.
To get the height which is just over 1/2” at 0.56”, I cut two 1/2” x 1/16” and two 1/16” x 1/16” pieces to about 0.67” and glue them together creating boards that are 0.56” x 0.67”. I do the same with two pieces (of 1/2” x 1/16” and 1/16” x 1/16” that are about 0.45”) to form the tall (aft) side. The short (fore) side is not over 1/2” so I just cut/sand down a 1/2” piece of 1/2” x 1/16” to 0.3” x 0.43”.
The walls are glued together with 1/8” x 1/8” posts in the corners.

In looking at pictures I thought there was a need for a 1/16” x 1/16” board on top (in addition to the one on the bottom) of the front wall. This was true for the main cabin, so it made sense, but when I really looked at the pictures, it was not needed, and I had to cut/sand it off.
Cut horizontal groove in center in the aft wall to simulate two panels that lift out when the entrance is open.
It was at this point I realized that the aft wall should have been pushed in slightly to the fore instead of even with the side walls. To correct this, I added two pieces of 1/16” x 1/16” boards vertically on the aft corners.
I cut six 1/16” x 1/8” planks that are 0.8” and used pencil on the edges. They are glued together and then sanded down to 0.78” x 0.7” (using the jig) with slightly rounded corners.
The aft edge of the roof is notched in about 1/16” to match the shape of the base.
The roof is placed into golden pecan stain for a few minutes then dried off and put in the stain again for a second coat.
The rails for the sliding cover are created by two sections of 1/16” x 1/16” boards that are cut to 0.78”, painted white, and glued onto the roof. The sliding cover was made using 1/2” x 1/16” x 0.7”. The 1/2” is sanded down to 0.45” while all but the aft edge is sanded to give it a curved appearance. It is painted white. It is now where I see where the 1/16” x 1/16” board (previously removed) is needed. It is needed perpendicular between the rails as without it, a 1/16” gap is created between the stained roof and the sliding cover.
I cut and sand a piece until it fits between the rails and glue it in place. The aft facing side, in addition to the aft facing edge of the stained roof, are painted white.
The sliding cover is glued to the rails.
Using the pre-stained 1/16” x 1/16” stock, I created the coamings. These were then cut down to size, miter sanded and glued in place at the bottom of the base.
The companionway is then given a coat of clear satin finish.
The bottom of the companionway is then sanded to match the curve of the deck and given a coat of clear satin finish. As previously with the skylight (and main cabin), I will hold off on glueing it in place until I determine if it will get in the way while I am rigging.
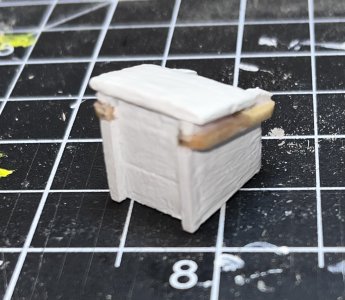
Next up is any of the remaining eyebolts and rings. I have already installed 16 of them to the bulwark stanchions, eight along each side, leaving only four to be installed along the front of the main cabin. Since the cabin was not glued onto the deck yet, these are easy except that while looking at pictures of the cabin on Suburban Ship Modeler, I noticed that there is a small fascia right under the roof that was not detailed in their instructions. I look at a couple of other build logs and it is hit or miss if this is there. I will admit that it does look better with it though.
I strike a happy medium and instead of putting one up around the entire cabin, I only put one on the front of the cabin as adding one around the entire cabin would require redesigning the structure. Again, since the cabin has not been glued in place, it is an easy add. I cut a 2.5” section of 1/16” x 1/16” lumber and glue it in place, holding it with three clamps. I am going to add a note to my main cabin post bringing this to light so others can decide whether to add a fascia or not.
It is then painted white to match the cabin and I mark off four equally spaced holes along the fascia and drill four 0.6mm holes.
An eyebolt and ring are glued into each of the holes.
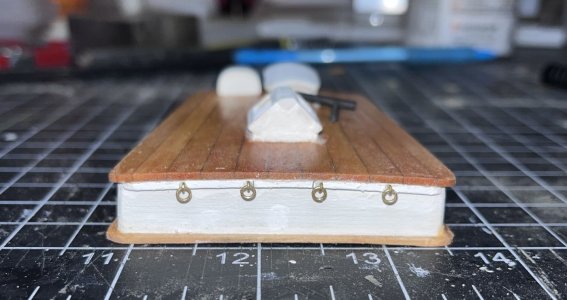
Next up were the so from the two mooring chocks, the bow and stern chocks, and the steering wheel, all from the Britannia metal pieces.
I used a few small files of different shapes to sand them free of the parting lines and gave them a couple of coats of primer.
3945
3946
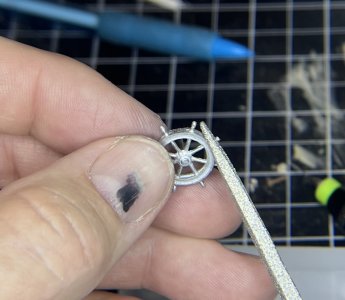
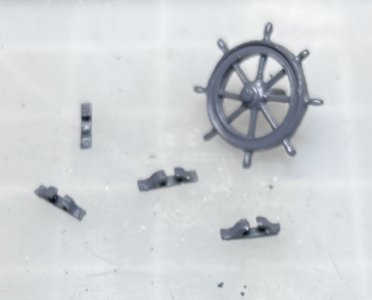
And then Covid hit me again (and yes, I am vaccinated and bolstered). After a few days, I was up to some painting.
The chocks were easy as they are painted black.
I had wanted to dress up the steering wheel, so I used black, brown, and gold. They looked okay after they were done, but when I looked at a few pictures I had pulled up to give me ideas, I realized that in my Covid-infected brain I had mixed up where I was painting some of the black and some of the gold.
It sucked, but I repainted it and felt it looked better the second time around.
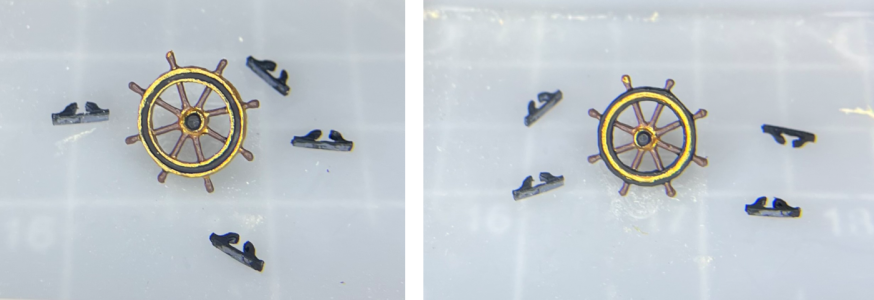
These five Britannia pieces are then glued in place.
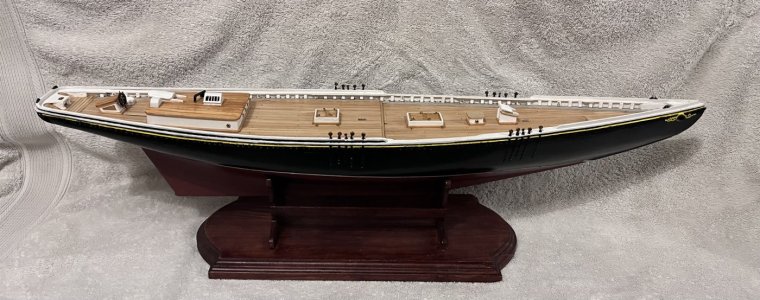
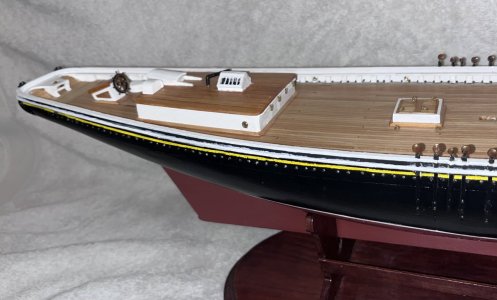
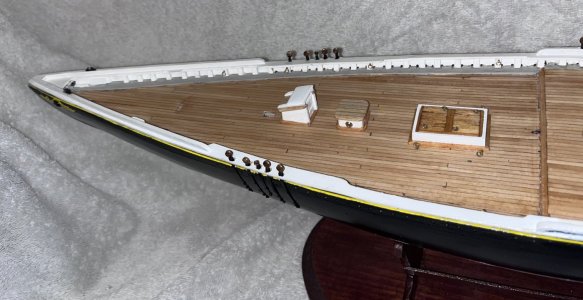
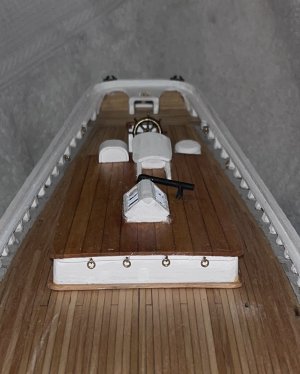
Work time: 12.5 hours
Total work time: 305 hours
Before working on to the furniture/structures on the front 1/2 of the ship I must create the “unknown” piece located next to the wheelhouse. It is 1/2” in diameter and is 0.20” in height. I use a 1/2” dowel and sand a curved look to the end.

To make it look like it is two separate pieces, I hold the dowel in my miter box to cut right at where the sanded curve begins. At this point, I cut a groove using a saw completely around the dowel. I then use a small, pointed file and sand the groove a bit to open it up.
I then put a mark just a little more than 0.20” and cut completely through the dowel using a saw. I sand the entire piece until it is 0.20” in height.
Two coats of white paint, a little sanding to match the curve of the deck and it is ready to be glued in place.

On to the skylight and companionway. Neither of these are very complex, but since there are not any instructions, I created them much like I did for the previous structures. Creating the instructions took about an hour.
During the Rocky Mountain Shipwrights workshop on Saturday, I cut and sanded the four wall pieces of the skylight and rough-cut and glued the three taller sections of the companionway (that were taller than 1/2”).
As with many of the steps of creating these two structures, I did certain tasks at the same time - for example as stated above, I cut the pieces for the walls of both structures at the same time. For the build log, I will detail the building of the two structures separately.
Skylight
The skylight walls were made with 1/16” x 1/2” sanded down to 0.3” (the height of the skylight).
I need two lengths of boards that are 0.56” and two that are 0.44”. These are glued together using 1/8” x 1/8” x 0.25” posts in the corners creating a 0.56” square base.
The sides are sanded, filler added and sanded again. The corners are then rounded using sandpaper.

4mm holes are drilled on the port and starboard sides and given a little reaming/sanding with a small round file until the portholes fit.
The skylight is given two coats of white paint.
The roof is created using six 1/16” x 1/8” x 0.7” planks. Used pencil on the edges to look like grout. Once glued together, it is sanded down to 0.68” square and the corners are rounded.
I had built a jig to help with sanding edges square (90 degrees) and at 45 degrees. It is a shooting board, but for sanding instead of using a plane. It works ok, but I need to add some “wings” to hold the sandpaper up at the height of what I am sanding.


The roof is given two coats of classic pecan stain.
The portholes are glued in place and then so is the roof, leaving about 1/16” overhang on all the four sides. As before, thanks for the portholes goes to Alice, my deceased MIL, as she wanted to be part of the hobby that I get so much joy from.
I stained a couple of short (around 3”) of 1/16” x 1/16” stock which will be used for the coamings with golden pecan. These are then cut down to size, miter sanded (using the updated jig) and glued in place at the bottom of the base. This should be enough for both structures.
The bottom of the skylight is then sanded to match the curve of the deck.
The skylight is then given a coat of clear satin finish.

After a suggestion from Phil in the RMSW, I will hold off on glueing it in place until I determine if it will get in the way while I am rigging.
Companionway
The sides of the companionway are quadrilateral (like the wheelhouse) whose sides are 0.3” (fore) x 0.56” (aft) x 0.65” (bottom) x 0.71” (top). The top is at a slight angle, about 78 degrees.
To get the height which is just over 1/2” at 0.56”, I cut two 1/2” x 1/16” and two 1/16” x 1/16” pieces to about 0.67” and glue them together creating boards that are 0.56” x 0.67”. I do the same with two pieces (of 1/2” x 1/16” and 1/16” x 1/16” that are about 0.45”) to form the tall (aft) side. The short (fore) side is not over 1/2” so I just cut/sand down a 1/2” piece of 1/2” x 1/16” to 0.3” x 0.43”.
The walls are glued together with 1/8” x 1/8” posts in the corners.

In looking at pictures I thought there was a need for a 1/16” x 1/16” board on top (in addition to the one on the bottom) of the front wall. This was true for the main cabin, so it made sense, but when I really looked at the pictures, it was not needed, and I had to cut/sand it off.
Cut horizontal groove in center in the aft wall to simulate two panels that lift out when the entrance is open.
It was at this point I realized that the aft wall should have been pushed in slightly to the fore instead of even with the side walls. To correct this, I added two pieces of 1/16” x 1/16” boards vertically on the aft corners.
I cut six 1/16” x 1/8” planks that are 0.8” and used pencil on the edges. They are glued together and then sanded down to 0.78” x 0.7” (using the jig) with slightly rounded corners.
The aft edge of the roof is notched in about 1/16” to match the shape of the base.
The roof is placed into golden pecan stain for a few minutes then dried off and put in the stain again for a second coat.
The rails for the sliding cover are created by two sections of 1/16” x 1/16” boards that are cut to 0.78”, painted white, and glued onto the roof. The sliding cover was made using 1/2” x 1/16” x 0.7”. The 1/2” is sanded down to 0.45” while all but the aft edge is sanded to give it a curved appearance. It is painted white. It is now where I see where the 1/16” x 1/16” board (previously removed) is needed. It is needed perpendicular between the rails as without it, a 1/16” gap is created between the stained roof and the sliding cover.
I cut and sand a piece until it fits between the rails and glue it in place. The aft facing side, in addition to the aft facing edge of the stained roof, are painted white.
The sliding cover is glued to the rails.
Using the pre-stained 1/16” x 1/16” stock, I created the coamings. These were then cut down to size, miter sanded and glued in place at the bottom of the base.
The companionway is then given a coat of clear satin finish.
The bottom of the companionway is then sanded to match the curve of the deck and given a coat of clear satin finish. As previously with the skylight (and main cabin), I will hold off on glueing it in place until I determine if it will get in the way while I am rigging.

Next up is any of the remaining eyebolts and rings. I have already installed 16 of them to the bulwark stanchions, eight along each side, leaving only four to be installed along the front of the main cabin. Since the cabin was not glued onto the deck yet, these are easy except that while looking at pictures of the cabin on Suburban Ship Modeler, I noticed that there is a small fascia right under the roof that was not detailed in their instructions. I look at a couple of other build logs and it is hit or miss if this is there. I will admit that it does look better with it though.
I strike a happy medium and instead of putting one up around the entire cabin, I only put one on the front of the cabin as adding one around the entire cabin would require redesigning the structure. Again, since the cabin has not been glued in place, it is an easy add. I cut a 2.5” section of 1/16” x 1/16” lumber and glue it in place, holding it with three clamps. I am going to add a note to my main cabin post bringing this to light so others can decide whether to add a fascia or not.
It is then painted white to match the cabin and I mark off four equally spaced holes along the fascia and drill four 0.6mm holes.
An eyebolt and ring are glued into each of the holes.

Next up were the so from the two mooring chocks, the bow and stern chocks, and the steering wheel, all from the Britannia metal pieces.
I used a few small files of different shapes to sand them free of the parting lines and gave them a couple of coats of primer.
3945
3946


And then Covid hit me again (and yes, I am vaccinated and bolstered). After a few days, I was up to some painting.
The chocks were easy as they are painted black.
I had wanted to dress up the steering wheel, so I used black, brown, and gold. They looked okay after they were done, but when I looked at a few pictures I had pulled up to give me ideas, I realized that in my Covid-infected brain I had mixed up where I was painting some of the black and some of the gold.
It sucked, but I repainted it and felt it looked better the second time around.

These five Britannia pieces are then glued in place.


Work time: 12.5 hours
Total work time: 305 hours


