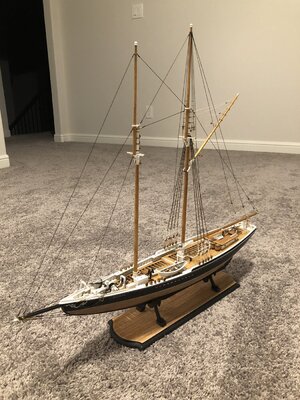
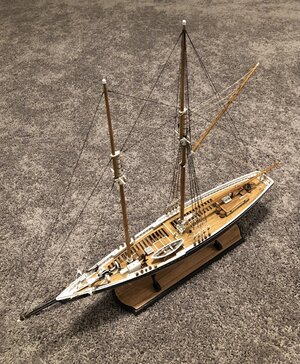
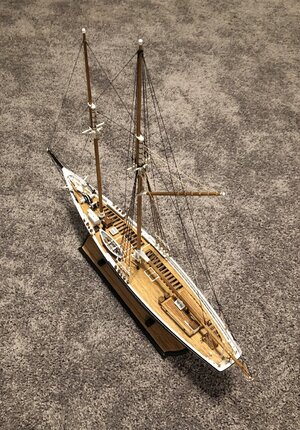
Bluenose 1/72 POF [COMPLETED BUILD]

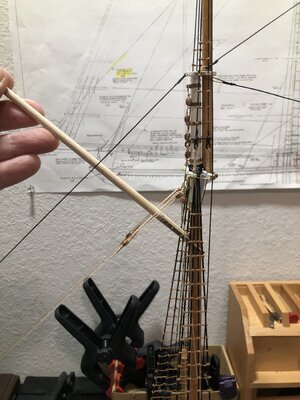
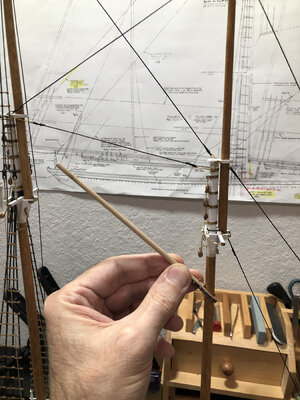
Here is a pic from rigging plans showing the angle of the gaff with sails.
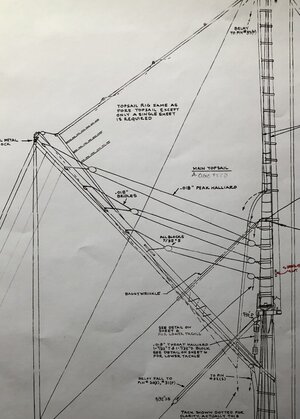
5B3DFB8D-5B68-4FDF-9A2D-E4F5E5AF259C.jpeg

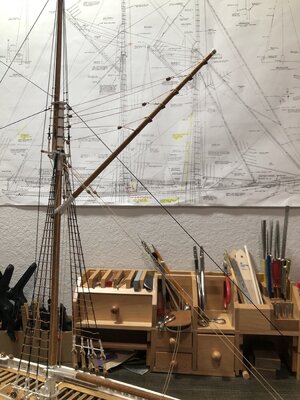
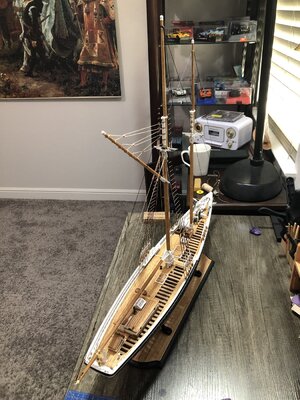
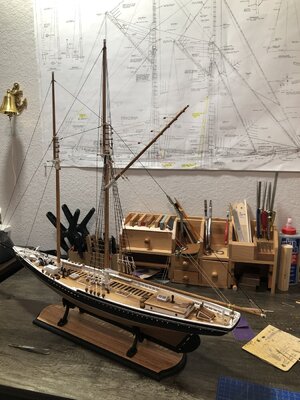
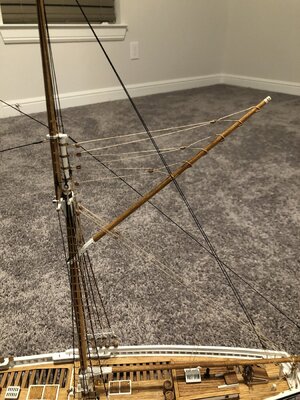
This is important to me, because even though I have decided not to add sails. I have chosen to display the ship with the gaffs raised as if a sail was in place.
To me this is a more visually pleasing
display, than having them lowered above the boom, with all of the rope falls cluttering up the ship. Just my personal preference, so to each his own they say! ;)

Example…
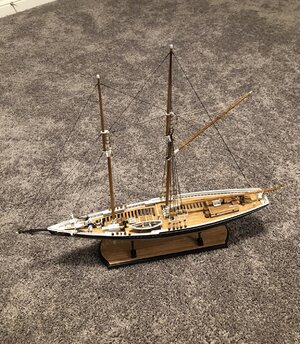
279EB3A1-DD11-45BE-B03D-77CDA157BA6F.jpeg
 
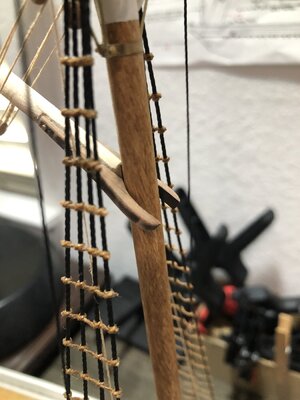
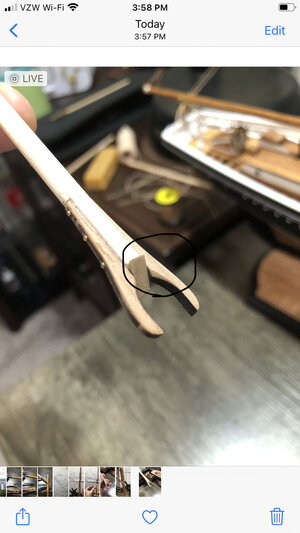
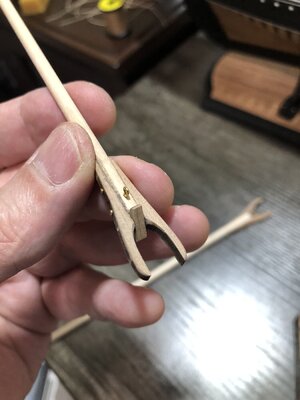
Another tip, if you want the gaff to sit snug (or tight) against the mast, you will need to add a chamfer on the upper inside edge close to the clapper. I used a rat tail file to get in there and then test fit against mast until fit was good.

Main mast gaff…
B8DDF1D9-4F8C-42C9-B0E2-E229EEA240D6.jpeg260AD879-50A6-4F38-B529-CED089D73EC6.jpeg

Foremast gaff…
9791E03F-98F3-4BB4-AECA-06A71EE67861.jpeg89752806-88C3-40F0-B675-4C8A745B746A.jpeg

If you don’t add this chamfer, most likely the clapper will never even touch the mast, because the gaff frame will prevent it from doing so if it is at a steep angle. This doesn’t matter if it is perpendicular to the mast. Just an observation of form, fit and function. ;)
 
Last edited:
Cotton tail.
Running over them is not the best form of population control. They breed up to 3 times a year due to the attrition rate. Most wild rabbits only live 1-2 years. There are many predators of rabbits, who normally keep the population down. I hear owls every night around my house. They will certainly eat a rabbit if the opportunity presents itself. I try to stay out of the way of nature and let it be. Wood ducks had babies in a hole in our pecan tree. The hole location is about 2 stories up. And we had squirrels use that same hole in the tree for their offspring. So because we have pecan trees, fruit trees, and Bermuda grass…the squirrels, ducks, birds and rabbits come. And because they come, so do the predators! ;)
I just observe mostly and enjoy nature.
I agree with that as too much habitat is being destroyed by development demanded by our own population growth.
 
Another tip, if you want the gaff to sit snug (or tight) against the mast, you will need to add a chamfer on the upper inside edge close to the clapper. I used a rat tail file to get in there and then test fit against mast until fit was good.

Main mast gaff…
View attachment 252980View attachment 252981

Foremast gaff…
View attachment 252982View attachment 252983

If you don’t add this chamfer, most likely the clapper will never even touch the mast, because the gaff frame will prevent it from doing so if it is at a steep angle. This doesn’t matter if it is perpendicular to the mast. Just an observation of form, fit and function. ;)
From what I have come across many of the working fishing schooners protected the mast at the gaffs in a similar manner as the metal collar down at the main boom area. Nice file work to bring the upper gaff jaw in alignment with the clapper. RIch
 
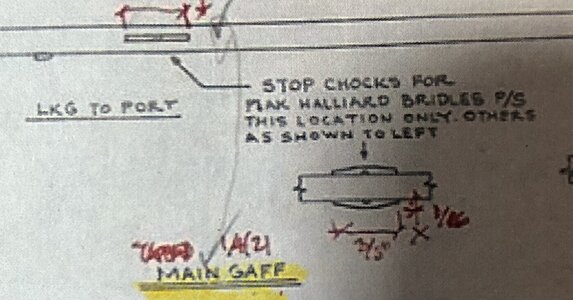
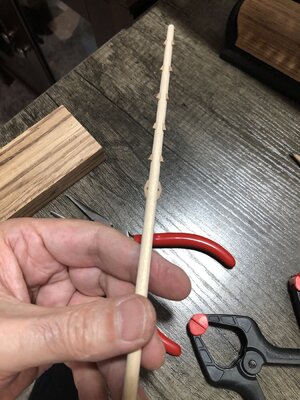
Added the stop chocks to the main gaff. Instructions show to just tie the line around, but these should be there.
Plans that show this…
64BD1BF1-0BE7-4873-92B5-2A9FA8EE4027.jpeg300A4772-682A-4403-823E-039597C2E8C0.jpeg

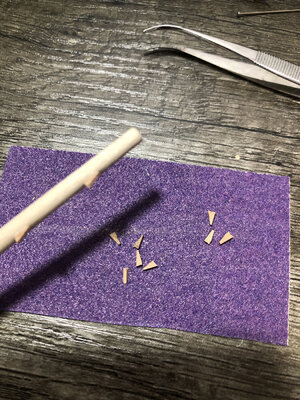
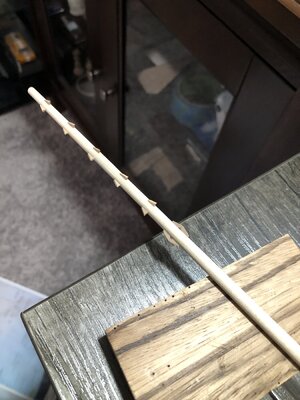
Built and added to my gaff…
F94B1EAE-73FB-4CB2-8D94-5B6533D527F4.jpeg55072C9C-1F4E-46FE-849A-41AA392558BB.jpegDE6D4E08-74F4-47E1-B084-ACEFA793FD58.jpeg

Note: these stop chocks are installed facing the wrong way! I discovered later and removed them and put on facing the opposite way (180 degrees).
 
Last edited:
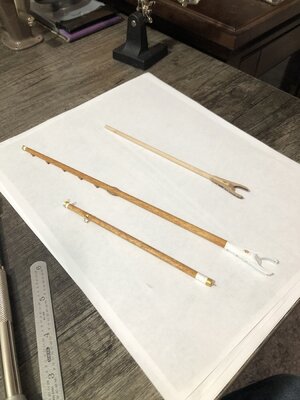
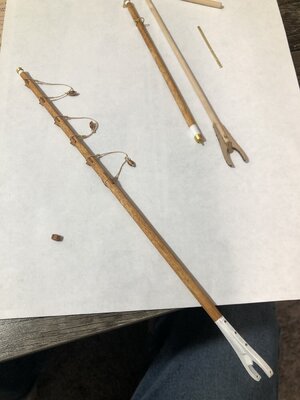
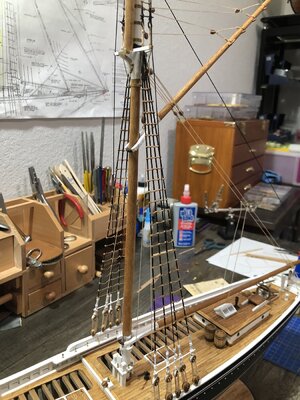
Today’s accomplishment…finished building the main mast gaff, built the foremast boom, half done with the foremast gaff.
Tomorrow I will do rigging on the main mast gaff, and add the main mast back stays.
If I have time I will start rigging the foremast boom. Moving my way towards the bow. Then I decided to do the foremast shroud lines last. Finish with rat lines and rope loops on stanchion pins. I can see light at the end of the tunnel! :p

353E5B4C-87F4-4B8A-B52D-1FEC02F92065.jpeg

Note: stop chocks on main mast gaff are facing the wrong way in this picture. I realized later and corrected them. ;)
 
Last edited:
Today’s accomplishment…finished building the main mast gaff, built the foremast boom, half done with the foremast gaff.
Tomorrow I will do rigging on the main mast gaff, and add the main mast back stays.
If I have time I will start rigging the foremast boom. Moving my way towards the bow. Then I decided to do the foremast shroud lines last. Finish with rat lines and rope loops on stanchion pins. I can see light at the end of the tunnel! :p

View attachment 253015
Nicely done as you approach your coming spars completion and rigging. Rich
 
Another great job, Dean. With a lot of details!
It took a lot of time, but the result is wonderful. A good investment of your time, that is running out for delivery.
But you will succeed
Regards, Peter
Thank you Peter. There are still many small details that need attention. But I’m getting close to having the ship completed! I realized I still need to mount the ships bell, and I’m not even sure where it goes! :p
 
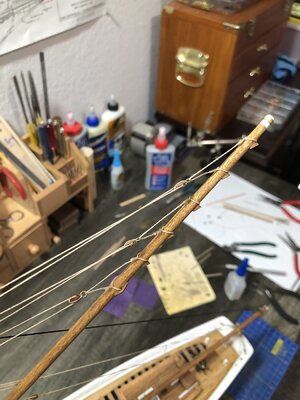
Well the day started off on a bad note…lol…it seems I glued all of the stop chocks onto the gaff backwards! Great! So off they came one by one and glued back on (180 degrees) with the stop facing towards the end of the gaff! Then the bridles were made.
35034414-99B5-46B9-B455-3A20E22338B8.jpeg
Then while attempting to raise the gaff and tension the lines I managed to break the quarter lift hook off of the trestle tree. Where it went…only God knows…probably in the bottom of the hull somewhere thanks to an open deck! :p
Being determined I shrugged it off as a casualty of rigging, made a new one and attached the quarter lift line again. Always easier second time!
Then I started the peak halliard line for the gaff, that runs through 7 pulleys and is tied off on both sides of the fife rail.
Once the throat halliard line to raise the gaff and the peak halliard line was in place I put the rope with the parrels around the mast at the base of the gaff. Tensioned and secured all lines and I can move on to the main mast back stays.

F1B415EC-2811-4022-84D4-DDA947D64324.jpeg7AFBF79F-70E0-4818-BD7B-9CABA896E438.jpeg6F6CE3E4-6E58-4F13-986C-DE9D73A8DB9C.jpegC9F67383-1E19-4A6C-A1C0-9C95D2A6470C.jpegE36E0EAA-94E7-46AC-8C86-651C314F8B34.jpeg
 
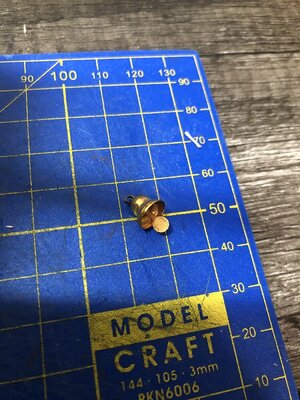
Ships bell…another mini project…sigh!
as it came…
D6F974C3-54E9-4862-AB1A-88EC69647A0B.jpeg
As someone once sang…oh no, I can’t go for that…no can do! :p

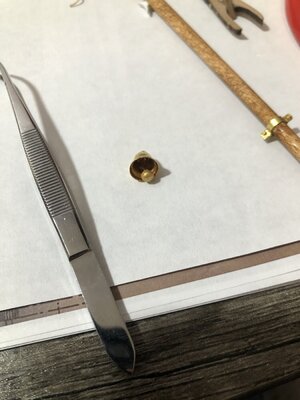
so I cut the flat ringer off, and glued on a bead, filled in with glue and painted gold…
35D4A8F8-C9C9-47E8-AE6E-F0C89F18BB77.jpeg
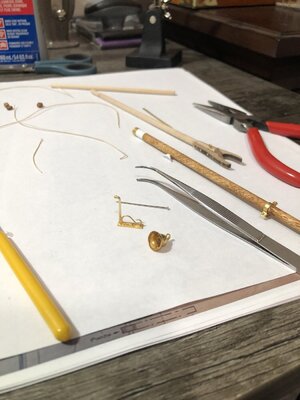
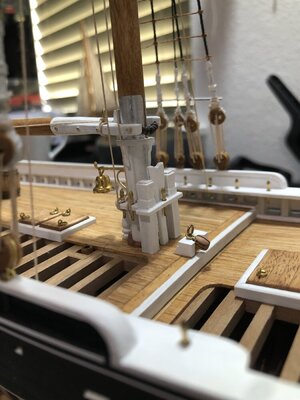
Now how to hang from mast? Thanks to Rich for pointing out it was probably on the aft side of the main mast. I could have just drilled a hole and used a piece of brass rod to hang it. But oh no!!! I had to make a hanger and mini project out of it! Soooo… I used my new bending tool and made a nice scroll to put under a rod on a flat plate…
4B7EB181-D4A3-4F60-B8E3-584966C36FF4.jpeg
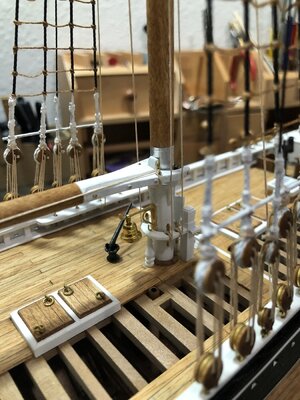
Then I put it and the bell on the mast. I’m ok with it. Probably not my best work, but it is sufficient and an improvement on what I had to work with.
0E4EC337-6304-40BD-9B06-F939E7D0DB98.jpeg8DB2C0FB-69A1-4D8C-8581-20B815F727AB.jpeg
Thanks for following my journey, and for all of the likes and comments thus far.
I’m off to work on back stays now!
 
Ships bell…another mini project…sigh!
as it came…
View attachment 253191
As someone once sang…oh no, I can’t go for that…no can do! :p

so I cut the flat ringer off, and glued on a bead, filled in with glue and painted gold…
View attachment 253192
Now how to hang from mast? Thanks to Rich for pointing out it was probably on the aft side of the main mast. I could have just drilled a hole and used a piece of brass rod to hang it. But oh no!!! I had to make a hanger and mini project out of it! Soooo… I used my new bending tool and made a nice scroll to put under a rod on a flat plate…
View attachment 253193
Then I put it and the bell on the mast. I’m ok with it. Probably not my best work, but it is sufficient and an improvement on what I had to work with.
View attachment 253194View attachment 253195
Thanks for following my journey, and for all of the likes and comments thus far.
I’m off to work on back stays now!
Bong. . . Bong. . . Bong. . . . Now the dories out in the fog can hear the direction to return and unload before all of their catch prep before a very short sleep. You can pace your own work now that the bell in is place. Very nice rigging. Rich (PT-2)
 
Well the day started off on a bad note…lol…it seems I glued all of the stop chocks onto the gaff backwards! Great! So off they came one by one and glued back on (180 degrees) with the stop facing towards the end of the gaff! Then the bridles were made.
View attachment 253185
Then while attempting to raise the gaff and tension the lines I managed to break the quarter lift hook off of the trestle tree. Where it went…only God knows…probably in the bottom of the hull somewhere thanks to an open deck! :p
Being determined I shrugged it off as a casualty of rigging, made a new one and attached the quarter lift line again. Always easier second time!
Then I started the peak halliard line for the gaff, that runs through 7 pulleys and is tied off on both sides of the fife rail.
Once the throat halliard line to raise the gaff and the peak halliard line was in place I put the rope with the parrels around the mast at the base of the gaff. Tensioned and secured all lines and I can move on to the main mast back stays.

View attachment 253186View attachment 253187View attachment 253188View attachment 253189View attachment 253190
Your days work removing and replacing those tiny cleats was multiple but I will claim larger damage when I reached across my mainmast to turn off a light and snagged the stbd. crosstree arm and broke it off at the weakening hole of the upper shrouds futtock rod!!!!! :-(((
As a bandage response I dipped the end into a good spot of glue and moved it back into place, trying to hold it firm and steady until the glue had set. The curved metal rod at the bottom side was also loose so I tried to set it in the same manner for both to cure overnight. This morning saw more slathering of adhesive over the fracture line and on both end on all four sides of the arm. So far it is in place just waiting for a repeated blunder on my part. . . . then a real problem is presented to totally replace that broken cross arm.
Move slowly!!! Rich
 
You had me wondering about those stop chocks/cleats (whatever they are called) as I had just finished mine on the Haarlem's bowsprit. Are they just glued on or did you cut a little groove for them to slot into first?

The rigging and ship's bell look exemplary as usual!
 
Your days work removing and replacing those tiny cleats was multiple but I will claim larger damage when I reached across my mainmast to turn off a light and snagged the stbd. crosstree arm and broke it off at the weakening hole of the upper shrouds futtock rod!!!!! :-(((
As a bandage response I dipped the end into a good spot of glue and moved it back into place, trying to hold it firm and steady until the glue had set. The curved metal rod at the bottom side was also loose so I tried to set it in the same manner for both to cure overnight. This morning saw more slathering of adhesive over the fracture line and on both end on all four sides of the arm. So far it is in place just waiting for a repeated blunder on my part. . . . then a real problem is presented to totally replace that broken cross arm.
Move slowly!!! Rich
Sorry to hear that Rich. Fixing things is never fun, and is usually at the expense of forward progress!
 
You had me wondering about those stop chocks/cleats (whatever they are called) as I had just finished mine on the Haarlem's bowsprit. Are they just glued on or did you cut a little groove for them to slot into first?

The rigging and ship's bell look exemplary as usual!
Thank you Heinrich.
I just glued the stop chocks on prior to staining. So I had to remove them and be sure to put back in the exact same spot (void of stain). They don’t see enough tension to warrant making grooves.
 
Back
Top