-

Win a Free Custom Engraved Brass Coin!!!
As a way to introduce our brass coins to the community, we will raffle off a free coin during the month of August. Follow link ABOVE for instructions for entering.
- Home
- Forums
- Ships of Scale Group Builds and Projects
- Bluenose PoF Group Build
- Bluenose Group Build Logs
You are using an out of date browser. It may not display this or other websites correctly.
You should upgrade or use an alternative browser.
You should upgrade or use an alternative browser.
Bluenose by Liebre
- Thread starter Henk Liebre
- Start date
- Watchers 21
- Joined
- Oct 28, 2018
- Messages
- 753
- Points
- 403

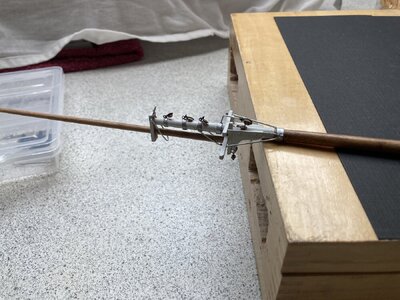
After several failed attempts to attach the Futtocks (I think that's what those rods are called, correct me if this is not the case) made of brass, which resulted in some damage, I let everything rest for a while.
The brass parts with the rods gave too much tension.
Last few days there was an oven in the workshop due to the summer weather, and paint spraying was parked for a while.
I thought again about how to solve this differently (sometimes it helps to leave it alone for a while until the Eureka moment comes)
The damage suffered has been removed and the Futtocks reattached (I call it the redo show nowadays)
I had to make the mast band a little wider and update everything again.
I will do the other mast in the same way.
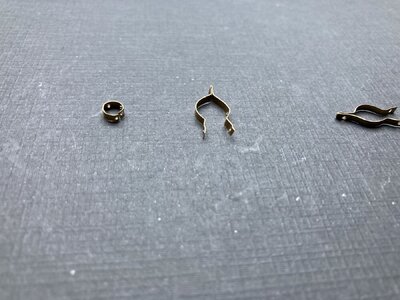
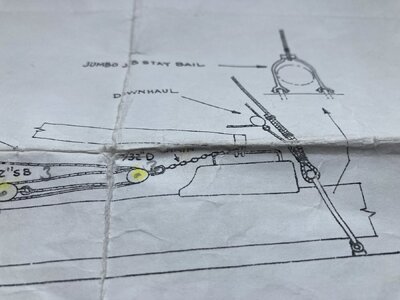
Looking again at the "failed" brass parts, this gave me an idea to use the smaller one for Jumbo jib stay bail on the deck near the bowsprit.
I did not find the solution of the supplied plans an acceptable solution,the deck is still easily accessible so let's see what else needs to be done and can be done.
Regards Henk
Last edited:
- Joined
- Sep 3, 2021
- Messages
- 5,078
- Points
- 738

Thinking back, I was very late addressing this detail and I had to drill the holes in the deck with the bowsprit in place. That was the easy part. What really gave me a full sized headache was to install the bail. I attached the two hooks to the bail (having provided two hooks to the bail as well, not conforming to the MS plans) and fiddled as long as was needed to get the hooks into the pre-drilled holes. It took me forever...Looking again at the "failed" brass parts, this gave me an idea to use the smaller one for Jumbo jib stay bail on the deck near the bowsprit.
I did not find the solution of the supplied plans an acceptable solution,the deck is still easily accessible so let's see what else needs to be done and can be done.
Nice to see that you restarted the build of your BN, Henk. Like Johan wrote, a lot of fiddling to get the bail in place. I fitted 2 eyepins to the eyes of the bail.View attachment 465349
After several failed attempts to attach the Futtocks (I think that's what those rods are called, correct me if this is not the case) made of brass, which resulted in some damage, I let everything rest for a while.
The brass parts with the rods gave too much tension.
Last few days there was an oven in the workshop due to the summer weather, and paint spraying was parked for a while.
I thought again about how to solve this differently (sometimes it helps to leave it alone for a while until the Eureka moment comes)
The damage suffered has been removed and the Futtocks reattached (I call it the redo show nowadays)
I had to make the mast band a little wider and update everything again.
I will do the other mast in the same way.
Looking again at the "failed" brass parts, this gave me an idea to use the smaller one for Jumbo jib stay bail on the deck near the bowsprit.
I did not find the solution of the supplied plans an acceptable solution,the deck is still easily accessible so let's see what else needs to be done and can be done.
Regards Henk
View attachment 465341
View attachment 465343
Regards, Peter
- Joined
- Oct 28, 2018
- Messages
- 753
- Points
- 403

Good idea Peter from the eyespinsI fitted 2 eyepins
I received your plans from Johan, I will check your log.
Regards
Henk
A little help in the amount of pages: —> pag 101, posts #2014 and #2019 <—……Good idea Peter from the eyespins
I received your plans from Johan, I will check your log.
Regards
Henk
Regards, Peter
Henk,
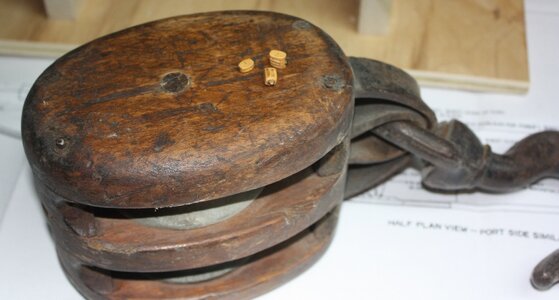
Your model looks terrific and the attention to detail is great!. Hard to tell from the first photo in post #262 but are the blocks externally stropped with rope? The drawing you posted in #262 shows internally stropped blocks as is appropriate. Internally stropped block are available with at least one aftermarket supplier but it is in the USA. Making them on your own is relatively easy, albeit a little time consuming. Then again, hobbies have no time schedules
Single, double, and triple homemade internally stropped blocks resting on a 120 year old real double one.

- Joined
- Sep 3, 2021
- Messages
- 5,078
- Points
- 738

Looking at your pics, Peter, I copied your solution for the bail...
Good looking job at the crosstrees Henk. I made all my bales out of wire including the one over the bow sprit.
- Joined
- Oct 28, 2018
- Messages
- 753
- Points
- 403

Hello Allan,Your model looks terrific and the attention to detail is great
Thanks for the compliment, and for sharing the photo.
Lots of inspiration and learned a lot from my other Dutch BN builders here on this forum.
Today I looked back where I left off and looked up stuff to pick things up again.
To my shame I only saw your message today, I have been busy with other things lately and not always new messages come through to my email.
Blocks, rigging etc. is not “My cup of tea” as they call it.
I have no technical background and am not familiar with ship terms and have never built a ship with rigging before.
I had not come across the terms double and single stropped blocks before and just looked this up.
To answer your question.
Attached are the strops on the blocks as they are now.
Given the scale, my 50 Cents chosen solution.
BTW, based on the photo, I am curious, are you currently building a ship?
Regards
Henk
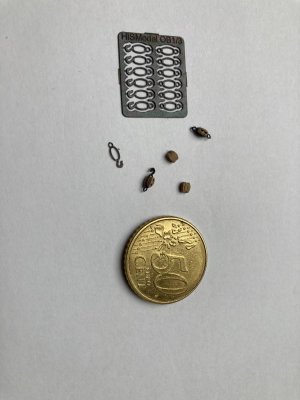
Hello Henk,BTW, based on the photo, I am curious, are you currently building a ship?
Yes I am working on a model at this time but the blocks in the photo I posted above were for a schooner model and my current project is for Litchfield (50) 1695. As the model is probably about half complete I started a retro build log on her recently here at SoS if you are interested in checking it out.
https://shipsofscale.com/sosforums/threads/hms-litchfield-48-1695-1-64-scale.15460/
Allan
Last edited:
- Joined
- Sep 3, 2021
- Messages
- 5,078
- Points
- 738

Hey Henk, I think we have/had a fellowmember who was mentioning internally stopped blocks. Since our Bluenoses have block sizes, ranging from approximately 2,5mm to 6mm, I didn't even bother. Way too small for my sausage resembling appendages, sometimes being referred to as fingers, plus I think one should be a watchmaker to accomplish selfmade internally stropped blocks.Hello Allan,
Thanks for the compliment, and for sharing the photo.
Lots of inspiration and learned a lot from my other Dutch BN builders here on this forum.
Today I looked back where I left off and looked up stuff to pick things up again.
To my shame I only saw your message today, I have been busy with other things lately and not always new messages come through to my email.
Blocks, rigging etc. is not “My cup of tea” as they call it.
I have no technical background and am not familiar with ship terms and have never built a ship with rigging before.
I had not come across the terms double and single stropped blocks before and just looked this up.
To answer your question.
Attached are the strops on the blocks as they are now.
Given the scale, my 50 Cents chosen solution.
BTW, based on the photo, I am curious, are you currently building a ship?
Regards
Henk
View attachment 477312
- Joined
- Oct 28, 2018
- Messages
- 753
- Points
- 403

Here is my 50 cent solution to post #270
The rigging is back on course
Masts are loose and standing rigging is definitely fastened and a lot of attention has been paid to making sure they are in the right position and can still be finally adjusted
Booms and gaffs are in place
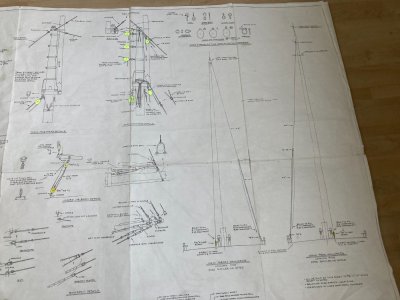
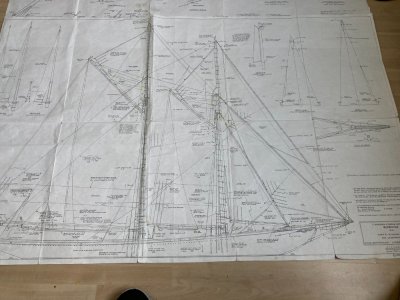
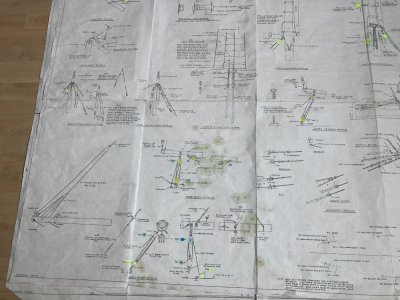
Because I let go of YuanQing's plans, I followed the Lankford plans (but without sails)
Because the drawings are based on sails, it took me quite some time to understand these plans, and which blocks apply there and which do not, to show them under sails
Other plans, other changes and other insights, I removed all 3 mm blocks that were used and replaced them with 4, 4.5 and 5 mm
For the tackles for the main mast among other things I kept 3 mm I thought about the order in which I am going to attach the rigging
, I left a littlebit to get the line tight
Today I had support from Peter Voogt
Thanks for this Peter
I have just applied the solution you suggested, and with comparison from the earlier photos I sent you, you can see that this is now a considerable improvement.
The lines are all still loose and not yet definitively attached.
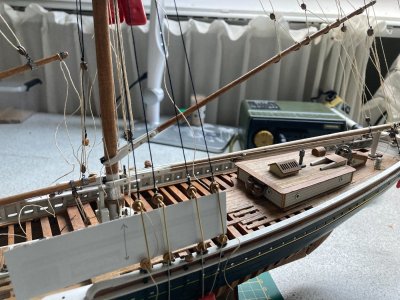
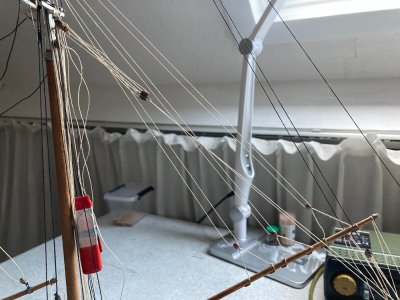
This gives a good starting position to continue on this path.
For those who are not familiar with the Lankford plans, here is an impression.
Regards
Henk
The rigging is back on course
Masts are loose and standing rigging is definitely fastened and a lot of attention has been paid to making sure they are in the right position and can still be finally adjusted
Booms and gaffs are in place
Because I let go of YuanQing's plans, I followed the Lankford plans (but without sails)
Because the drawings are based on sails, it took me quite some time to understand these plans, and which blocks apply there and which do not, to show them under sails
Other plans, other changes and other insights, I removed all 3 mm blocks that were used and replaced them with 4, 4.5 and 5 mm
For the tackles for the main mast among other things I kept 3 mm I thought about the order in which I am going to attach the rigging
, I left a littlebit to get the line tight
Today I had support from Peter Voogt
Thanks for this Peter
I have just applied the solution you suggested, and with comparison from the earlier photos I sent you, you can see that this is now a considerable improvement.
The lines are all still loose and not yet definitively attached.


This gives a good starting position to continue on this path.
For those who are not familiar with the Lankford plans, here is an impression.
Regards
Henk


Last edited:
I was pleased to help you with some advice, Henk. And it is clear that you are on the right track.Here is my 50 cent solution to post #270
The rigging is back on course
Masts are loose and standing rigging is definitely fastened and a lot of attention has been paid to making sure they are in the right position and can still be finally adjusted
Booms and gaffs are in place
Because I let go of YuanQing's plans, I followed the Lankford plans (but without sails)
Because the drawings are based on sails, it took me quite some time to understand these plans, and which blocks apply there and which do not, to show them under sails
Other plans, other changes and other insights, I removed all 3 mm blocks that were used and replaced them with 4, 4.5 and 5 mm
For the tackles for the main mast among other things I kept 3 mm I thought about the order in which I am going to attach the rigging
, I left a littlebit to get the line tight
Today I had support from Peter Voogt
Thanks for this Peter
I have just applied the solution you suggested, and with comparison from the earlier photos I sent you, you can see that this is now a considerable improvement.
The lines are all still loose and not yet definitively attached.
View attachment 517053View attachment 517054
This gives a good starting position to continue on this path.
For those who are not familiar with the Lankford plans, here is an impression.
Regards
Henk
View attachment 517055
View attachment 517057
View attachment 517058
Think about the ‘sheer pole’ on top of the upper deadeyes. That rod helps your to keep those upper deadeyes in the right position:
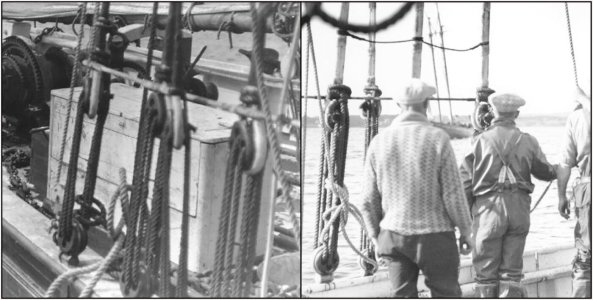
Regards, Peter
- Joined
- Sep 3, 2021
- Messages
- 5,078
- Points
- 738

Hey Henk,
Good to see you're working your way through the rigging. All those ropes and blocks are overwhelming, confusing ánd complicated. Very wise to take your time to understand what you're dealing with and to seek expert advice when needed.
Johan
Good to see you're working your way through the rigging. All those ropes and blocks are overwhelming, confusing ánd complicated. Very wise to take your time to understand what you're dealing with and to seek expert advice when needed.
Johan
She’s looking good Henk, you’re approaching the finish line! 
Alright Henk! Great to see you back at it.
- Joined
- Oct 28, 2018
- Messages
- 753
- Points
- 403

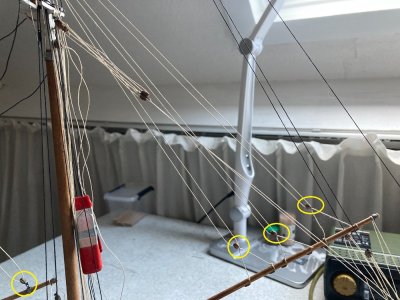
Added the ''sheer line'' to my 'memory'.Think about the ‘sheer pole’ on top of the upper deadeyes
I used the map in the picture as a second reference point.
Then I can tighten the lines between the blocks to determine the horizontal position of the ''sheer line''.
In line terms, so to speak.
We are on the same line.
Regards
Henk
- Joined
- Oct 17, 2020
- Messages
- 1,673
- Points
- 488

Hi , you see that these blocks are mounted in reverse.FrankHere is my 50 cent solution to post #270
The rigging is back on course
Masts are loose and standing rigging is definitely fastened and a lot of attention has been paid to making sure they are in the right position and can still be finally adjusted
Booms and gaffs are in place
Because I let go of YuanQing's plans, I followed the Lankford plans (but without sails)
Because the drawings are based on sails, it took me quite some time to understand these plans, and which blocks apply there and which do not, to show them under sails
Other plans, other changes and other insights, I removed all 3 mm blocks that were used and replaced them with 4, 4.5 and 5 mm
For the tackles for the main mast among other things I kept 3 mm I thought about the order in which I am going to attach the rigging
, I left a littlebit to get the line tight
Today I had support from Peter Voogt
Thanks for this Peter
I have just applied the solution you suggested, and with comparison from the earlier photos I sent you, you can see that this is now a considerable improvement.
The lines are all still loose and not yet definitively attached.
View attachment 517053View attachment 517054
This gives a good starting position to continue on this path.
For those who are not familiar with the Lankford plans, here is an impression.
Regards
Henk
View attachment 517055
View attachment 517057
View attachment 517058
- Joined
- Oct 28, 2018
- Messages
- 753
- Points
- 403

Hi DeanShe’s looking good Henk, you’re approaching the finish line!
This project feels a bit like running a marathon in the past.
Running in bad conditions, where at the 30km point you think
Wow, I've run 30km already, but the finish line isn't in sight.
The good news is
No matter how long it takes, the finish line is always in sight.
Henk

