• SUBSCRIBE TO SHIPS IN SCALE TODAY!

    The beloved Ships in Scale Magazine is back and charting a new course for 2026!
    Discover new skills, new techniques, and new inspirations in every issue.

    NOTE THAT OUR NEXT ISSUE WILL BE July/August 2026
  • Win a Free Custom Engraved Brass Coin!!!
    As a way to introduce our brass coins to the community, we will raffle off a free coin during the month of August. Follow link ABOVE for instructions for entering.

Bluenose Model Shipways 1:64 Beautiful ship

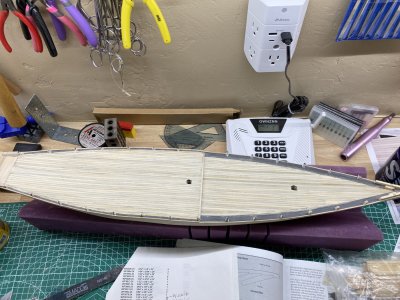
Very nice Rob, that deck will really pop when you apply your top finish.

Thank you. I have bought a very light maple stain that I want to try, I'll test it on some left over cut off planking. Speaking of planking, I have 28 left over planks for the deck. A lot of people say they have just enough, I do have a habit of using every bit of a plank I can and this is a second hand kit, it may be old and they may have included more planking,
 
Last edited:
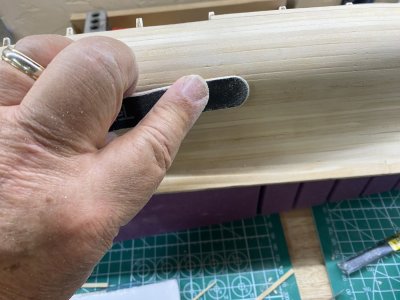
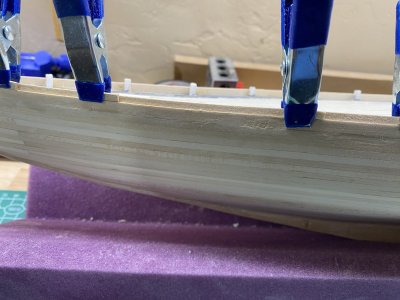
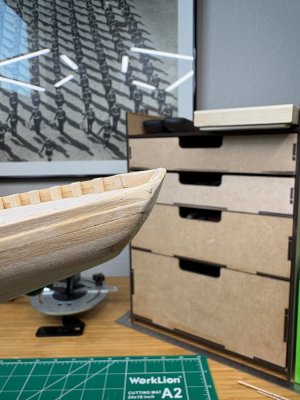
While working on the decking I have also been refining the hull by sanding it with finer grit abrasivesI am using some large "emergy boards" used for manicuring. I buy these in bulk from Amazon. They are flexible and really perfect for working on curved surfaces.

IMG_2355.jpeg

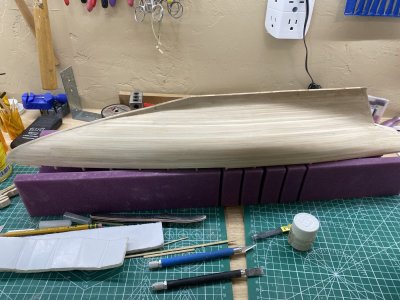
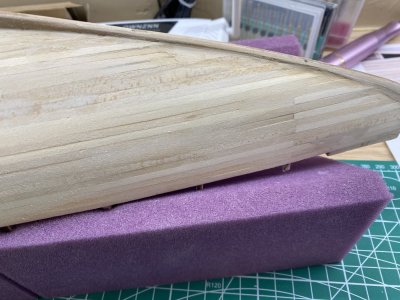
The hull is really becoming much smoother. I am happy with how it is progressing.

IMG_2356.jpeg

IMG_2359.jpeg
 
Last edited:
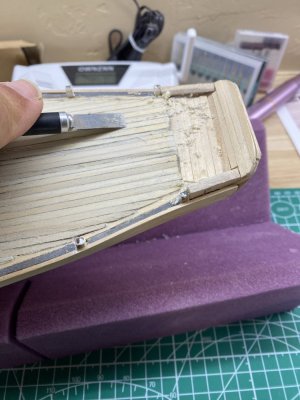
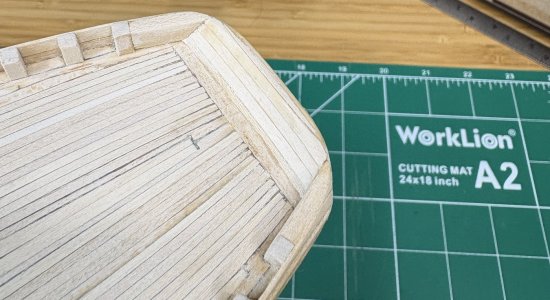
Some of the decking was very uneven. I am sure that some has to do with the the way I installed the deck and some with the unevenness of the planned decking strips. I was able to level it a lot by using a chisel blade as a kind of "mini plane" to shave off the unevenness. This saved a lot of sanding time.

View attachment 616623
While working on the decking I have also been refining thee hull by sanding it with finer grit abrasivesI am using some large "energy boards" used for manicuring. I buy these in bulk from Amazon. They are flexible and really perfect for working on curved surfaces.

View attachment 616624

The hull is really becoming much smoother. I am happy with how it is progressing.

View attachment 616625

View attachment 616626
What ‘some scraping & sanding’ can do to a model. That is looking very nice Rob.
Regards, Peter
 
Dan and Peter you are so right! I was feeling a bit disappointed after seeing the condition of the deck, but "planing" the wood and sanding has completely changed the look of the ship. Once I do some finer sanding I plan on putting on the bulwarks and then the infamous stanchions. I have decided to skip the scuppers, they are very small and I think not very noticeable.
 
If you compare this picture with the one of the newly completed deck I showed previously you can see the improvement due to sanding.

IMG_2363.jpeg

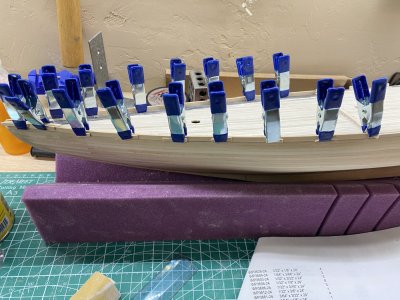
I next installed the foredeck bulwarks. While i could not find the width of the board stated anywhere, by looking at the plans it says it is twice the with of the hull planking boards or 3/16 x 1/16" I fitted pieces of the 3/16 x 1/16" stock from the "step" between the foredeck and quarterdeck and glued them along the bulkhead stanchions and the top of the uppermost hull strake, The fit is not perfect but it is close. A bit of filler and some sanding should blend these in nicely.

IMG_2368.jpeg

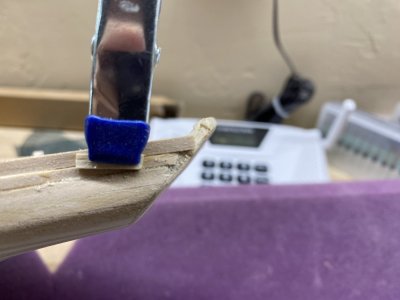
I used bits of left over planking to help prevent the clamps from leaving pressure marks on the wood.
 
I installed the 2nd row of bulwarks which is a 1/8 x 1/32" strip. Doing so i realize I have a problem. The strip is supposed to end at the level of the top of the transom. However it appears to be about a quarter of an inch below the transom level.

IMG_2369.jpeg

IMG_2370.jpeg

There are 2, 1/16" circular pieces that go on the upper edges of the stern blocks tp make the transom. What probably occurred is when I notched in the 2 pieces in I should have set them deeper into the stern blocks then I did. I will think about what to do, but I will probably lower the back of the transom by using a razor saw or a Dremel. i will let it ride for now while I prepare the deck for staining and sealing and prime the hull.
 
Speaking of priming the hull, I started a thread about when is smooth enough, smooth enough and got some wonderful advice from members of SOS for how to prepare the hull of the Bluenose for painting. I was particularly intrigued by the suggestion of @Bryian who has used

Rust-Oleum 249279-2PK Automotive Filler Primer Spray​


With success. This primer is designed to fill minor imperfections and is often used by people making 3D printed parts to get rid of the layered look that those pieces often have. It is inexpensive and I am going to try it. I plan on sanding the hull with about 300 grit paper to allow the surface to have a bit of "bite" for the primer to adhere to and see how it looks.
 
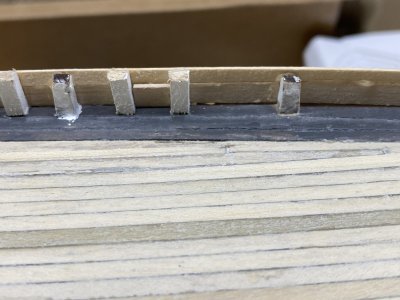
I started to for the stanchions in place. They are made from1/8 x 1/8" strip. You should be aware that the stanchions of the foredeck are slightly taller than the stanchions of the quarterdeck so plan accordingly. (don't ask me how I found this out!) Doing some measurement I found there was a 7mm (note the metric) space between each stanchion. When fabricating them (at least the longer ones) I sanded the strip and painted other the white that will be on the bulwarks before I cut them to length. I made a 7 mm spacer and used it to space the stanchions as I glue them into place.

IMG_2376.jpeg


Well at this point I reluctantly am taking another long hiatus. I will be returning to Arizona in later september when I will restart on this ship, which I really enjoy. In the meantime I will be switching to continue work on my Black Swan build.
 
Good morning Rob. Ahhh she is starting to come out really nice. Cheers Grantt
Looks great, Rob - wishing you safe travels and I’ll look forward to your return to the BN and your Black Swan posts as well!
Thank you Bill and Grant for your words of encouragement. I really love the look of this ship. It has been fun to work on (so far!)

Rob
 
Now onto the waterways. The Bluenose waterways are really divided into two parts. On the foredeck it consists of three planks. The outer planks between the stanchions of the bulkheads, a plank next to that on the onside and a final inner plank that tapers to the level of the decking. The quarterdeck has a single plank that goes between the stanchions and interior to that is a plank that the deck will be nibbed (notched) on to.

The instructions would have you cut a series of planks between the stanchions and glue them from the "shelf" of the bulkhead that was created when you thinned the stanchion to 1/8th" on to the next stanchion. That's a bit difficult to do. What I did was to place the strips that go inside the stanchions and rest on the bulkheads. I then glued small pieces of scrap under those planks to act as shelves to support the outer strips.

View attachment 578754

Once these support pieces were placed it was easy to glue short pieces between the stanchions and to the inner strip.

View attachment 578757
Then third innermost strip was then tapered and attached.
View attachment 578758

Once that was done, the outer strip was lightly sanded to "curve" the outer strips and make them seem more like one continuous piece.

I like the reversed wooden clothespeg clamp, I'll have to remember that one when I get a bit further on in my BN build. Looking good BTW!
 
Speaking of priming the hull, I started a thread about when is smooth enough, smooth enough and got some wonderful advice from members of SOS for how to prepare the hull of the Bluenose for painting. I was particularly intrigued by the suggestion of @Bryian who has used

Rust-Oleum 249279-2PK Automotive Filler Primer Spray​


With success. This primer is designed to fill minor imperfections and is often used by people making 3D printed parts to get rid of the layered look that those pieces often have. It is inexpensive and I am going to try it. I plan on sanding the hull with about 300 grit paper to allow the surface to have a bit of "bite" for the primer to adhere to and see how it looks.
Smooth but not so smooth that the look of wood disappears and the hull looks plastic. My mom said that about one of my hulls… :)

It’s looking good.

-Rich
 
Back
Top