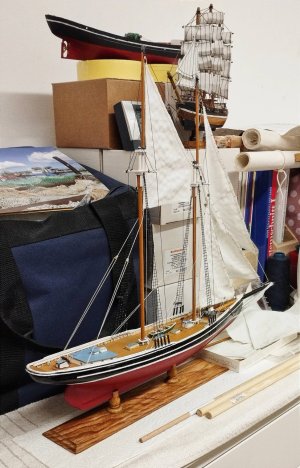
Bluenose - Scientific Kit No. 164 (1:72 scale)

Hi!
I'm presently awaiting two orders of rigging supplies and tools, paints, oak stain plus a really nice plane and an extra blade for it.

So I'll start rigging my schooner when it all arrives I'll have what I need to work on my 1:142 North Sea trawler plus begin with my 1:25 Hoogaars. So more updates on this later.

Bye for now! UrkerVisser
 
Last edited:
Hi Mike,
I checked it again and came up with 1:72 scale using the LOA length from the tip of the bowsprit all the way back to the tip of the Main Sail's gaff (or boom).

I also double checked it by using the Artificial Intelligence 'GPT-4o mini'.

Best Regards, UrkerVisser
A bit of a shame that you deleted the AI answer. My answer is now hanging a bit in the air. But it’s you log, ‘UrkerVisser’.
Regards, Peter
 
A bit of a shame that you deleted the AI answer. My answer is now hanging a bit in the air. But it’s you log, ‘UrkerVisser’.
Regards, Peter
Hi Peter,
This whole discussion of Mike's about errors in scale (which was 'Scientific's' problem) plus his vacation photos were starting to "unravel" my thread about building this kit. Therefore I had to 'get out in the garden and pull a few weeds' so to say in order to limit further distractions to get this build log back on course.

With friendly greetings, UrkerVisser
 
Wednesday, 12. March 2025
Construction Continues:

Hi everybody!
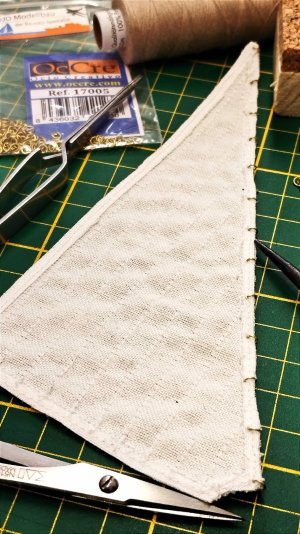
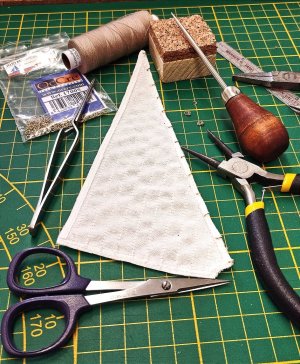
After a long pause in writing I finally have some updates. I worked on the Stay Sail installing 2 mm brass rings and 3 mm blocks. Plus I used the rigging thread from the early 1980's which came with the kit.

31.jpg30.jpg32.jpg35.jpg36.jpg37.jpg

I actually had the sail attached on with only the 15 brass rings and then looked over at Walter A. Musciano's blueprints and saw sail tie downs on the Stay Sail (although other model photos I've seen didn't have them).
So I removed the sail and sewed two rows of fine, horizontal stitches just above and below the tie downs.

My list of unloved chores now include:
1.) Carving the factory roughed in 4" x 4" x 24" board into a nice hull.
2.) Installing rat lines for 'forever and a day'.
3.) Installing sail ties and double knotting then on each side; and trying to steam iron them so they don't stick out like the whiskers on a cat!

Alas, I still have to install all the sail ties on the Fore and Main sails.

Best Regards, UrkerVisser
 
Friday, 21. March, 2025:
Hi!
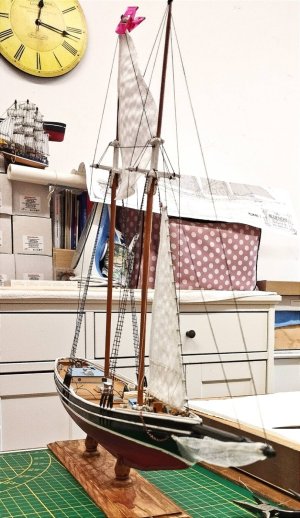
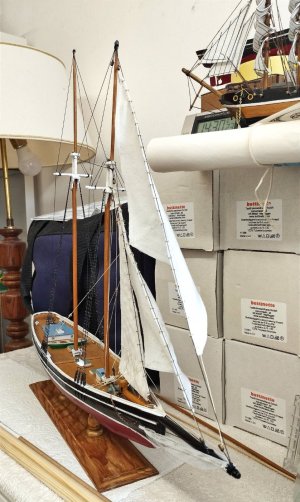
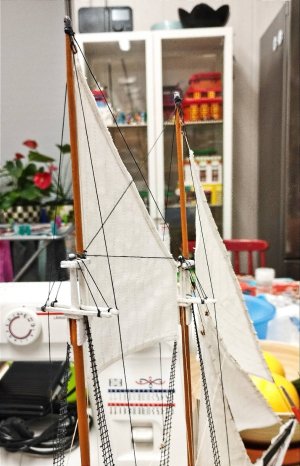
Now I have the stay sail and both jibs installed complete with their rigging which I tightened up on her starboard side to allow them to catch the wind nicely.

46.jpg47.jpg

I'm sure glad I took the time and effort to create my own sails out of my old, white Oxford Broadcloth shirt!

The impregnated sail material which came with the kit was as 'stiff as a plank' even after I sewed all the gores into them!

10.jpg
The sail material from the kit.

But I'll save all eight of them as sewing patterns incase I need to make spares.

Best Regards, UrkerVisser
 
Sunday, 23. March, 2025:
Hi everybody!
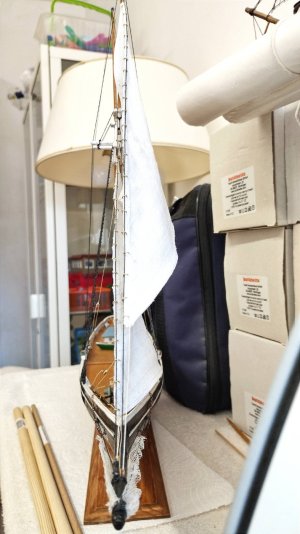
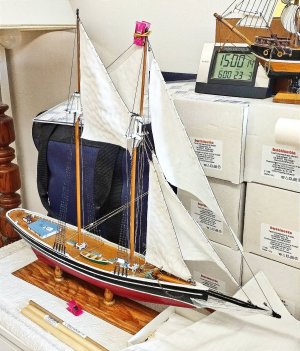
It was a pleasant Sunday morning and I installed the "Fisherman's Topsail' and did it's rigging while listening to my usual church service in Dutch.

48.jpg

I also altered the 'Main Sail' and it's boom which were both way out of proportion in width and length more like 1:72 or beyond while everything else above deck is 1:76 here. Check out the kit's blueprints and you'll see what I mean!

49.jpg
The sawed off tip of the boom can be seen in the lower, left corner. It was really long and the sail on the kit's blueprints too!

Comparing my results to old black & white photos of 'Bluenose' from 1921 now confirm my model has the correct look.

I still have to shorten the 'Main Sail Gaff' a bit but not until after my sail is attached to the mast and boom.

The hull is of course 1:100 due to the factory's decision to limit it to using a 2 foot 4" x 4". Maybe the size of the kit's carton was also an issue; who knows? I'm only the reporter here.

Best Wishes, UrkerVisser
 
Sunday, 23. March, 2025:
Hi everybody!
It was a pleasant Sunday morning and I installed the "Fisherman's Topsail' and did it's rigging while listening to my usual church service in Dutch.

View attachment 509345

I also altered the 'Main Sail' and it's boom which were both way out of proportion in width and length more like 1:72 or beyond while everything else above deck is 1:76 here. Check out the kit's blueprints and you'll see what I mean!

View attachment 509346
The sawed off tip of the boom can be seen in the lower, left corner. It was really long and the sail on the kit's blueprints too!

Comparing my results to old black & white photos of 'Bluenose' from 1921 now confirm my model has the correct look.

I still have to shorten the 'Main Sail Gaff' a bit but not until after my sail is attached to the mast and boom.

The hull is of course 1:100 due to the factory's decision to limit it to using a 2 foot 4" x 4". Maybe the size of the kit's carton was also an issue; who knows? I'm only the reporter here.

Best Wishes, UrkerVisser
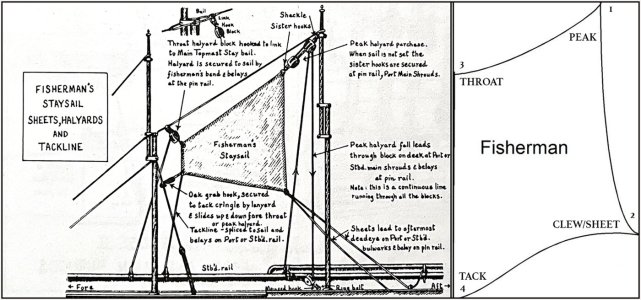
Hi ‘UrkerVisser’. Perhaps this drawings gives you some information about the Fisherman’s. It’s not running with ‘hanks’ over the stay, but it is hoisted from the deck with 4 lines:
IMG_4370.jpeg
PS: As far as I know the Jumbo Jib Sail has no reef-bands.
Regards, Peter
 
Last edited:
Hi ‘UrkerVisser’. Perhaps this drawings gives you some information about the Fisherman’s. It’s not running with ‘hanks’ over the stay, but it is hoisted from the deck with 4 lines:
View attachment 509370
PS: As far as I know the Jumbo Jib Sail has no reef-bands.
Regards, Peter
Thanks Peter!
I'll change it tomorrow; it's already almost 23:00 here.
Are the Main Topsail and Fore Topsail also hung the same way? My kit's blueprint is very vague on some if the rigging.
mvg, UrkerVisser
 
Ahoy!
Until 22:00 I was very busy reworking my Main Topsail and the Fore Topsail. I carefully removed all of my gore stitching on them which had a stitch length of 1 mm; yes it was a tedious chore indeed as not to damage my Oxford fabric in the doing.

Alas I had sewn the gores into them vertically (Ooöops!) so now their gores are diagonal. I also pulled out my stitching on the boarders of 2 mm interfacing and this time did a much better job.

50.jpg

This work took two hours per sail.

Maybe tomorrow I'll install them if time permits.

Good Night! ✨☁️
UrkerVisser ⛵
 
A good reference I've been consulting for rigging is the 'Model Shipways' Bluenose build log of John Ruy from Biddeford, Maine. He really built a beautiful schooner in the scale of 3/16" to the foot.

Alas my kit will never be in such a league of greatness as his model.

UrkerVisser
 
Thanks Peter!
I'll change it tomorrow; it's already almost 23:00 here.
Are the Main Topsail and Fore Topsail also hung the same way? My kit's blueprint is very vague on some if the rigging.
mvg, UrkerVisser
In my build log I have worked out the rigging of all 8 sails. I have worked out the most logical combination from Jenson and Lankford. You don't have to struggle through all the pages …….. ;)
The —> Main Top Sail <— is on page 128. You can click on the blue hyperlink.
The—> Fore Top Sail + Others —> started at page 142 till 157.
It may be ‘a bit’ extensive, but once you understand the progression of the lines, you can make a plan for your own model.
In our —> Group Build <— there are more examples of sails. We have not posted our YQ-BN’s on MSW because the YQ models are banned there.
But here in that Group Build this BN’s under full sail:
Lawrence @Canoe21
Daniel @Daniel20
Johan @RDN1954
Hopefully this is helpful for you?
Regards, Peter
 
Last edited:
...Hopefully this is helpful for you?
Regards, Peter
Dankje Peter!
Thanks for your help! I want to get going with rigging but it appears I have a lot to learn yet about every rope, block and so forth.

Or I'll be constantly updating the rigging on this model until the ☁️ 'Paar'len Poorten' ☁️ open! Haha!

I have a question: I reinstalled the Fisherman's Topsail as you noted but my plans show it's rigging sheets extending aft by the cabin; doesn't this prevent the Main Sail and it's boom from swinging? Or does it only swing starboard to port only a few degrees?

Mvg, UrkerVisser ⛵
 
I have a question: I reinstalled the Fisherman's Topsail as you noted but my plans show it's rigging sheets extending aft by the cabin; doesn't this prevent the Main Sail and it's boom from swinging? Or does it only swing starboard to port only a few degrees?
They can attache the sheet also to a position more to the front, between the main mast and cabin.
Like in this picture:
200310117a.jpg
If they sail even more before the wind, they can then ease that line even further.
Also like the Main Boom they have a second point for attaching it when it swings out more and more. Then they use the tackle under the boom and attached it halfway.
Regards, Peter
 
Last edited:
Ahha! Then I have to move my eye-pins further forward to a point just aft of the shrouds! The kit's plans were wrong. Thanks Peter!
Mvg, UrkerVisser
No, let it there, just an extra eye-pin. Those eye pins were also used for the sheet of the Jib Topsail. Multi function with different sail arrangements.
It was designed for racing. The less weight the better. That's why they also took of a row of ratlines when racing.
Regards, Peter
 
No, let it there, just an extra eye-pin. ...
Regards, Peter
OK, I left the two eye-pins aft by the cabin and moved my sheets fore a bit. Now when both sheets are really loose the Fisherman's Topsail can swing nicely to port like in your photo.

51.jpg

52.jpg
My shipyard is the dining room table.

By the way, I love your build report on your Bluenose! I'll read every page of it this week. Your's took quite a world trip! Mine only came by an 'Evergreen' container ship from Baltimore to Rotterdam and onward to Hamburg.

Mvg, UrkerVisser
 
Sunday, 30. March, 2025:
Hi!
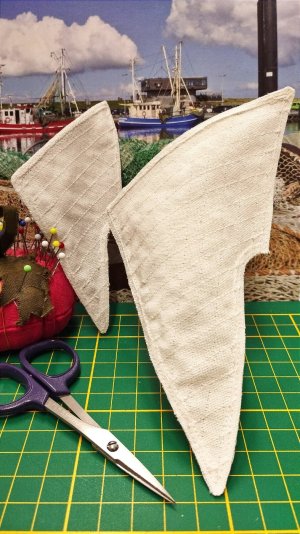
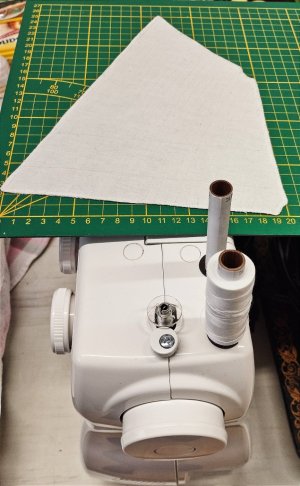
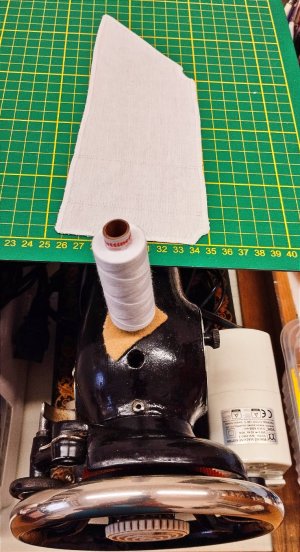
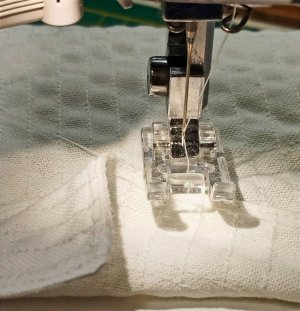
It's a cold, rainy Sunday so a good time to sew more sails since I wasn't satisfied with my main and fore sails so I decided to replace them.

Main Sail on my W6.jpg
The main sail on my 'German' W6 sewing machine (from Taiwan).

Fore Sail on my wife's Singer Podolsk Model 15.jpg
My fore sail on my wife's 'Singer Model 15 from the 1920's.

My first set of sails had the gores sewn vertical perpendicular to the mast. This set has the gores sewn in relation to the after edge of the sails which are diagonal or slightly so in the case of the fore sail.

As before I cut meter long strips of Number 320 interfacing fabric 3 mm wide with a hobby knife on my cutting mats against a straight edge. And I glued them to both sides of the edges of my sails with 'Güterman - Creative HT2' textile glue which is thin, fast drying, clear rubber cement. Of course I sewed them down later.

3 mm strips of interfacing and textile glue.jpg
Cutting these 3 mm strips were a real chore!

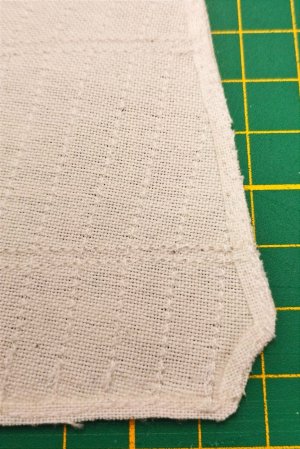
Boarder on both sides.jpg
The edges are sewn after gluing plus the gores reach the boarder with 4 stitches in forward then reverse. The stitch length is about 1.5 mm.

Corner detail.jpg
I have to cut out little rounded pieces of interfacing for these types of corners. (Interfacing is used on the insides of shirt collars.)

A good steam iron is also needed because sewing the gores with small stitches can pull the cloth in other directions. Ironing helps a lot.

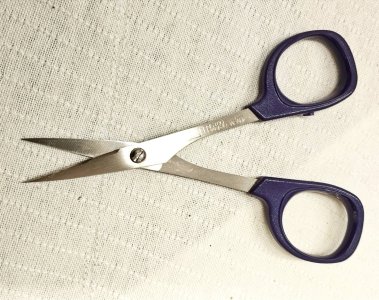
And a 'must' for your ship building tool kit is one of these super sharp pointed scissors for needle point work.

KAI N5100 scissors - Japan.jpg
KAI N5100 - Japan (about 20 €)

Best Regards, UkerVisser
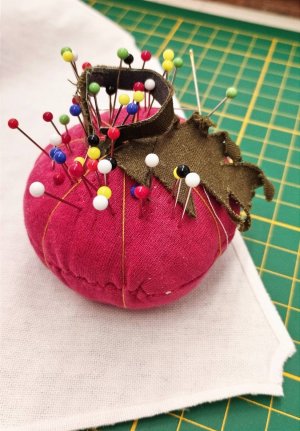
PS: My DIY Tomato out of an old T-shirt.
My DIY Tomato.jpg
 
Last edited:
Sunday, 30. March, 2025:
Hi!
It's a cold, rainy Sunday so a good time to sew more sails since I wasn't satisfied with my main and fore sails so I decided to replace them.

View attachment 510734
The main sail on my 'German' W6 sewing machine (from Taiwan).

View attachment 510735
My fore sail on my wife's 'Singer Model 15 from the 1920's.

My first set of sails had the gores sewn vertical perpendicular to the mast. This set has the gores sewn in relation to the after edge of the sails which are diagonal or slightly so in the case of the fore sail.

As before I cut meter long strips of Number 320 interfacing fabric 3 mm wide with a hobby knife on my cutting mats against a straight edge. And I glued them to both sides of the edges of my sails with 'Güterman - Creative HT2' textile glue which is thin, fast drying, clear rubber cement. Of course I sewed them down later.

View attachment 510736
Cutting these 3 mm strips were a real chore!

View attachment 510739
The edges are sewn after gluing plus the gores reach the boarder with 4 stitches in forward then reverse. The stitch length is about 1.5 mm. japanese street fashion

View attachment 510740
I have to cut out little rounded pieces of interfacing for these types of corners. (Interfacing is used on the insides of shirt collars.)

A good steam iron is also needed because sewing the gores with small stitches can pull the cloth in other directions. Ironing helps a lot.

And a 'must' for your ship building tool kit is one of these super sharp pointed scissors for needle point work.

View attachment 510741
KAI N5100 - Japan (about 20 €)

Best Regards, UkerVisser
PS: My DIY Tomato out of an old T-shirt.
View attachment 510737
Thats amazing nice work!
 
Back
Top