Looking very good Rich! Nice work. Soon you will be ready for the POF BN.Far past time to put up some photos of progress since the last shot of the rudder installation.
View attachment 213120View attachment 213121View attachment 213122View attachment 213123View attachment 213124Here is a diversion item taking a kit dory and rigging it for sailing out to a fishing location the oar used as a rudder is not shown but there are four for each dory. The others will be done for a nested condition.
I am using this old photo to provide guidance for how I have done the main cabin and provision for deck storage forward of that with deck protective planks, baiting prep storage box, liver oil tanks, and barrels not shown here. This guided me in how to place the venting pipe on to of the cabin, differently than shown on the kit plans.
View attachment 213126View attachment 213125
-

Win a Free Custom Engraved Brass Coin!!!
As a way to introduce our brass coins to the community, we will raffle off a free coin during the month of August. Follow link ABOVE for instructions for entering.
-

PRE-ORDER SHIPS IN SCALE TODAY!
The beloved Ships in Scale Magazine is back and charting a new course for 2026!
Discover new skills, new techniques, and new inspirations in every issue.
NOTE THAT OUR FIRST ISSUE WILL BE JAN/FEB 2026
You are using an out of date browser. It may not display this or other websites correctly.
You should upgrade or use an alternative browser.
You should upgrade or use an alternative browser.
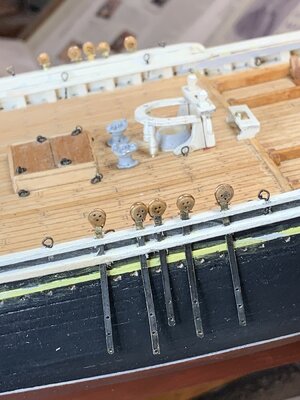
I will probably leave the deck alone but as it was white pine and got a lot of fishing foot and guts use I may have to find some worn stain. The small housings were all white so I have been painting those as they were assembled and then glued down. I'll probably do some touch up paint finish work toward the end or before areas become inaccessible. RichWow - you have been busy Rich - and you have made great progress. Are all those deck fittings still going to be stained or do they stay like that in their natural state?
Thank you, Dean. Not up to your standards but it is what it is at this point in life and hobby. Even with that I end up redoing some things over and over, particularly the hand cutting of small parts and those that get broken or misplaced when glued down.Looking very good Rich! Nice work. Soon you will be ready for the POF BN.
It is the way that I spend time and life now instead of precision pistol matches in the cold, dark, rainy winter months. When it gets warmer and more sunlight I may return to some shooting for diversion but not necessarily relaxation as my old shaky arm and hand presents accuracy problems out at 25 and 50 yards with the single hand competition style that is required in the 2700 point matches.
On a model I don't have the immediate competitors seeing what I am doing but as in SoS I appreciate their support as I only try to improve my prior scores and am my own competition. After all, life is what we have at the moment so I think it is best to try to appreciate the moment and know that it is past and the next should be approaching. Rich
Nicely accomplished Rich. Beautifully rendered working boat.
My thanks for the compliments as my BN progresses. . . .Nicely accomplished Rich. Beautifully rendered working boat.
that is more than I can say in a present state of high agitation after being scheduled for a COVID vaccination clinic in town and after working through blocks long lines with merging cars cutting in we were told that although we had arrived with the paperwork showing the date and time we did not have a code showing our name on their lists and were told to leave and reschedule!!!!!!
I'm too agitated to even think about touching the model and may instead head out to the rifle range to make some noise and punch holes in paper with my target pistol which may also be aggravating lacking precision in the single handed shooting results at 25 and 50 yards. The bullseye is two inches in diameter with the X ring inside of that being the size of a fifty-sent piece. Some days just do not seem to go according to expectations, as my mother told me long ago, "Life is what happens when you are making other plans." Rich
Your Bluenose is looking great. Nice detail. Good luck with your vaccination. Try blasting the crap out of apples and veggies. I’ve had great fun exploding fruit and veg of all shapes and sizes. 
The COVID vaccination was a great waste of over an hour waiting in the line of cars only to be told that our name was not on their list of approved vaccinations. Depart, re-register, and come back again whenever you are assigned an appointment. I had a hard time controlling my Navy veteran's explicatives to the county sheriffs deputy who was telling us to leave but didn't want to end up across my hood with handcuffed hands. After not shooting for five months a drop in scores was to be expected but not as bad as it could have been. . . "celebrate with a joyful noise" as we say out there. I had the range that I used totally to myself which helped a lot keeping my arc of motion within my own concentration and minimized as much as I could.Your Bluenose is looking great. Nice detail. Good luck with your vaccination. Try blasting the crap out of apples and veggies. I’ve had great fun exploding fruit and veg of all shapes and sizes.
Thanks for the compliment on progress but I am going to remake the main boom and jaws which were fastened (CV and four .020 brass through rods) in place. The two slots for the small sheaves at the end of the boom were too large and crude causing me to accidently crack the end at one of those and a CV patch is not acceptable after I tried that. My small bits wandered with the grain in the dowel and did not drill straight through with the drill press. Luckily there was enough 1/4" dowel for another boom and some flat stock to make another pair of jaws . . . more time required for those and tapering the boom . This time I will drill out the sheave slots and axle holes by hand before putting the jaws in place. Lesson learned.
Rich
With the mini-drill bushing jig I fashioned all of the lower deadeye chain plates in an hour and spent several more stropping the deadeyes with small copper wire to the chainplates for a test fit and get them out of the way until I have the standing rigging in place to align them on the hull.The COVID vaccination was a great waste of over an hour waiting in the line of cars only to be told that our name was not on their list of approved vaccinations. Depart, re-register, and come back again whenever you are assigned an appointment. I had a hard time controlling my Navy veteran's explicatives to the county sheriffs deputy who was telling us to leave but didn't want to end up across my hood with handcuffed hands. After not shooting for five months a drop in scores was to be expected but not as bad as it could have been. . . "celebrate with a joyful noise" as we say out there. I had the range that I used totally to myself which helped a lot keeping my arc of motion within my own concentration and minimized as much as I could.
Thanks for the compliment on progress but I am going to remake the main boom and jaws which were fastened (CV and four .020 brass through rods) in place. The two slots for the small sheaves at the end of the boom were too large and crude causing me to accidently crack the end at one of those and a CV patch is not acceptable after I tried that. My small bits wandered with the grain in the dowel and did not drill straight through with the drill press. Luckily there was enough 1/4" dowel for another boom and some flat stock to make another pair of jaws . . . more time required for those and tapering the boom . This time I will drill out the sheave slots and axle holes by hand before putting the jaws in place. Lesson learned.
Rich
After my COVID shot this morning I turned a few more small barrels, an open top tub, and a larger tank, all for ships stores on the protective planking fore of the main cabin.
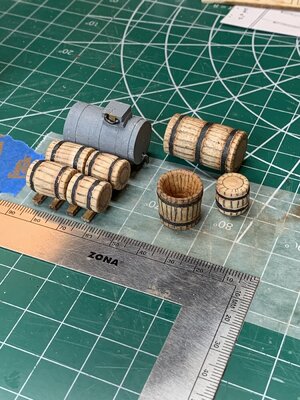
Just set in place and needing better touchup before gluing down later on and lashing in place.
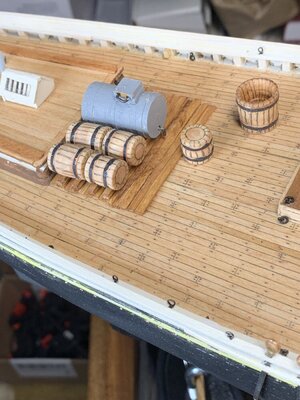
A bating box will be made and set to port of the large horizontal fluids drum generally following the old photo.
Love those barrels! Nicely accomplished!
Very nice RichWith the mini-drill bushing jig I fashioned all of the lower deadeye chain plates in an hour and spent several more stropping the deadeyes with small copper wire to the chainplates for a test fit and get them out of the way until I have the standing rigging in place to align them on the hull. View attachment 215278
After my COVID shot this morning I turned a few more small barrels, an open top tub, and a larger tank, all for ships stores on the protective planking fore of the main cabin.
View attachment 215280
Just set in place and needing better touchup before gluing down later on and lashing in place.
View attachment 215281
A bating box will be made and set to port of the large horizontal fluids drum generally following the old photo.
Looking good Rich!With the mini-drill bushing jig I fashioned all of the lower deadeye chain plates in an hour and spent several more stropping the deadeyes with small copper wire to the chainplates for a test fit and get them out of the way until I have the standing rigging in place to align them on the hull. View attachment 215278
After my COVID shot this morning I turned a few more small barrels, an open top tub, and a larger tank, all for ships stores on the protective planking fore of the main cabin.
View attachment 215280
Just set in place and needing better touchup before gluing down later on and lashing in place.
View attachment 215281
A bating box will be made and set to port of the large horizontal fluids drum generally following the old photo.
Thank you. I initially tried to cut and place individual staves on a tapered mold but without success so I faked the work by turning a maple dowel on my small lathe and after painting the raised hoops used a .3mm drafting pencil to scribe them onto the body. Not the best of work but I can say that Granddad did them and did not purchase better ones on line.Looking good Rich!
On the opposite side of the coin I have ordered small oval deadeyes to replace the poorly laser cut ones in the kit which were without any stropping grooves and several broke upon cutting them out. They will be a matching species/coloration as the lower round deadeyes provided in the kit.
I will also probably have to abandon using the 1/64x1/16 brass strips for the fittings on the spars and use a much more thin sheet stock (cut to width) that may be better folded over forming the single, double, triple, and quad projecting "ears" for fittings. I will initially try to lay out and drill matching holes for folded "ears" but doubt that I can do that successfully in the jig. I will probably have to punch and hand drill the holes in those which I did with my prior pilot boat rigging.
It will be what it is. Rich
I have scrapped to too large diameter oil drum and turned another more in scale with a couple of small buckets also down at a scale size but will fake the staves in those as with the small barrels. First brass strip main boom outboard end fitting was done today and with a good center punch and folded tab secured in a mini-vise was able to freehand drill the holes for shackles for which I am using very small chain links to simulate. Also drilled and set two small functional brass sheaves for the topping lift tackle. The next piece inboard will be for the sail clew iron (triangular piece in the corner clew) which is secured between two vertical parts of the band with through bolt but I will use small wire to simulate that. There is a photo of this in the BNII photos.Thank you. I initially tried to cut and place individual staves on a tapered mold but without success so I faked the work by turning a maple dowel on my small lathe and after painting the raised hoops used a .3mm drafting pencil to scribe them onto the body. Not the best of work but I can say that Granddad did them and did not purchase better ones on line.
On the opposite side of the coin I have ordered small oval deadeyes to replace the poorly laser cut ones in the kit which were without any stropping grooves and several broke upon cutting them out. They will be a matching species/coloration as the lower round deadeyes provided in the kit.
I will also probably have to abandon using the 1/64x1/16 brass strips for the fittings on the spars and use a much more thin sheet stock (cut to width) that may be better folded over forming the single, double, triple, and quad projecting "ears" for fittings. I will initially try to lay out and drill matching holes for folded "ears" but doubt that I can do that successfully in the jig. I will probably have to punch and hand drill the holes in those which I did with my prior pilot boat rigging.
It will be what it is. Rich
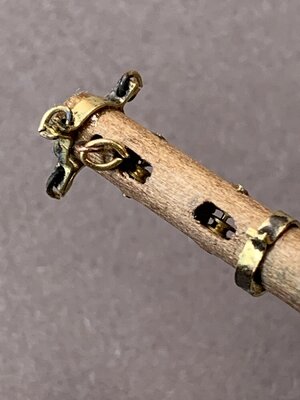
Here is the BNII clew iron photo which is a bit different than what the kit rigging presents as it appears to be lashed and not pinned to a boom band vertical which may be out of the photo. I may ask the crew about this. Rich
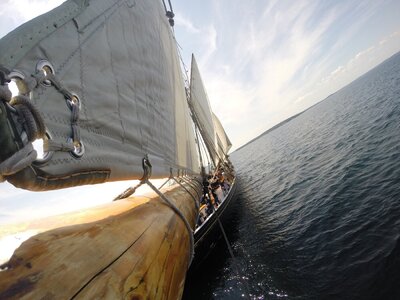
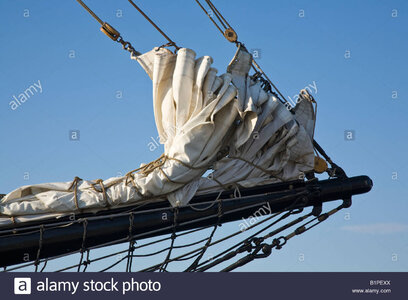
At the opposite end of the schooner I have been sent a side photo of the bowsprit tip with some fittings and blocks visible to assist in fitting that out.I have scrapped to too large diameter oil drum and turned another more in scale with a couple of small buckets also down at a scale size but will fake the staves in those as with the small barrels. First brass strip main boom outboard end fitting was done today and with a good center punch and folded tab secured in a mini-vise was able to freehand drill the holes for shackles for which I am using very small chain links to simulate. Also drilled and set two small functional brass sheaves for the topping lift tackle. The next piece inboard will be for the sail clew iron (triangular piece in the corner clew) which is secured between two vertical parts of the band with through bolt but I will use small wire to simulate that. There is a photo of this in the BNII photos.View attachment 215834
Here is the BNII clew iron photo which is a bit different than what the kit rigging presents as it appears to be lashed and not pinned to a boom band vertical which may be out of the photo. I may ask the crew about this. Rich View attachment 215835
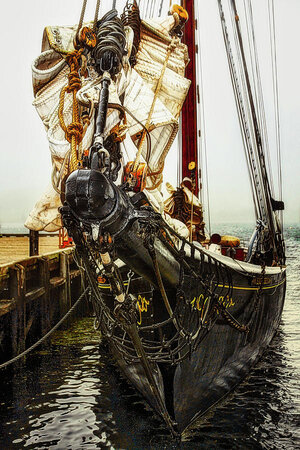
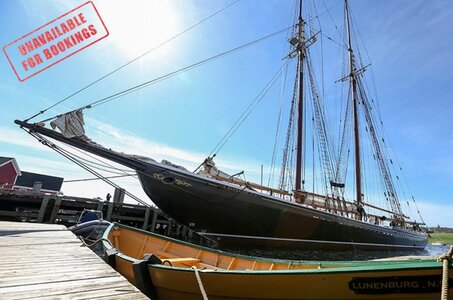
and now to file oval deadeyes for the MS2130 model from round ones as the laser cut were too crude and without stropping grooves
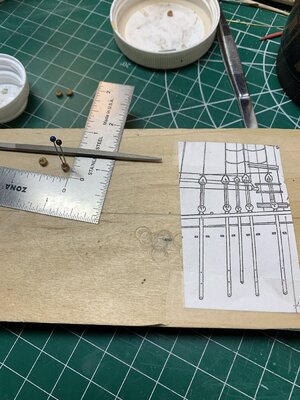
and closer
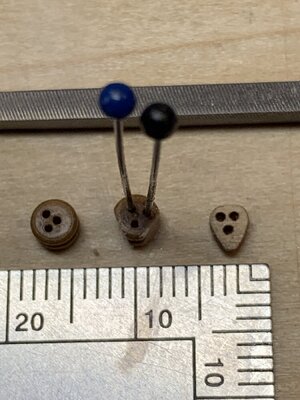
these and all of the blocks need to have the holes "reamed" with No. 72 bits for the entry and exiting grooves on the blocks' faces for smooth curved falls and not those square from not preparing the holes beforehand. Very slow but work that needs to be done in preparation for setting the blocks in fittings and running rigging. Rich
As a follow up on the bowsprit rigging, here is a copy and past of the reply which is in text as the schooner is under maintenance with top foremast and associated rigging removed so no current photos available. You will have to form your own mental image of what is being explained, as I will have to do and sketch out for my own rigging work. It starts with my questions in the boxes and their replies following those:At the opposite end of the schooner I have been sent a side photo of the bowsprit tip with some fittings and blocks visible to assist in fitting that out.View attachment 217948View attachment 217949View attachment 217950
and now to file oval deadeyes for the MS2130 model from round ones as the laser cut were too crude and without stropping grooves
View attachment 217951
and closerView attachment 217952
these and all of the blocks need to have the holes "reamed" with No. 72 bits for the entry and exiting grooves on the blocks' faces for smooth curved falls and not those square from not preparing the holes beforehand. Very slow but work that needs to be done in preparation for setting the blocks in fittings and running rigging. Rich
* * * * * * *
There is a semi circular hoop with eyes at each end that is passed through the clew of the sail. Then a pin is passed through one eye, a hole in the boom and then the other eye. There is a split pin and washer arrangement that keeps the pin in the end of the boom.Good morning Richard, Please see responses below.
1. What is the manner in which the clew of the main sail connected to the end of the main boom? I have seen the two grommeted holes in the sail corner plate but do not know how they are actually run aft and to what fitting.
2. There are a lot of blocks and fittings on the end of the bowsprit for stays, hawsers, down-hauls, etc. . . In most photos those are covered over or too indistinct for me to sort out. Will you please send me a few photos of those various fittings and the associated blocks identified with their functions? One example would be the downhaul blocks aft of the stays and hawsers blocks/fittings.
It is very difficult to get this photo now as the ship is completely down rigged and the fore topmast is in the yard! May I suggest borrowing a copy of Chappelle's American Fishing Schooners. There should be some good diagrams in there.
In general, the jib downhaul passes through a block on the port side. The flying jib (aka ballooner or jib topsail) passes on the starboard side. These blocks are made fast to iron hooks associated with the band that holds the fitting for each stay. After turning through the block the downhauls pass through fair leads, port and starboard on the table just above the bowsprit.
If we look at the bands on the end of the bowsprit they also hold the bobstays, whisker stays and foot ropes. The sails are bent to the bottom of the turnbuckles with light lines (1/2”)
* * * * * *
I don't understand some of this right off and will have to consider for some time.
I will be very interested to see how the YQ models are fitted and rigged.
Rich
With some stimulus and a good side photo of the fore end of the bowsprit I returned to make some more turnbuckles. I didn't have any 2 mm tube and had to use 2.5 mm with the ability to insert a 1 mm rod to help reinforce the tubeAs a follow up on the bowsprit rigging, here is a copy and past of the reply which is in text as the schooner is under maintenance with top foremast and associated rigging removed so no current photos available. You will have to form your own mental image of what is being explained, as I will have to do and sketch out for my own rigging work. It starts with my questions in the boxes and their replies following those:
* * * * * * *
There is a semi circular hoop with eyes at each end that is passed through the clew of the sail. Then a pin is passed through one eye, a hole in the boom and then the other eye. There is a split pin and washer arrangement that keeps the pin in the end of the boom.
It is very difficult to get this photo now as the ship is completely down rigged and the fore topmast is in the yard! May I suggest borrowing a copy of Chappelle's American Fishing Schooners. There should be some good diagrams in there.
In general, the jib downhaul passes through a block on the port side. The flying jib (aka ballooner or jib topsail) passes on the starboard side. These blocks are made fast to iron hooks associated with the band that holds the fitting for each stay. After turning through the block the downhauls pass through fair leads, port and starboard on the table just above the bowsprit.
If we look at the bands on the end of the bowsprit they also hold the bobstays, whisker stays and foot ropes. The sails are bent to the bottom of the turnbuckles with light lines (1/2”)
* * * * * *
I don't understand some of this right off and will have to consider for some time.
I will be very interested to see how the YQ models are fitted and rigged.
Rich
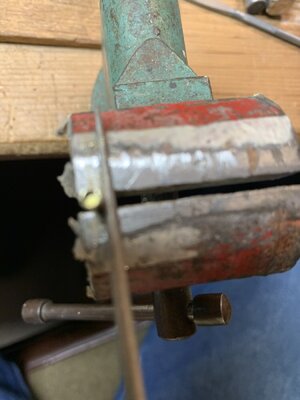
First a vertical tube in my small vise to score opposite sides with a round file
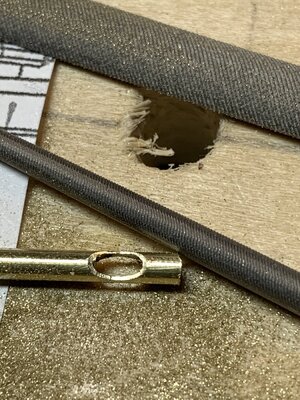
that was followed by using a half-round file to enlarge each side opening it to the middle and again the point of the round file to touch up the opened sides
 followed by using a thin cutting stone in my Dremel type grinder/hand drill
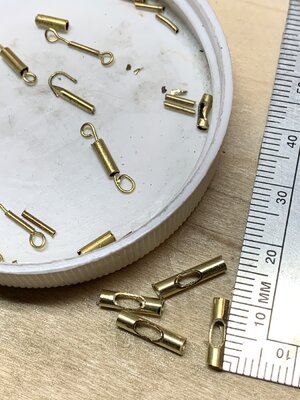
After blackening these I inserted a copper wire of 0.04 In. for the innards with bend ends for connections. These were then attached to the bent brass strips for two of the "eared" bowsprit fittings awaiting blocks and further rigging.
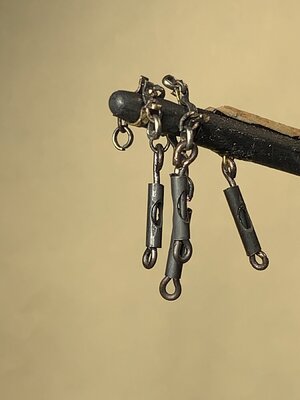
If I can get some 2 mm tube I will probably make up some smaller turnbuckles and replace these as they are too large in scale. As most of the standing rigging was metal cable I will try turning some wire for those and not use thread. The bowsprit rigging was one of those areas for the higher tension of the turnbuckles.
Fantastic production Rich! Well accomplished!
Thank you for considering the filed fittings. As with many things that seem right to start with when these were dry set on the bowsprit they were way out of scale and will be removed. I ordered some 1.5 mm tube, half way between my 1 mm which too small to file out and these 2 mm tubes which are too large. I'll see how the middle tube works out. Blackening everything in a way spoils the visual but is more consistent with the actual which is my objective. RichFantastic production Rich! Well accomplished!
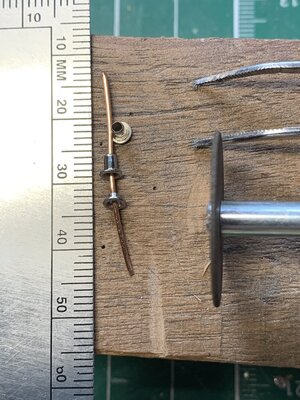
While waiting for the smaller tubes to arrive for smaller turnbuckles I have done some more small stuff prep work in addition to filing the oval deadeyes which still need more to be done. Here are some fairleads with soldered staple connectors starting with the soldering clamp jigThank you for considering the filed fittings. As with many things that seem right to start with when these were dry set on the bowsprit they were way out of scale and will be removed. I ordered some 1.5 mm tube, half way between my 1 mm which too small to file out and these 2 mm tubes which are too large. I'll see how the middle tube works out. Blackening everything in a way spoils the visual but is more consistent with the actual which is my objective. Rich
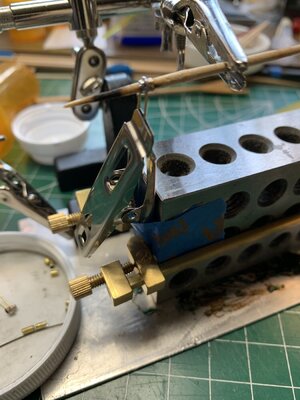
and product
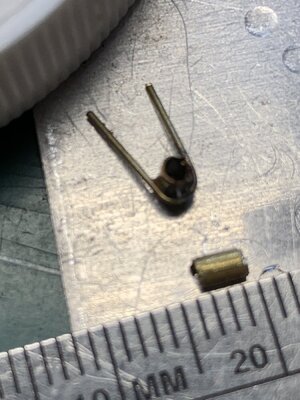
and for "relaxation" cutting down the stem on 2 mm grommets for those located in the head, tack, and clew of the sails which will be placed and sewn on both sides of those locations. . . tedious and about 60 required with two extras.
 ired with two spares.
Also ordered some 2.5 and 3 mm single and double replacement blocks as the ones in the kit are too large in scale visually.


