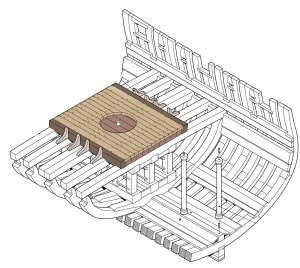
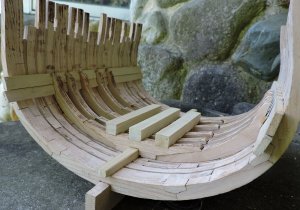
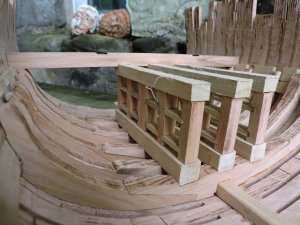
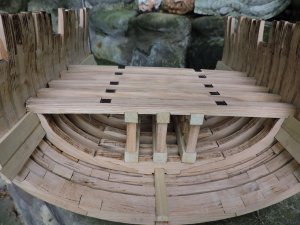
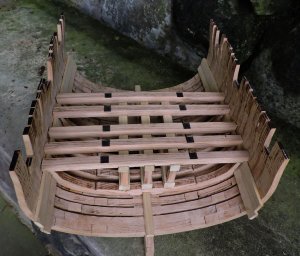
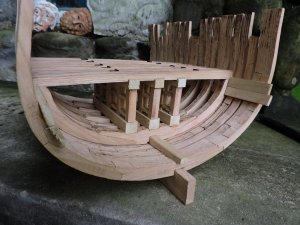
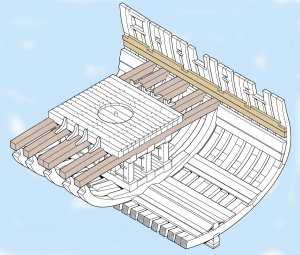
Bomb vessel cross section - scale 3/8 or 1:32

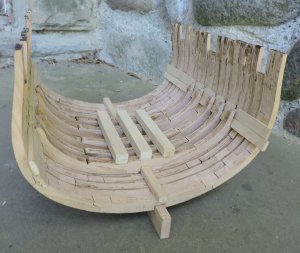
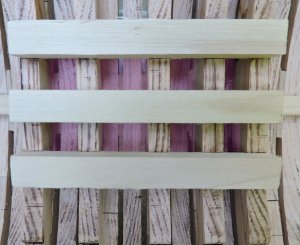
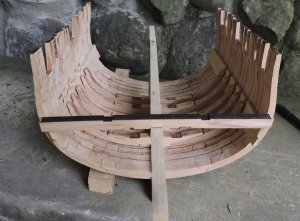
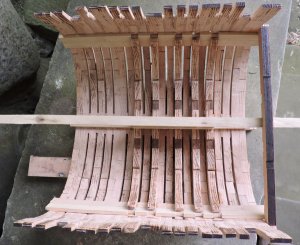
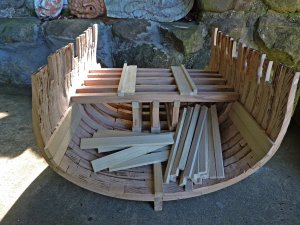
after the floor riders and clamps are in place it is time to set the timbers for the mortar support. starting with the three main timbers that sit across the riders.

timbering is no big deal if you have a table saw or bandsaw

bottom tinber1.jpg

bottom tinber2.jpg

I set the timbers in place just to make sure they sit in the notches and are the correct length.
 
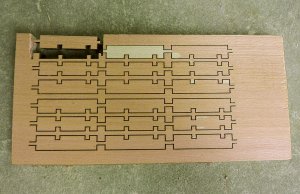
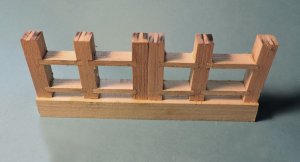
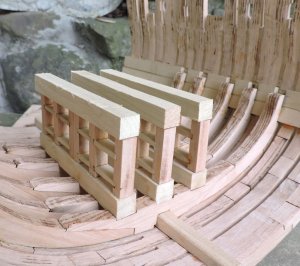
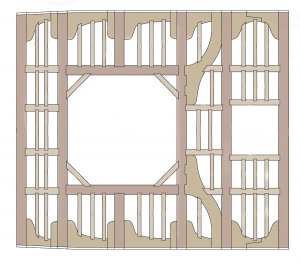
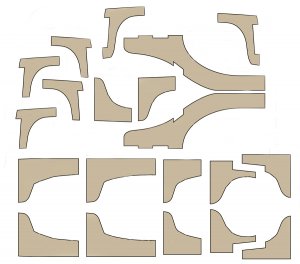
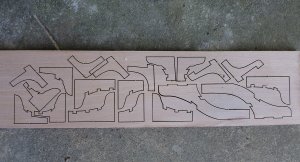
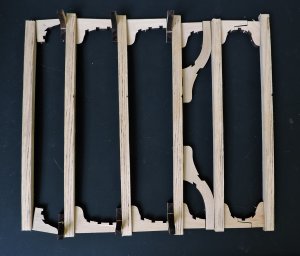
On these timbers is the up right posts and shelves for the shot. This i did off the model and on the work table. Making the posts would be a bit of a job because you have to cut all the slots for the shelves and they need to be exact. The answer to this is to laser cut them. all i had to do was cut them apart and sand off the nub at the ends.

post1.jpg

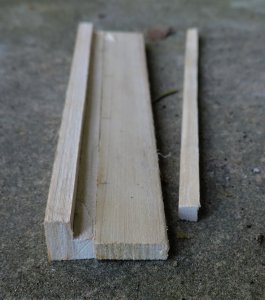
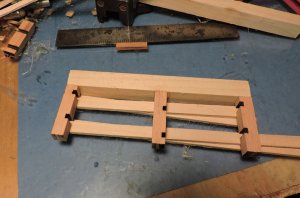
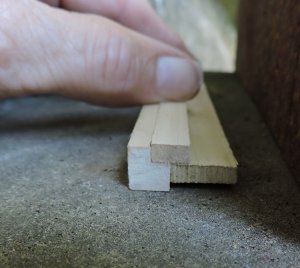
i rummaged through my scrap pile and found a strip of wood the correct size so the post is even with the edge of the beam. notice there are two strips of wood, i used one strip to set the posts on so it will leave an offset.

post2.jpg

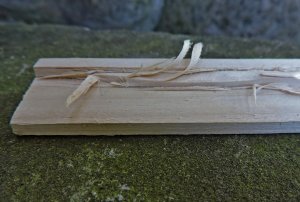
i just measured along the beam and glued the posts in place and setting on one strip of wood.

post3.jpg

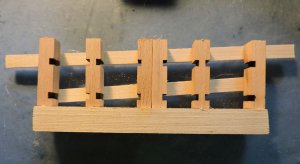
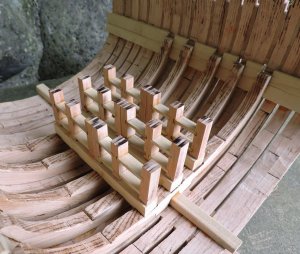
Standing the piece up you can see what i was saying about the offset. The strip of wood automatically set the posts in the center of the beam so i had a lip equal on both sides.

post4.jpg
 
Last edited:
i set the finished pieces back into the hull and into the notches on the floor riders just to make sure everything was as it should be.

post5.jpg


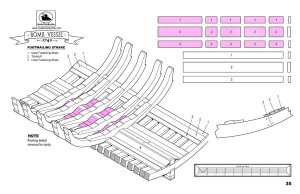
Looking at the plans there are short pieces of planking that go between the riders

plankb1a.jpg


They go here, it is not that i am a lazy builder but i will not add these pieces of planking to the model because 1 it is tedious and time consuming and once the model is built they will never be seen. 2 The purpose of this build is a prototype just to see how it all works out and not a fine finished model. Anyone wanting to take on the build can add all the detail they want.

plankb2.jpg


plankb3.jpg
 
Last edited:
now for the beams which are another laser cut part because the notches top and bottom all have to be in line. I am skipping over the "how to " part for actually cutting these beams and notches, I realize no one has a laser in their shop that will cut through 3/8 thick timber so if anyone does pick up this build and has to cut parts then hopefully it will added to the build later on. Those who purchase the laser cut package will have pre cut beams. In any case once you do have the beams here is how i set them up.

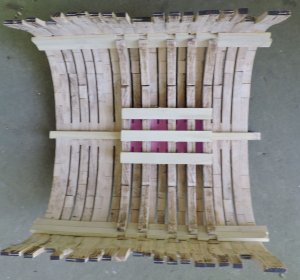
i glued the center post rack in place and used a beam to sit on top of it, this gave me dead center. The beams were cut a little long and they need to be cut to fit. This was done because as the hull is built it may be a little wide or narrow depends on the hand of the builder.

beamu1.jpg


beamu2.jpg


make sure the beam is sitting in the beam notch

beamu3.jpg


and finally mark the inside of the frame

beamu4.jpg
 
once the shot racks are done and the top beams set in place the beams are cut to length

beam1.jpg

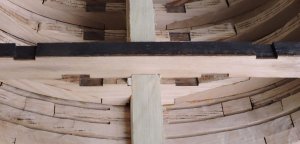
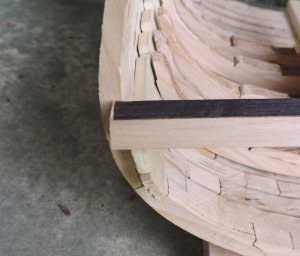
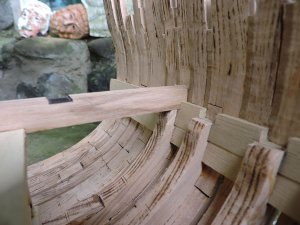
the beams sit on the center top beams and also sit in the notch in the clamps. some adjustments might have to be made in the thickness of the top crib beams if the deck beam does nor sit in the clamp notch. The deck beam not only sits in the clamp notch but it also sits on the top of the rider.

beam2.jpg


with the beam notched over the top crib beams and sitting in the clamp notch it makes the structure very strong and stable.

beam3.jpg

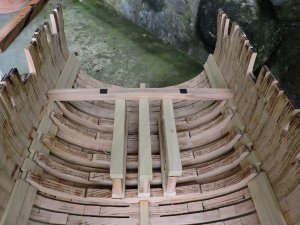
one by one each beam is set in place above the cribbing and the entire structure being all joined with notches becomes one very strong unit. with this platform now in place the next step is the cut out the upper deck clamps which will run along the side of the hull and sit on the ends of the platform beams.
When cutting the beams to length be careful to keep the notches on the top of the beam in line. with notches in all the timbering each fit will have an effect on the over all structure and fitting of the next parts. so you have to keep in mind the next step and make sure everything lines up.

beam5.jpg

beam6.jpg

beam4a.jpg
 
AS ALWAYS DAVE FANTASTIC BUILD AND GREAT EXPLANATIONS, when the kit comes out are there going to be any instructions or is the prototype log the instructions. THANKS AS ALWAYS Don
 
AS ALWAYS DAVE FANTASTIC BUILD AND GREAT EXPLANATIONS, when the kit comes out are there going to be any instructions or is the prototype log the instructions. THANKS AS ALWAYS Don

I do not think there will be any formal "instructions" what I hope will happen is this basic prototype build will be the foundation of how the model is built. Then if anyone else decides to build the model that information will be added and as more builders take on the project more information, tips and methods are added. Then maybe in time everything posted can be edited and reworked as instructions.
The idea of one set of instructions are like a practicum where one builders methods are offered when in fact there may be a number of ways to do any one thing. One builder may want to start from scratch and cut all the parts by hand or someone may want to use laser cut parts. Like me i am taking the basic plans and tweaking them to suit my version of the build.
 
back to the build it is time to build the platform for the mortar
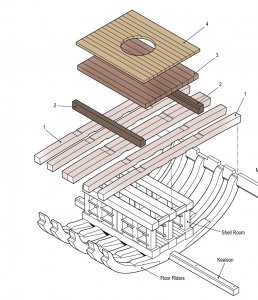
mortar deck 2.jpg

this is what it looks like

mortar deck1.jpg

it is a double platform with the plank seams staggered for straight.
Starting with the two end timbers i cut them to fit into the notches then took the two end planks and edged glued them to the inside of the end beam. i just used a dab of glue between the deck beams because i do not want to glue the pieces to the beam, i will remove the pieces once the glue sets.
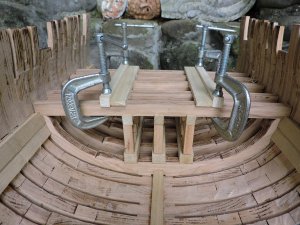
mortar deck3.jpg


I removed the piece to cut a notch along the inside edge so the upper plank overlaps the seam between the end beam and lower plank.
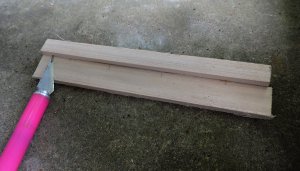
mortar deck4.jpg

i flipped the piece and used the top plank as a guild for the second cut.
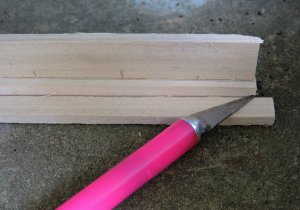
mortar deck5.jpg

when cutting something like this i always will make a light first cut to score the surface and then using more and more pressure until the cut is deep enough. You can see the difference from the first to the last cut
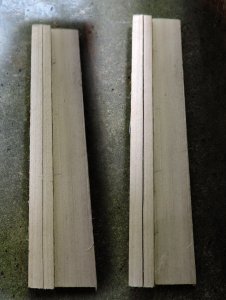
mortar deck6.jpg

and the piece pops out.

mortar deck7.jpg

if you have a small table saw you could set the height of the blade and cut the notch in the beam. There are a lot of model builders out there who do not have these expensive tools. some groups out there insist you need all these expensive power tools to build models, i say no you don't everything can be done by hand, not as fast but none the less it can be done.

Another way i have cut these type of notches is to whittle them out piece by piece.
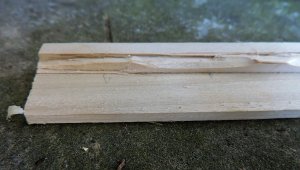
mortar deck8.jpg

mortar deck9.jpg

Another thing is the wood you use, again some groups when asked by beginners what wood to use they will quickly say Boxwood Pearwood and other expensive exotic woods. I will tell you from experience cutting that notch in Boxwood will take a long time because the wood is very hard. I have also heard it said i would never be caught using Basswood or softer woods in a model because the wood is a bad choice, that is just babble coming from people who do not consider the full range of model builders from beginners with a very limited range of power tools and experience in wood working. I have seen some beautiful work done by professionals who use everything from Pine to Basswood to fine exotic woods.
 
This is the joinery we want to see each seam is lapped over by another timber.

mortar deck10.jpg

and here we have it in place

this vessel was called a bomb ketch for good reason the sheer weight of the mortar itself requires a strong base to sit on, when fired the recoil is enough to split a beam so this structure has to be all joined and strong.

mortar deck11.jpg
 
Last edited:
This project is about learning woodworking skills useful to the beginner as well as the more experienced builders, from using a simple knife to CNC milling.
with any model you use the drawings and or plans as a general guild as to what the structure is and how it works. As the model is build even the most skilled woodworker finds the creeping dimensions. As an example of this fitting the above end beams of the mortar platform. This beam fits into notches in the beams, these beams notch over the up right beams of the shot racks, this shot rack fits into notches cut into the riders and those riders have a notch that fits over the keelson. Each step along the way depends on what you did in the step before it. As the model is built you adjust the fit of the components and adjust the sizes of the parts. As the model is built and actually real ship building making adjustments all along the way is done to achieve the final results. Looing at studies of ship wrecks you find framing is not evenly spaced and you find beams and timbers vary in size.
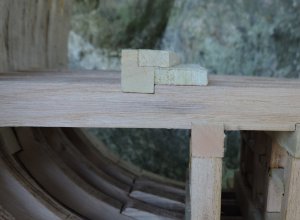
As your structure begins to take form it is more about building and fitting pieces and parts to the structure as apposed to trying to match the plans to their exact measurements.
If you cut your own modeling wood or order wood either rough resawn or finished keep in mind if the part is 1/4 x 3/16 and that is what you get then there is zero room for error in the structure. you can not add to the size or make any adjustments for fitting to your build.
There are those who insist every piece of wood has to be milled to exact dimensions down to thousandths of an inch. Think about it no one builds to such close tolerances and if you do you should be doing your own milling. another thing to think about is any milled wood is recut to fit into the model or something like planking it is fit to the model and finish sanded so there is no point in insisting on a fine finish or exact sizes.

"'Beware of the Jabberwock that bites, my child,'" quoted Harvey.

Lewis Carroll

Jabberwocky is a language consisting of invented, meaningless words; nonsense; gibberish.
Whoever said that the timbers need to be that accurate probably never worked with wood or built a wooden ship model Lol.
 
Whoever said that the timbers need to be that accurate probably never worked with wood or built a wooden ship model Lol.

Zoltan

well actually there are those who do build to very close tolerances they are a group of "model engineering" and I deal with them building the steam engine, if parts don't fit the engine don't move.
but my point is we do not want to scare away beginners wanting to try their hand at scratch or semi-scratch building with silly gibberish about everything having to be so tight and exact.
 
Right on DAVE STEVENS, LOVE THE 3-D WORK is THIS INCLUDED OR CAN IT BE AN EXTRA FOR THE BOMB KETCH KIT,,,,,,,BY THE WAY USE OF BASSWOOD GENE BODNER COMES TO MIND. Don

yes Gene is one of those master builders who use all sorts of materials and techniques and has built many a fine model using "common" woods
 
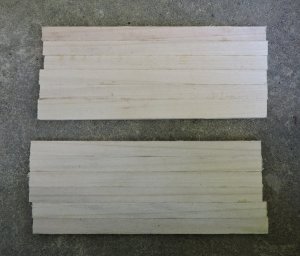
moving on with the build I cut planking for the mortar bed these pieces were cut on a bandsaw and run through a thickness sander.

bedp1.jpg

the first layer was no problem just a little sanding on the edge to get al the planks to fit tight between the ends

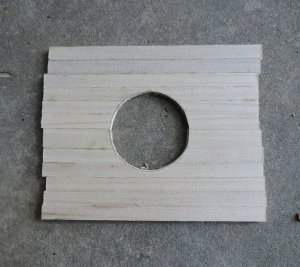
the second layer has a hole in the middle so I glued up two halves

bedp2.jpg

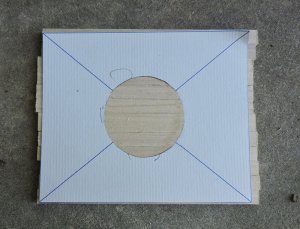
then using a pattern from the plans i drew a circle with the 2 halves together

bedp3.jpg

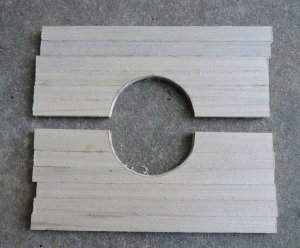
I did not glue the 2 halves together so I could separate them and cut the circle with a bandsaw

bedp4.jpg

when the circle was cut in both halves then i glued the pieces together

bedp5.jpg

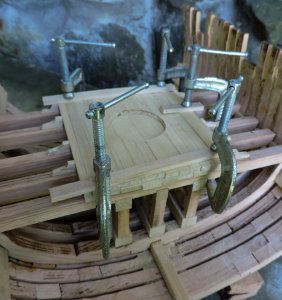
now it was a simple task to glue the bottom and top beds and clamp them in place

bedp6.jpg

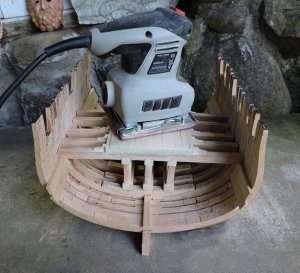
when cutting and sanding your planking you do not have to be dead accurate in the thickness because the final sanding will smooth everything out.

bedp7.jpg

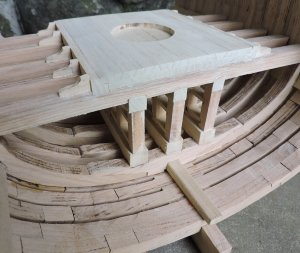
and that's it the bed platform for the mortar is done

bedp8.jpg
 
Once the mortar bed is finished it is time to move on to the main deck structure. This structure is made up of knees, carlings, ledges and beams.

md1.jpg

If you have a scroll saw or bandsaw you can cut the knees from sheet stock

md2.jpg

or you can order a set of laser cut parts, you have to deal with the laser char along the edges but a quick swipe with a drum sander on a Dremel tool will make short work of it.
The beams have an arch to them so you can not cut them on a table saw you can take wider square stock and sand in the arch , use pre cut laser cut beams or cut them with a bandsaw.

md3.jpg
 
at this point there is a little pre planning the main deck beams sit in notches along the clamps but i do not want to cut the notches and install the clamps because if i did that the location of the deck beams are set and the knees would have to be cut to fit between the beams.

md4.jpg

because the knees are pre cut my approach to the deck is to build it outside the hull using the knees to set the space between the beams so i set up the knees and beams so i can see where to start.

md5.jpg
 
Last edited:
Back
Top