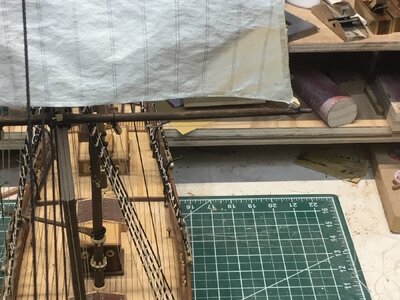
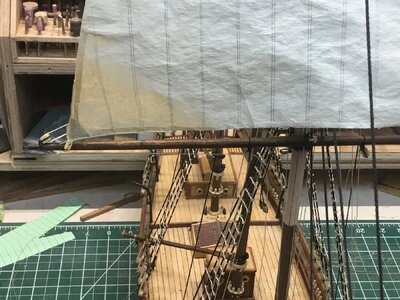
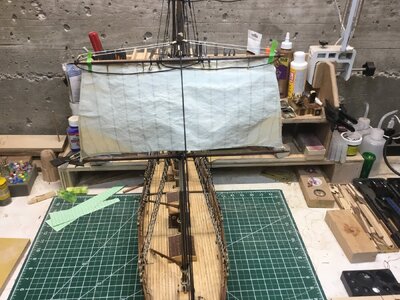
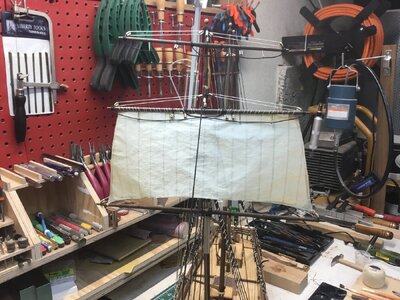
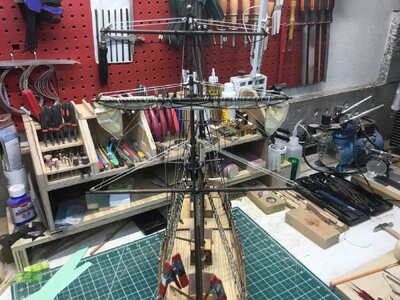
Hey I s tar tèThe more I complete the main shrouds and lanyards, the less pleased I am with the results. I’m seriously thinking about starting over with different thread and or rope diameters. I’m really not sure of what to do. Maybe I’ll put it aside for a bit and think about it… Happy New Year everyone!
-

Win a Free Custom Engraved Brass Coin!!!
As a way to introduce our brass coins to the community, we will raffle off a free coin during the month of August. Follow link ABOVE for instructions for entering.
-

PRE-ORDER SHIPS IN SCALE TODAY!
The beloved Ships in Scale Magazine is back and charting a new course for 2026!
Discover new skills, new techniques, and new inspirations in every issue.
NOTE THAT OUR FIRST ISSUE WILL BE JAN/FEB 2026
You are using an out of date browser. It may not display this or other websites correctly.
You should upgrade or use an alternative browser.
You should upgrade or use an alternative browser.
As I mentioned above I’m horrible at documenting… So, thank you @John Hendrix for reminding me. 
Therefor, I spent the day making rope in order to create a reference library of rope each thread size results in.
I like working with cotton thread since I can secure the knots and ends with PVA glue. (I’m horribly allergic to CA glue and accelerator) also, it’s much easier to dye to the color I want. I primarily use DMC Cordonette Special although it is no longer imported into the US ( Bummer ) and getting difficult to find at a reasonable price.
Since the thread really is miniature 3-strand Z layed “rope” I can use the individual thread sizes right out of the package for 0.15mm up to 0.45mm.
Using my ropewalk I can get from 0.50mm up to 1.25mm in about 0.05mm increments. I could get larger diameters if needed by going to 3/3 or even 4/3 strands. Once passed through a diluted PVA bath there is very minimal fuzzing.
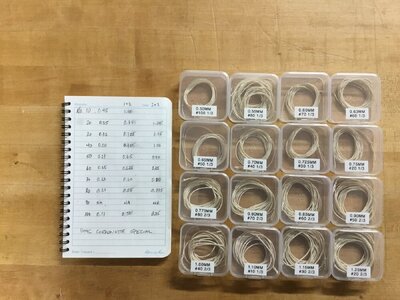
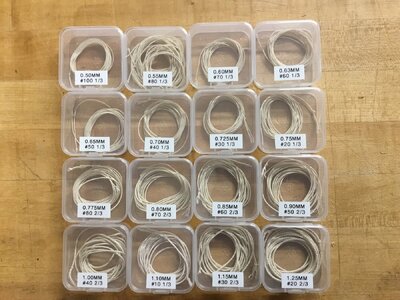
Ok, enough playing around! On to the running rigging!
Therefor, I spent the day making rope in order to create a reference library of rope each thread size results in.
I like working with cotton thread since I can secure the knots and ends with PVA glue. (I’m horribly allergic to CA glue and accelerator) also, it’s much easier to dye to the color I want. I primarily use DMC Cordonette Special although it is no longer imported into the US ( Bummer
 ) and getting difficult to find at a reasonable price.
Since the thread really is miniature 3-strand Z layed “rope” I can use the individual thread sizes right out of the package for 0.15mm up to 0.45mm.
Using my ropewalk I can get from 0.50mm up to 1.25mm in about 0.05mm increments. I could get larger diameters if needed by going to 3/3 or even 4/3 strands. Once passed through a diluted PVA bath there is very minimal fuzzing.


Ok, enough playing around! On to the running rigging!
Last edited:
Hi Zoopher, was the above comment the equivalent of a cell phone “pocket dial”?Hey I s tar tè

Good luck finding the size thread you want. In the model business threads are in mm (millimeters) In the thread world they are tex 30, tex40 etc and there is no way to figure what mm's they are and the factories don't know either. You can get the smaller sizes ok because they fit sewing machines. Bigger sizes are available but most of the thread companies don't carry them because they DON"T fit sewing machines. If you find anywhere that sells spools of thread and you can tell what the mm sizes are then please tell the rest of us. Meantime you'll have to be content with what the hobby suppliers sell in 6-12 meter lengths. Order extra too.Hey I s tar tè
You are correct that sewing thread are measured in various ways that to the untrained eye make absolutely no sense. I did find this article that helps provide some information and I’ve used it to compare various manufacturer’s thread sizes.Good luck finding the size thread you want. In the model business threads are in mm (millimeters) In the thread world they are tex 30, tex40 etc and there is no way to figure what mm's they are and the factories don't know either. You can get the smaller sizes ok because they fit sewing machines. Bigger sizes are available but most of the thread companies don't carry them because they DON"T fit sewing machines. If you find anywhere that sells spools of thread and you can tell what the mm sizes are then please tell the rest of us. Meantime you'll have to be content with what the hobby suppliers sell in 6-12 meter lengths. Order extra too.
https://en.wikipedia.org/wiki/Units_of_textile_measurement
To measure my thread diameter I simply wrap 10 coils around a dowel and measure with a caliper and divide by ten. Works close enough for me.
Hej Olivier!
Glad to be of service (re. documentation)
The sizes are confusing indeed..but your linke helped, thnx!
Glad to be of service (re. documentation)
The sizes are confusing indeed..but your linke helped, thnx!
I would just like to say thank you! I am attempting my first build of this type. I picked the esmeralda by occre. Every time I have a question I go back and reread your build and so far I have found the answers. The pictures are also very good. Thanks again.Having sailed on sailboats with this wheel configuration, I know the helmsman (I guess the appropriate term would be helmsperson…) faces the bow and stands next to the wheel usually on the opposite side that the boom is on So they can see past the sail.
Thanks for your kind words! I’m enjoying the build but also must take frequent breaks to research how best to do complete a particular task. Most of the credit for my success goes to members of this forum. Also, what did we do before YouTube?I would just like to say thank you! I am attempting my first build of this type. I picked the esmeralda by occre. Every time I have a question I go back and reread your build and so far I have found the answers. The pictures are also very good. Thanks again.
Print his out or copy down the numbers. Here is the best I've seen for thread sizes in mm's. The bottom numbers refer to the mfg's number and the fraction like number next to it is the number of threads on the rope walk. #40 2/3 means Mfg's item #40 with two lines of thread on each hook of the three hooks on a rope walk. This will give you a rope 1.00 mm thick.As I mentioned above I’m horrible at documenting… So, thank you @John Hendrix for reminding me.
Therefor, I spent the day making rope in order to create a reference library of rope each thread size results in.
I like working with cotton thread since I can secure the knots and ends with PVA glue. (I’m horribly allergic to CA glue and accelerator) also, it’s much easier to dye to the color I want. I primarily use DMC Cordonette Special although it is no longer imported into the US ( Bummer) and getting difficult to find at a reasonable price.
Since the thread really is miniature 3-strand Z layed “rope” I can use the individual thread sizes right out of the package for 0.15mm up to 0.45mm.
Using my ropewalk I can get from 0.50mm up to 1.25mm in about 0.05mm increments. I could get larger diameters if needed by going to 3/3 or even 4/3 strands. Once passed through a diluted PVA bath there is very minimal fuzzing.
You are correct that sewing thread are measured in various ways that to the untrained eye make absolutely no sense. I did find this article that helps provide some information and I’ve used it to compare various manufacturer’s thread sizes.
https://en.wikipedia.org/wiki/Units_of_textile_measurement
To measure my thread diameter I simply wrap 10 coils around a dowel and measure with a caliper and divide by ten. Works close enough for me.
View attachment 424192View attachment 424193
Ok, enough playing around! On to the running rigging!
We made a lot of mistakes, that's what.Thanks for your kind words! I’m enjoying the build but also must take frequent breaks to research how best to do complete a particular task. Most of the credit for my success goes to members of this forum. Also, what did we do before YouTube?
Thanks Norgale. You are correct in the nomenclature I use. That said, there is another factor that determines rope diameter and that is how tightly (or loosely) you wind your strands on the rope walk. I try and maintain about a 45° lay (twist) for repeatable results.Print his out or copy down the numbers. Here is the best I've seen for thread sizes in mm's. The bottom numbers refer to the mfg's number and the fraction like number next to it is the number of threads on the rope walk. #40 2/3 means Mfg's item #40 with two lines of thread on each hook of the three hooks on a rope walk. This will give you a rope 1.00 mm thick.
We made a lot of mistakes, that's what.
With my rope walk I keep twisting until it looks right.
I just realized the foot ropes should be behind the sail. Darn it! Looks like I’ll be practicing some more…
oh well, time to get out the snips…
oh well, time to get out the snips…
Maybe it's a consolation for you to know..that guys like me take heart from knowing they are not the only ones who make stupid mistakes;-)
(this particular one I did not make -yet- .. but I could send you a list...)
I'm half-way with the first planking..so far so good!
(this particular one I did not make -yet- .. but I could send you a list...)
I'm half-way with the first planking..so far so good!
Looking great Oliver!!
- Joined
- Jun 13, 2022
- Messages
- 310
- Points
- 168

Nice work … looking really good. Also liking your storage solution in the back of the image.It’s been some time since I updated this log as I was working on Le Rochefort build. Well, I decided that I really needed to get this one back into dry dock so I’ve been working on the rigging. I was unhappy with my first as well as my second attempt so I ripped it all out and started a third time… you know that old saying, three times the charm?… Anyway, I‘m stopping at three. I completed the standing rigging and am ok with the results. Not great but ok.
View attachment 421525View attachment 421527View attachment 421528View attachment 421529
I will start on the running rigging next but first it’s back to the ropewalk to make a bunch of rope for the running lines. I’m still going back and forth on whether to install sails or not. The Admiral says leave them off as they hide the other details… we’ll see.
Thanks Keith. The one draw back is having to reach through or around the ship to get at tools. I’ve been trying to figure out a better setup but so far I’m stumped…Nice work … looking really good. Also liking your storage solution in the back of the image.
Hej Olivier,
I put my models in progress on a 'Lazy Susan', which makes it easy to turn her out of the way, and is very convenient while rigging.
I put my models in progress on a 'Lazy Susan', which makes it easy to turn her out of the way, and is very convenient while rigging.
Thanks John. I actually tried to use a Lazy Susan but my workbench with the tool tray is too narrow and I broke off the bowsprit several times on a previous model. I’m still pondering how to redesign the space I have to work with. Just as I’m sure I would still be complaining if I had double the square footage available!Hej Olivier,
I put my models in progress on a 'Lazy Susan', which makes it easy to turn her out of the way, and is very convenient while rigging.


