-

Win a Free Custom Engraved Brass Coin!!!
As a way to introduce our brass coins to the community, we will raffle off a free coin during the month of August. Follow link ABOVE for instructions for entering.
-

PRE-ORDER SHIPS IN SCALE TODAY!
The beloved Ships in Scale Magazine is back and charting a new course for 2026!
Discover new skills, new techniques, and new inspirations in every issue.
NOTE THAT OUR FIRST ISSUE WILL BE JAN/FEB 2026
You are using an out of date browser. It may not display this or other websites correctly.
You should upgrade or use an alternative browser.
You should upgrade or use an alternative browser.
I’ve only just tuned in again to your log Nigel and find it very impressive and educational. As I read your posts I wanted to keep hitting the “wow” and “love it” icons but then you’d just have a very long string of Alerts from me in that drop down menu  . So a post is possibly the better way to show appreciation for your skills. I think a “wow” will do it
  .
.
 .
.Very nice model Jim  Fair point as to the bleaching of red, I remember Vauxhall cars of the 80's,90's were particularly prone to turning pink over the years in the sun
Thanks Roger and thanks everyone who calls by and drops a like etc.
Not much traffic on this log as it is a bit niche for this forum however I think more interest will be shown when I get to the bits everyone understands, i.e above deck details As with my other builds, I have a mental image of the finished model and I am working towards it. Boxwood and Pear will even get a look in later on

Thanks Roger and thanks everyone who calls by and drops a like etc.
Not much traffic on this log as it is a bit niche for this forum however I think more interest will be shown when I get to the bits everyone understands, i.e above deck details
- Joined
- Jun 29, 2024
- Messages
- 1,503
- Points
- 438

I just found your log too. Great to see another steam ship modeler too, although mine is static. Your workmanship is exceptional.
My only concern would be overheating your boiler without a reserve water supply. With your RC gear is there a way for you to know when your boiler is low on water and to remotely turn off the fire?
Roger
My only concern would be overheating your boiler without a reserve water supply. With your RC gear is there a way for you to know when your boiler is low on water and to remotely turn off the fire?
Roger
Thanks Roger
I discussed the boiler water level with the Guy who built it. He recommended I kept things as simple as possible at first. The boiler has a 1.7 Litre capacity and with a few runs I should know how much run time I have before requiring a top up. Even if I had an on board water tank, that would run out at some point causing the same issue. Only way round it would be to draw water from the pond which I am not prepared do, the boiler will run on distilled water to keep the insides in top condition.
Maybe I could rig an optical sensor to the water gauge and utilise a telemetry feature of the radios available today.
Progress is a little slow at the minute.
Work is really busy and plenty of overtime available so I am banking it while it is there as I seem to be spending a fortune on tooling. Next on shopping list is full 3 axis DRO for my mill
Back to the build
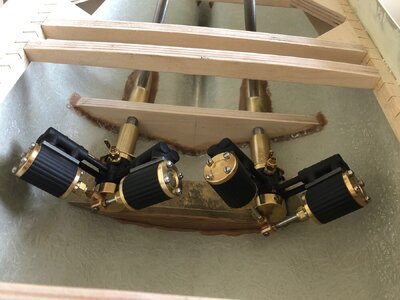
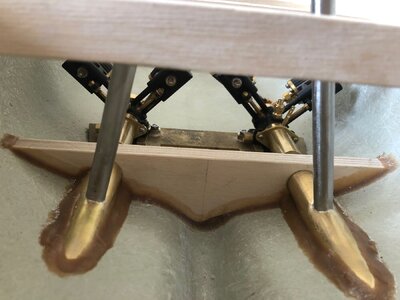
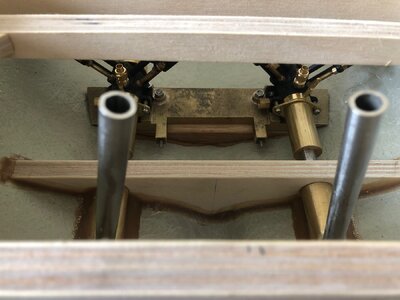
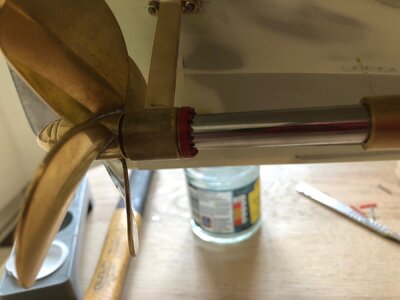
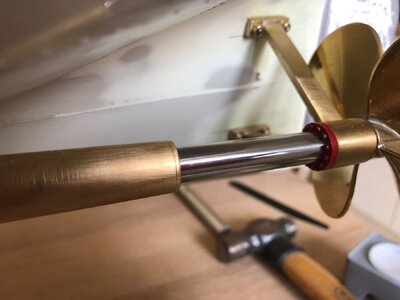
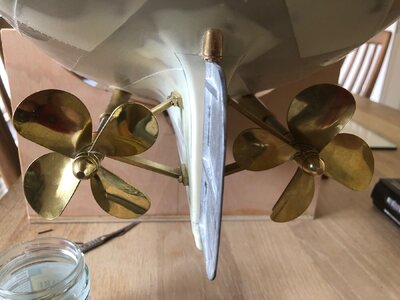
My propshafts are installed with the flanges in my last post slipped on during assembly. I had to use a grain of wheat build inserted in the props aft to ensure the the oil holes aligned with the tubes. The tubes are boned in place using Locktite 638 bearing fixture.
I turned two brass sleeves to aid engine alignment with the flywheels temporarily removed. The pictures show the oak bearer now bonded into the hull with Stabilit Express two part adhesive. Next job is to clean up what has oozed out and general tidy up the glue joints inside of the hull before continuing with the deck beams and boiler supports.
PS The propellers are fitted backwards I realised this afterwards but doesn't matter, they were only fitted temporally to get the shaft end position inside the hull
Work is really busy and plenty of overtime available so I am banking it while it is there as I seem to be spending a fortune on tooling. Next on shopping list is full 3 axis DRO for my mill
Back to the build
My propshafts are installed with the flanges in my last post slipped on during assembly. I had to use a grain of wheat build inserted in the props aft to ensure the the oil holes aligned with the tubes. The tubes are boned in place using Locktite 638 bearing fixture.
I turned two brass sleeves to aid engine alignment with the flywheels temporarily removed. The pictures show the oak bearer now bonded into the hull with Stabilit Express two part adhesive. Next job is to clean up what has oozed out and general tidy up the glue joints inside of the hull before continuing with the deck beams and boiler supports.
PS The propellers are fitted backwards
 I realised this afterwards but doesn't matter, they were only fitted temporally to get the shaft end position inside the hull


Hello Nigel. I wish you all the best and a very Happy Birthday  .
.
 .
.Awesome! Here's to hoping you have a great birthday celebrating with family and friends!
Happy Birthday, bro!  All the best on your special day.
 All the best on your special day.
Thanks Guys, we celebrated with a meal at the Abbey Innn, Byland N Yorks.If you are not familiar, this has been reopened by renowned British Chef Tommy Banks and the food certainly didn't disappoint.
I have had holiday this week at work so have a few photos with more in the pipeline.
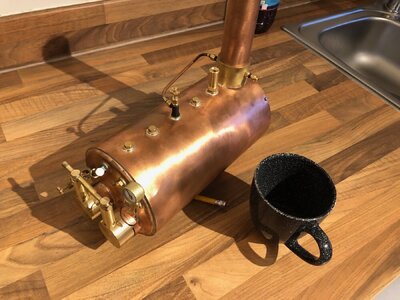
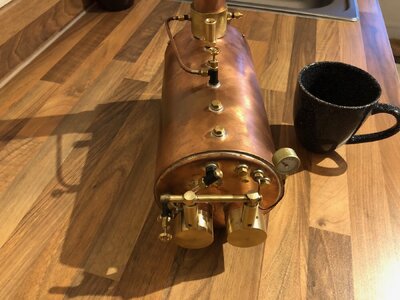
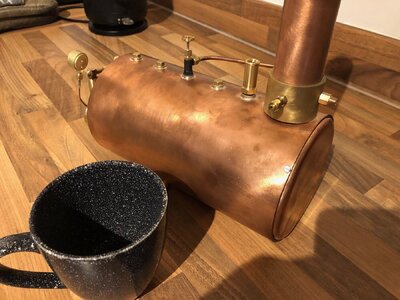
The first pictures show the boiler as received with cup for scale. This has now been stripped of the fittings, mahogany cladding fitted, sanded and varnished. I am currently in the process of painting the ends matt black. pictures to follow when I get this done.
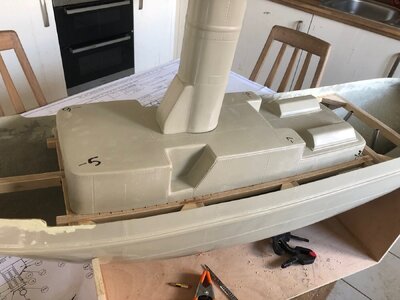
Second lot of pictures show the basic preliminary deck framework with superstructure plonked on top.
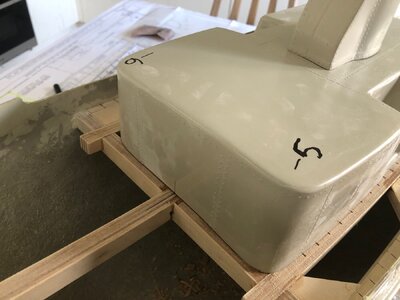
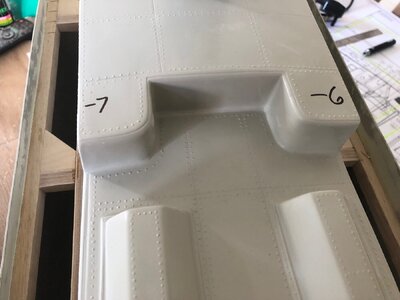
I very lightly sanded this moulding to get it closer to the deck shear and referring to the drawings there is an issue (isn't there always?) . It is obvious the moulding has been over trimmed at the factory as the figures in sharpie show how low the is at superstructure is at those points. As I have already done some sanding, don't fancy my chances of a replacement part and I was planning to do extensive improvements to this moulding anyway.
Had the model been powered by motors I would build a new structure from scratch but I want the integrity and moisture/heat resistance of this moulding given the engines and boiler are directly below.
I already know how to sort the issue, just need to get on and do it then show you Guys how I did it


It sounds as though you had a lovely birthday, Nigel. Over my vacation, I finally caught myself up with your Imara. This is a fascinating build-log with all kinds of different modeling issues to sort through. There's a lot to admire, here, but I was particularly impressed with your plate seam hack. Very well done, as is the entirety of the project, to date.
Thanks Marc
I have nearly finished resolving the height issue with the superstructure, that will be completed tomorrow provided I can find some more Stabilit Express in the house.
The next task is to sort everything else out with this moulding and there is a LOT. Suffice to say all plating and rivet detail will be lost and will be reinstated using a different technique to that of the hull.
It may seem I have gone off piste a bit but I want the superstructure position sorted and funnel fitted to ensure my Boiler position is correct. Trouble is I have to sort this moulding out before I can fit the funnel and the funnel has it's own issues which will be sorted after this
- Joined
- Jun 30, 2024
- Messages
- 30
- Points
- 48

Hello Nigel,
I recently decided to have a go at ship building and came across your build log. I have in the past done model engineering as a hobby and due to getting divorced a few years back, I am currently disposing of my workshop machinery from my very understanding ex wife's garage. None of which has been used in anger in over 20 years now.
I wondered what machinery you are using? I have a generic 918 style lathe and an RP25 mill/drill which came from Axminster Power Tools back in the mid 1990s.
This had to go as I now live in a flat with a remote garage that has no power to it. I do still have my lovely little Unimat 3 lathe which has the milling attachment which I can see being used again soon.
Again years ago I bought the Caldercraft Joffre kit and a Cheddar Models Pintail (I think) which has been retrieved from the ex's garage. Unfortunately I cannot find the chimney for the boiler but hope it will still come to light.
Keep up the great work.
Kind regards, Mark
Edit. I see you are in Yorkshire. If you fancy an interesting day out this bank holiday and live not to far from York, take a drive to Gilling East and visit the Ryedale and district model engineers track. There will be 5" gauge locos running pulling scale length trains on a fully signalled two track railway complete with shunting yards. I used to attend this event twice a year.
Last edited:
Hi Mark and Thankyou
I am currently using both the 7 x 10 lathe and mill from Machine Mart
These were not bought with the intent of model Engineering, more to help with fittings and Machining frames for fully framed Saint Philippe build (over in the scratch section)
Now my modelling interests have expanded to the Steam side of the hobby, I have a new larger mill landing from Warco next Tuesday. A larger Lathe is planed but will have to wait as the mill was a big investment for me.I chose to upgrade the mill first as the sheer volume of complex milling and hole drilling of the Bolton Engine is massive. The new mill has XY digital readout with digital depth gauge on the quill. Once I work out how to use the DRO, I will be able to add coordinates for drilling the hole patterns.
Busy weekend this bank Holiday, I was planning on going along to the Rawdon MBC open day but I have an Engine hoist arriving on hire Saturday to move/install the mill and my Worksop needs a complete clear out to be able to get the machine in it's resting place. Not light at 125kg plus floor stand, I nearly went for the next model up which is 225KG ! but where do you stop? I reasoned a 700mm table is more than enough, I don't really need 840mm.
Kind Regards
Nigel
- Joined
- Jun 30, 2024
- Messages
- 30
- Points
- 48

Thanks for the info Nigel. I remember using an engine hoist to move my mill/drill when I moved it from my parents house.
I will follow your build with interest.
I originally got my Unimat 3 from someone I knew and intended to use it to make bits for scale RC aircraft, never did. But a fellow flyer who had his own engineering business gave my a book called Building the Stuart 10V on the Unimat 3 and that started the rot so to speak lol.
I do miss using the machines though but marriage, family and the divorce put paid to enough spare time. Don't regret any of it though. I have a fine son and am still on pretty good terms with my ex.
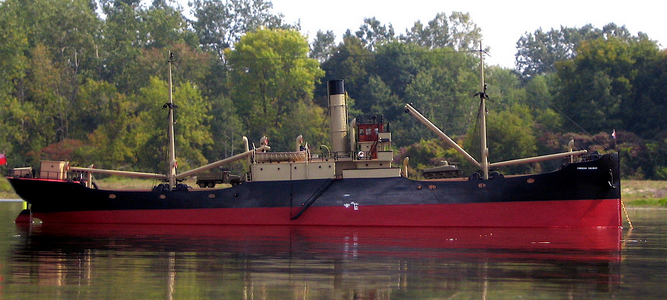
We must draw the attention of the captain of his ship because he does not comply with regulation 30 of COLREG:Nigel, if your vessel sees a lot of time in the sun your brilliant red will eventually start to turn a dull shade of red. My Canadian Engineer is going that way and the deck has an obvious tint of pink to it. This is over a period of fifteen years, but I guess it's authentic.
Jim
View attachment 461639
Aanchored Vessels and Vessels aground
(a) A vessel at anchor shall exhibit where it can best be seen: (i) in the fore part, an all-round white light or one ball;
...
Amazing work!!Progress is a little slow at the minute.
Work is really busy and plenty of overtime available so I am banking it while it is there as I seem to be spending a fortune on tooling. Next on shopping list is full 3 axis DRO for my mill
Back to the build
My propshafts are installed with the flanges in my last post slipped on during assembly. I had to use a grain of wheat build inserted in the props aft to ensure the the oil holes aligned with the tubes. The tubes are boned in place using Locktite 638 bearing fixture.
I turned two brass sleeves to aid engine alignment with the flywheels temporarily removed. The pictures show the oak bearer now bonded into the hull with Stabilit Express two part adhesive. Next job is to clean up what has oozed out and general tidy up the glue joints inside of the hull before continuing with the deck beams and boiler supports.
PS The propellers are fitted backwardsI realised this afterwards but doesn't matter, they were only fitted temporally to get the shaft end position inside the hull
View attachment 462848View attachment 462849View attachment 462850View attachment 462851View attachment 462852View attachment 462853
Progress is steady, working lots of overtime to pay for the new toy in the last picture
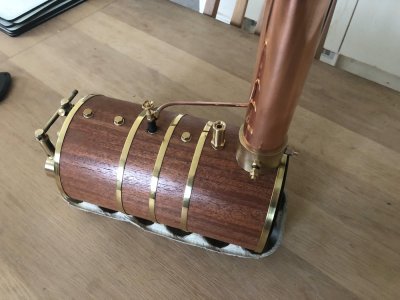
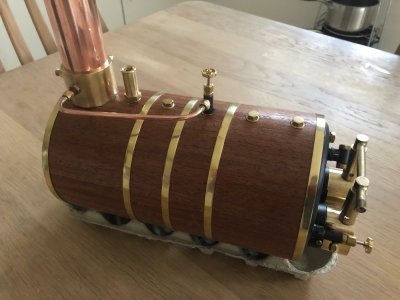
I stripped the boiler of all fittings and then clad in 2 x 5mm Mahogany. This is spot glued to the boiler casing with CA. After sanding and varnishing I masked the wood and sprayed the ends in VHT paint. This will cure properly when the boiler is put to use. The Brass banding was then cut to size, annealed, polished and then fitted. There are two more bands to add which will only cover the top half, the bottom ends will camped to bulkheads with scallops shaped to fit the boiler.
As a side note, the CA will fail as soon as the boiler gets hot, it was only there to enable me to fit the cladding, the banding will hold the cladding in place long term
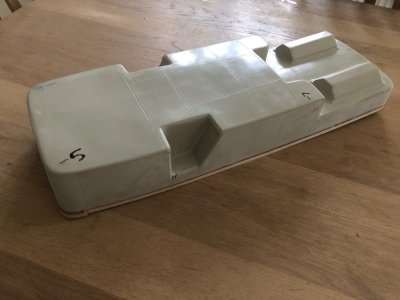
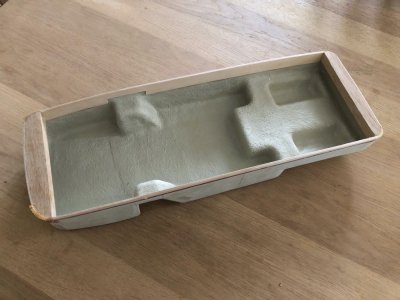
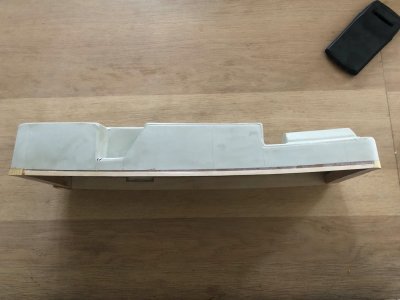
I have extended the lower edge of the superstructure moulding using 1/16" ply. One piece inside overlapping the moulding, the outer piece sitting flush with the outside face. Lots of remedial work required to get this moulding how I want it!
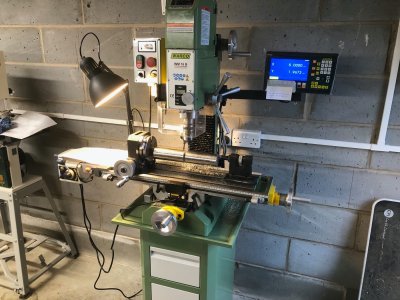
Finally, I was on holiday this last week and have spent most of it moving my workshop around to get my new mill in. The mill isn't that big but the engine hoist was. That was required to pick it up given it is 140kg without the stand. I have fitted power feed to the x axis and just have the linear scale for the DRO to fit to the Z axis. Paused with this while I design some custom bracketry. The mill came with digital readout installed on the X and Y axis and also has a digital depth gauge on the quill, I want the readout on the main Z axis for boring model engine cylinder blocks.


