The only difference between men and boys is the price of their toys.
-

Win a Free Custom Engraved Brass Coin!!!
As a way to introduce our brass coins to the community, we will raffle off a free coin during the month of August. Follow link ABOVE for instructions for entering.
-

PRE-ORDER SHIPS IN SCALE TODAY!
The beloved Ships in Scale Magazine is back and charting a new course for 2026!
Discover new skills, new techniques, and new inspirations in every issue.
NOTE THAT OUR FIRST ISSUE WILL BE JAN/FEB 2026
You are using an out of date browser. It may not display this or other websites correctly.
You should upgrade or use an alternative browser.
You should upgrade or use an alternative browser.
Got to agree with that Paul !
Wow, that boiler is B-eautiful!
True storyWow, that boiler is B-eautiful!
Thanks Marc, I have the condenser to lag in Mahogany as well, I know it won't be seen when sailing but I can show it off at the side of the pondWow, that boiler is B-eautiful!

In order to get the superstructure fitted with funnel so I may ensure the boiler is correctly aligned, first job is to sort the superstructure moulding.
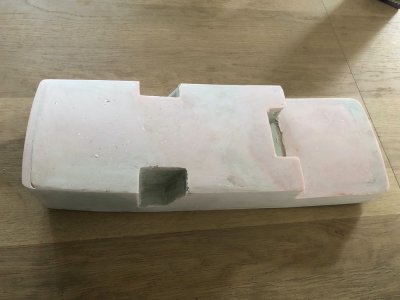
Numerous issues of asymmetry, varying deck camber and no face that should be vertical is vertical.
As mentioned earlier, I want to keep this moulding as it will be resistant to the heat and moisture from below.
After first removing and blanking off the skylights ( these will be recut and then frames fabricated from brass ) I proceeded to add fibreglass paste followed by lots of sanding (and DUST ) to bring the overall shape to correct lines.
Still lots to do but the big bit is out the way. The plating will be reinstated using 0.25mm Brass sheet and I will be using Dry Dock models tiny nails to represent the riveting., These are on order along with 5 sheets of Castello Boxwood for the deck planking, No way was I going to use the laser etch planking sheets as I am going so far with everything else..
In the first picture you can see how much paste has been added to the front face, this was nearly 10mm out of plumb once it is sat on the deck. The last picture just shows the level of Asymetry in the radius corners


Nigel,
Wow - just catching up -
Wow - just catching up -
Thanks John
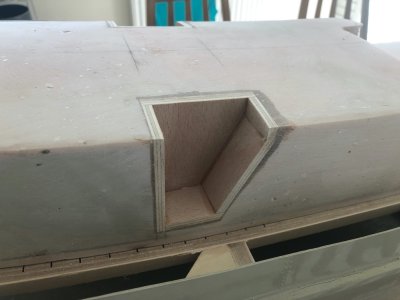
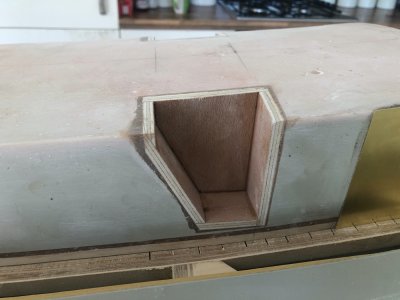
Given the companionway recesses bared a mere passing resemblance to the drawing if you squinted and didn't measure anything, the easiest solution was to chop them out.
I remade new sections from 5mm ply, removed the original sections and installed the new units. The outer edges need to be radiused where the plating will end.
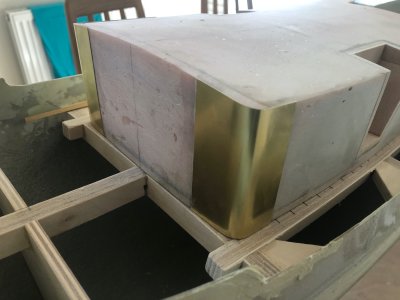
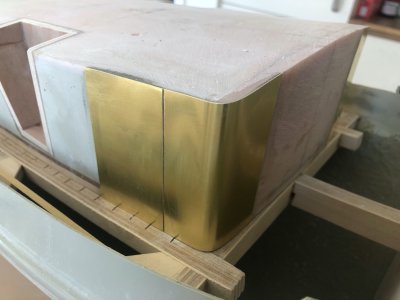
Next issue is the dropdown to the lower aft section is 5mm too far toward the bow, I decided to make a start on the plating whilst I ponder how to deal with this problem. At least I have to extend the vertical face, rather than chop it away
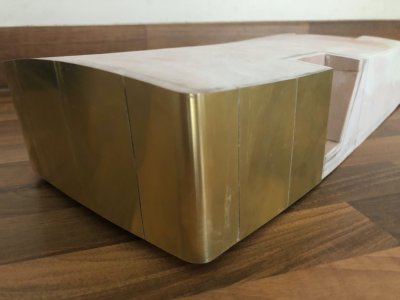
The plating is 0.25mm Brass sheet epoxied to the moulding after first abrading the back of it with 60grit glass paper.I bent the curved sections around some steel tube I had in my stash which worked out the right size.


- Joined
- Jun 29, 2024
- Messages
- 1,503
- Points
- 438

Nigel, Very nice work! What are you using to attach the brass sheet to the plastic sub structure?
Roger
Roger
Thanks Roger
Zap 30 minute Epoxy. The substrate is polyester fibreglass paste, had it been plastic I may have used a different adhesive.
Zap 30 minute Epoxy. The substrate is polyester fibreglass paste, had it been plastic I may have used a different adhesive.
Work seems to be getting in the way of proceedings but I am making some progress.
The raised "wall" towards the aft of the main superstructure has been remodelled to be geometrically correct and true to the plans.
Further brass plating sheets have been fitted and with the reshaping of the moulding now complete I can continue with this in earnest.
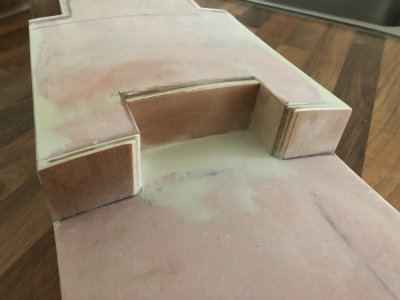
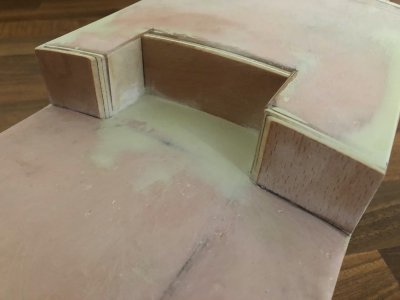
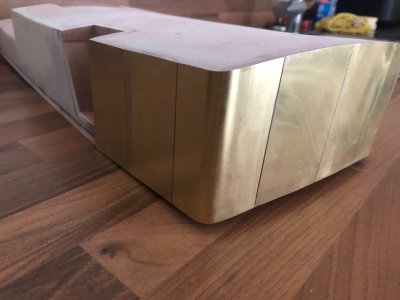
The raised "wall" towards the aft of the main superstructure has been remodelled to be geometrically correct and true to the plans.
Further brass plating sheets have been fitted and with the reshaping of the moulding now complete I can continue with this in earnest.


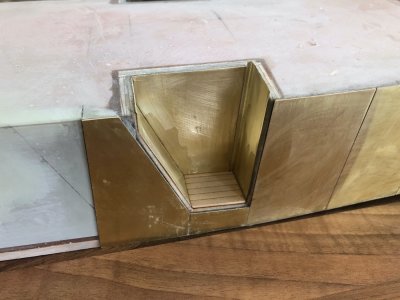
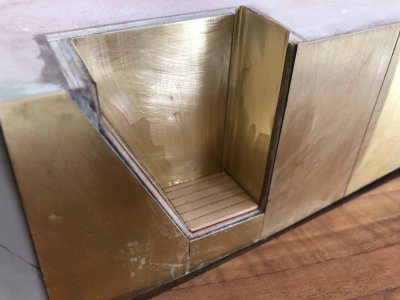
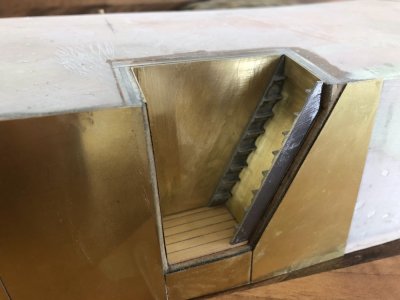
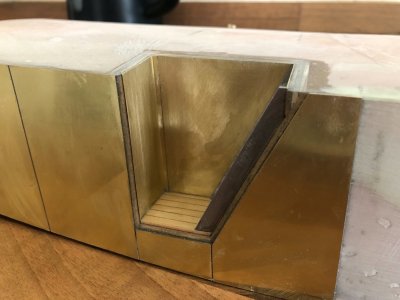
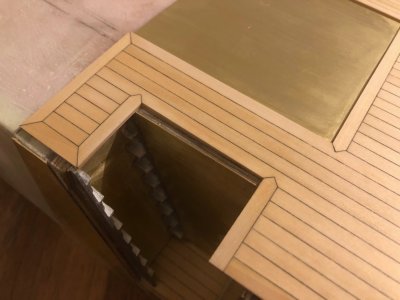
Continuing on, I have focused on the plating of the Companionway recesses.
I have folded an overlap in the internal corner of the brass sheet that will be later drilled for faux rivets.
Many representations I have seen of this kit show bare steel plate at the foot of the steps which strikes me as a little slippy. I joined Castello boxwood planks together with PVA using Brown acrylic pencil as caulking. This section then went in my new mill and was faced off flat. First time I have tried it on wood.It has a brushless motor and belt drive with no gearbox, it was quieter than a kettle boiling performing this task! The MF70 is probably 3 times as loud.
The provided cast stair stringers are way too short and I had to pinch the longer ones for the next deck up. I will probably scratch build replacements. I did think about casting some using the kit parts as a master but to be honest it is less hassle to make some from scratch as they are simple. Treads will be added much later after paint and I am undecided between boxwood or pear for these.
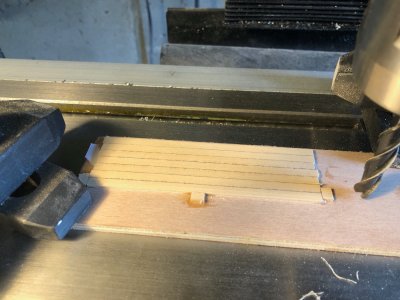


Check me on this...you just face milled a 3 cm square piece of decking with a $2500 machine...  .
.
I guess if you've got it, you should use it .
.
 .
.I guess if you've got it, you should use it
Precisely that Paul, I have got it so why not use it
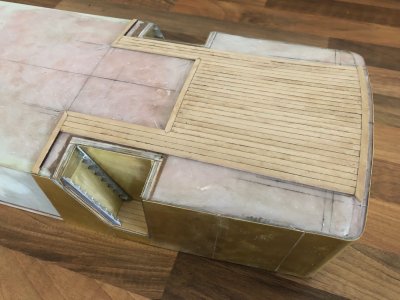
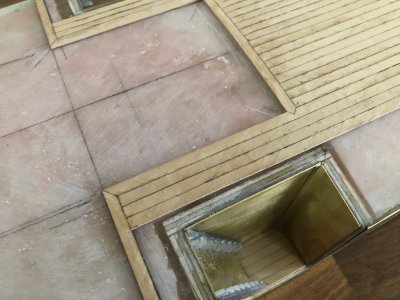
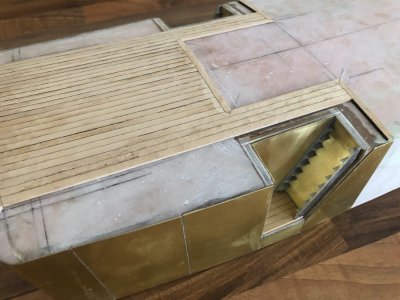
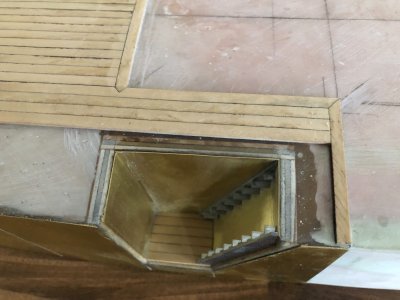
Back to the build and some nice "warts and all " pictures of the deck planking underway on the superstructure. This is limited to the forward end around the Wheelhouse and Companionways. The kit provides laser etched panels but these will not go with all the other extra work I am putting into the model. Lots of small improvements to take what was at the time of release, one of the most detailed RC ship kits on the market.
The deck is being planked in Boxwood using Derwent Acrylic Chocolate colour pencil for caulking. Medium CA glues the planks to the superstructure whilst PVA is used for the edge to edge joins.The planks are rough sawn over thickness and the whole area will receive a thorough sanding/scraping when complete.
I do plan to represent the plugs used to cover the bolts that were used on the original to fasten the planking to the steel subdeck.More on this when the time comes.
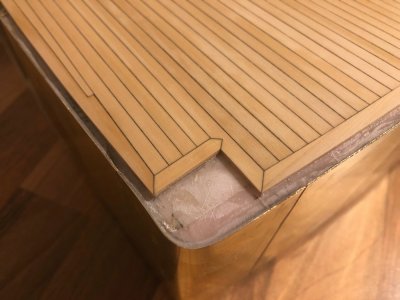
The rebate at the front to the superstructure will follow around the deck sides. This is to take a thicker rail that takes the railing stantion's. This will be in Pear.
One thing to note, I have deviated from the plans and not stopped the parking where it abuts the wheelhouse.I feel in reality this would run underneath as the wheelhouse is simply a timber "shed"


Last edited:
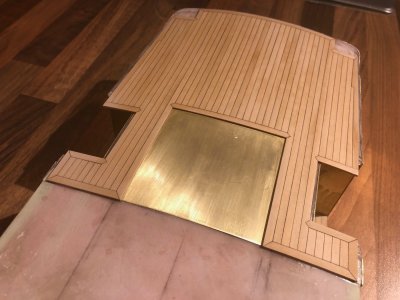
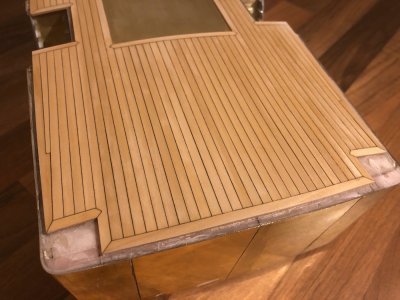
Feeling quite chuffed with myself that I have managed to steal the odd hour here and there during the working week to enable me to finish laying the planking on the superstructure. The many joints did stretch my patience but tempers were calmed by doing a little at a time. The ledge is now formed that will take the Pear rail that borders the edge and also runs part way into the Companionway openings.


Now THAT'S some impressive joinery! Wow, wow, wow!
Absolutely a true story!Now THAT'S some impressive joinery! Wow, wow, wow!
INDEED beautiful wok!!
Thankyou Guys for the compliments and likes etc. The real joinery challenge will come with the Wheelhouse which I intend to make from Pear and construction will mimic the original.
Still LOTS to do though before I start that
Still LOTS to do though before I start that
Gorgeous stuff, Nigel!


