Thank for the compliment, that little diversion was fun.Your Pilothouse loooks great Jan,
-

Win a Free Custom Engraved Brass Coin!!!
As a way to introduce our brass coins to the community, we will raffle off a free coin during the month of August. Follow link ABOVE for instructions for entering.
-

PRE-ORDER SHIPS IN SCALE TODAY!
The beloved Ships in Scale Magazine is back and charting a new course for 2026!
Discover new skills, new techniques, and new inspirations in every issue.
NOTE THAT OUR FIRST ISSUE WILL BE JAN/FEB 2026
You are using an out of date browser. It may not display this or other websites correctly.
You should upgrade or use an alternative browser.
You should upgrade or use an alternative browser.
Chaperon 1884 Stern Wheeler
- Thread starter Pathfinder65
- Start date
- Watchers 35
-
- Tags
- chaperon model shipways
The saga continues.
The painting of the Bling has progressed. With a lot of trial and error I finally settled on
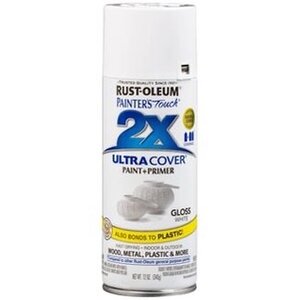
as the paint of choice for painting this part
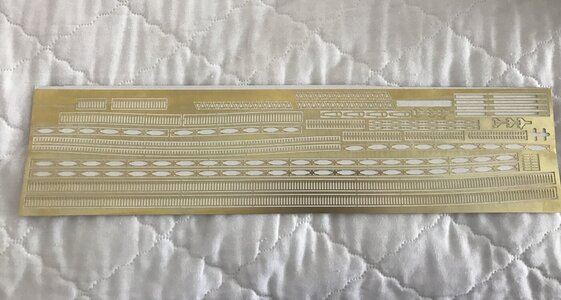
and the final result is this.
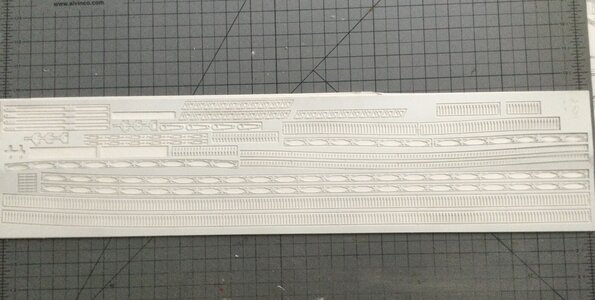
I did four passes, spraying only from right to left for each side about two hours apart. Then I let the part hang in the basement for three days to "cure".
The next step will be interesting, how does one glue these pieces?????
The painting of the Bling has progressed. With a lot of trial and error I finally settled on

as the paint of choice for painting this part

and the final result is this.

I did four passes, spraying only from right to left for each side about two hours apart. Then I let the part hang in the basement for three days to "cure".
The next step will be interesting, how does one glue these pieces?????
Scrape the paint offThe saga continues.
The painting of the Bling has progressed. With a lot of trial and error I finally settled on
View attachment 307240
as the paint of choice for painting this part
View attachment 307243
and the final result is this.
View attachment 307245
I did four passes, spraying only from right to left for each side about two hours apart. Then I let the part hang in the basement for three days to "cure".
The next step will be interesting, how does one glue these pieces?????


 ...
...Sorry. Made myself laugh. For photoetch brass bits I roughened the surface to be glued with sandpaper/emery stick/files and used thicker CA. Holding so far.
Yup, that was part of the plan, but the glue and how to hold the pieces while it sets, that's the puzzle.Scrape the paint off

...
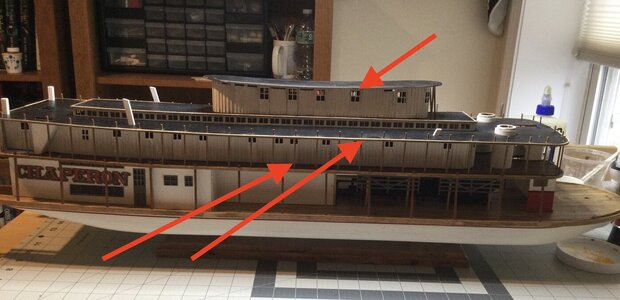
The boiler deck fancy rail fixture and the roof fancy work (The bottom red arrows) I can clamp to hold them in place. But the fancy fixture for the Pilot house and the roof of below it (The top arrow) will be a little more difficult. (I'm probably guilty of over thinking this).
Last edited:
- Joined
- Jan 9, 2020
- Messages
- 10,566
- Points
- 938

My friend, I can't help you there. I have never glued "bling" and have no idea what glue would work. On the WB there were plenty of parts that I glued without clamping it - I would simply hold it down until the glue had set somewhat and then I left it for a good 8 hours. But that was wood and I could use PVA.
I am leery of the gel super glue stuff. I’ve been browsing the information highway looking for alternatives.My friend, I can't help you there. I have never glued "bling" and have no idea what glue would work. On the WB there were plenty of parts that I glued without clamping it - I would simply hold it down until the glue had set somewhat and then I left it for a good 8 hours. But that was wood and I could use PVA.
Grr.

That function finds words that I never learned.
Anyway, spell check or not the research continues.
That's a nice start.The saga continues.
The painting of the Bling has progressed. With a lot of trial and error I finally settled on
View attachment 307240
as the paint of choice for painting this part
View attachment 307243
and the final result is this.
View attachment 307245
I did four passes, spraying only from right to left for each side about two hours apart. Then I let the part hang in the basement for three days to "cure".
The next step will be interesting, how does one glue these pieces?????
And about the glue: just what Paul mentioned: CA of (gel) super glue. Point with a toothpick tiny dots. The less of glue gives the best result!
It's stuck in a split second. But watch your fingers!!!! Use a toothpick to point the pressure or a wooden strip for printing over a larger area.
Regards, Peter
So far I’ve not found any good alternatives to CA gel. Epoxies, Super Silicon, etc. glues make me shudder. (The smell lingers for a long time). I have a tube of Gorilla Gel CA. I’ll try that using the toothpick method you describe on the Pilot house later today.That's a nice start.
And about the glue: just what Paul mentioned: CA of (gel) super glue. Point with a toothpick tiny dots. The less of glue gives the best result!
It's stuck in a split second. But watch your fingers!!!! Use a toothpick to point the pressure or a wooden strip for printing over a larger area.
Regards, Peter
it does look yammmmmmmmmy! Enjoy!Oh Boy, got to run. Look what just came out of the oven.
View attachment 307298
Strawberry pie. What has to do with ship building? Nothing, but it’s got my attention and I‘m first in line for a piece as soon as it cools.
Some men marry better than others!
- Joined
- Jan 9, 2020
- Messages
- 10,566
- Points
- 938

That looks wonderful!Oh Boy, got to run. Look what just came out of the oven.
View attachment 307298
Strawberry pie. What has to do with ship building? Nothing, but it’s got my attention and I‘m first in line for a piece as soon as it cools.
- Joined
- Jan 9, 2020
- Messages
- 10,566
- Points
- 938

No - they are more tactful!Some men marry better than others!

The theory and the result.
1) Scrape off tiny dots on the fancy work.
2) Use the tip of a toothpick to place a dot of Gorilla CA gel on the scraped off dots (Peter V, thank you for that idea)
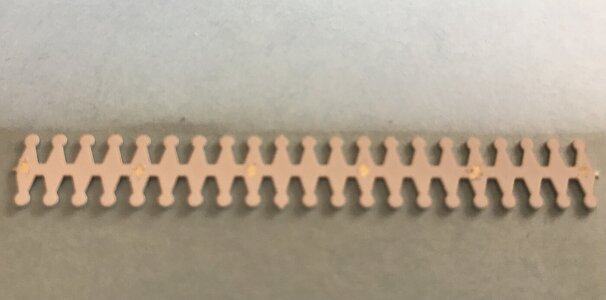
3) Place the roof square edge on the gel dots and hold perpendicular while gel sets.
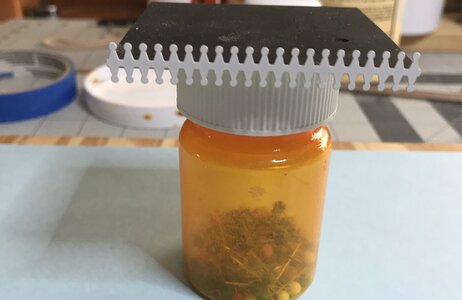
One side done, three to go.
Thank you guys for all the help.
1) Scrape off tiny dots on the fancy work.
2) Use the tip of a toothpick to place a dot of Gorilla CA gel on the scraped off dots (Peter V, thank you for that idea)

3) Place the roof square edge on the gel dots and hold perpendicular while gel sets.

One side done, three to go.
Thank you guys for all the help.
Last edited:
Indeed, that little roof and the Hurricane deck roof are a "how do I do this" exercise. The kit is a fun build and a great distraction from other things I'm working on.Wonderful! I'm glad that you have that sorted.
That looks tight, Jan. Much better than 'copper-bling-bling'.The theory and the result.
1) Scrape off tiny dots on the fancy work.
2) Use the tip of a toothpick to place a dot of Gorilla CA gel on the scraped off dots (Peter V, thank you for that idea)
View attachment 307385
3) Place the roof square edge on the gel dots and hold perpendicular while gel sets.
View attachment 307386
One side done, three to go.
Thank you guys for all the help.
Regards, Peter
Oh Boy: The Bumbler has to admit he goofed.
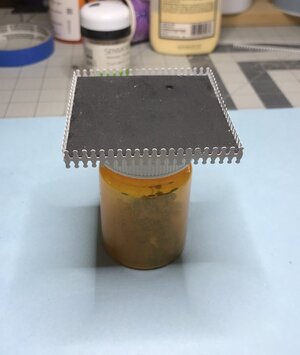
The pilot house roof trim episode was successful.
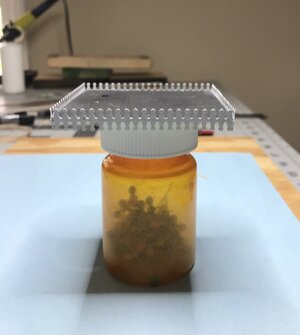
So moving along I thought about how to attach the trim to the Hurricane decks roof. It occurred to me if I attached short extension pieces for support under the roof then it might be easier to hold and glue the trim. So…..
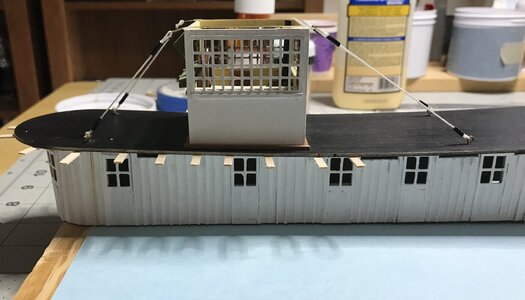
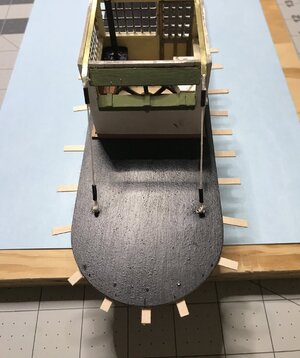
The first part of the trim glued in place.
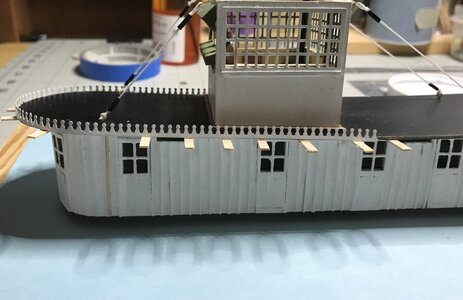
I said to myself, “self that looks pretty good.“ But as I looked closer and got ready to remove the temporary supports the “RO-OH” moment occurred. “ Why are the trim ends facing down at the center.” Aha, the Rookie started the glue job by bending the trim around the curve of the roof and having the ends of the trim meet in the middle of the roof. Hmmm, I have to admit I missed the part in the build instructions that indicated there was a center line mark at both ends of the roof to help out with locating the start of the trim gluing. That was my error #1, error number #2 was
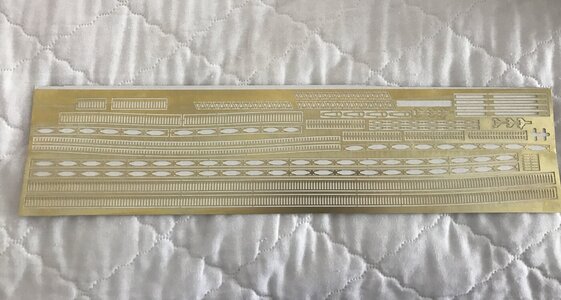
not noticing the up and down sweep of the trim that can be seen the fifth and sixth row up from the bottom.
The next step is to un-bond the gel CA, clean up the roof edges, repaint the trim piece and definitely follow the build instructions.
To be continued.
The pilot house roof trim episode was successful.


So moving along I thought about how to attach the trim to the Hurricane decks roof. It occurred to me if I attached short extension pieces for support under the roof then it might be easier to hold and glue the trim. So…..


The first part of the trim glued in place.

I said to myself, “self that looks pretty good.“ But as I looked closer and got ready to remove the temporary supports the “RO-OH” moment occurred. “ Why are the trim ends facing down at the center.” Aha, the Rookie started the glue job by bending the trim around the curve of the roof and having the ends of the trim meet in the middle of the roof.

not noticing the up and down sweep of the trim that can be seen the fifth and sixth row up from the bottom.
The next step is to un-bond the gel CA, clean up the roof edges, repaint the trim piece and definitely follow the build instructions.
To be continued.
The starting was hopeful. But that camber and sheer ........... everything goes round and round and round ......Oh Boy: The Bumbler has to admit he goofed.
The pilot house roof trim episode was successful.
View attachment 308669
View attachment 308670
So moving along I thought about how to attach the trim to the Hurricane decks roof. It occurred to me if I attached short extension pieces for support under the roof then it might be easier to hold and glue the trim. So…..
View attachment 308674View attachment 308675
The first part of the trim glued in place.
View attachment 308677
I said to myself, “self that looks pretty good.“ But as I looked closer and got ready to remove the temporary supports the “RO-OH” moment occurred. “ Why are the trim ends facing down at the center.” Aha, the Rookie started the glue job by bending the trim around the curve of the roof and having the ends of the trim meet in the middle of the roof.Hmmm, I have to admit I missed the part in the build instructions that indicated there was a center line mark at both ends of the roof to help out with locating the start of the trim gluing. That was my error #1, error number #2 was
View attachment 308680
not noticing the up and down sweep of the trim that can be seen the fifth and sixth row up from the bottom.
The next step is to un-bond the gel CA, clean up the roof edges, repaint the trim piece and definitely follow the build instructions.
To be continued.
But when you know ....... and RTFM ........
Regards, Peter
Hi Peter,The starting was hopeful. But that camber and sheer ........... everything goes round and round and round ......
But when you know ....... and RTFM ........
Regards, Peter
An instance of having to many projects going. The weather has been great so the outdoor projects are competing with the indoor. I "hurried" through this part of the build and the results are obvious. Now it's "Do Over" time. I've temporarily shelved my other two builds and will concentrate on finishing this one as time allows.

