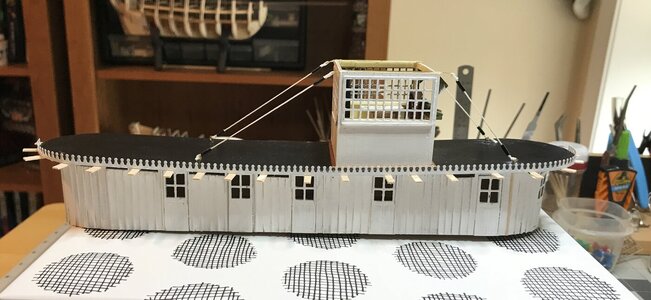
@dockattner. Thanks for checking in, I'm sure that I'll be adding to my long list of "DO OVERS" as I bumble along.
-

Win a Free Custom Engraved Brass Coin!!!
As a way to introduce our brass coins to the community, we will raffle off a free coin during the month of August. Follow link ABOVE for instructions for entering.
-

PRE-ORDER SHIPS IN SCALE TODAY!
The beloved Ships in Scale Magazine is back and charting a new course for 2026!
Discover new skills, new techniques, and new inspirations in every issue.
NOTE THAT OUR FIRST ISSUE WILL BE JAN/FEB 2026
You are using an out of date browser. It may not display this or other websites correctly.
You should upgrade or use an alternative browser.
You should upgrade or use an alternative browser.
Chaperon 1884 Stern Wheeler
- Thread starter Pathfinder65
- Start date
- Watchers 35
-
- Tags
- chaperon model shipways
looks as good as your Chaperon!....Tasted better I'm sureOh Boy, got to run. Look what just came out of the oven.
View attachment 307298
Strawberry pie. What has to do with ship building? Nothing, but it’s got my attention and I‘m first in line for a piece as soon as it cools.
Hi Heinrich, I outsmarted myself on this bit. I ”carefully” measured the trim piece to find its center and matched that to the scribed line in the center of the roof curve. BUT…..Why do instructions always get in the way of a good story?The "preliminary" fitting looked very good Jan so I am sure that once the zeegs and sways have been ironed out, the result will be most pleasing.
Yes indeed, the pie waslooks as good as your Chaperon!....Tasted better I'm sure

An interesting builders note:
I noticed this morning that my model looked a little odd. Glancing quickly at the model I noticed a slight ripple effect along the edge the of the Boiler deck roof. That part of the build was done many weeks ago during the winter months. I’m thinking with the high humidity we have had over the last couple of weeks is causing a “bit” of expansion/contraction.
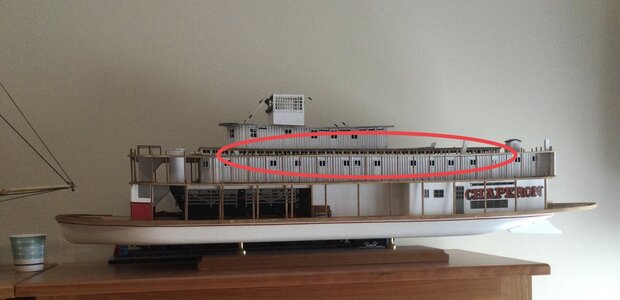
The stanchions and roof where all glued at the same vertical measurement. I used jigs to help with that process. A slight adjustment will be necessary before I glue the trim to the roof edge.
I noticed this morning that my model looked a little odd. Glancing quickly at the model I noticed a slight ripple effect along the edge the of the Boiler deck roof. That part of the build was done many weeks ago during the winter months. I’m thinking with the high humidity we have had over the last couple of weeks is causing a “bit” of expansion/contraction.

The stanchions and roof where all glued at the same vertical measurement. I used jigs to help with that process. A slight adjustment will be necessary before I glue the trim to the roof edge.
I see it - but could you use the trim to hide it a bit? It won't be an easy fix...
I see it - but could you use the trim to hide it a bit? It won't be an easy fix...
I’m hoping to ”de-bond” the worst area and re do the stanchion and roof bond. If you look at the previous trim picture, rows three and four (counting up from the bottom) are the trim pieces that attach to the Boiler deck roof edge. They have a slight upward curve from stem to stern. It definitely will be “touchy” procedure.That is now a bummer Jan. I agree with Paul's advice to try and disguise it.

The trim fits on top of the roof edge trim (blue arrow) and is glued against the stanchion tops. Not much of a chance to disguise the “Ripple”.
The Hurricane roof trim Re Do progress:
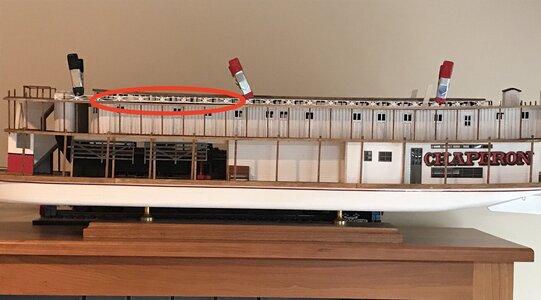
I managed to unglue all the stanchions at the roof of the Hurricane deck. I then clamped a six inch section to the right height and used a glue looper to place a drop of fine CA between the roof and the stanchions. I know that CA is supposed to be an instant bond but I gave it a couple of hours to do it's thing before moving on to the next section. For no particular reason I worked from the stern to the bow. The circled portion is the last section to "adjust" , I think the fix will be "OK". The clamped piece of trim fits the way the build instructions indicate it should. The Starboard side also needs to be re-done

I managed to unglue all the stanchions at the roof of the Hurricane deck. I then clamped a six inch section to the right height and used a glue looper to place a drop of fine CA between the roof and the stanchions. I know that CA is supposed to be an instant bond but I gave it a couple of hours to do it's thing before moving on to the next section. For no particular reason I worked from the stern to the bow. The circled portion is the last section to "adjust" , I think the fix will be "OK". The clamped piece of trim fits the way the build instructions indicate it should. The Starboard side also needs to be re-done
Good! I am glad that the fix worked out well. Now onwards to the other side!

Great to see that you fixed the problem, Jan. Also here: the time investment and your willing to redo this, pays off! It are eye-catching lines over the full lenght and it would bother you forever.The Hurricane roof trim Re Do progress:
View attachment 309274
I managed to unglue all the stanchions at the roof of the Hurricane deck. I then clamped a six inch section to the right height and used a glue looper to place a drop of fine CA between the roof and the stanchions. I know that CA is supposed to be an instant bond but I gave it a couple of hours to do it's thing before moving on to the next section. For no particular reason I worked from the stern to the bow. The circled portion is the last section to "adjust" , I think the fix will be "OK". The clamped piece of trim fits the way the build instructions indicate it should. The Starboard side also needs to be re-done
Regards, Peter
Hi Peter.Great to see that you fixed the problem, Jan. Also here: the time investment and your willing to redo this, pays off! It are eye-catching lines over the full lenght and it would bother you forever.
Regards, Peter
Indeed, that little problem was an “eye catcher“, not so much from a full on side view as viewing it full length from bow to stern. The ripple effect would have been very noticeable while trying to attach the trim piece. In the above post #531 there is still a minor gap (the red outlined area) that needs to be re done. The trim piece is designed to follow the sweep of the roof line and attaches to the top of the stanchions. That part of the build (the completed decks, etc.) was set aside on top of a bookshelf while I worked on the Pilot house and Texas deck. I never gave any thought to the possible effects humidity.
Luckily I has (till nowHi Peter.
Indeed, that little problem was an “eye catcher“, not so much from a full on side view as viewing it full length from bow to stern. The ripple effect would have been very noticeable while trying to attach the trim piece. In the above post #531 there is still a minor gap (the red outlined area) that needs to be re done. The trim piece is designed to follow the sweep of the roof line and attaches to the top of the stanchions. That part of the build (the completed decks, etc.) was set aside on top of a bookshelf while I worked on the Pilot house and Texas deck. I never gave any thought to the possible effects humidity.
The “RE-DO” of the Texas Roof Trim:
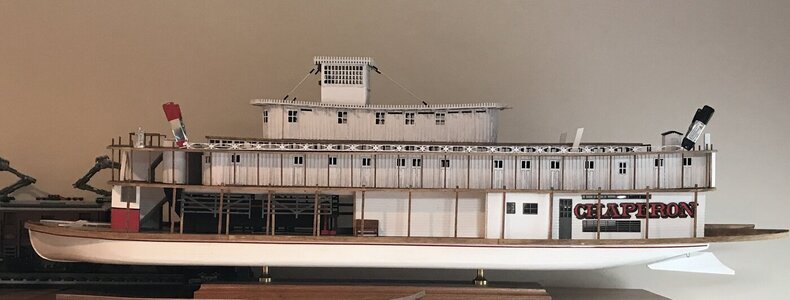
It took several tries but I’m finally happy with the current result. There are several places that that need a slight paint touch up but overall I like the Pilot House and Texas Roof trim combination.
The next little project
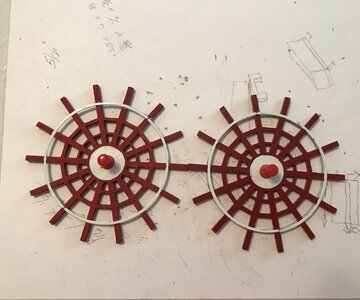
The paddle wheel. Two pieces done, two pieces to go. I now need to imagineer a jig to help with the assembly of the rest of the paddle wheel components.

It took several tries but I’m finally happy with the current result. There are several places that that need a slight paint touch up but overall I like the Pilot House and Texas Roof trim combination.
The next little project

The paddle wheel. Two pieces done, two pieces to go. I now need to imagineer a jig to help with the assembly of the rest of the paddle wheel components.
Thank you for that. Lots of fiddly work carefully done because I really don't like working with the CA glue I had to use on the trim.Great progress Jan - she looks beautiful!
Last edited:


