Chaperon 1884 Stern Wheeler

The “RE-DO” of the Texas Roof Trim:

View attachment 311525

It took several tries but I’m finally happy with the current result. There are several places that that need a slight paint touch up but overall I like the Pilot House and Texas Roof trim combination.

The next little project

View attachment 311526

The paddle wheel. Two pieces done, two pieces to go. I now need to imagineer a jig to help with the assembly of the rest of the paddle wheel components.
Nice detailed work, Jan. The beginning of the paddles is looking good.
Regards, Peter
 
The “RE-DO” of the Texas Roof Trim:

View attachment 311525

It took several tries but I’m finally happy with the current result. There are several places that that need a slight paint touch up but overall I like the Pilot House and Texas Roof trim combination.

The next little project

View attachment 311526

The paddle wheel. Two pieces done, two pieces to go. I now need to imagineer a jig to help with the assembly of the rest of the paddle wheel components.
Good evening Jan- that is looking so cool! You are building a fantastic river boat. It looks like a whole lot of fun to make as well. Cheers Grant
 
What's a I guy do on rainy day in the Northeast USA??

Yup, head to the shipyard and ......

And Multitask :D

5E7414F6-6BE0-4F6B-878F-23CC75F72AA8_1_201_a.jpeg

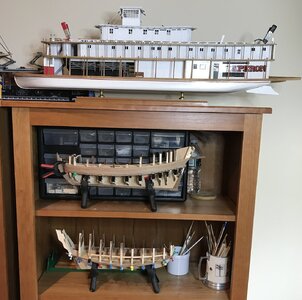
The dry dock:


Top of the bookcase -- the "Chaperon", Hurricane deck roof trim fit in place and glued.

1st shelf -- the "Duyfken", the first tapered plank on the Port side, sanded, fit and glued.

2nd shelf -- the "WB", the 1st 4mm plank on the Starboard side, soaked, bow curve bent with the "K" iron and pinned to hull while drying.

(Hmm, is it allowed to post three builds on the same build log???)

Jan
 
Last edited:
What's a I guy do on rainy day in the Northeast USA??

Yup, head to the shipyard and ......

And Multitask :D

View attachment 312186

The dry dock:


Top of the bookcase -- the "Chaperon", Hurricane deck roof trim fit in place and glued.

1st shelf -- the "Duyfken", the first of tapered planks on the Port side sanded, fit and glued.

2nd shelf -- the "WB", the 1st 4mm plank on the Starboard side, soaked, bow curve bent with the "K" iron and pinned to hull while drying.

(Hmm, is it allowed to post three builds on the same build log???)

Jan
Jan I am getting concerned about you ;).3 in the dry dock is cause for shipbuilder anonymous... Cheers Grant
 
Good evening Jan- that is looking so cool! You are building a fantastic river boat. It looks like a whole lot of fun to make as well. Cheers Grant
Hi Grant. It definitely is a great kit. Lot's of room for out of the box thinking. I learned a lot following Peter V's build of his "Lee". Looking at what I've done so far and finding examples and documentation on these kinds of ships, I can see many things I would do differently. There is still a lot left to do and personal touches that I can add.
 
Wow - now you are into the swing of things, Jan. They all three look great - just don't mix up the builds or get confused! The Duyfken in particular is looking GOOD!!! Thumbsup

But I am a little concerned. Where is the future monster going to go?
 
ROTF OH YEAH, I can see the whole bunch us sitting in a circle and chanting "SOS is for us", ROTF and H would be there with his fleet of Dutch Exploration shipsROTF, OMG I've got to stop sniffing CAROTF

Jan
You talk about MY fleet of exploration ships - you have two of your own on your shelves! One more than yours truly at this point! ROTF
 
A couple of hours here and there this week in the shipyard.

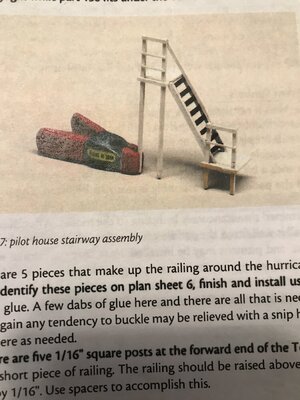
The instructions show this little picture.

35B90C09-6BD4-419E-B73A-C43F193F372F.jpeg

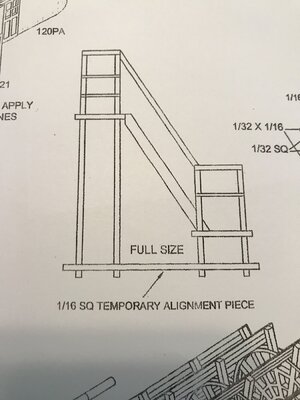
and then there is the plan

60C4DBE6-DBC0-4C3B-824A-368DC169B5EA.jpeg

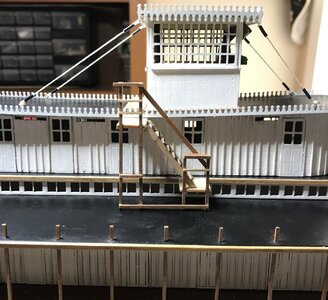
and then there is “do-over” number #5

F126F514-8AFB-486C-8264-D57F15E7133E.jpeg

not perfect but acceptable.

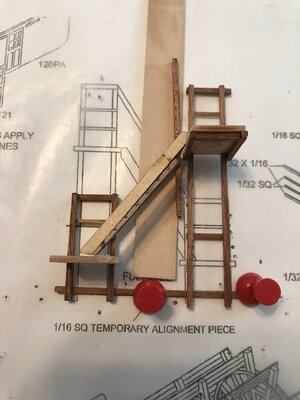
I have to admit I bumbled through this little build. The build plan and instructions seemed so simple, but looking at the plan over and over it finally occurred to me that I was looking at the Port side of the ship and should mentally build a mirror image looking at the assembly from the Starboard side. (That explanation make sense? :rolleyes:). I guess this would be an inside out kind of thing.
 
Really nice Jan. These fragile constructions are harder than they appear on paper.
That is absolutely true. When you add the “all thumbs” builder into the mix, things start to get interesting. I had numerous parts flip off the tweezers and get transported into that dimension that exists between the workbench and the floor. (Never can find those little parts)
 
A couple of hours here and there this week in the shipyard.

The instructions show this little picture.

View attachment 314159

and then there is the plan

View attachment 314160

and then there is “do-over” number #5

View attachment 314161

not perfect but acceptable.

I have to admit I bumbled through this little build. The build plan and instructions seemed so simple, but looking at the plan over and over it finally occurred to me that I was looking at the Port side of the ship and should mentally build a mirror image looking at the assembly from the Starboard side. (That explanation make sense? :rolleyes:). I guess this would be an inside out kind of thing.
Jan, on the starboard side, the same fence will just be on the other side of the stairs
 
Back
Top